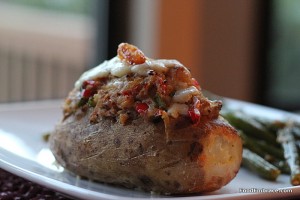
Crab Stuffed Twice Baked Potatoes

There’s been a lot of experimenting going on with crab here at the HQ. Both Scott and I adore crab and while crab cakes are tasty, sometimes you need a little more out of life.

I’ve been hesitant in the past to mess around with crab because it is a pricey protein option and the idea of messing something up didn’t sit well with me.

However I reached a point where I realized that if we don’t experiment in the kitchen we won’t grow as cooks.  And that doesn’t do anyone any good.  So in the name of Embracing Cooking, I decided to start experimenting more with crab.

And that lead to twice baked potatoes!

Andrea’s Crab Stuffed Twice Baked Potatoes

  • 2 Large Russet Baking Potatoes, scrubbed
  • 8oz Crab Claw Meat, drained, rinsed, and checked for shell
  • 1/2 Red Pepper, finely chopped
  • 1/2 Green Pepper, finely chopped
  • 1/4 Red Onion, finely chopped
  • 4 Slices of crispy bacon, chopped
  • 1TBSP Grainy Mustard
  • 2tsp Worcestershire Sauce
  • 2TBSP Prepared Horseradish
  • 1/2C Shredded Cheddar
  • Big Pinch Red Pepper Flakes
  • 1/2-1tsp of Garlic Powder
  • 1tsp Old Bay Seasoning
  • Olive Oil for sauteeing, about 1/2 TBSP

Preheat oven to 400 degrees, poke holes in the potatoes with a knife, and wrap in foil.  Bake for about an hour until potatoes are soft and cooked through.

Remove potatoes from oven and allow to cool enough to handle.

Cut the top off of the potato and scoop out insides into a large mixing bowl.  You want the potato to look like a boat but don’t scoop so much out the potato loses structure.

In a medium sized skillet, heat oil over medium heat.  Add in the peppers and onion and sautee just till they start to soften.  About 2-3 minutes.  Remove from heat and add to the mixing bowl.

Add in the crab, bacon, mustard, horseradish, worcestershire, and seasonings along with 1/4C of the cheddar.  Start to stuff the potatoes.  This makes a lot of filling and the potatoes will be stuffed to the tippy-top.

Before serving, heat oven to 400 degrees and line a baking sheet with foil.  Spray or brush olive oil on the baking sheet and place the potatoes on top.  Bake for about 20 minutes or until the insides are hot.  Sprinkle on remaining cheddar and allow to melt.

Remove from oven and serve!
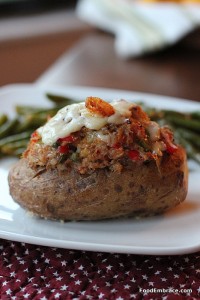
These potatoes hit the spot! And because they are large, they can be used as a main dish.  Just add some veggies or a salad on the side to round things out.

I kept the flavors similar to that of a crab cake with the use of the peppers and onion.  I knew that combination already worked so I ran with it and incorporated it into the twice baked.

The potato is very filling! So much so, that I could only eat half and saved the other half for the next day.

One reason I loved twice baked potatoes is because they can be made up to a day ahead of time, then you just have to heat them right before serving.  Add a few extra minutes to the time if they are going from fridge to oven.

They also are perfect for freezing!

Remember guys, have fun and always play with your food! Enjoy!

Keep It Simple: Sauteed Chard with Rice

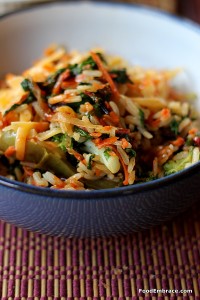
The other day I was craving something warm for lunch.  I enjoy having big salads and fresh fruit at lunch but sometimes I want something warm.  Especially in the colder months! It’s hard to cozy up to a nice big salad when it’s 17 degrees outside.

We had some leftover rice from the previous night’s dinner and I had some chard that needed used up.  Combine the two and you’ve got a great lunch!

It was super quick to put together.  I sauteed up:

  • 1/4 Onion, sliced
  • 1/4 Green Pepper, sliced
  • Once large bunch of chard, chopped
  • Shredded carrots
  • A few broccoli florets

Sauteed in some olive oil with a pinch of salt, pepper, red pepper flakes, chili powder, and garlic powder.

Added in the leftover rice at the end and cooked just long enough for it to heat through.

Spooned in bowls, topped with a bit of shredded cheddar and a few dashes of hot sauce.

Perfect warm lunch and super easy to put together.  Could be assembled the night before or early in the morning to take to work.

The only thing I had to chop was the chard. I already had shredded carrots on hand ready for weekday salads.  I had sauteed onions and peppers leftover from dinner a previous day and I had broccoli in a bagged, prepped and ready to go.

The idea was to use up what I had on hand to make a quick meal.

You can also add in some extra protein by adding in beans or some scrambled eggs.  If you have leftover meat or fish from dinner the night before, you could add that too. Whatever you like and whatever you have on hand is the concept for this dish.

It’s a great way to utilize leftovers and to make a quick filling meal.

Have fun guys, and remember, always play with your food! Enjoy!
Keep It Simple

For Christmas 2011, one of the gifts that Scott gave me was a large cast iron skillet. I’ve talked about my love for cast iron before and I was not so subtly hinting that I would really enjoy a larger skillet.

I have a 9in cast iron skillet which is perfect for some things but not perfect for everything.  A larger one would allow me a little more variety of uses.

Oh Christmas my wish came true and I was gifted with a 12 inch cast iron skillet.  I even got a little handle holder and trivet for it as well!

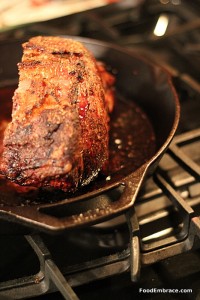
Every year for Christmas Dinner, Scott and I enjoy a standing rib roast.  It’s our once a year splurge and so worth every penny!

This year, I put my brand new cast iron skillet to work right away by using it for Christmas Dinner.  It worked out perfectly!

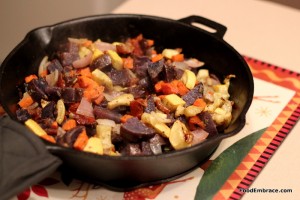
It wasn’t long before I used it again to roast some veggies.  Scott was having leftovers and I was in the mood for some veggie action.  I chopped up some:

  • Red Onion
  • Green Pepper
  • Blue Potatos
  • Yellow Squash
  • Carrots
  • Sundried Tomatoes, reconstituted in hot water water

Tossed that with olive oil and seasoned with:

  • Salt
  • Pepper
  • Garlic Powder
  • Red Pepper Flakes

Roasted at 400 for about half an hour, until the potatoes were tender.  Once the veggies were done, I pulled the pan out of the oven and splashed on a bit of red wine for “sauce”.

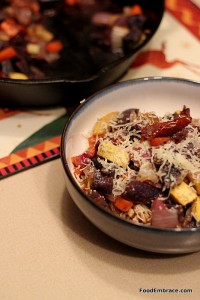
Placed the veggies on some cooked barley, topped with shredded parm and dinner was served!

Very easy to put together and super filling!

Dinner and meals don’t always have to be a complicated affair.  A few simple ingredients can go a long way to creating something filling and comforting. Keep it simple!

Beer and Mustard Dip

While on our most recent break, Scott and I had “snackies” one night for our evening meal. Since we were on vacation, I wanted to make snackie night a little bit more special by adding in a few dips to the mix.

On a recent episode of Triple D (because I love it so), I saw mention of a beer and cheese dip.  This got me thinking about creating a beer dip that you could have with snacks and that doesn’t need to be kept warm.

By eliminating the need to keep this dip warm, it becomes perfect for having out for parties and get togethers.

I wanted the beer flavor to come through while also having a little bit of a kick to it.  What goes great with beer? Mustard!

Once I knew mustard was going into the mix, the rest of the recipe fell into place.

Andrea’s Beer and Mustard Dip

  • 1C Dark Lager Style Beer (I used Great Lakes Eliot Ness)
  • 2TBSP Whole Grain Mustard
  • 3TBSP Dijon Mustard
  • 2 Cloves of Garlic
  • 1/4 Small Onion, chunked
  • 1TBSP Prepared Horseradish
  • 1/2TBSP Unbleached All-Purpose Flour
  • 1/4tsp Garlic Powder
  • Big Pinch Red Pepper Flakes
  • About 1/2tsp each, salt and ground black pepper
  • Couple Dashes Your Favorite Hot Sauce
  • 1tsp Olive Oil
  • 1C Shredded Cheddar

In a small mixing bowl, combine the cheddar and flour.  Set aside.  In a small food chopper or food processer, add in the onion and garlic cloves and pulse until finely chopped.  In a medium sized sauce pan add in the olive oil and heat over medium heat.  Add in the onion and garlic and sautee for about 2 minutes stirring constantly so the garlic doesn’t burn.  Add in the salt, pepper, red pepper flakes, and garlic powder. Add in the beer, mustards, and horseradish.  Stir and allow to come to a simmer.  Simmer for about 5 minutes.  You should notice the sauce starting to thicken up at this stage (not a lot, it thickens just a tad).  Turn heat down to low and slowly whisk in the cheddar and flour combo.  Keep whisking until the cheddar is melted and fully incorporated into the sauce.

Remove from heat and pour dip into a glass bowl.  You can serve this immediately or allow to cool, cover, and store in fridge till you need it.

This dip is great warm and it’s great cold.  It can also be served at room temperature making it a perfect party dip!

It’s creamy with a strong flavor of beer and mustard.  It goes well with veggies, chips, or even sausage bites!  It can also be used on top of sandwiches as a spread or sauce.

The cheddar helps thicken it up just a little more while providing some background sharpness that brings some depth to the dip.  Horseradish makes it demand to be noticed.

I’m already looking forward to making some more of this and seeing what else I can add it to!

Have fun guys, and remember, always play with your food! Enjoy!
 

French Onion Soup For Two

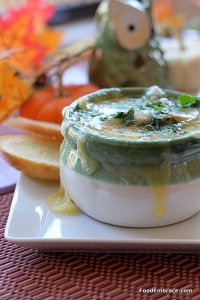
I adore French Onion soup. It’s warm and loaded down with caramelized onions. It’s got bread that helps thicken it up and then it’s topped with melty cheese. Plus served to you in a little crock pot! Can it get any better?

When Scott and I were dating, I would order this soup as a starter whenever I saw it on the menu.  It wasn’t the best “date” soup to be eating but Scott never minded me slurping away or when I had cheese dangling from my chin.

He’s a keeper!

Once I started making it at home, I stopped getting it out at restaurants.  For some reason I have not made this soup in ages and recently decided that I needed to change that.

My version is not traditional at all but it gets the job done.  When I’m craving French Onion soup, this is where I turn.

Andrea’s French Onion Soup For Two

  • 1QT Beef Stock
  • 1/3C Merlot (or another dry red wine)
  • 2-3TBSP Worcestershire Sauce
  • 1 1/2 Medium Onion, sliced thin
  • 1 Large Shallot, sliced thin
  • 2C Frozen, chopped greens
  • Salt and pepper to taste
  • Large Pinch of Red Pepper Flakes
  • Dash of Sage
  • Sprinkle of Garlic Powder
  • Olive Oil for sauteeing, about 1-1 1/2 TBSP
  • 1/2 of a baguette
  • Olive Oil for baguette, about 1TBSP
  • Swiss Cheese Slices, about four thick slices
  • Chopped Parsley for garnish

Preheat oven to 400 degrees.  Slice baguette on an angle and place on a baking sheet either lined with parchment paper or silipat.  Brush slices with a bit of olive oil and place on baking sheet.  Slide baking sheet into oven and bake until the slices are toasty and golden in color.  May take between 7-10 minutes.  Keep an eye on them so they do not burn.

Heat a soup pot over medium heat and add in the olive oil.  Once that is heated, add in the onion slices and the shallot.  Stir, add in salt, pepper, and red pepper flakes.  Stir again and reduce heat to medium low.  Cook onions and shallot for about 15-20 minutes, stirring occasionally.  They will soften and start to caramelize.  Once they have reached a nice light brown color, add in the sage, garlic powder and stir.  Add in worcestershire sauce, and stir. Cook for two minutes. Add in the merlot and stir.  Let cook for about three minutes.  Then add in the beef stock, the greens, and bring up to a simmer.  Simmer the soup for about 20 minutes.

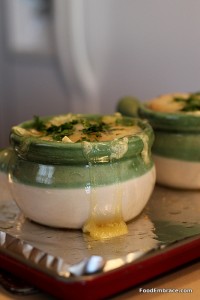
While the soup is simmering, prep your soup crocks.  Brushing the tops of them with a bit of oil will help keep the cheese from sticking too much to the outside.

Once soup has simmered, ladle soup into the soup crocks.  Add in a few of the toasted baguette slices and top with slices of swiss cheese.

Place crocks on a baking sheet and very carefully place in the oven.  Let heat just until the cheese is melty and bubbling.  About 5-10 minutes.

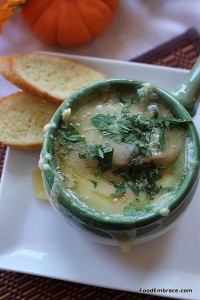
Very carefully remove from oven and very carefully place soup crocks on a small serving plate.  Sprinkle tops with chopped parsley and add a few more baguette slices on the side.  Serve immediately and enjoy!

It was a cold Saturday afternoon and this soup made the perfect lunch.  It was warm and very filling!

Swiss cheese isn’t traditional but it was what I had on hand at the time.  I have made this with a lovely aged provolone as well, which gives the soup a nice little sharp bite to it.  The swiss was very creamy and melted perfectly over the crock.

The addition of the greens is because I wanted this soup to have a vegetable added to it, but not something that would over power or take away from the main flavor.  The greens gave it a little more umph and a little more balance.

Parsley on top just because it makes for a nice garnish!

Have fun guys, and remember, always play with your food! Enjoy!

Cornmeal Deep Dish Pizza

Last week for Pizza Thursday I went all out and created something completely new.

New crust, new sauce, and new cooking method.

Experimenting time!

The results were interesting and a little surprising.

I had some greens that needed used up and everything just snowballed from there.

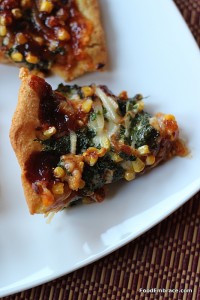
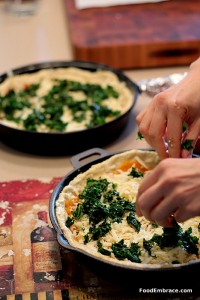
I decided I was going to create deep dish style pizzas using a cornmeal crust.

One pizza was going to have a butternut squash puree as the “sauce” and the other was going to have a BBQ and tomato base.

The cheese and toppings would all be the same with the addition of local bacon to the BBQ one.

I got out my cast iron skillets (Note to self Scott: We need more cast iron.) and greased those with a bit of butter.

I used my basic pizza dough recipe as a guide to create the cornmeal crust. The changes were:

  • 1 1/2C Unbleached All-Purpose Flour
  • 1 1/2C Cornmeal

Everything else, yeast amount and water was the same.  I did notice that this crust needed a little more AP flour, about 1/4C more to make it easier to handle.

I’m not sure if this is a result of me adding in too much water or due to using cornmeal.  Clearly more testing needs to happen.

I let the dough rise and do it’s thing during the afternoon.  This dough wasn’t quite dense enough to roll out and cook on a pizza stone.  However it was perfect for the cast iron method!

I just split the dough in half and worked it until it filled up the cast iron skillets.  Much like how you would work a dough to line a pie pan.

For the Butternut Puree: I boiled up some chopped BNut squash and mashed that with just a small amount of butter and unsweetened coconut milk.  Since I was using this as  “sauce”, I wanted it thicker so I skimped as much as possible on the butter and coconut milk.  It was more for a touch of flavor over getting a creamy consistency. I added in a small pinch of garlic powder and smoked paprika as well.  I probably used about 2C of chopped BNut.  I had a very large BNut that needed attention and didn’t use anywhere near all of it for this pizza.

For the BBQ Sauce: I mixed in about 1/2 a can of tomato paste with about a 1/4C of my favorite BBQ sauce.  If you’ve got homemade, certainly use that!

The Toppings:

  • Sautted Chopped Kale
  • Caramelized Onions
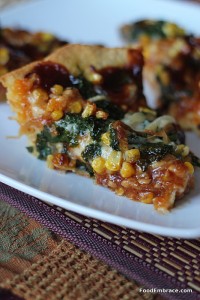
  • Roasted Sweet Corn
  • Bacon
  • Grassfed Mozeralla
  • Sharp Aged Cheddar

With a drizzle of BBQ sauce over the top of each pie.

I baked these pies (both skillets fit in my oven) at 425 for about 1/2 an hour.  Because the skillets were greased with some butter they were pretty easy to get out of the pans. It still took two of us to get them out though! Scott held the pan while I handled the pies.

I wanted them out to be able to get some shots of the crust, next time I’ll just leave them in the skillet.

These pizzas were probably the most unique that I’ve made so far and I would defiitely make this method again.

The kale worked great as a topping and so did the sweet corn.  The corn kind of caramelized a bit during baking and become sweet little chewy nuggets.  A completely different taste experience that way.

I used a little too much BNut squash and would take that down to a thinner layer next time.  It became a little too heavy while eating because it was so dense.

The BBQ sauce on top was okay but I might leave that off next time.

I like the deep dish style so I was happy with this crust.  If I wanted to use it on a pizza stone, I would reduce the amount of cornmeal and use more AP flour to give it a little more gluten action making it easier to roll.

The pizza was certainly different and a nice change of pace from the standard style pies.  I’m anxious to play with the cornmeal a little more and see what else I can come up with.

Have you ever had a cornmeal crust pizza before?

Leftover Idea: Potato and Green Bean Hash

Scott and I had boiled potatoes and green beans for dinner one evening and I made a huge batch of it.  I knew I was going to use it for leftover purposes but I initally thought that I would be reheating and eating.

As dinner apporached the next day, I wasn’t feeling the reheat and eat method.  I wanted a little something different and I started thinking about what I could do with those leftovers.

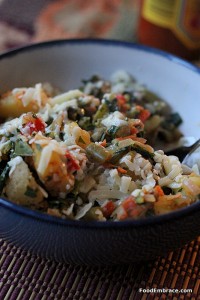
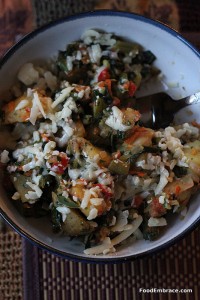
Make a hash!  Hashes are my new favorite dish.  Kale and potato hash rocks my world and I knew that I could use that concept to create something with these leftovers.

I chopped up some onion and pepper and got busy.

Andrea’s Potato and Greenbean Hash

  • 1/2 A Medium Onion, finely chopped
  • 1/2 Red Pepper, finely chopped
  • 1/2 Green Pepper, finely chopped
  • 1 Carrot, shredded
  • Leftover boiled potatoes, chopped (can use leftover roasted or baked potato as well)
  • Leftover Green Beans, chopped
  • 2C Frozen Chopped Greens (I used collards)
  • Chili Powder
  • Garlic Powder
  • Red Pepper Flakes
  • Salt and pepper
  • Olive oil for sauteeing, about 1/2TBSP
  • Stock (Your choice) for deglazing, no more than 1/4C

In a sautee pan, heat olive oil over medium heat.  Add in the onions, pepper, and carrot.  Add in the seasonings, gently combine and sautee for about two minutes.

Add in the chopped potato and green beans.  Stir and allow to cook for about 3-5 minutes.  Add in the frozen chopped greens and stir.  At this point you might see some of the food sticking to the bottom of the pan.  Add in the stock and stir, scraping up all the bits on the pan.  You just need a splash to help clean the bottom and create a steam for the greens.

Cook for about 5-7 minutes and then remove from heat.  Dish up into bowls and serve!

Sprinkling the top with sharp cheddar and adding in some hot sauce is highly recommended.  Of course if you want to add in some scrambled eggs, go for it!

This dish comes together quick and is a great way to jazz up some leftovers.  Perfect for a warm lunch as well!

Have fun guys, and remember, always play with your food! Enjoy!

Johnny Marzetti With A Twist

Recently, my friend John, contacted me and a few other local food bloggers about doing a blog post on the Johnny Marzetti dish.  We each would create our version of the dish and then all post about it on the same day.

I immediately said I was in! Then I asked what the Johnny Marzetti dish was.  Not being a Columbus, or even an Ohio native, this was completely new to me.

John directed me to this link explaining the dish.  I knew exactly what it was once I read the description.  Where I grew up, it was called Goulash.  Some folks, mostly those from the New England area, refer to it as Chop Suey.

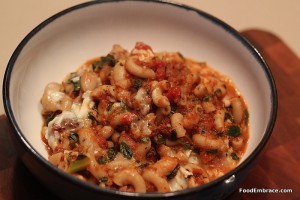
It’s elbow pasta with ground beef in a tomato sauce.  We had this all the time growing up and it was one of the few ways I would be willing to eat ground beef.  I made it for Scott when we started dating and he fell in love with it.

I recently got back from a long weekend in NYC and the food supplies are in an emergency state here at the HQ.  I committed to the dish and needed to pull something together.  The question was, how and with what?

I decided to keep it simple by upping the flavor factor just a bit by roasting veggies and using a smoked sausage.

Andrea’s Johnny Marzetti With A Twist

  • 2 Links of Smoked Spinach and Feta Chicken Sausage, finely chopped
  • 1 Green Pepper, chunked
  • 1 Medium Onion, chunked
  • 2 Cloves Garlic
  • 2C Frozen Chopped Greens
  • 2C Whole Wheat Elbow Pasta
  • 1 28oz Can of Fire Roasted Crushed Tomatoes
  • 1 14oz Can of Diced Tomatoes with Garlic and Olive Oil
  • 1 15oz Can of Cannelline Beans, drained and rinsed. (Optional)
  • 1/2C Dry Red Wine (I used Chianti)
  • Big Pinch of Red Pepper Flakes
  • 2tsp Dried Basil
  • 2tsp Dried Oregano
  • 1tsp Italian Seasoning (I like Mrs. Dash Brand)
  • Olive Oil for Sauteeing
  • Shredded Mozeralla
  • Shredded Pecorino Romano

Preheat oven to 400 degrees.  In a large pot, fill with water and bring to a boil.  Cook pasta according to directions on box.  Cook just shy of being “done”.  Drain and set aside.

Line a baking sheet with foil and place onion, green pepper, and garlic on it.  Drizzle with a bit of olive oil, toss to coat.  Place in oven and roast for about 10 minutes until the veggies get soft and start to brown along the edges.  Remove from oven.

In a blender add in the can of crushed tomatoes along with the roasted veggies.  Blend until veggies are completely broken down and pureed in with the sauce.

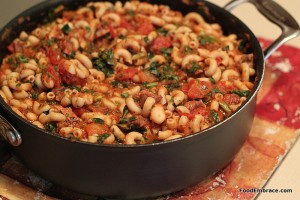
In a sautee pan, drizzle in a little olive oil and heat over medium heat. Add in the sausage and sautee until the sausage starts to crisp up a bit.  Add in the red pepper flakes and then the red wine.  Add in the wine slowly and carefully.   Stir and let the wine deglaze the bottom of the pan.  Cook for about 3 minutes.  Add in the blended tomato sauce and the can of diced tomatoes.  Add in the frozen chopped greens and the beans. Then stir and bring to a simmer.  Allow to simmer for about 5-10 minutes.

When the flavors have come together, turn off the heat and slowly add in the elbow pasta.  Gently combine and top with shredded cheese.  How much is up to you.

Place pan in oven (remember it’s still heating from roasting the veggies) just long enough for the cheese to melt and get gooey.  About 5-10 minutes.

Remove from oven using pot holders, serve and enjoy!

As I mentioned, just getting home from a trip, the ingredients were slim pickings around here.  Thankfully I had a few staple items and things in the freezer that I could use for this dish.

I knew right away that I would be using the smoked sausage and I decided to play off of that flavor.  By roasting the veggies first for the sauce and using fire roasted tomatoes as the base, I think this really complimented the smoked sausage flavor.

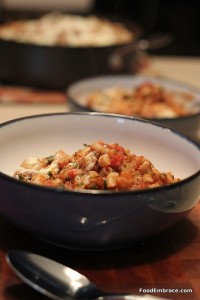
This made a TON of food.  Plenty for leftovers or for a large party.  This dish freezes very well.

The beans got lost in the dish, so they are completely optional.  If I made this again, I think I would rather use more sausage in place of the beans.

Columbus Locals, I purchased the sausage at The Anderson’s over behind Sawmill.  They have great locally sourced sausages.

Chopped frozen greens give the dish some color while also bumping up the veggie intake.

Not a bad dish for trying to scramble for ingredients! The entire time I was making it, Scott kept commenting on how good it smelled.  He had two full servings so I think he was pleased.

This was my Johnny Marzetti dish with a twist!

Go and check out the other takes on this Ohio dish!

Rachel’s Homegrown Version

Debra’s Texan Version

John’s Classic Version

Have you had Johnny Marzetti or Goulash style dish before?

Have fun guys, and remember, always play with your food! Enjoy!


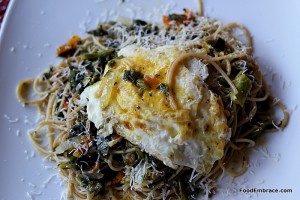
Spaghetti and Eggs

When one arrives back home from a trip away, I fully believe that a warm and comforting meal is a must. Whatever food is your favorite, whatever dinner makes you content, that’s what you should be eating.

When Scott got back home from being gone for a week, he said he was ready to eat some good food.  He said he missed my cooking and couldn’t wait to sit down to a lovely dinner.

Is he fab or what?

And because of my belief mentioned above, I knew he needed something comforting.  Scott has a lot of comfort foods and two of them happen to be pasta and fried eggs.  I was going back and forth about what to make him.

Breakfast?  Or a pasta dish?

Then it occured to me, why not combine them?

The measurements aren’t exact because this is a recipe that can easily be adjusted to serve one or 20.

Andrea’s Spaghetti and Eggs

  • Thin Whole Wheat Spaghetti, enough for two people
  • Eggs
  • 1/2 A Medium Onion, chopped
  • 1 Large Tomato, chopped (do not seed, keep the insides)
  • About 1 Large Bunch of Finely Chopped Greens of Your Choice (I used Kale and Collards)
  • 2 Cloves of Garlic, grated (or finely chopped)
  • 1/2 Dry White Wine
  • Olive Oil for sauteeing

Bring a large pot of water to a boil and cook pasta till just shy of being done.  Drain, reserving some pasta water, about 1/2C and set pasta aside.

In a sautee pan, heat oil over medium high heat and add in the onions.  Sautee for just about two minutes and then add in the greens.  Cook until the greens have cooked down, now add in the tomato and garlic. Sautee for about a minute.  Add in the white wine and simmer for about 2 minutes.  Add in just a touch of the pasta water, maybe 2 TBSP.  Simmer for another 2 minutes.  Add in the pasta, stir and reduce heat to low.

In a small frying pan, add in some olive oil, maybe 2 tsp, just a touch.  Heat over medium heat and fry up the eggs to your preferred done-ness.  Don’t forget to crack each egg in a small bowl first just to be on the safe side.

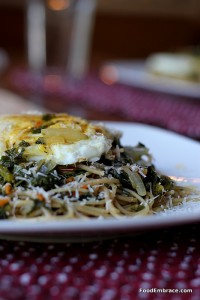
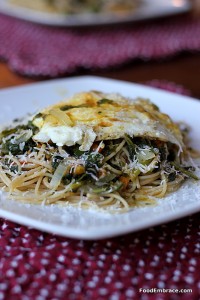
Plate up pasta, top with a fried egg or two, sprinkle with parm, drizzle on a little bit more of the pasta sauce and serve!

Would you have thought that such simple ingredients would make such a gorgeous dish?

What I love about this meal is that it really doesn’t take long to make at all.  Waiting for the water to boil for the pasta is what takes the most time, everything else is really quick.

I didn’t seed the tomato because I want that juice to help create a “sauce” for the pasta.  It’s a very light pasta dish without a heavy sauce.  I did this on purpose because I wanted the egg to shine. And if you’re like Scott, who enjoys runny eggs, that will help coat and “sauce” up the pasta.

I listed eggs with no amount because that’s up to you.  I ate mine with one egg while Scott had his with two eggs.  Do what you like and it’ll work out.

This dish, uses few ingredients and all of them are budget friendly.  You certainly don’t have to use wine but can use stock of your choice or a small can of diced tomatoes would work just as well.

Most grocery stores now carry chopped frozen greens, if you can’t find any fresh.  I love frozen chopped greens! While I do use fresh when I can, having the frozen on hand is a must for me now.

Scott loved this dish, which was good because I created it specifically with him in mind!  It was part of the “Welcome Home” week I planned out for him.

Now I have a dish in my recipe box that is quick to put together and very filling!

Have fun guys, and remember, always play with your food! Enjoy!
Try New Combinations

There’s a little diner here that serves the best black beans I have ever had. I dream about these black beans.

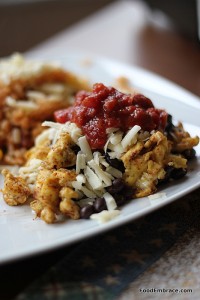
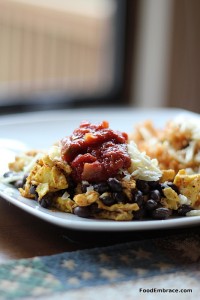
Scott and I went one day for breakfast and I got a side order of beans.  Yeah, beans for breakfast, don’t knock it!  I had eggs with my breakfast and decided to just plop the beans right on top.  With a little hot sauce on top, I was a very happy lady.

Had I not ordered beans with my breakfast, it probably never would have occurred to me to try mixing them with eggs.

Once I did, I couldn’t figure out why this hadn’t done this before!  Now black beans over eggs is one of my very favorite combinations.

I scramble up eggs and season them with garlic and chili powder.  Then I top with:

  • Black Beans
  • Cheese
  • Salsa
  • Hot Sauce

You can even add in some sour cream as well!

It’s an easy dish to put together and is also very budget friendly.  Eggs and beans are inexpensive and pantry staples.

With summer in full swing, tomatoes are in season so they are inexpensive, allowing you to make your own salsa.

So don’t be afraid to try different combinations with your food.  Play around with textures and tastes.  You just might surprise yourself and find something that you really enjoy.