Slow Cooker Chuck Roast with Red Wine Sauce

Chuck Roast with Tomato Wine Sauce
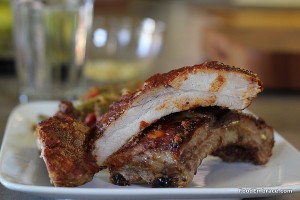
I had an open bottle of red wine and a little two pound chuck roast, both of which needed to be used up.

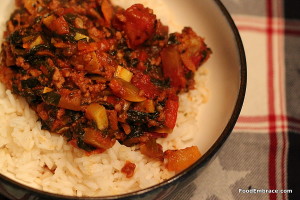
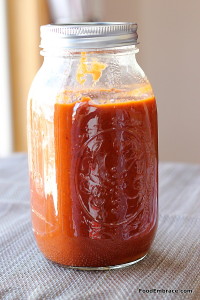
I decided to try to combine the two and see what I could come up with.  I added some tomato sauce to the wine to help extend it, added some veggies, tossed everything in the slow cooker and hoped for the best.

It turned out delicious!

I love using the slow cooker especially on days when I’m at work all day long.  Coming home to dinner practically ready and serving itself is a huge time saver.

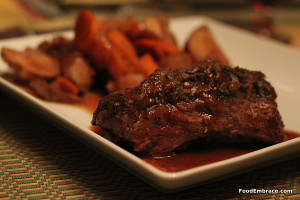
Andrea’s Slow Cooker Chuck Roast with Red Wine Tomato Sauce

  • 1 2lb Chuck Roast
  • 1 8oz Can of Tomato Sauce (your favorite brand)
  • 1C Red Wine (Whatever you have on hand)
  • 1/2 Medium Onion, cut in chunks
  • About 4 Large Carrots, also cut in to chunks
  • About 5-6 Small-Medium Potatoes, chuck in to chunks
  • 1/2tsp Salt
  • 1/2tsp Ground Black Pepper
  • 1tsp Ground Garlic
  • 2tsp Italian Seasoning

Pour the tomato sauce and red wine in the slow cooker and mix.  Add in the chuck roast followed by the veggies.  Sprinkle with the seasonings and cover with the slow cooker lid.

On low, cook for about 6-7 hours.

If you’re home, every few hours bast the veggies and roast with the sauce.  If you’re not around, don’t worry about it.

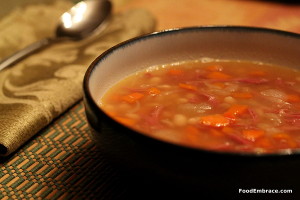
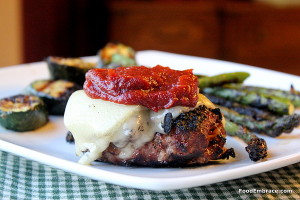
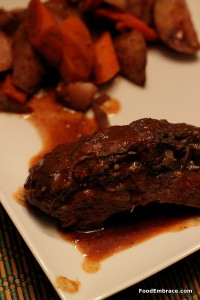
When the roast and veggies are done, strain as much of the juice from the slow cooker as possible.  Add to a medium sized sauce pan and bring to a simmer.  Reduce by half.

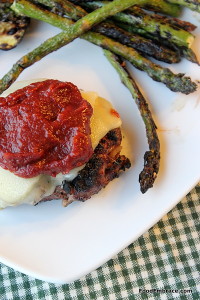
Cut the meat into portions and serve along with the veggies.  Use the sauce on top and enjoy!

Chuck roast with root veggies

This dish really couldn’t be easier and it’s totally adjustable.  You can use a bigger roast, just add in more wine and sauce.  You can add in as much veggies as you like.  I didn’t really keep track of how much I used, my goal was to have enough for leftovers.  The above amounts are guesstimates.

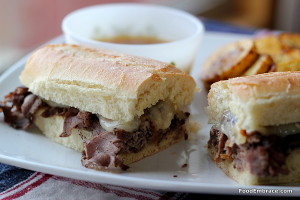
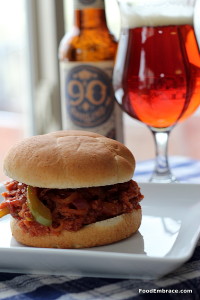
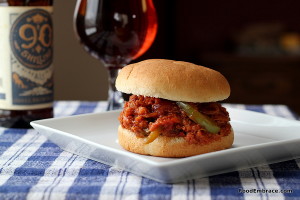
I served up the leftovers as sandwiches.  I shredded the roast, added that to the sauce and heated.  Placed that on buns with a little swiss and heated it up in the oven till the cheese was melty.  Served with leftover veggies, it was a great meal!

Easy slow cooker meal that looks and sounds fancy!

Have fun guys, and remember, always play with your food!  Enjoy!

Sloppy Joe Bowls

Sloppy Joe BowlsSloppy Joes made an appearance frequently at our house.  My mom made them frequently but it was always with some sort of mix.

Not the canned Manwich mix because that was a little too fancy for our household.  My mom used some sort of packet seasoning and the addition of tomato sauce.

I wasn’t really a fan of it but I ate it.

I couldn’t even tell you the last time I had a Sloppy Joe or was even interested in eating one.  But last week I craved that tangy and slightly spicy tomato sauce that goes with Sloppy Joes.

So what the heck, I decided to create a Sloppy Joe dish that also has veggies and served it over rice. Filling and perfect for getting snug on the couch and watching a little hockey.

Andrea’s Sloppy Joe Bowls

For The Rice:

  • 1C Long Grain or Jasmine Rice
  • 2C Water

Bring water to a boil and add the rice.  Reduce to a simmer and cook for about 10 minutes or until rice has absorbed all the water.  Remove from heat and cover.

For The Sloppy Joes:

  • 1lb Ground Pork (or any ground meat of your choosing)
  • 1-2 Large Carrots, shredded
  • 1 Large Red or Green Pepper, diced
  • 1 Yellow Squash, diced
  • 1/2 Medium Onion, diced
  • 2C Frozen Chopped Greens
  • 2 8oz Cans of Tomato Sauce
  • 1 14.5oz Can of Diced Tomatoes (do not drain)
  • 5TBSP Apple Cider Vinegar
  • 4TBSP Worcestershire Sauce
  • 1TBSP Cane Sugar
  • 4tsp Ground Chili Powder
  • 3tsp Garlic Powder
  • 1/2tsp Kosher Salt
  • 1tsp Ground Black Pepper
  • Big Pinch of Red Pepper Flakes
  • 1/2TBSP Olive Oil for cooking

In a large skillet (preferably cast iron if you have it), heat the oil up over medium heat.  Add in the ground pork and cook through.  Remove pork from the skillet and set aside.

Add in the carrot, pepper, squash, and onion.  Cook until everything starts to soften up, about 5-7 minutes.  Add the pork back in along with the frozen greens.  Add the seasonings and gently combine everything.  Add in the tomato sauce along with the diced tomatoes and combine.  Then add in the apple cider vinegar, the Worcestershire sauce, and the sugar.  Stir everything together and allow to simmer for about 20-30 minutes.

Once the mixture has thickened up, remove from heat and serve over rice.

Sloppy Joe BowlTangy, slightly sweet, and a little bit of heat brought this dish together.  The addition of veggies provides some heft to the dish. We had it over rice and the next night we had it over cheddar grits.

This could be served over baked potatoes or even stuffed in some taco shells.

You could also sub in lentils if you didn’t want to do a ground meat. About 3-4C of cooked lentils should do the trick.

This makes a good size portion of Sloppy Joes.  Enough for us to each have two meals and then some leftover for freezing.

When was the last time you had a Sloppy Joe?

Have fun guys, and remember, always play with your food!  Enjoy!

Ham Hock Bean Soup

Bean SoupGrowing up I didn’t really like beans.  The only beans I really willingly ate were green beans.

My mom and dad loved bean soup and they would eat it often for lunch during the winter months.  As a kid, I couldn’t wrap my head around the concept of bean soup.

Who wants to eat a huge bowl of only beans?

The answer now is me! I love beans as an adult and make up big batches of them to have on hand.  Cooking beans in a slow cooker is a breeze and it’s much cheaper to buy dried beans over canned beans.

Since the weather is turning colder, I decided to tackle making some bean soup from scratch starting with cooking up the beans.

I recently saw this recipe from Lori over at Fake Food Free where she used a wheat beer while cooking her beans.  This sparked the idea to use some beer while cooking up the beans for this soup.

Andrea’s Ham Hock Bean Soup

For The Beans

  • 1lb Navy Beans
  • 1 Large Smoked Ham Hock (or 2 if you want more ham)
  • 1/2 Large Onion, cut into chunks
  • 1 Bottle Dark Beer, (I used New Belgium’s 1554)
  • 10C Water
  • 3 Cloves of garlic

The day before you make this soup, soak the beans in water for 24 hours.  Drain, remove any debris and add the beans to the slow cooker.  Add in the ham hock and the remaining ingredients.  Cook on high for about 6-8 hours or until the beans are soft to the bite.

Remove the ham hock and drain the beans.  Be sure to save the liquid from the beans, you’ll need this for the soup (plus you just made awesome ham hock stock).

Once the ham hock cools, shred and set the meat aside.

For The Soup

  • 1/2 Large Onion, chopped
  • 3 Large Carrots, peeled and chopped
  • 4C Navy Beans
  • 4C Ham Hock Stock
  • 4C Chicken Stock
  • Pinch of salt and ground black pepper
  • 2tsp Ground Garlic
  • 1/2tsp Worcestershire Sauce
  • 1TBSP Olive Oil for sauteeing

In a large soup pot, heat oil over medium heat and add in the onions and carrots.  Sautee for about 5-7 minutes until everything starts to soften.  Add in the seasonings and stir.  Add in the stocks, the beans, and the ham. Stir and then add in the Worcestershire sauce.  Bring to a simmer and simmer for about an hour or until the carrots are cooked through.  Stirring occasionally.

Once the soup is ready serve with cornbread or biscuits and enjoy!

Bean SoupThis soup was everything I hoped it would be.  The dark smokey beer paired perfectly with the ham hock.  If you want, you can sub out some of the stock in the soup with another bottle of the beer.

Yes this took all day but it was totally worth it.  You can break this up and cook the beans one day and the soup the next.  Or you can freeze the cooked beans and shredded ham hock so that they are ready when you would like to make this soup.

I think the addition of maybe some greens would be great in this soup and I might do that next time.  Perfect soup for a chilly fall day.

You’ll have more ham hock stock then you’ll need for the soup so keep the leftovers for other uses or freeze to save for later.  And keep that bone so you can make more stock with it later!

Have fun guys, and remember, always play with your food! Enjoy!

Kale Pesto Meatballs

Kale Pesto MeatballsA little delayed but here is the last version of how I used the Kale Walnut Pesto, in meatballs!

I was trying to think of different ways to use pesto and while I know it’s a common topper/sauce for pasta, there had to be something else to do with it.

And that’s when I realized we haven’t had spaghetti and meatballs in ages and why not put the pesto in the meatballs?

So I did and the dish turned out fabulous!

Andrea’s Kale Pesto Meatballs

  • 1lb Ground Beef
  • 1lb Ground Pork
  • 1C Kale Walnut Pesto
  • 2 thick slices of crusty white bread, cubed
  • 1/4C Red Wine (can use milk or stock instead)

Preheat oven to 400 degrees.  Either grease/line a baking sheet or a long casserole dish.  In a small bowl soak the bread in the wine and let sit for a couple of minutes.  Once the bread is soaked, add it to a large mixing bowl along with the beef, pork, and pesto.  Mix until everything is well combined.

Form into balls and place on the baking sheet or casserole dish.  I made them about tennis ball size.  Place in the oven and bake for about 20-25 minutes or until they are fully cooked through.

Serve immediately as a main dish or along with some pasta.

Kale Pesto MeatballsI served this with spaghetti dressed in a really basic tomato sauce.  I added some of the pesto to the sauce (about 1/2C).  When I plated the pasta I also added a little pesto on top for color and extra flavor.  Topped the whole dish with more grated Parmesan cheese.

We had this two nights in a row!  The meatballs are also great for sandwiches or crumbled on top of pizza.

Depending on what size you decide to make the meatballs will determine how many you get.  I did about tennis ball size so that yielded around 6, give or take.  It will also determine cooking time, so if they are smaller they will have a shorter cook time.

It’s a great make-ahead dish and the cooked meatballs freeze really well.

A nice little twist on spaghetti and meatballs for a weeknight dinner.

Have fun guys, and remember, always play with your food!  Enjoy!

Happy Fourth!

Blackberry LemonadeIt’s July!  Hooray!  We’re pretty excited for July over here at the HQ.  It’s a holiday week plus we will be celebrating our anniversary.  Along with some other fantastic goodies sprinkled throughout the month.

If you’re looking for some additional deliciousness to add to your holiday week, then I’ve got just the stuff!

Tart and cool Blackberry Lemonade!  Adds a nice touch of color to the party and is cool and refreshing on a warm day.  Add some limoncello for an extra kick!

Wow your guests and make your own mayo for your coleslaw and potato salads this time around!

Braised Pork RibsDon’t have a smoker? No problem! Whip up some quick Braised Ribs and put them on the grill for a few minutes before serving to add some smokey flavor.

If you need some sauce for those bad boys, Hatch Green Chili BBQ Sauce or some Bourbon BBQ Sauce will go perfectly!

Roasted Tomato Salsa Fresh salsa is always a hit!  And Roasted Tomato Salsa will only take a few minutes and can be made a day ahead!

You can never go wrong with beer!  And Beer Brined Pork Chops would be great grilled to perfection!

Need something sweet at the end?

Figgy Bourbon Refrigerator JamFiggy Bourbon Refrigerator Jam would be perfect drizzled over some fresh scooped local ice cream!

Have a great holiday!  Stay safe, drink beer, and eat great food!

Roast Beef Dip Sandwich

Roast Beef Sandwich with JusDeli style roast beef wasn’t something we had a lot of growing up. Our family was “on a budget” and roast beef was pricey so it was only purchased for special occasions.

I did love it though.  Back in the day, when I ate fast food, Arby’s was my favorite.  Yuck now! But at the time it was heaven.

If I ever ordered a hoagie, I usually got a hot roast beef sandwich.

Despite all of that, I never had a roast beef dip sandwich.  Ever.  I don’t know why either because it’s totally up my alley.

I recently was able to enjoy a prime rib dip sandwich from Common Link (my fave food truck in Fort Collins) and fell in love.  I’ve been dreaming of having another one very soon! Since I’ve been without, I had to make do and create one on my own.  Complete with homemade jus!

I didn’t use prime rib but did use some roast beef deli meat and while it wasn’t Common Link’s sandwich, it definitely hit the spot.

It’s super easy to put together too!

I don’t have measurements for the sandwiches because you can adjust the amount to fit your needs.  I do have measurements for the jus (dipping sauce) though!

Andrea’s Roastbeef Dip Sandwich

  • Deli Roastbeef, sliced thin
  • Swiss Cheese
  • Caramelized Onions (technique is explained here)
  • Long Rolls (I used brat rolls)
  • 1TBSP Butter or Olive Oil

For the Jus (dipping sauce), Makes Enough For Two Servings

Preheat oven to 425 and grease or line a medium sized baking sheet.  Split the rolls and place them on the baking sheet.

In a medium sized sauce pan, add in all the ingredients for the jus.  Bring to a simmer and allow to simmer for about 10 minutes.

In a medium sized skillet, heat the butter or oil over medium heat and add in some roast beef.  Lightly sauté and add in the caramelized onions.  Add in about a tablespoon of the jus and combine.

Put the beef and onion mixture on one half of the roll.  Top with swiss cheese and place baking sheet in oven.  Heat for about 10 minutes or just until the cheese is nice and melted.

Remove from heat, top with the other half of the bun.  Cut sandwich in half and plate.  Pour the jus into little bowls and place on the plate.  Serve and enjoy!

Roastbeef Dip SandwichPretty simple, right? And it’s so very tasty! Perfect if it’s a busy day and you need to quickly get dinner together.  The onions can be sautéd to soften them up instead of taking them all the way to caramelization, if you’re short on time.

I used homemade stock but you can used store bought if you don’t have homemade on hand.  Still add the extra seasonings though because that makes a big difference!

If you have leftover beef from a roast, this would be a great way to utilize the leftovers!

I’ll definitely being making this again if I can’t swing over to Common Link!


Caramelized Onion Burgers

Caramelized Onion BurgersScott and I made a vow that we were going to spend more time outside this year and that we were going to spend more time grilling.

I’m pleased to say that when Fort Collins gets a streak of warm weather, we have been grilling like crazy!

I had a craving for a lovely grilled burger but I wanted to dress it up a little bit.  Nothing too fancy but I did want the burger to have a little bit more flavor to it.

I used two kinds of meats and added in some caramelized onions.  The burgers smelled amazing as they cooked and had the exact depth of flavor that I was looking for.

Andrea’s Caramelized Onion Burgers

  • 1lb Ground Beef (fat ratio of your choice)
  • 1lb Ground Pork
  • 1 Medium Onion, sliced thin
  • 1TBSP Dijon Mustard
  • 1/2TBSP Worcestershire Sauce
  • 1tsp Garlic Powder
  • 1/2tsp Ground Sage
  • 1TBSP Olive Oil for sauteeing
  • Pinch of salt and pepper

In a large mixing bowl, place the beef and the pork.  In a medium sized skillet, heat the olive oil over medium-low heat.  Add in the onions and sprinkle with a little bit of salt and pepper.  Stir and continue to stir occasionally as the onions cook down and start to caramelize.

This will take some time! Around 45 minutes for the onions to caramelize.

Once the onions have caramelized, remove from heat and add in the mustard, worcestershire sauce, garlic powder, and sage.  Stir and allow mixture to cool, about 5 minutes.

Add onion mixture to the beef and pork mixture and combine well.

Form into hamburger patties.  The size and thickness is up to you.  I made medium sized burgers and ended up with 5 medium size and one on the small side.

Store patties in fridge for at least an hour to allow the flavors to combine.  Remove from fridge at least 1/2 hour prior to cooking.

Heat a grill or skillet over medium heat.  If using a skillet, add in some oil or lard, about 1TBSP.  Place patties on grill/skillet and cook for about 5 minutes on each side.

Because this uses ground pork, you have to cook the burger all the way through.

Remove from heat and top with your favorite toppings, and enjoy!

Caramelized Onion Burgers

The burgers turned out great!  The pork along with the caramelized onion mixture kept the patties nice and juicy.  The flavor was subtle, the onions in no way over power the burger.

I topped with some swiss cheese along with some Quick and Dirty Beer Ketchup but feel free to top with your favorite sauces!

Will you be grilling more this summer?

Pepperoni Stromboli Roll

pepperoni stromboli rollSince I’m still not done eating things from my childhood, I busted out an oldie but goodie a couple weekends ago.

Pepperoni rolls were common and super popular where I grew up.  I don’t really see them out anywhere else and that kind of bums me out because they are so delicious.

Basically it’s pizza dough with pepperoni slices and then rolled up and baked.  My mom used to make a huge one layered with lots of sandwich pepperoni and shredded cheese.

It was awesome and it was even better cold the next day.  When I moved in with Scott, it was something I would make for us on occasion.  Except I kicked mine up a little bit more and added sauce and some toppings.  This makes it extra gooey and delicious.

We haven’t had one in ages and when we were stuck inside one snowy Saturday, it seemed like a great time to bust it out.

I call it a stromboli roll because it has sauce and instead of just folded over dough, I roll it up like a log.

There’s no measurements because you use as much as you want in terms of toppings and cheese.  This is what I used when I made it:

Andrea’s Pepperoni Stromboli Roll

  • Pizza Crust
  • Pizza Sauce, just a little bit
  • Shredded Mozzarella
  • Sandwich pepperoni
  • Chipped (shaved) Ham
  • Olive Oil

Preheat oven to 400 degrees.  Grease or line a baking sheet.  Roll out the dough until you get a rectangle-ish shape about 1/4 inch in thickness.

First layer is sauce, then sprinkle on some cheese.  Add in the pepperoni and ham.  Sprinkle on some more cheese and then start to roll up the dough.  Shape into a log and gently place on the baking sheet.  Brush the top with olive oil and cut a few slits in the top to allow steam to escape.

Bake for about 20 minutes.  If you used a lot of toppings, then go a little bit longer possibly 30 minutes.

Remove from oven and let sit for about 5 minutes.  Slice and serve!

pepperoni stromboli roll


It’s gooey and delicious. You have to eat it with a fork and knife. In other words, it’s awesome.

I’ve done onions, peppers, sausage, and mushrooms before as well.  If you do any veggies, I suggest giving them a quick sauté first to help remove some of their water content.  Otherwise you’ll end up with a really soggy roll and nobody wants that.

Thankfully we have leftovers stored away for another weekend dinner!

Have fun guys, and remember, always play with your food! Enjoy!


90 Shilling Ham Barbecue Sandwiches

90 Schilling BBQ Sauce Ham barbecue is most definitely a Western PA thing. It’s pretty simple combo, barbecue sauce and some chipped ham.

That would be “shaved” ham for those outside of Western PA.

Buying chipped ham in the Pittsburgh area is no big deal. Deli workers fully expect that order to come in and don’t bat an eye.

There are automatic slicers that the deli workers can program and then move on taking other orders.  It takes a long time to get a pound of chipped ham.

Since I love chipped ham, I still order it even though I don’t live in Western PA any longer. I have to say “shaved” and oh do I get the stink eye from the deli workers when I do.  I’ll gladly risk it to get some delicious chipped ham though. Stink eye be damn.

Ham barbecue was a staple growing up and I admit that I wasn’t that big of a fan.  I love chipped ham and I love barbecue sauce but for some reason I did not find the two enjoyable.

It wasn’t until I started making my own version did I truly start to enjoy the ham barbecue experience.  Since I was revisiting some childhood sandwiches recently, I decided to make some ham barbecue making the barbecue sauce using some local beer.

90 Schilling Ham Barbecue Sandwich

Andrea’s 90 Shilling Ham Barbecue Sandwiches

For the BBQ Sauce:

  • 1 1/2C Ketchup
  • 1/2C Yellow Mustard
  • 1/2 Medium Onion, chunked
  • 1/2 Green Pepper, chunked
  • 1 Chipotle Pepper plus 1TBSP Adobo Sauce
  • 2 Cloves Garlic
  • 1/4C Brown Sugar
  • 2TBSP Apple Cider Vinegar
  • 2TBSP Worcestershire Sauce
  • 1C 90 Shilling Beer
  • 1tsp Garlic Powder
  • 1tsp Chili Powder
  • Pinch of salt and ground black pepper
  • 1TBSP Light Olive Oil for Sauteeing

In a medium sized sauce pot, heat the olive oil over medium heat.  Add in the garlic, onion, green pepper, and chipotle pepper.  Sprinkle with salt and pepper, sautee for about 5 minutes.  Until the onion and pepper just start to soften.

Add in the ketchup and mustard and stir.  Then add in the beer and the remaining ingredients.  Stir to combine and bring to a simmer.  Allow to simmer for about 15 minutes.

Remove from heat and add mixture to a blender or food processor.  Blend until the sauce is completely smooth.  You can strain the sauce for an even smoother consistency but I prefer it to have some texture.

Return sauce to the pan and gently heat bringing it back up to a very slight simmer.  Simmer for another 10 minutes and then remove from heat to cool.

Makes almost 1 quart of BBQ sauce.  Store in airtight glass container and this will keep in the fridge for up to two weeks.  Freeze any leftovers.

For the Sandwiches:

  • 1lb of Chipped (“shaved”) Ham of your choice (you can use any flavor or style, it just has to be chipped)
  • 1/2 Medium Onion, thinly sliced
  • 1/2 Green Onion, thinly sliced
  • 1/2TBSP Light Olive Oil for sautéing
  • 1 1/2C 90 Shilling BBQ Sauce
  • Buns or rolls for serving

In a medium sized sauce pan, heat oil over medium heat.  Add in the onions and peppers and sauté until they are soft, about 5-7 minutes.  Add in the pound of ham and heat that with the onions and peppers for about 3 minutes.

Add in the barbecue sauce and stir.  Bring to a simmer and simmer for about 7 minutes.  Serve warm on buns.

Makes about 6 servings.

90 Schilling Ham Barbecue SandwichesI like the addition of the peppers and onions to the sandwich, it gives a little more texture and some crunch.  This sandwich is messy and great on a chilly day.

It also does well in a crockpot, perfect for game days or potlucks.

Making the barbecue sauce at home gives the sandwich a little more zing and makes it a little more special.  I recommend making the sauce the day before. Allowing it to sit in the fridge for a day brings all the flavors together nicely.

If you can’t get 90 Shilling, an amber or brown ale will work well in this recipe.

A sandwich from my childhood, kicked up to an adult version.

Have fun guys, and remember, always play with your food!  Enjoy!

Beef with Udon Noodles

Beef with Udon Noodles I love leftovers. I know they get a bad rap but I think that just stems from people not being creative with what they have in the fridge. Leftovers have the ability to turn into something totally new. It’s all about how you view the food before you.

I was rummaging around in the freezer earlier this week when I spied a package of leftover prime rib roast chunks.  We had that for Christmas dinner.

Knowing that I needed to use that right now or it was history, I pulled the package out and started brain storming what I could make.

I asked Scott if he would rather have stir fry or an Asian inspired noodle dish.  He went with noodles and Beef with Udon Noodles was born.

It was easy to put together, the longest prep was waiting for the water to boil for the noodles.

I cooked one 8oz package of udon noodles first, drained and let those hang out while I sauteed up some chopped:

  • Carrots
  • Red Onion
  • Broccoli

The leftover prime rib was already in chunks that I then cut up into smaller pieces to make them more bite size.

I created a sauce like the one for Pad Thai.  Once the veggies were warmed through, I added in the beef and noodles.  Poured the sauce over top, tossed and served.

Beef with Udon Noodles.Not bad for some leftovers, right?  Bonus, it was a weeknight meal that came together really quickly.

See, leftovers don’t have to be boring.  Now what are you going to make with your leftovers this week?