Status

Stuffed Chicken Breasts In A Lemon Garlic Wine Sauce

Transitioning from winter to spring in Colorado is always an adventure.  The days will be warm and sunny but the early mornings and evenings are still pretty chilly.  Sometimes we’ll have the occasional snow storm to keep us on our toes.  I wanted to create a meal that was light and fitting for spring but still hearty enough to stand up to those random snow days.

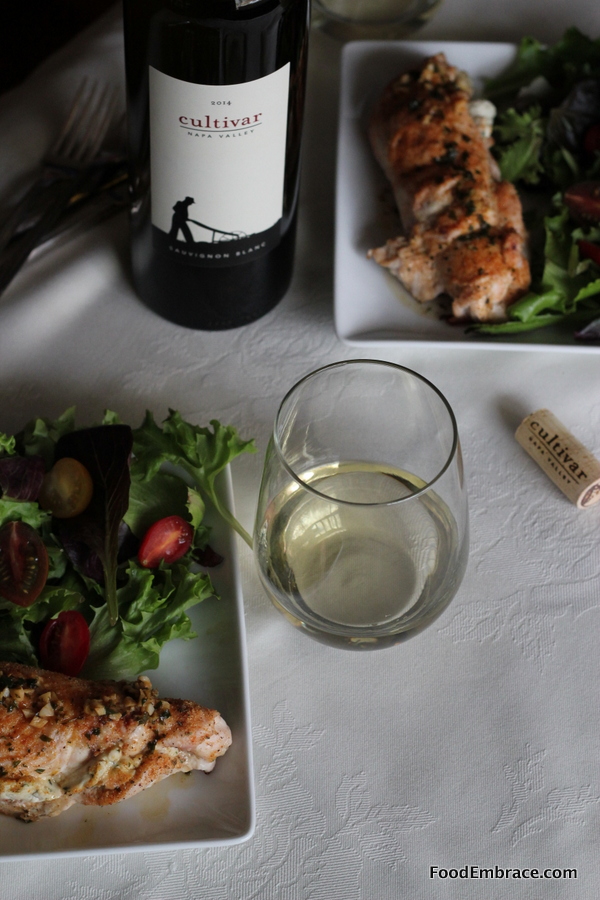
I decided on cream cheese stuffed chicken breasts and made a lovely sauce to go on top using 2014 Cultivar Napa Valley Sauvignon Blanc.  The dish came out beautifully!

Stuffed Chicken Breasts with a Lemon Garlic Sauce

Andrea’s Stuffed Chicken Breasts In A Lemon Garlic Wine Sauce

  • 2 Boneless Skinless Chicken Breasts
  • 4 oz Herb/Chive Cream Cheese (I used Kite Hill Almond Milk Cream Cheese)
  • 1/2 TBSP Garlic Blend Seasoning* (See note at bottom)
  • 1 TBSP Light Olive Oil or Melted Ghee
  • 2 Cloves Garlic, finely chopped
  • Zest of 1 Small Lemon
  • 1 TBSP Ghee or Butter
  • 2 TBSP Chopped Parsley
  • 1/2 C White Wine
  • Juice of 1/2 a Small Lemon
  • Toothpicks

Preheat oven to 4oo degrees.  Add in 1 TBSP of oil or Melted Ghee to a oven proof skillet, set aside.

Pound out the chicken breasts until they are about 1/2 – 1/4 inch thin. Thin enough to be able to roll them but not so thin that they fall apart.

Sprinkle some of the garlic seasoning blend on each side of the chicken breasts.  Divide the cream cheese into half ( 2 oz portions) and spread 2 oz on one of the chicken breasts.  Roll up the chicken and secure with toothpicks.  Repeat with the other chicken.

Place the stuffed chicken breasts in the skillet and place in the oven.  Cook for about 15 minutes or until cooked all the way through.  Remove the skillet from the oven and place the chicken on plates allowing to rest as you make the sauce.

In the same skillet that you used to cook the chicken, heat over medium heat and add in the ghee or butter.  Then add in the parsley, garlic, and lemon zest.  Stir and cook for 1 minute, then add in the wine.  Allow to simmer for three minutes and then add in the lemon juice.  Cook for an additional minute and then pour the sauce over the chicken and serve.

This makes a good bit of sauce so there will be extra for serving!

* I used Flavor God’s Garlic Lover’s seasoning but you can use any garlic blend you like.  Or you can season simply with salt, pepper, and garlic powder.

Pan sauces with meats is one of my favorite combinations so I tend to make a good bit of sauce because I like having extra for dipping or drizzling on some greens or broccoli.

The 2014 Cultivar Napa Valley Sauvignon Blanc  brought this dish to life. The clean crispness of the wine lightened the decadent cream cheese while the bright citrus notes complimented the lemon and made this dish pop.

This chicken is perfect for those early spring days when it’s starting to be light out longer but the evenings remind us that winter is still there in the background.

If you’d like to try Cultivar Wine , they are offering a special promotion to my readers. Use the code CultivarWineFoodEmbrace when you order and you’ll receive 10 percent off your purchase.

Disclosure: I’m required to disclose a sponsored partnership between our site, Food Embrace, and Cultivar Wine. I have been compensated in exchange for this post in the form of product. All opinions presented are my own. I receive wine from Cultivar Wine as a member of the Cultivar Wine Bloggers group.

Status

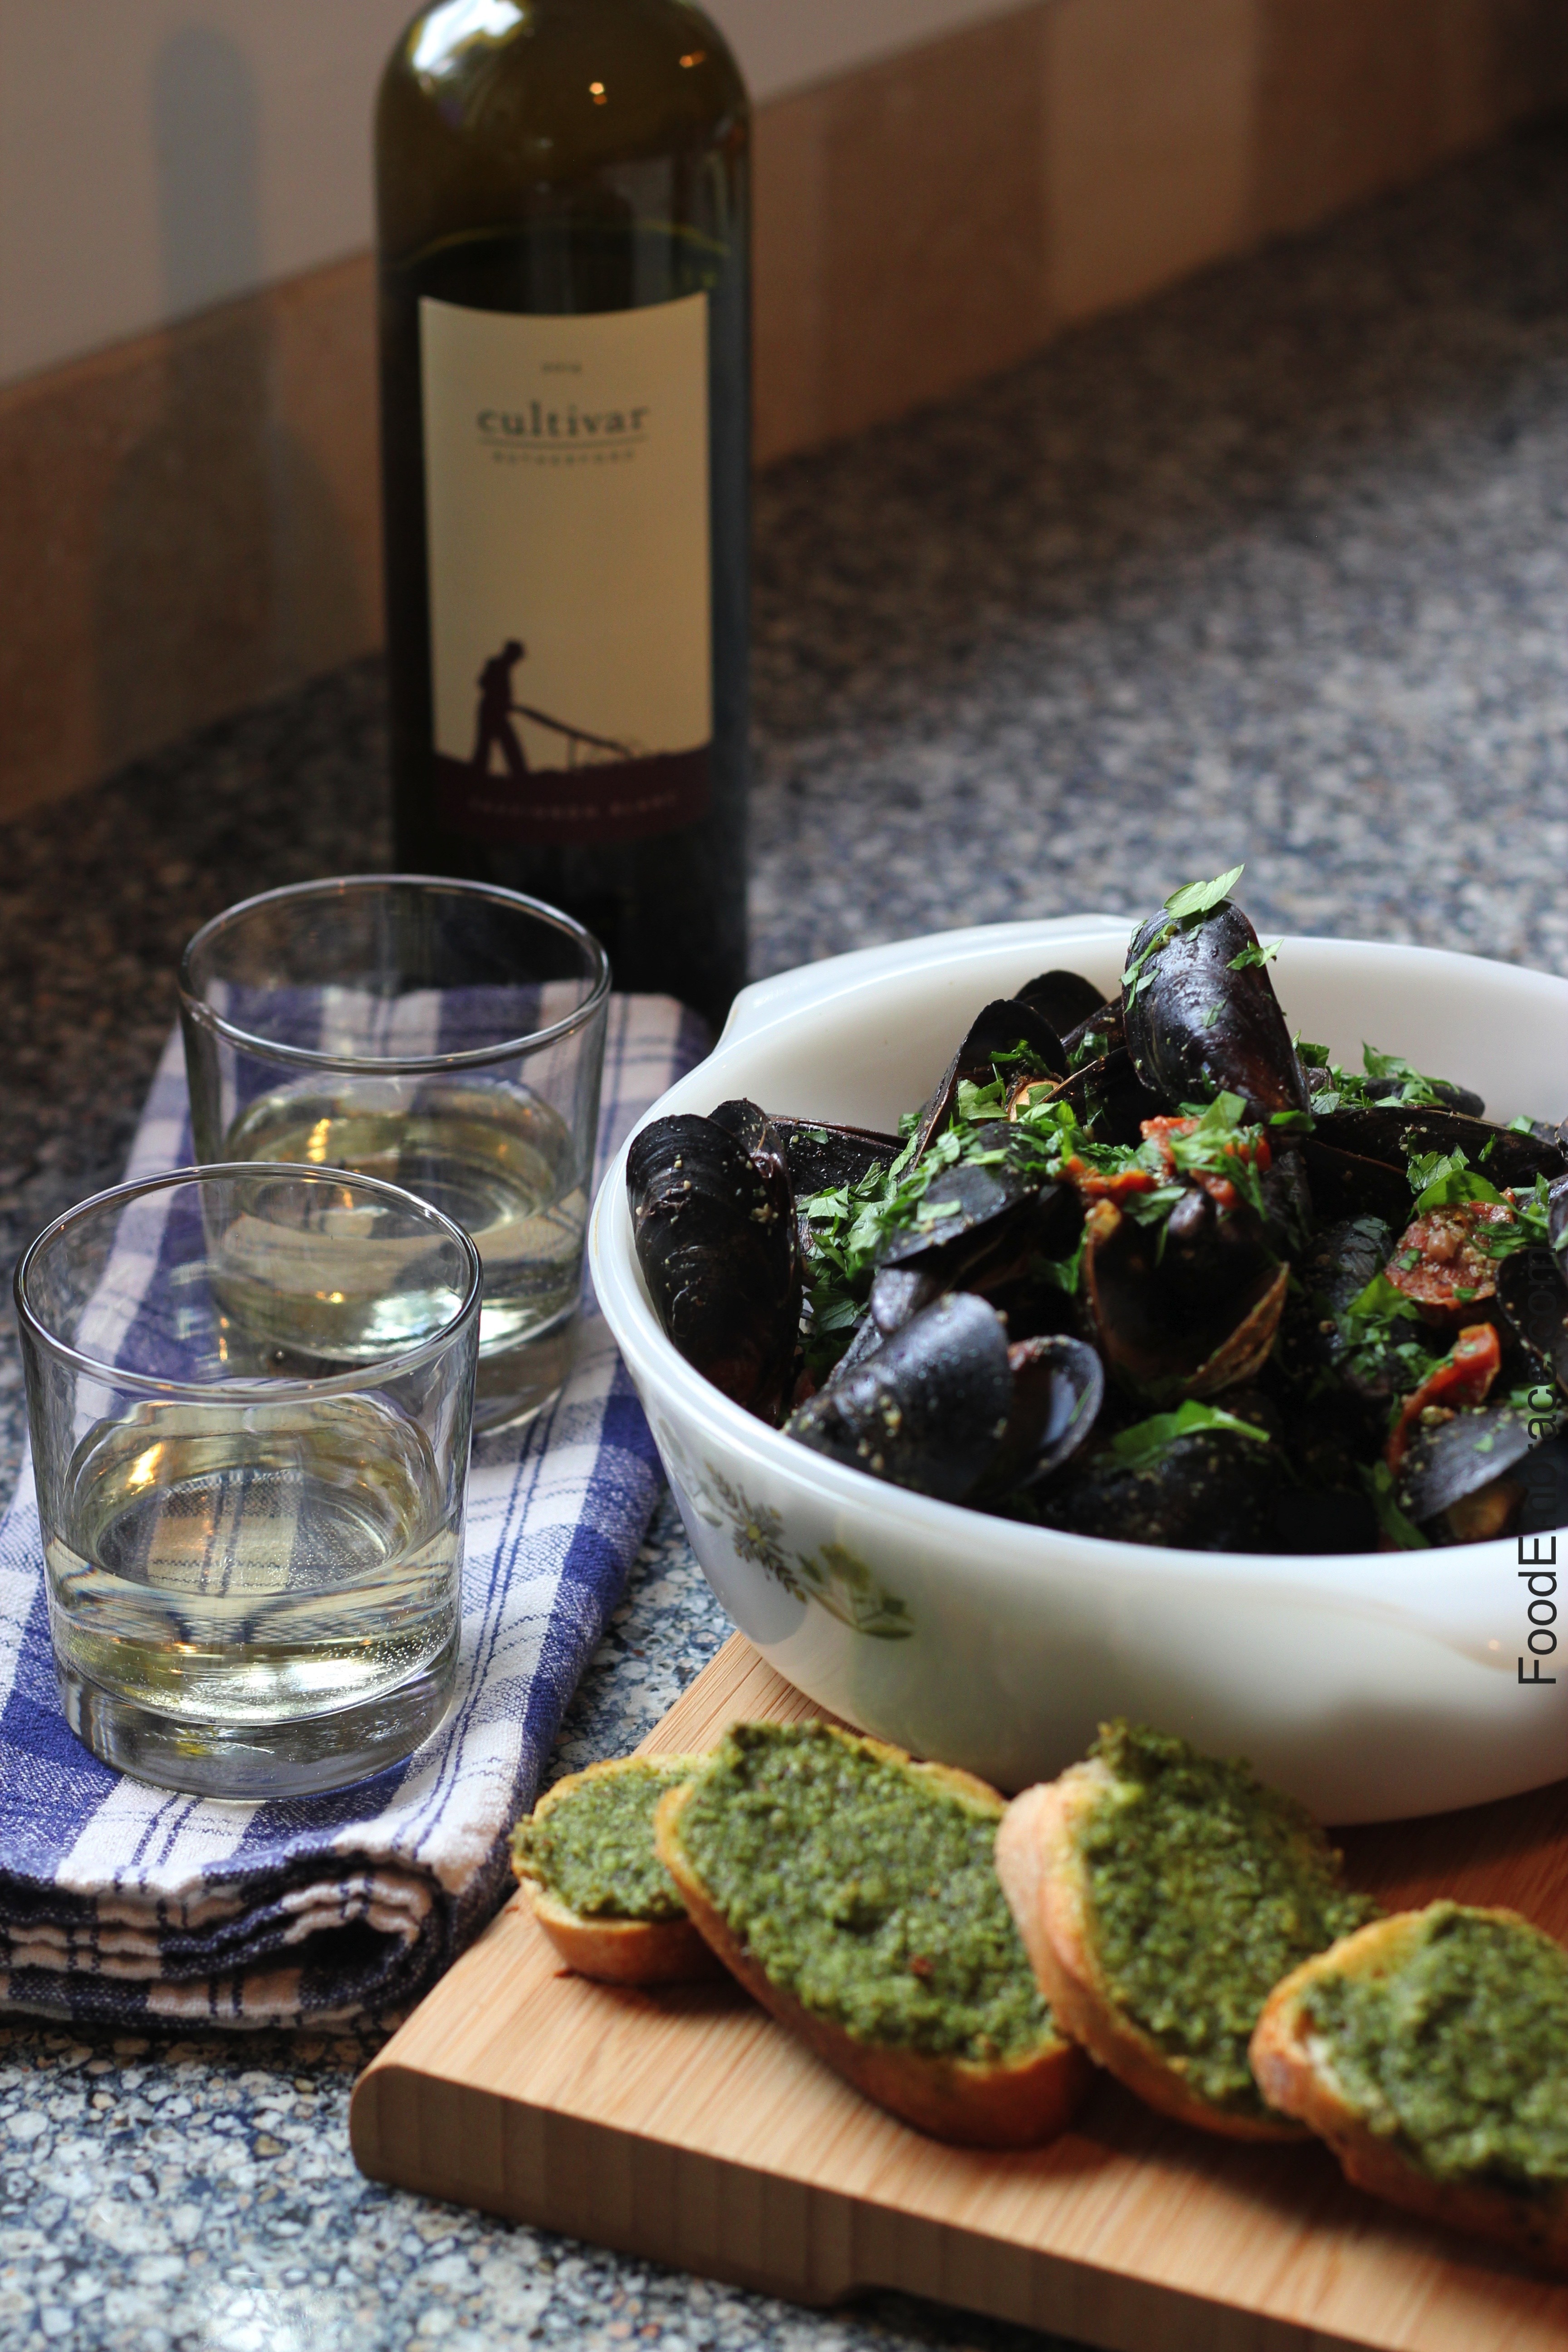
Mussels with Pesto and White Wine


Mussels with 2014 Cultivar Rutherford Sauvignon Blanc

I went to the 2014 Cultivar Rutherford Sauvignon Blanc  immediately because I will admit up front, I’m not a huge sauvignon blanc fan so I was curious about what this wine was going to be like.  Sauv Blancs that I’ve had in the past have been really tart with some strong grapefruit flavors, which are off-putting flavors for me.

The 2014 Rutherford is not even close to tasting that way. In fact, this wine blew me away and has made me rethink Sauv Blancs, willing to give them more of a chance.  This wine has some deep and complex characteristics to it.  The oak shines through but doesn’t over power.  There is some light citrus notes but they are mellow and smooth. This is a great wine for sipping and savoring.

To balance out the oak I thought this wine would be great paired with some steamed mussels. I added some pesto and sun dried tomatoes for some added depth.  The slight salty nuttiness of the pesto enhanced the richness of the wine.

This meal looks fancy but comes together in about 15 minutes.  Quick and delicious!

Andrea’s Mussels with Pesto and White Wine

  • I used this recipe for pesto. You can sub in spinach for kale if you like.
  • 2lbs of Fresh PEI Mussels, cleaned
  • 1/4C Chicken Stock
  • 1/4C White Wine
  • 1/4C Pesto
  • 1/2C Chopped Sun Dried Tomatoes
  • 2TBSP Olive Oil for cooking

In a large high sided sauté pan, heat the olive oil over medium heat.  Add in the pesto, stock, wine, and tomatoes. Gently stir then add in the mussels.  Cover and allow the mussels to steam until they open and are cooked.  About 10 minutes.

Remove from heat and serve with crusty bread.  Garnish with parsley and additional parmesan if desired.

I also sliced up a baguette and spread some of the pesto on the slices.  Baked at 400 for about 10 minutes until the slices of bread were crispy and the pesto had become bubbly.

The wine worked beautifully with this dish!  The slight sweet brininess of the mussels combined with the rich and oaky wine made for a fantastic date night dinner.

If you’re interested in trying out Cultivar Wine, as a reader of Food Embrace, you will be given 10% off your order.  Use the code, FoodEmbrace at checkout.

I am part of the Cultivar Wine Bloggers Club and receive some bottles of wine quarterly to sample and pair with recipes and foods.  This time I decided to pair the 2014 Cultivar Rutherford Sauvignon Blanc with fresh PEI mussels.


Disclaimer: I’m required to disclose a sponsored partnership between our site, Food Embrace, and Cultivar Wine. I have been compensated in exchange for this post in the form of product or experience. All opinions and recipes presented are my own.

Status

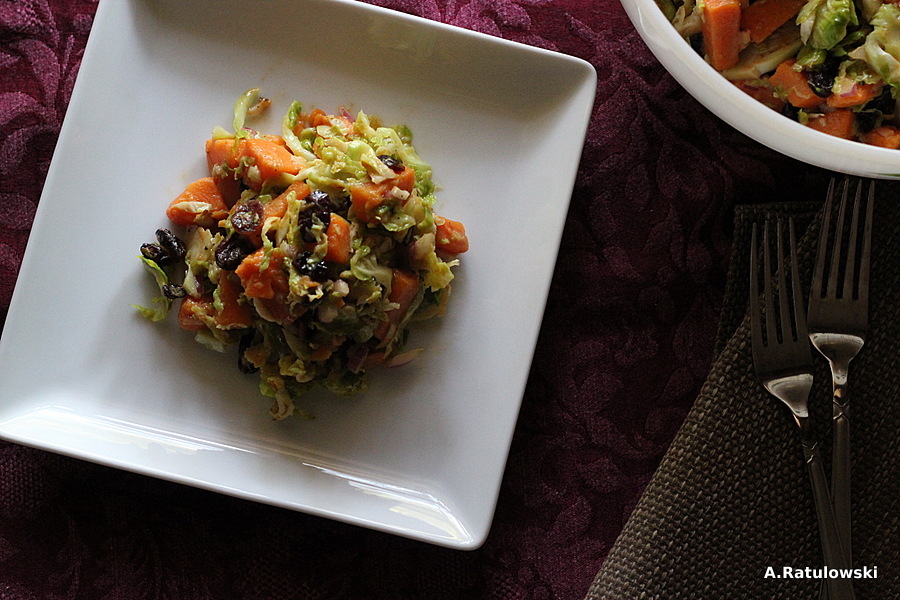
Shaved Brussels Sprouts and Sweet Potato Salad

Salads.  It’s one of those dishes that when I hear it, a few things come to mind.  I automatically assume it’s either lettuce or grain based.  Unless it’s at a summer gathering, then I think it’s either going to be potato or macaroni salad.  I’m trying to change my perception of what makes a salad so that I can experiement a little more.  Salads don’t have to be lettuce or grain based!  This might not be some amazing revelation to you but for me it opened up a lot more possibilities.

I was looking for something that I could create that would yield leftovers.  I wanted something to have at lunch that was veggie packed but not your standard boring mixed greens salad.

Since it was fall, I decided to incorporate a bunch of traditional fall ingredients like sweet potatoes and cranberries to create a salad that is great for lunch or as a side dish.  It’s also perfect for traveling so it can be taken to work (mason jar salad!) or to a party or picnic.  It’s grain free, it’s vegan, it’s Paleo.  It’s all the buzz words.

Shaved Brussels Sprouts and Sweet Potato Salad


Andrea’s Shaved Brussel Sprouts and Sweet Potato Salad

For the salad:

  • 2 Medium Sweet Potatoes, peeled and chopped
  • 1 1/2lb Brussels Sprouts, trimmed
  • 1/2 Red Onion, finely chopped
  • 1C Dried Cranberries
  • 1 tsp of Olive Oil for cooking

For The Dressing:

  • 2TBSP Dijon Mustard
  • 2TBSP Maple Syrup
  • 1/4C Balsamic Vinegar
  • 1/4C Light Olive Oil
  • 1/2tsp Salt
  • 1/2tsp Ground Black Pepper


In a small glass bowl, whisk together all the ingredients for the dressing and set aside.  Bring a large pot of water to a boil and add in the cubed sweet potatoes.  Boil until the sweet potato is just fully cooked through so that a knife pierces it easily but the sweet potato isn’t mushy.  About five – 10 minutes.  Drain the sweet potatoes making sure to remove as much water as possible.  Add to a large mixing bowl.

Using the fine grate or thin slice blade for your food processor, shred or shave (either works here) the Brussels Sprouts.  In a large skillet add in 1 tsp of light olive oil and heat over medium heat.  Add in the sprouts and cook for about 3 minutes.  Remove and add to the sweet potatoes.

Add in the cranberries and the red onion, toss to combine.  Pour the dressing over top of the salad and gently mix until everything has been coated in dressing.

Serve immediately or cover and place in fridge until ready to serve.  Serves 4 meal size portions or 8 as a side dish.

A couple of notes:

I slightly cooked the sprouts to help bring out more flavor and reduce their bitterness a bit.  This is a taste preference.  If you like raw sprouts then it’s OK to skip this step.  If you allow the salad to sit for several hours before serving, that will help breakdown the sprouts a bit.

This dish gets better the longer it has time to marinade in the dressing.

It does make for a big salad and this served two people as a meal for two lunches.

Leftovers are great but make sure to eat this in at least three days, otherwise the sprouts start getting a little funky.

Adding in some nuts, seeds, or even a little feta or goat cheese on top would make great additions to this salad!  A little twist on the traditional veggie side makes it perfect for holiday gatherings.

Have fun guys, and remember, always play with your food!  Enjoy!

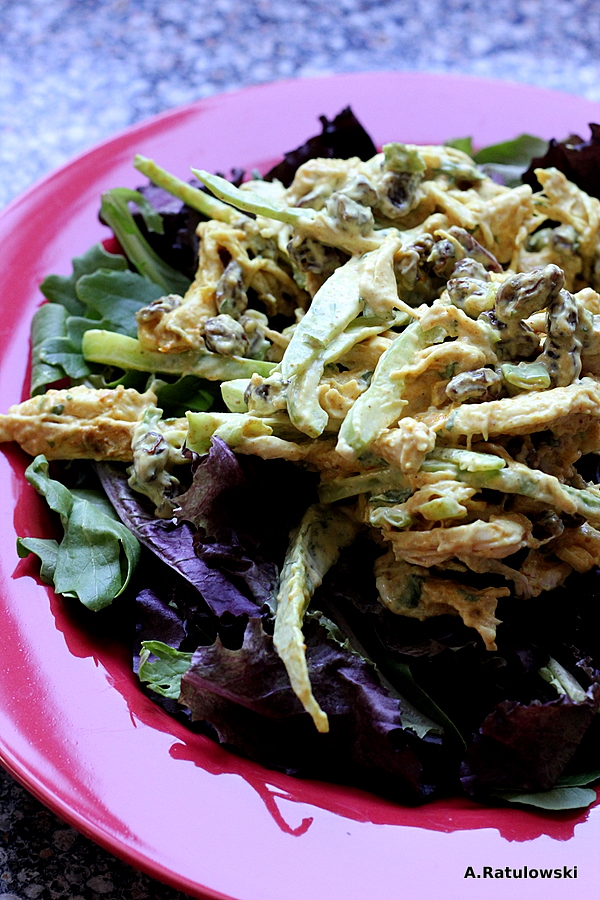
Curry Chicken Salad

Curry Chicken Salad

The first time I had a curry chicken salad was at a Whole Foods in North Carolina.  It kind of blew my mind.  It was my first experience with anything “curry” and was a whole new flavor sensation to me.  I immediately wanted to recreate it and I have finally succeeded!

It’s an easy recipe and the amounts can be adjusted to however much chicken you have.  There are always leftovers when I roast a chicken and this is my go-to recipe to transform those leftovers into something tasty.

I’m going to provide rough estimates for the amounts I use for leftovers but definitely play around with this recipe to fit your tastes and for how much you want to make.

Andrea’s Curry Chicken Salad

  • 1 Large Chicken Breast, cooked and shredded
  • 3 Green Onions, chopped
  • 1 Green Pepper, sliced thin
  • 1/2C Raisins
  • 3/4C Mayo
  • 1TBSP Curry Powder (I like Simply Organic)

In large bowl combine all ingredients.  Make sure to mix well so the mayo and curry covers everything.  It can be served immediately but is best when left to sit for an hour or more.

Eat it on a sandwich, in a wrap, on top of a salad!  Or just out of the bowl, like I sometimes do. A little different than your standard chicken salad, curry brings some warmth while that little bit of raisin keeps things sweet.   It’s great for lunch during the week or for dinner on a hot summer day.  Heck, or even breakfast! No judging here.

Have fun, and remember, always play with your food!  Enjoy!

Cowboy Burgers

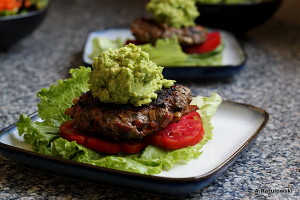
Cowboy BurgerI’ve been on a big burger kick lately, it’s all that I really want to eat and I’m going with the flow.  If that’s what my body wants, so be it! Burgers all around!

I wanted to make a burger that had a nice punch of flavor to it.  It’s getting to be about that time here in Northern Colorado, when roasted green chilies are going to be popping up at the farmer’s markets.  I love roasted green chilies!  You can get any spice level you like, the chilies are roasted fresh while you wait, and the smell is amazing.

I still had some roasted chilies in the freezer so I pulled those out and got to work creating this burger.  It’s super easy to prepare and tastes delicious!


Andrea’s Cowboy Burgers

  • 1 pound Grassfed Ground Beef
  • 2 Roasted Green Chilies, seeded and chopped
  • 1/4 Small Red Onion, finely chopped
  • 2 Slices Cooked Bacon, chopped
  • 1/2TBSP Worcestershire Sauce
  • 1tsp Chili Powder
  • 1/2tsp Salt
  • 1/2tsp Pepper
  • 1/2tsp Garlic Powder
  • 1TBSP Oil for cooking (I recommend Lard or Ghee)

Add all ingredients to a mixing bowl and gently combine.  Quarter the mixture, and make a patty out of each quarter.  In a large skillet, heat oil over medium heat.  Place patties in skillet and cook on each side for about 4-5 minutes.  Remove from heat and serve!

Makes 4 patties

Cowboy Burger

You can serve these however you like!  Top with cheese and maybe some caramelized onions.  I topped ours with guacamole and served them on lettuce wraps.

The roasted chilies bring a nice heat to the burgers while the bacon highlights the smokiness.  The spice level of the chilies used will determine how spicy the burgers turn out.  If you love heat, use spicier chilies!

These would also be great grilled!  Leftovers can be used right away or frozen.  To reheat, gently warm them up in a toaster oven or in a regular oven at 375 for about 10 minutes.

Have fun guys, and remember, always play with your food!  Enjoy!


Asian Inspired Minced Pork Bowls

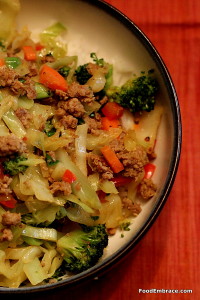
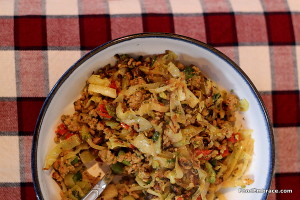
Asian Inspired Pork BowlsScott’s mom makes the best egg rolls hands down.  The wrapper is thin so it becomes super crispy when fried.  The filling is full of fresh ingredients in equal balance.  And there’s ground pork!  Gloriously seasoned ground pork mixed with some vegetables. It’s a welcome change from what usually passes for egg rolls here in the States.

Getting her to talk about and share the recipe is like pulling teeth.  She doesn’t know specifics, she just does it.  We do not live close by so sadly we do not have a fresh supply of egg rolls.

I have tried my best to work through the flavors and to come up with something that is similar.  Because let’s face it, I’ll never figure out the exact recipe and I will never be able to make it nearly as well.

Instead of official egg rolls, we have deconstructed egg rolls.  All of the yummy insides plus some extras thrown in because we like them.  Sometimes I serve this over some rice and sometimes I add in even more veggies so that we have a huge bowl of egg roll goodness.

It’s a favorite dish of ours and it’s super easy to make!

Andrea’s Asian Inspired Minced Pork Bowls

  • 1 Pound Ground Pork
  • 1/2 A Medium Cabbage, shredded
  • 2 Large Carrots, peeled and chopped
  • 1 Medium Crown Of Broccoli, florets removed and chopped
  • 1 Red or Green Pepper, thinly sliced
  • 5 Green Onions, thinly sliced

For The Pork:

  • 1/2tsp Ground Onion
  • 1tsp Ground Garlic
  • 1tsp Curry Powder
  • 1tsp Soy Sauce
  • 3 Dashes of Fish Oil
  • 1/2TBSP Lard or Ghee

In a cast iron skillet or large sautee pan, heat the lard over medium heat.  Add in the ground pork and season with the remaining ingredients.  Stir to combine and continue to cook until the pork is cooked through.  Line a glass bowl with some paper towels, remove the pork from the skillet and place in the glass bowl.

For the Veggies:

  • 1/2tsp Curry Powder
  • 1/2tsp Garlic Powder
  • 1/4tsp Kosher salt
  • 1/4tsp Ground Black Pepper
  • 1/2TBSP Lard or Ghee

In the same skillet the pork was cooked in, heat lard or ghee over medium heat.  Add in all of the veggies except the green onion, stir to coat with the fat, and sautee for about 5 minutes until the veggies start to soften.  Add in the seasonings and stir.  Continue to cook until the veggies are cooked through, about 10 minutes.  Add the pork back to the skillet and combine with the veggies.  Cook for another 3 minutes.  Turn off heat and serve.

Curry Pork Bowl

It’s perfect to eat as is, or you can serve over rice or rice noodles.  This dish also freezes well which means you can increase the amount to have portions to freeze.  The veggies can also be prepped ahead of time so that when it’s time to make dinner, you just have to heat and serve!

It has become a weeknight go-to meal since it’s so simple to make.  And there’s only like two dirty dishes at the end that Scott has to wash, so everyone wins!

Have fun guys, and remember, always play with your food! Enjoy!

Grain Free Chicken Enchiladas With Roasted Green Chili Sauce

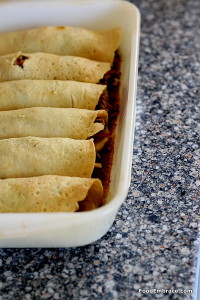
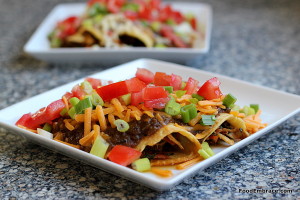
Grain Free Chicken EnchiladasThe first thing that I made with my batch of grain free tortillas, was some chicken enchiladas.  I wanted to see how the tortillas handled being rolled and how well they stood up to baking.

They worked beautifully!

I will admit that I didn’t bake them covered in sauce. Since this was my first time working with grain free tortillas, I wasn’t sure how they were going to stand up to baking and I didn’t want to risk making them soggy with sauce.

Instead I heated up the sauce on the side and we were able to use as much sauce as we wanted to top our portions.

I do think that if the tortillas were covered in sauce and baked that they might fall apart so stick with keeping the sauce warm on the side.

Andrea’s Grain Free Enchiladas with Roasted Green Chili Sauce

**For the Filling:

  • 4 Chicken leg quarters, cooked, and shredded
  • 2C Shredded Carrot
  • 1 Bunch Kale, stems removed
  • 1/2TBSP Ghee
  • 1tsp Salt
  • 1tsp Garlic Powder
  • 2tsp Chili Powder
  • 6 Grain Free Tortillas

Place the kale in a food processor and pulse until the kale is finely chopped.  In a medium sized saute pan, heat the ghee over medium heat.  Add in the kale and the carrots.  Saute for about 2-3 minutes then add in the shredded chicken.  Season with salt, garlic powder, and chili powder.  Add in 1/2C of the sauce (see recipe below).  Stir and cook for about 3 minutes. Remove from heat.

For The Sauce:

  • 1 Medium Sized Onion, chopped
  • 1 Green Pepper, seeded and chopped
  • 4 Roasted Green Chilies (your choice, I used anaheim)
  • 1 14.5oz can of Diced Tomatoes with Green Chilies
  • 1TBSP Ghee
  • 1tsp Salt
  • 2TBSP Coconut Sugar

In a medium sized sauce pot, heat the ghee over medium heat.  Add in the onion and peppers and sauté for about 5 minutes until the peppers and onions start to soften.  Add in the diced tomatoes, salt, and coconut sugar.  Bring to a simmer and simmer for about 10 minutes.  Remove sauce from heat and pour into a blender.  Blend until the sauce becomes smooth and free of lumps.  Pour sauce back into sauce pot and keep warm over low heat.

Assembly and Baking

Preheat an oven to 4oo degrees.  In a 9×12 casserole dish, pour in 1/2C of the sauce.  Spread it around so it coats the bottom.  Place 1/2C of filling in each tortilla.  Roll and place in the casserole dish.  Cover dish with foil and bake for about 15 minutes.

Remove from oven.  Portion out onto plates and top with sauce.  Makes 6 portions.

Please see notes at the bottom.

Grain Free Chicken Enchiladas

**Notes: 

This dish can be prepped ahead of time.  Once the enchiladas are made, cover with foil and store in fridge until you’re ready to heat them up.  Place in a 400 degree oven and bake, covered, for about 1/2 an hour or until the enchiladas are heated through.  While they are baking, the sauce can be simmering on the stove.

The filling makes enough for two batches of enchiladas.  You can make two batches right away if you’re feeding more than two people.  Or you can freeze the remaining filling and use it another time.  Since the tortillas and the filling freezes well, that’s already another meal you have prepped and ready to go!   The filling is also great as a topping for salads, mixed with scrambled eggs, or eaten on it’s own.

I added the coconut sugar to help tone down the heat from the chilies.  If you love spicy foods feel free to omit the sugar.


We topped our enchiladas with chopped tomato, green onion, and cheddar.  Some sour cream and chopped cilantro would also be great as well!

This dish is really easy to make despite what might seem like a lot of steps.  Perfect way to use up some leftover roast chicken and turn a weeknight meal into something a little more exciting.

Have fun guys, and remember, always play with your food! Enjoy!


Curry Cabbage Slaw with Sauteed Curry Shrimp

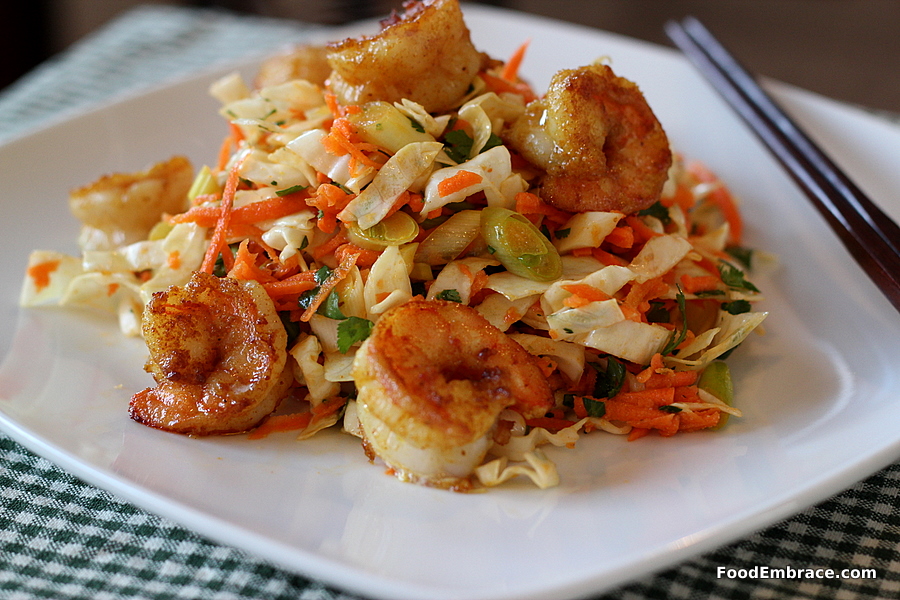
Curry Cabbage Slaw with Curry ShrimpIt was midweek and we needed something for lunch.  It was late in the day and I had a craving for shrimp. I was wondering if there was a way I could make some sort of shrimp and veggie salad.

Light enough for lunch but hefty enough to keep you full and satisfied for the rest of the day.

I’ve made a cabbage and radish slaw as a topper for fish tacos.  So I wondered if I could make a curry based slaw?  Full of curry spice but no heavy sauces to weight down the dish.

Crunchy cabbage and carrot slaw with curry topped with some curry spiced shrimp turned out to be one of the best dishes I’ve made recently.

Light enough for a late lunch but substantial enough that you can have this for dinner on a warm evening.

Andrea’s Curry Cabbage Slaw with Sauteed Curry Shrimp

For the Slaw:

  • 1/2 of a small to medium head of cabbage, thinly sliced
  • 2 Large Carrots, shredded
  • 1 handful of cilantro, chopped
  • 4 Green Onions, chopped, white and green parts
  • Juice of 1 large lime
  • 1TBSP Light Olive Oil
  • 1/2 tsp Curry Powder
  • 1/2 tsp Garlic Powder
  • 1/2 tsp Cane Sugar

In a large mixing bowl, add in the cabbage, carrots, and green onions.  In a small mixing bowl add the remaining ingredients and whisk until the sugar is dissolved.  Pour dressing over the veggies and toss until everything is coated.  Set aside for at least half an hour before serving.  Gently stirring every few minutes.

For the shrimp:

  • 16 Raw EZ Peel Shrimp, remove also the tail
  • 1/2 tsp Garlic Powder
  • 1/2 tsp Curry
  • 1/2 tsp Light Olive Oil
  • 1/2 tsp Soy Sauce
  • 1/2TBSP Light Olive Oil for sauteeing

In a medium mixing bowl, add all ingredients except for the 1/2TBSP olive oil, and gently toss together.  Heat the 1/2 TBSP of oil over medium heat and then add the shrimp in.  Cook shrimp about 2 minutes on each side and remove from heat.

Scoop out large spoonfuls of the slaw onto a plate and then top with the shrimp.  Serve and enjoy!

This makes two large servings with a little bit of slaw leftover.

Curry Cabbage Slaw with Curry ShrimpI’m not sure if Scott and I even talked with each other the entire time we were eating this dish!  It hit the spot perfectly and made for a great late lunch.

I think some extra chopped cilantro and maybe some crushed peanuts on top would be great additions and kick the dish up a little bit.

Have fun guys and remember, always play with your food!  Enjoy!

Leftover Ideas: Mashed Potato Stuffed Peppers

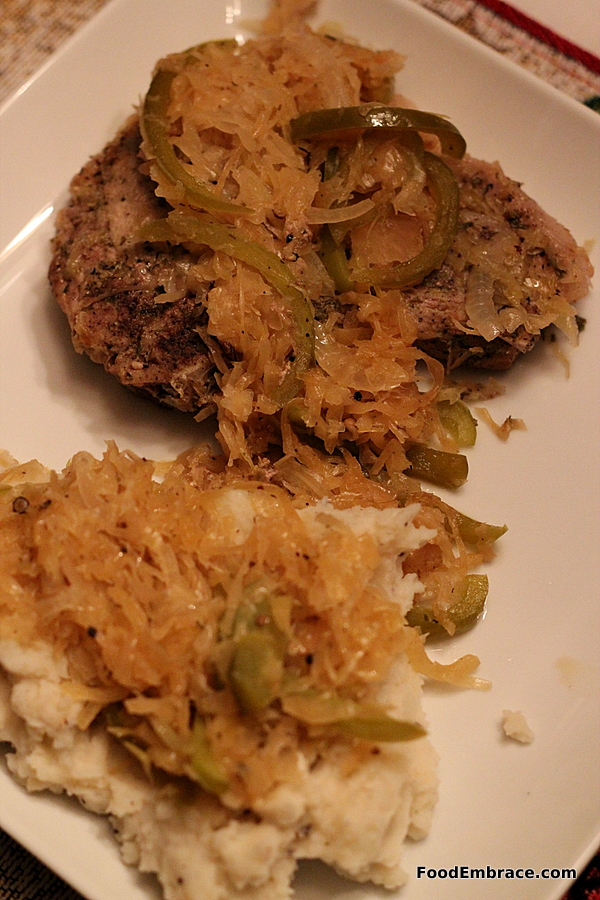
Pork chop with sauerkraut and mashed potatoesFor New Year’s Day, our tradition is to eat pork and sauerkraut for good luck and health in the upcoming new year. Normally I do country ribs in the slow cooker but I didn’t have any this year.  We had some bone-in pork chops instead but that left things off balance in terms of leftovers.

The pork chops were eaten leaving us with leftover mashed potatoes and sauerkraut.

What to do?

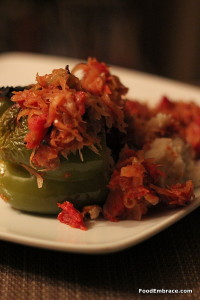
I had some green peppers that needed used up and figured that I could stuff those with the leftover mashed potatoes.


Mashed potato stuffed peppers with a tomato and sauerkraut sauce.I added a can of diced tomatoes to the sauerkraut and a little pinch of brown sugar (to help cut the tartness a bit), mixed that all up and poured it over top of the stuffed peppers.  I baked the stuffed peppers in a casserole dish at 400 for about 45 minutes.

The resulting dish was comforting and filling, perfect for a chilly evening.  I was able to utilize the leftovers in a new way and use them all up! I’m calling that a leftover success.

I’m pretty sure this might be a go-to dish now whenever we have leftover mashed potatoes.

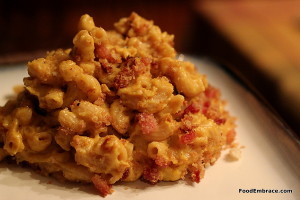
Curry Butternut Squash Mac And Cheese

Butternut Squash Mac and CheeseIt’s cold out and winter is officially here, at least in our neck of the woods.  Which means all I want is the most comfortable of comfort foods.

Mac and cheese totally hits the spot but I wanted a little something different.  A little way to toss in some veggies and make it taste slightly more indulgent.

I thought if I pureed up some butternut squash and some coconut milk this might work to form a really creamy sauce.  It worked beautifully and we had a creamy cheesy dish to to eat while we snuggled on the couch in our jammies watching TV.

Andrea’s Curry Butternut Squash Mac and Cheese

To Roast:

  • 1 2 1/2 pound Butternut squash, peeled, seeded, and cut into chunks.
  • 1 Small onion, cut into chunks.
  • 1/2TBSP Olive Oil
  • 1tsp Curry Powder
  • 1tsp Garlic Powder
  • Sprinkle of salt and pepper
  • 3C Elbow Pasta

Preheat oven to 400 degrees.  Put the onion and squash in a bowl and toss with the olive oil and seasonings.  Place on a greased baking sheet and roast in the oven for about 25 minutes.

You can also cook the pasta at this time as well, 3C of elbow pasta.  Bring a large pasta pot to boil and cook pasta for 3 minutes. Don’t cook the pasta all the way, only take it to where the pasta is just beginning to soften just a bit.  It will finish cooking in the oven when the dish is fully together.  Drain pasta, put back in pasta pot, and set aside.

For the Sauce:

  • 1 Can Coconut Milk, full fat (you can use reduced fat if you like)
  • 1 1/2C Water
  • 1/2 tsp Curry Powder
  • 1/2tsp Garlic Powder
  • Pinch Red Pepper Flakes
  • Roasted squash and onion
  • 1 1/2C Shredded Jack Cheese
  • 2C Shredded Sharp Cheddar

Place the first five ingredients in a blender and blend till mixed.  Then add in the squash and onion and blend until everything is creamy and smooth.  You might need to stop along the way and use a spoon to help break things up.

In a large sauce pot, add the sauce and heat over low-medium heat.  Slowly add in the cheese until all the cheese is used and melted into the sauce.

Grease a 12×8 casserole dish. Add the sauce to the pasta in the pasta pot and stir until everything is mixed.  Then add that mixture to the casserole dish.

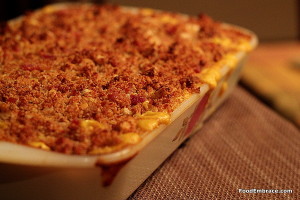
Place in the 400 degree oven and let bake for about 15 minutes.  Stir and bake for another 15 minutes.  Sprinkle the topping (see below) all over the top of the dish, give it another 5 minutes and remove from oven.

Topping:

  • 1C Breadcrumbs
  • 1/2C Grated Parmesan
  • 4 Slices of crispy cooked bacon, crumbled
  • 4TBSP Olive Oil

Mix all ingredients in a small bowl.

Allow the mac and cheese to cool for two minutes then serve and enjoy!

Butternut Squash Mac and Cheese

It’s going to seem like a lot of sauce but it will cook down once it’s in the oven.  That’s the reason for not cooking the pasta all the way.  The pasta will finish in the oven and absorb some of that sauce.

Creamy and slightly different with the curry powder.  Yeah, ok I used a lot of cheese and if you’d like to reduce that amount you can.  I used the jack for melty goodness and the cheddar to give it some bite.

The coconut milk provides the perfect base for the sauce because you don’t need to use any thickeners like flour.  You don’t even need to take the time to make a roux!  It also isn’t noticeable in the taste, no one is going to suspect you used coconut milk in this dish.

I had bacon on hand so why not?  You can omit that too if you’d like to keep it veggie friendly.

This makes a good bit of mac and cheese and is perfect for leftovers the next day.  It won’t last longer than that though so make sure to eat it up!

I was pleased how this dish turned out though I think I might tweak with it a little more and see what else I can do with it.  That’s the best part of cooking, just playing around with recipes and methods!

Have fun kids, and remember, always play with your food! Enjoy!