Superbowl 2013 Snackies

Braised Pork Ribs Someone said that there was a big athletic event this weekend. All I know is that hockey is back and the Pens play the Capitals (I can’t stand the Capitals and their website looks horrible. Ahem.)  on Sunday, so I’ll be focused on that.

If you’re having a big event on Sunday for the game of your choice, I’ve got some great ideas for you that will power you through the afternoon.

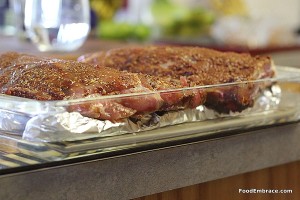
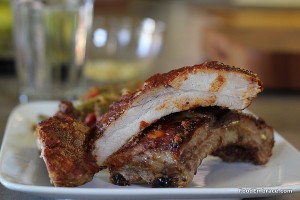
Braised Ribs are easy to make and the perfect “messy” game day food.  They can be served hot or room temperature and will keep you and your guests satisfied during the big day.

Pair it with some bourbon or green chili barbecue sauce for some extra kick!

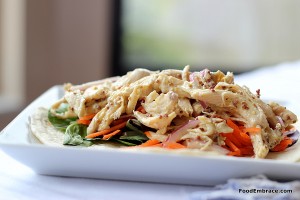
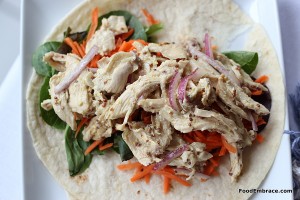
If you’re looking for something a little less messy, then this honey mustard chicken salad is where you should turn.

Honey Mustard Chicken SaladThere’s no mayo so it can sit out without a problem.  Everyone can make their own sandwiches or wraps, or even put it on top of a mixed salad.

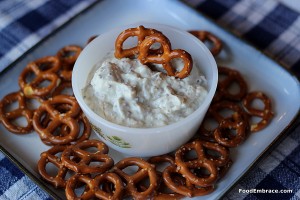
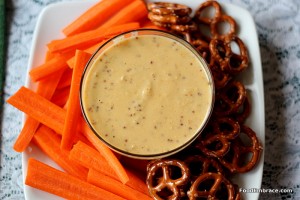
Chips and dips are always a must on game day.  Make your own horseradish onion dip the day before and it will be ready for when your guests arrive! Can be served with chips or veggies!

Horseradish Onion Dip If you’re looking for a different cocktail to serve, my friend Lori has a great one using sriracha! Head over to check it out!

Have fun this weekend and get your snacking on!


Braised Pork Ribs

Scott and I love ribs and great barbecue is tops on our list of favorite eats.

When we made our travel across the country earlier this year, stopping for barbecue was on our “must do” list. And we succeed in finding some top eats!

I currently don’t have a smoker and do not have the know-how to turn my grill into a smoker at this point.  Eventually I want to learn how to smoke meats and try my hand at some pork!

For now I go with the braising method of cooking ribs; low and slow in the oven with just a little bit of liquid.

I started off following Alton’s method for ribs but have since moved to my own method.  It works for now and produces juicy ribs that satisfy the craving for a little bbq rib action.

Here’s how I approach braising ribs:

Andrea’s Braised Pork Ribs

  • 1 slab of ribs cut in half
  • 1-1 1/2 C Dark or Pilsner Style Beer
  • Foil or metal cooling racks
  • Large baking dish or roasting pan

Prep your ribs using a dry rub.  I prefer a good 12-24 hours for the rub to be on the ribs.  Store the ribs in the fridge and pull them out at least 15 minutes before putting them in the oven.

Preheat the oven to 300 degrees.

You need to elevate the ribs in the baking dish/roasting pan.  You can do this either with metal cooling racks or the rack that came with your roasting pan.

If you have neither of those, you can roll up foil lengthwise, making what looks like a foil log.  Lay three to four foil logs in the baking dish/roasting pan and place the ribs on top of the foil. Click on the first picture to see an example of this.

Pour the beer in the bottom of the baking dish.  Cover the ribs with more foil and poke a few holes into the foil to allow steam to escape.

Place in oven and cook covered for about 45 minutes.  Remove cover, check on ribs.  The should be looking almost cooked through.  Cook uncovered for about 10 -15 minutes.

It really doesn’t take long for ribs to cook through.  You can use a meat thermometer to double check for doneness.

Brush with your favorite bbq sauce or put some out and let everyone add it themselves!

We recently had ribs with the hatch green chili barbecue sauce but if you’re looking for sauce with a little something extra, I’ve got a bourbon barbecue sauce as well.

I’ve got a great coffee and cocoa dry rub recipe that would be perfect for the ribs.

So far this method is working well and I can quickly whip up some ribs when the mood strikes.

Have fun guys, and remember, always play with your food!  Enjoy!

Keep It Simple: Zucchini and Tomato Saute

Zucchini and tomatoes are my two favorite summer time veggies. Well corn is up there too but zucchini and tomatoes take top spots.

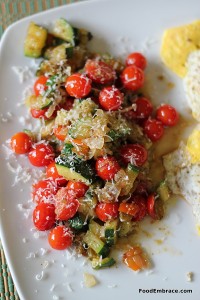
They also go well together and I use them to make a simple side dish that takes only minutes to prepare.

I eat this often at lunch and sometimes again at dinner.  I know that summer and it’s bounty only stick around for a short time so I try to get in as much as I can.

Especially tomatoes!  A fresh summer tomato is better than candy.

I used little wee cherry tomatoes but you can certainly use whatever tomato you have on hand, just chop it up!

Measurements are guesstimates because amounts can be adjusted to suit your tastes and what you have on hand.

Andrea’s Zucchini and Tomato Saute

  • 1 Medium Zucchini, chopped into bite-sized peices
  • 1/2 Pint of Cherry Tomatoes, halved OR 1 Large Tomato, chopped
  • 2 tsp Olive Oil
  • Salt
  • Pepper
  • Red Pepper Flakes
  • Italian Seasoning
  • Grated Parmesan

In a medium sized skillet heat olive oil over medium heat.  Add in zucchini and seasonings. Saute until the zucchini starts to get tender, then add in the tomato. Saute for about two minutes until the tomato is just heated through.

Remove from heat and serve. Sprinkle each portion with the parmesan.

Remember the seasonings are up to you!  You can make a lot or a little.  It’s also great cold and spooned onto some lovely bread.  If you want, you can even add a little chopped onion in there for some kick.

A simple and quick way to use up some of that produce leftover from summer’s harvest.

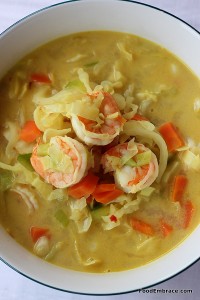
Coconut Shrimp Soup

I had some cans of coconut milk in my pantry that needed some attention, so I started experimenting around with them these past few weeks.

After seeing coconut milk used in a soup on Chopped, I decided that was going to be my experiment.

I had some cabbage that also needed to be used and thought a soup based off of that with some shrimp added in would make for a great weeknight dinner.

I used what I had on hand and ended up with a really great soup!  One that Scott seemed to love and wants more of in the future.  I love when that happens.

Andrea’s Coconut Shrimp Soup

  • 3/4lb Raw, Deveined Shrimp (or about 18 shrimp of 23/count size), Shell and Tail Removed
  • 1/2 Medium Sized Cabbage, finely sliced
  • 2 Large Carrots, finely chopped
  • 1 Clove Garlic, grated
  • 1/2C Coconut Milk (Full Fat Please, from a can)
  • 6C Chicken Stock
  • 1tsp Soy Sauce
  • 1/2TBSP Chili Garlic Sauce
  • 1/4tsp Tumeric
  • Juice and Zest of Half a Lime
  • Olive Oil for Sauteeing
  • 5-6 Green Onions, chopped

In a large soup pot, add in about 1/2TBSP of olive oil and heat over medium heat.  Add in the carrot and cabbage and saute until the cabbage starts to cook and become translucent.  About 10-15 minutes.

Add in the grated garlic and sautee for about a minute.

Add in the chicken stock, soy sauce, chili garlic sauce, and tumeric.  Stir and bring mixture up to a simmer.

Simmer soup for about 15 minutes to let the cabbage cook down a little further and to cook the carrots.

Add in the coconut milk, and green onions, and stir.  Then add in the shrimp and stir.  Cook for about another five minutes or until shrimp are pink, curled, and cooked fully.

Add in the lime zest, and lime juice, and stir.

Spoon soup into bowls, serve, and enjoy!


Makes enough for three large servings.

Cilantro would be a great addition to this soup but I didn’t happen to have any one hand.  Next time though!

This soup was flavorful and very filling.  The tumeric gives it a lovely color and a slightly floral flavor.  The lime brightens everything up!

Next time I make this, I do think that I’ll add in more shrimp and a little more coconut milk.  This was my first time playing around with coconut milk in soup so I didn’t want to over do it.  We love shrimp and can never have too much.

I’m already thinking about what other things I can add to this soup and when I’ll be able to get more coconut milk!

Have fun guys and remember, always play with your food!  Enjoy!

Memorial Weekend Eats

Memorial Day weekend is coming up and it’s time to start planning all the grub that you’re going to put out! If you are in need of some ideas, I’ve got some coming your way!

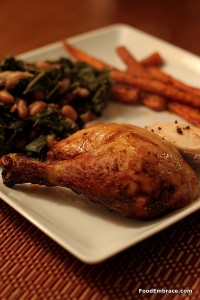
Tequila Brined Chicken can easily be made on the grill.  Either go the beer can route or you can quarter it up and grill it in pieces.

Got leftover chicken? Use it to make some mayo-less chicken salad!

Want a veggie dish that can stand up next to all the potato salads and baked beans?  Bring something a little different to the table with some Asian Noodles in a Coconut Peanut Sauce.

And don’t think I forgot the dips because that would be crazy talk.

Horseradish Onion Dip better than anything that requires you to use dehydrated onions from a packet.

And just for fun:

Beer Mustard Dip, cheesy creamy goodness.

Have fun this holiday weekend! Stay safe, drink some beer, and eat a little too much!

Honey Mustard Chicken Salad

I love chicken salad and I would have to say it was my favorite growing up.

Our chicken salad wasn’t full of grapes and nuts and seeds.  It had a mayo base with onions and celery and seasonings.

Similiar to how we made tuna salad.  Sometimes my mom would use chicken from a can.  Shudder all you like but at the time I loved it.

Now my tastes have changed.  No canned chicken here, I like roasting my own chicken.  In this recipe I use mustard instead of mayo for a base.

Removing the mayo makes dishes more friendly for potluck and backyard summer parties.

I came up with this really simple but amazingly tasty chicken salad.  I use chicken from bone-in chicken breasts and make a bunch at a time.

Andrea’s Honey Mustard Chicken Salad

  • 3 to 4, Bone-in, Skin-On, Chicken Breasts
  • 1/4 Small to Medium Red Onion, thinly sliced
  • 2TBSP Dijon Mustard
  • 2TBSP Whole Grain Mustard
  • 3TBSP Red Wine Vinegar
  • 2TBSP Olive Oil
  • 1 1/2TBSP Honey
  • Sprinkle of salt, pepper, garlic powder

Preheat oven to 400 degrees.  Line a baking sheet with foil and place chicken on baking sheet.  You can rub the chicken down with a bit of olive oil (nore more than 1/2tsp each) and sprinkle with a little bit of the seasonings above.

Bake chicken until fully cooked, about 10-15 minutes.

Remove from oven and allow to fully cool.

In a small mixing bowl combine everything but the chicken and onion.  Stir until everything is well mixed.

When the chicken is cool, remove skin and discard.  Start shredding the chicken and add that to a large glass mixing bowl along with the onion.

Pour dressing over chicken and onions, and stir to combine.  Cover and set in fridge for at least an hour before serving.

Serve on a salad or on a toasted bun, and enjoy!

This makes a decent sized amount of chicken salad.  It serves Scott and I two meals each at least.

I’ve also made this using four chicken breasts, keeping the dressing amount the same.  This recipe makes a good bit of chicken salad, perfect to have on hand for sandwiches and salads through the week.

This is one of our favorites and something I am starting to have in the fridge often especially as the weather starts to turn warmer.

It’s not over dressed so there’s no worries about losing the great chicken flavor.  The red onion can get a little potent so if you feel like 1/4 of an onion might be too much, decrease the amount.

This will last in the fridge, covered for several days.

We’ve eaten it cold on salads and in wraps.  Also toasted up on a sandwich with melty swiss cheese.  However you want to dish this up, will be a winner!

Have fun guys, and remember, always play with your food!  Enjoy!

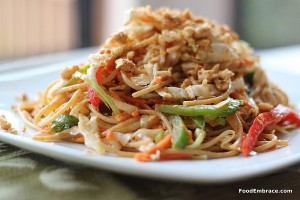
Noodles with Coconut Peanut Sauce

Warmer weather has me thinking of make ahead meals that can be eaten chilled or at room temperature.

When it’s hot and most especially when it’s humid, I don’t want to be stuck in a hot kitchen. Then eating a hot meal on top of that? Ick.

Pasta salads and roasted veggie salads almost become a summer staple here at the HQ.

I wanted to do something a little differently and decided to play around with some Asian inspired flavors.

I first made this dish last year to bring to a potluck (theme for the potluck was PB&J and this was my contribution) and made it again for us recently to have for dinner.  It’s a keeper.

Andrea’s Noodles with Coconut Peanut Sauce

For The Sauce:

  • 1/4C Water
  • 1/4C + 1TBSP Unsweetened Coconut Milk (Either canned or from the dairy aisle)
  • 1TBSP Chili Garlic Sauce (found in the Asian section at the grocery store)
  • 1tsp Soy Sauce
  • 1 Garlic Clove
  • 1/4C All Natural Peanut Butter (no added sugar, the kind you have to stir)
  • 1TBSP Honey
  • Juice from 1/2 a Lime

For the Pasta:

  • 1/2lb Whole Wheat Spaghetti
  • 1/2 Large Cabbage, cut in thin slices
  • 1/2 Red Pepper, thinly sliced
  • 1/2 Green Pepper, thinly slice
  • 2 Large Carrots, Shredded
  • 2 Green Onions, chopped
  • Roasted peanuts, crushed for garnish

In a blender, combine all ingredients for the sauce and blend until smooth.

Heat a skillet over medium heat, and add about 1/2tsp of olive oil.  Lightly saute the peppers until they just start to soften, about 2-3 minutes.  This is just to remove some of the excess liquid they have.

In a large stock or pasta pot, fill with water and bring to a boil. Cook pasta until just shy of being al dente.  You want it to have a little bite to it.

Drain pasta and add back into pot.  Add in all the veggies and toss.

Pour sauce mixture overtop and toss until everything is well combined.

You could serve immediately or place mixture in a bowl, cover and store in fridge until you’re ready to eat.

No need to heat this up, serve chilled.

Sprinkle with crushed peanuts if desired.
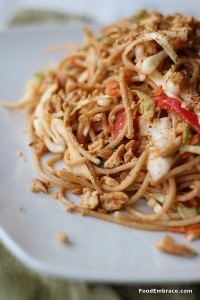
This dish completely hit the spot for us!  It was light, full of veggies, and with a slightly spicy heat in the background.

On a hot day when you don’t feel like cooking much, this is the perfect recipe!

The crushed peanuts give it a little bit more texture and some crunch to the dish.  You could get a little fancy and season the peanuts before roasting them with a little oil, chili powder, and garlic powder.  Roast at 350 for about 5 minutes.

I happened to have the whole wheat spaghetti on hand so that’s what I used but soba noodles would work well here as well.

Rice noodles, like the kind used for Pad Thai might also work though you may need a little bit more sauce if you use those.  You’ll have to play around with it and see what you come up with.

I’ve also used cilantro in this dish.  A handful added into the sauce and then some for garnish.  I left it out this time because I didn’t have any but feel free to toss that in if you like!

Have fun guys, and remember, always play with your food!  Enjoy!
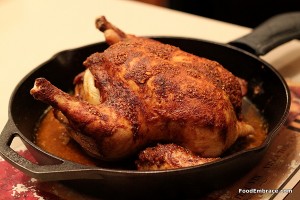
Tequila Brined and Roasted Chicken

You all know I love brining up some chicken and this one was inspired by Scott.

Scott has fallen head over heels in love with Tequila.  We have several different styles here on hand to cover all the bases, sipping, mixing, and cooking.

A good mid-range anejo style tequila is perfect for this dish as it has a little more depth and smokiness to it.

Andrea’s Tequila Roasted Chicken

For The Brine:

  • 1 Whole Chicken (about 5lbs)
  • 1/3C Tequila
  • 1/4C Brown Sugar
  • 1/4C Kosher Salt
  • 2 Fresno Peppers, cut in half
  • Huge Bunch of Cilantro
  • Water to cover

Basting Sauce:

  • 3TBSP Tequila
  • 4TBSP Olive Oil
  • 8 Cloves of Garlic
  • 1/2tsp Smoked Paprika
  • 1tsp Chili Powder
  • Pinch Cayenne Pepper
  • 1tsp Garlic Powder
Extras:
  • Lime, cut in half
  • Half an Onion
  • Cilantro
  • 2 TBSP Olive Oil

In your largest tallest bowl (or perhaps a stock or pasta pot) add in the salt, sugar, tequila, and 2 cups of hot water (not boiling).  Stir until the salt and sugar have dissolved.  Add in cold water until the bowl/pot is almost full.  Add in the chicken, peppers, and cilantro.  Add in more water until the chicken is fully submerged.

Place in fridge for at least 6 hours.

Preheat oven to 375.

Remove chicken from brine, rinse under cold water and pat dry.

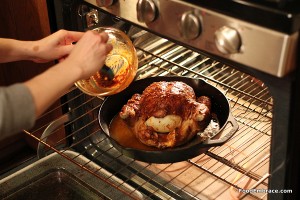
Place chicken in a baking dish, add in a little water or stock at the bottom, along with some olive oil. Place lime, onion, and cilantro inside the cavity of the chicken.  Rub olive oil over the chicken, about 1/2TBSP and place in oven.  Roast and occasionally bast with the water or stock that is in the pan.

Place all ingredients for the basting sauce in a food processor or blender and blend until totally smooth.

Once the chicken is about half way cooked (after about 30 minutes) start basting with the tequila mixture.  The mixture should get through two bastings.

Do the first basting and wait another 10 – 15 minutes before doing the second basting.

After the second basting allow the chicken to finish cooking until it is completely done.

Remove from oven and allow to cool for about 10 minutes before slicing and serving.

I got the idea for the basting sauce because I wanted something that would not only add some flavor to the chicken but also add some color to it.  Similiar to that deep red color you find on a smoked or barbequed chicken.

The paprika and the chili powder is what brings the roasted chicken to life and the tequila is what makes it stand out.

The reason you wait until the chicken is halfway through the cooking process before basting is because garlic can easily burn.  Adding in the basting sauce too early and you run the risk of garlic burning on you and creating a bitter taste.

We both really enjoyed this chicken dish and Scott’s excited for another reason to purchase tequila.

Have fun guys, and remember, always play with your food!  Enjoy! 

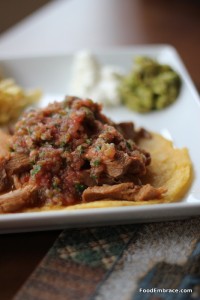
Pulled Pork Tacos

Pork is probably our favorite meat source here at the HQ. Ribs, sausage, and chops, oh my!

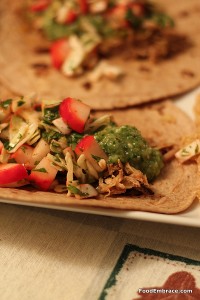
We’ve been having pulled pork tacos a lot recently.  It’s easy to make and provides plenty of leftovers for the next day and portions to freeze.

With how busy we’ve become on the weekends lately (house renos and new jobs), on Sunday it is really easy to toss a roast in the crockpot and let it do it’s thing all day long.

The smell and the anticipation of having pork tacos for dinner later in the evening makes the Sunday Blues a little more tolerable.

Andrea’s Pulled Pork

  • 3-5 pound pork butt
  • 1 Onion, thinly sliced
  • 1Green pepper, thinly sliced
  • 1 Jalapeno Pepper, cut in half (if you want)
  • 1C your favorite salsa
  • 1/4C-1/2C Stock (chicken or veggie)
Add everything but the pork into the crockpot and stir.  Then add the pork butt (fatty side up) turn on low and let cook for 6 hours.
At around the six hour mark, remove the roast from the crockpot.  Remove the fatty layer and discard.  Shred all the pork and place the pork back in the crockpot, mixing it with the juice and veggies for another 45 minutes to an hour.
Then serve up however you like!
We’ve had these on soft flour tortillas, corn tortillas, and even hard corn shells.  All work beautifully!
I purposefully do not add seasoning to the roast as it cooks because we top our tacos with salsa, guacamole, and slaw.  So there’s plenty of flavor to be added.  However if you would like to add some extra kick, feel free to add in some chili powder, red pepper flakes, and some garlic powder.
This usually will make enough for us to have for three meals.  I highly recommend making sure to cook enough for leftovers or you’ll be really disappointed in yourself.

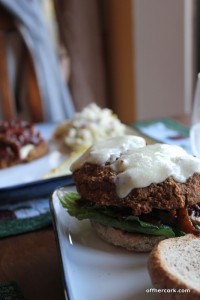
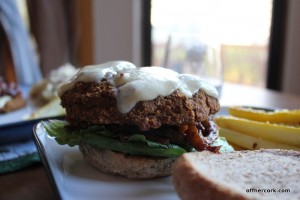
Monster Veggie Burgers

I adore veggie burgers and my love affair with them started a few years ago.  They are dense with crispy caramelized bits from being heated up in a skillet.  Sometimes they are loaded down with grains and they are always packed with protein.

They are also difficult to make.  I tried and tried but no matter what, I couldn’t find a combo that would hold together nicely.  It was too mushy and fell apart.

One day I was watching Guy make some veggie burgers (Yes I watch his show. Yes I think he’s fab. I fully embrace that with no shame.) and he used oats as a binder.

Well now.  I hadn’t done that before! I’ve also seen other versions of burgers have nuts and other grains added in so I decided to get back to experimenting and see what I could come up with.  I stumbled upon a combo that works for me and is now my favorite veggie burger.

Andrea’s Monster Veggie Burgers

  • 1 15oz Can of Chickpeas, drained and rinsed
  • 1/2C Walnuts
  • 1/4C Pumpkin Seeds (optional)
  • 1C Oats
  • 3 Cloves of Garlic
  • 1 Large Green Pepper, chunked
  • 1/2 Large Red Onion, chunked
  • 1 Jalapeno, sliced in half
  • 2tsp Garlic Powder
  • 2tsp Chili Powder
  • Big Pinch of Red Pepper Flakes
  • Pinch of salt and pepper
  • 1/2TBSP of Olive Oil + extra for a quick brush

Preheat oven to 400 degrees and grease a baking sheet with some nonstick spray or olive oil.  Toss the garlic cloves, red onion, and green pepper with the 1/2TBSP of olive oil and place on baking sheet.  Roast in oven for about 10 minutes or until the veggies start to soften up.  Remove from oven.

In a food processor, place the beans, oats, walnuts, and pumpkin seeds and process for a couple of pulses.  Add in the seasonings, and the roasted veggies.  Pulse until you get  a smooth consistency.

Pour mixture into a bowl and start to form patties with it.  This should make four HUGE patties or six medium sized patties.  Place on a platter or plate, cover with plastic wrap and place in fridge.  Allow the patties to set up for at least 2 hours.

When you’re ready to cook them, preheat oven to 400 degrees and spray a baking sheet with nonstick spray or oil.  Place patties on sheet and brush with a bit of olive oil on top.  Bake for about 15 minutes, till the tops are crisp and browned.

Serve immediately and enjoy!

I call these “Monster Burgers” because they are huge.  I used chickpeas because I think they provide a better texture to the burger and also give it more umph.  These are still soft and will smash down as you eat them but with the chickpeas they do hold their shape a little better.

The walnuts and seeds also provide texture and if you want to leave those out, you can.  The burger amounts will be smaller in size and not quite as dense.

You can bake them like I suggested or you can cook these in a skillet.  Just heat some oil over medium heat and cook the burgers about 4 minutes on each side.

We top ours with sharp cheddar, caramelized onions and green peppers, and BBQ sauce.

Yum yum!

Have fun guys, and remember, always play with your food! Enjoy!