Status

Bourbon Barrel Maple Vanilla Scones

Bourbon Barrel Maple Vanilla Scones

I was recently contacted by Kite Hill to review their almond milk based yogurts. They are the only company that I’ve come across that makes almond milk based products and I have been wanting to try them out for quite some time.  This gave me the perfect reason to finally dive in!

I know a lot of people who are dairy free for a number of reasons and these products seemed like a nice alternative to dairy based cheeses and yogurts.

I admit that I did go in with some hesitation.  I’ve tried non-dairy yogurts in the past and it hasn’t gone well.  The texture was off and the flavor was a little astringent with a fake sweetness to it.  I put my previous experience aside and went in with optimism.

Kite Hill sent me all of their flavors:

  • Plain
  • Vanilla
  • Blueberry
  • Strawberry
  • Peach

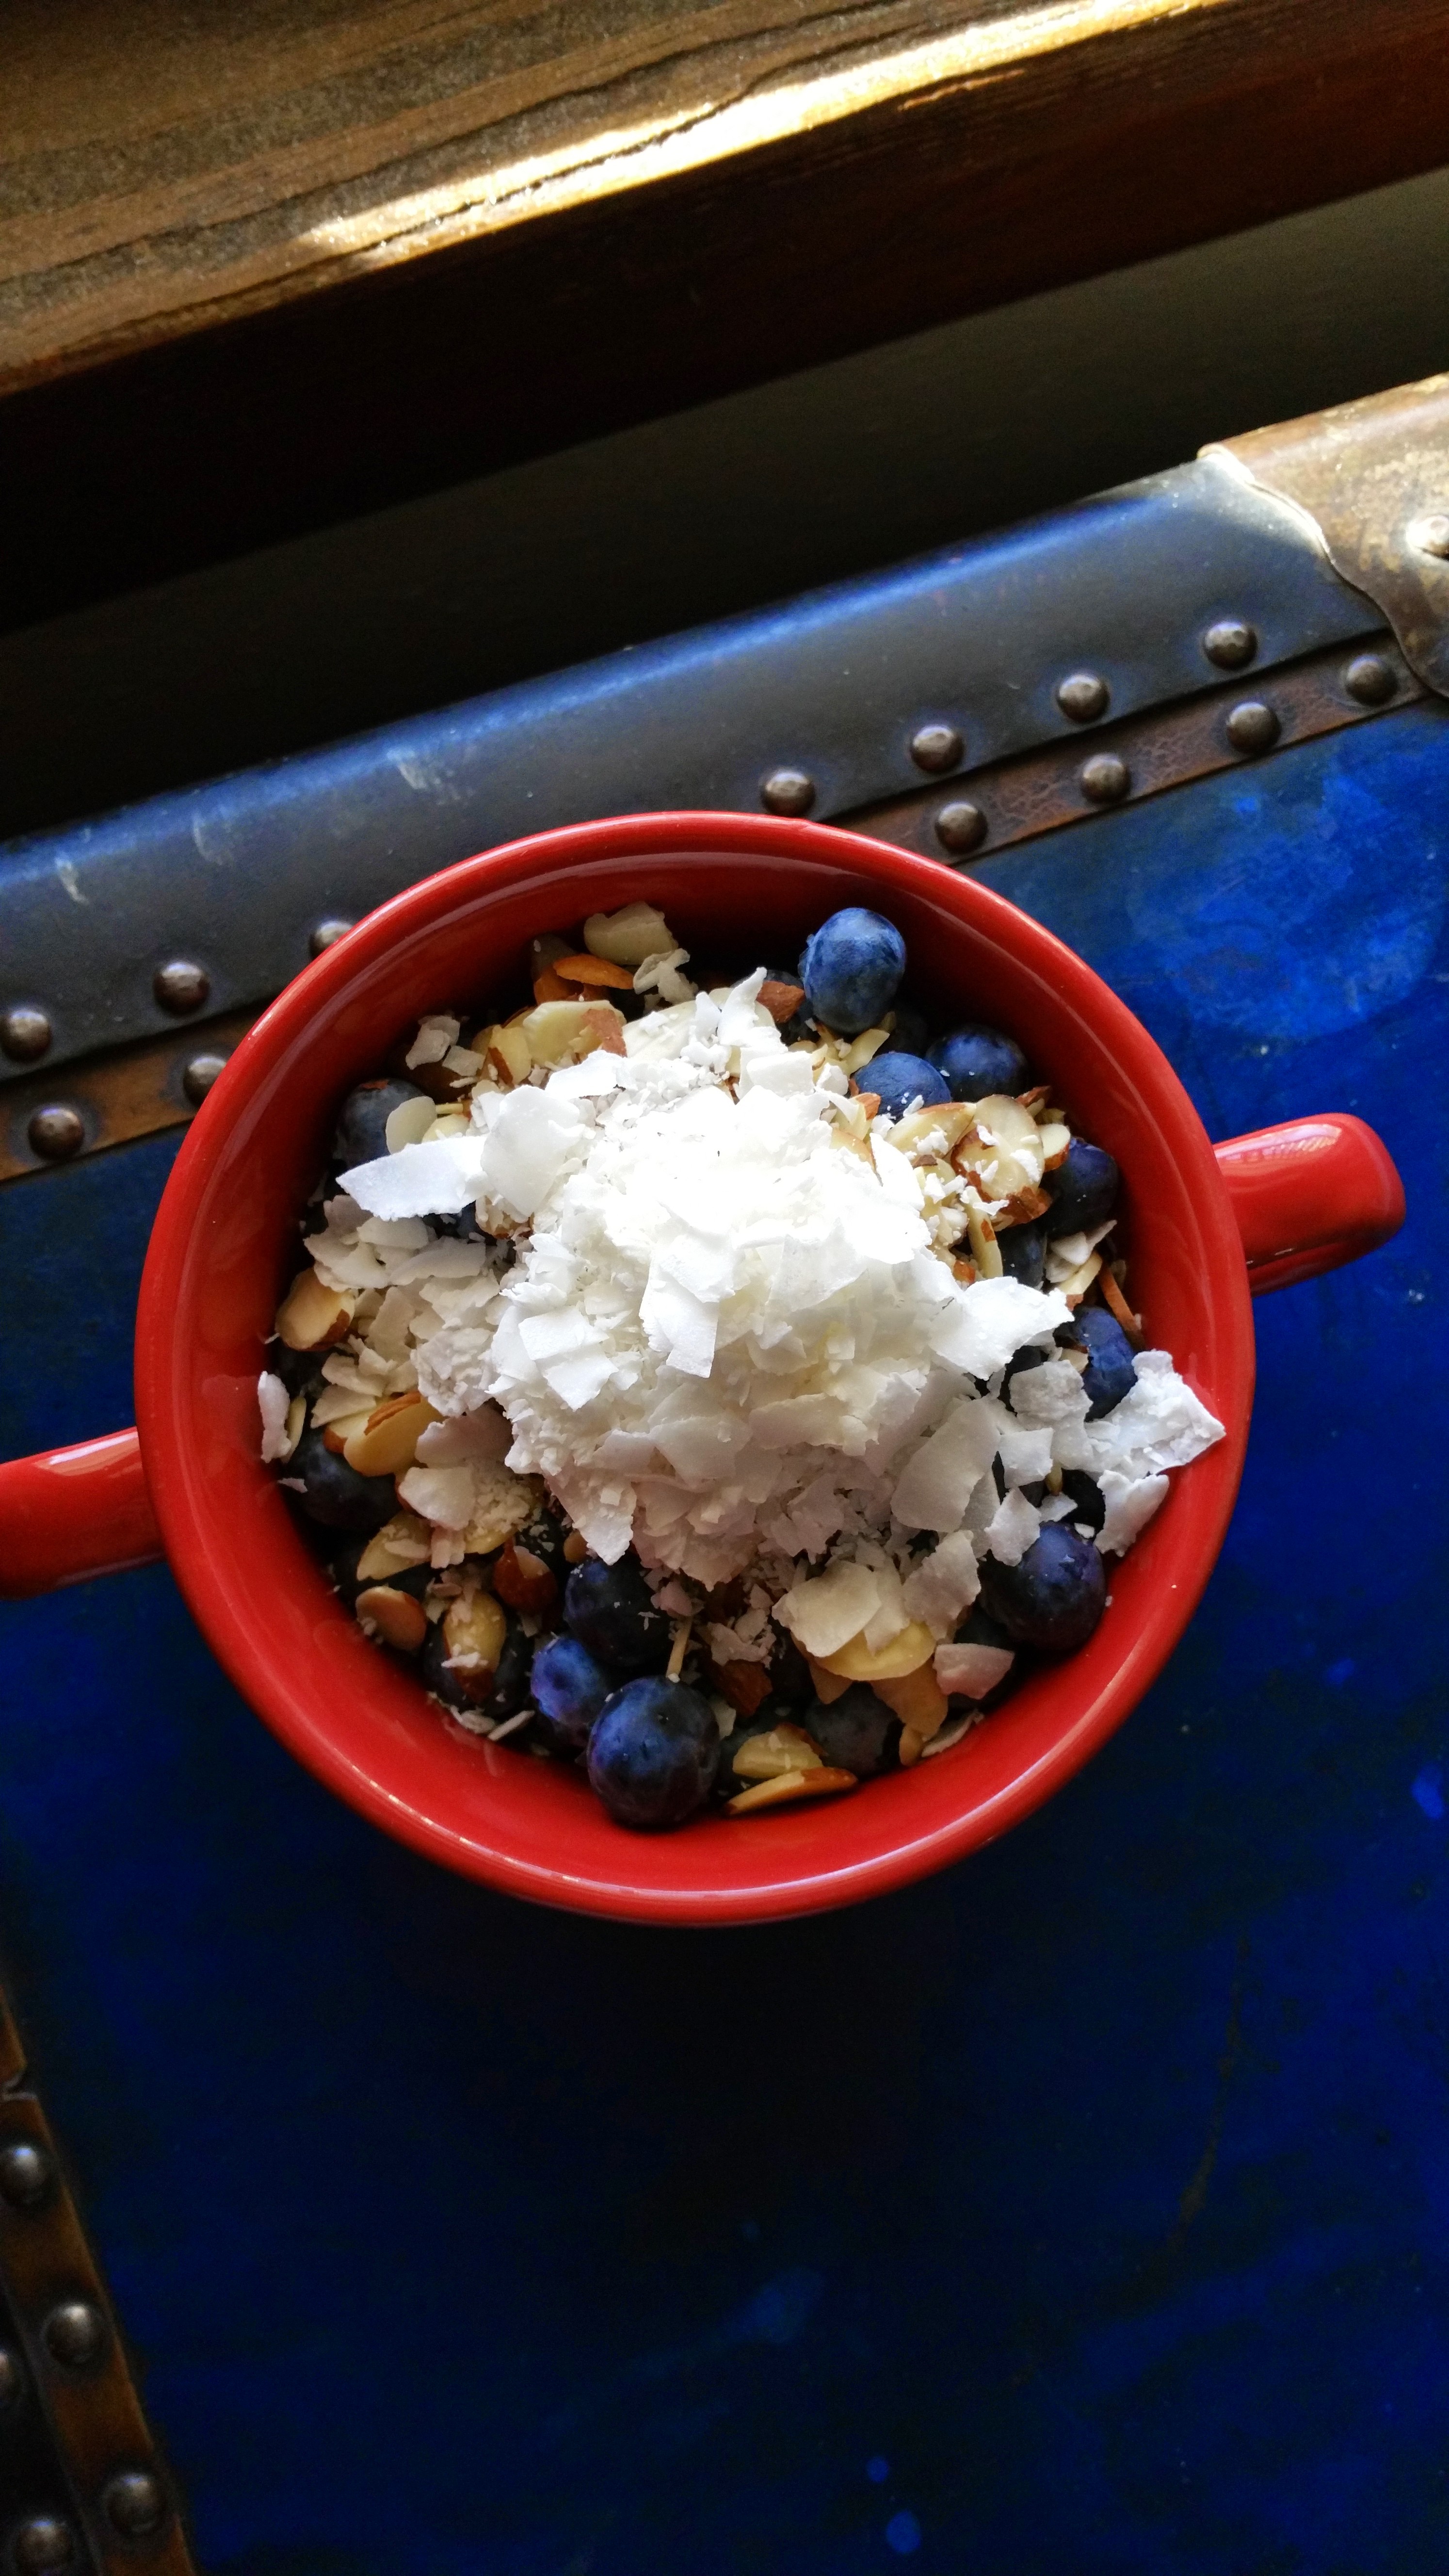
The strawberry I gave to Scott since I’m allergic but all of the other flavors I was able to test out.  I tried it as I normally eat yogurt, by making a yogurt bowl for breakfast.

I have to say this yogurt is pretty spectacular for a dairy free yogurt.  It is a little on the thinner side texture-wise but not by much. It’s creamy and rich with tons of fruit flavor.  It is lightly sweetened and if I had to give a critique, it would be to lessen the sweetness just a tad.

Kite Hill’s yogurts are hands-down the best non-dairy yogurts that I have tried.  These are perfect for those that are avoiding dairy or are looking for an alternative.  Plus there’s no soy in these products either which is a lovely added bonus!

I wanted to see how well these yogurts would work with baking so I decided to make some sweet scones with the vanilla yogurt. These scones are dairy-free, egg-free, grain-free, and vegan.

I win blogger bingo for that!

I also used bourbon barrel aged maple syrup in the recipe.  (drops mic)

Andrea’s Bourbon Barrel Maple Vanilla Scones

  • 2.5 C Almond Flour
  • 1/2 C Tapicoa Flour
  • 1/4 C Coconut Flour
  • 2 tsp Vanilla Extract
  • 2 TBSP Bourbon Barrel Aged Maple Syrup* (see note at bottom)
  • 5 oz Kite Hill  Vanilla Yogurt
  • 2 tsp Baking Soda
  • 1/2 tsp Ground Cinnamon

For the glaze:

  • 1/2 C Powdered Sugar
  • 4 TBSP Bourbon Barrel Aged Maple Syrup

Preheat oven to 400 degrees (If you live at sea level, reduce heat to 375) and line a baking sheet with either parchment or silicone.

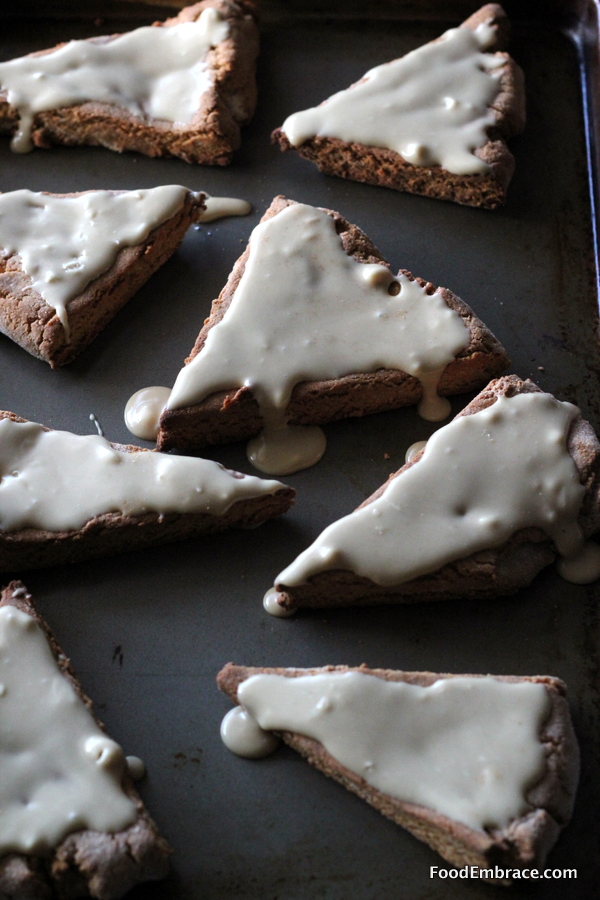
In a food processor, combine all ingredients for the scones and pulse until the dough comes together in a ball. Sprinkle the counter with a little extra coconut flour and place the dough on top.  Shape dough into a square about 1/2 an inch in thickness.  Cut dough into 8 triangles and place those on the baking sheet.

Place in oven and bake for about 10 minutes.  Remove and allow to cool before adding the glaze.  For the glaze, mix the sugar with the syrup and spread over scones.  This is a thicker glaze, if you want a thinner glaze add more syrup or a splash of almond milk to the mix.

*I purchased the bourbon barrel aged maple syrup at Trader Joe’s.  If you can’t find any or don’t want to use that, regular maple syrup will work just fine.

These scones are great as a breakfast treat or a little nighttime snack.  If you want to freeze them, then do not glaze them until you are ready to serve.

The yogurt did great in these scones providing a nice little sweetness along with enough acid to kickstart the baking soda.  It also provided enough moisture that I didn’t need to add any eggs to the mix.

Kite Hill yogurts are great straight up or you can use them in recipes in place of dairy yogurt.  I believe that currently these are only available at Whole Foods so you’ll have to swing by your local store to check them out.  Definitely try their products to see what you think!

Disclaimer: Kite Hill sent me these products for review.  All opinions are my own and I was not further compensated for this post.

Status

Yogurt For A Healthy Belly

yogurt bowlYogurt is one of those grey areas when it comes to Primal eating.  Some are for it and some are totally against it since it’s dairy.  I’m Team Yogurt.

For those that have issues with dairy, yogurt is something that can be tolerated.  This isn’t the case for everyone, obviously, but for many yogurt can be a part of the diet.

Yogurt also provides us with healthy bacteria needed for digestion.  Yes we can get that from other fermented foods as well but I do feel that if it works for you, yogurt should be in rotation in your diet.

There’s no way to know if one can tolerate yogurt unless they eliminate it for a time (30 days is optimal) and then slowly reintroduce it.

I recommend going with Greek yogurt in the reintroduction phase.  Plain full fat (0% fat yogurt is not a good idea) Greek yogurt.  It has a little bit more protein plus you don’t have to worry about thickeners or added sugar (which can trigger digestion issues).

For myself, I have found that yogurt in my diet has been essential with getting my digestion back on track.  While I have been doing other things like limiting alcohol consumption (can lead to leaky gut) and drinking bone broth (helps heal leaky gut) to help heal my gut, I’ve also been having yogurt on the regular.

A typical yogurt bowl for me is yogurt + fresh fruit + almonds + coconut flakes (unsweetened).  I love fresh blueberries in the spring/summer months. If those aren’t available, I’ll go with some sliced banana.

If I don’t have yogurt for breakfast then I will have it in a smoothie at lunch.  The good bacteria boost it provides is helping my digestive tract heal and get healthy again.

For many yogurt can be helpful in healing the gut and getting digestion back on track.  It can provide the much needed bacteria to help balance out digestion and get things moving properly.


Breakfast Sweet Potato

Meet my new breakfast, a sweet potato!

I’ve been sort of in a breakfast slump lately.  I’m not really digging on oatmeal anymore.

Well let me clarify that a bit.  I love oatmeal but I just don’t want it everyday.

I stumbled across Rachel’s blog, Two Healthy Plates, and saw that she posted about having sweet potatoes for breakfast.

Genius!

This was right up my alley and I immediately tried it out the following week.

I am in love with the breakfast sweet potato!

I top it with a little butter, yogurt (vanilla or Greek, your choice) and homemade granola.

Sometimes I’ll add on some sliced up banana as well and a drizzle of maple syrup.

Half a sweet potato with toppings is plenty of breakfast for me and it gets me through the entire morning.

The best thing about this breakfast is that it can be made ahead saving me time in the kitchen in the mornings.

I can roast several sweet potatoes at once and then keep them in the fridge for breakfast during the week.  When I’m ready for breakfast, all I have to do is slice, heat, and top.

Breakfast is done in minutes and it’s yummy!

It’s not a conventional breakfast, I know, but it is exactly what I was looking for.

Now I need to figure out how to make a breakfast soup and I think I’ll be out of my breakfast rut.

Memorial Weekend Eats

Memorial Day weekend is coming up and it’s time to start planning all the grub that you’re going to put out! If you are in need of some ideas, I’ve got some coming your way!

Tequila Brined Chicken can easily be made on the grill.  Either go the beer can route or you can quarter it up and grill it in pieces.

Got leftover chicken? Use it to make some mayo-less chicken salad!

Want a veggie dish that can stand up next to all the potato salads and baked beans?  Bring something a little different to the table with some Asian Noodles in a Coconut Peanut Sauce.

And don’t think I forgot the dips because that would be crazy talk.

Horseradish Onion Dip better than anything that requires you to use dehydrated onions from a packet.

And just for fun:

Beer Mustard Dip, cheesy creamy goodness.

Have fun this holiday weekend! Stay safe, drink some beer, and eat a little too much!

Horseradish Onion Dip

One of my favorite dips is French Onion dip! I loved it with all of it’s spice and tang along with the intense flavor of onions.

Growing up it was always made with soup mix, you know that stuff that doubles as meatloaf and pot roast flavoring?     When I was on my own and responsible for providing my own food, I would purchase premade dip.

That’s alright and it got the job done, of course, but there comes a point when you have to move away from the pre-made stuff.

Once I started cooking more and making my own versions of things, French Onion dip was something I tackled right away.

And failed at.

Oh the dip was tasty but it was way too sweet.  Caramelized onions are intense and super sweet! I was having trouble combating this and finally I put this idea up on the shelf to be revisited at another time.

I recently got inspired to start making dips again (we are a dip loving house!) and decided to give French Onion dip another shot.  This time I reduced the amount of onions and added in horseradish for much needed kick.

This was a winner!

Andrea’s Horseradish Onion Dip

  • 1 Large Onion, thinly sliced
  • 2TBSP Light Olive Oil
  • Pinch of Salt and Ground Pepper
  • 1TBSP Worcestershire Sauce
  • 2TBSP Prepared Horseradish
  • 2TBSP Whole Grain Mustard
  • 1tsp Garlic Powder
  • 1/2tsp Onion Powder
  • 1 1/2C 2% Greek Yogurt

In a medium sized skillet, heat the olive oil over medium-low heat.  Add in the onions and stir.  Sprinkle with salt and pepper, and stir again.

This is the part that takes the longest, caramelizing the onions.  This will take about 45 minutes to get the onions to where they need to be.  Stir on occasion until the onions are browned and soft.

They will look like this when ready:

Be patient! It’s completely worth it!


Allow onions to cool.

In a food processor, combine all of the ingredients including the onions.  Pulse until everything is well combined.  Do not pulse until completely smooth. You want some pieces of onion throughout the dip for texture and color.

Spoon dip into a glass bowl, cover and store in fridge at least 2 hours before serving.

Serve with your favorite veggies and chips!

I was a very happy lady with this dip!  Creamy with just enough onion bite to let you know it is the star ingredient.  The grainy mustard and the horseradish balance out the sweetness of the onions and give the dip that much needed tang and spicy note.

You could add in some red pepper flakes if you wanted to give it even more of a kick.

This makes a good amount of dip perfect for parties or two big dip lovers.

Or you could go bananas, and use this as a spread for shredded beef or thinly sliced ribeye sandwich.  Just a suggestion of course.

Have fun guys, and remember, always play with your food!  Enjoy!

Roasted Veggie Dip

Dip was something that my family had at every party and every kind of gathering. We are a dip loving folk and when I started dating Scott, he discovered he is a dip loving person as well.

Then dips kind of got pushed aside for a while here at the HQ, and now I’m looking to bring them back.  I’ve been recreating a lot of my favorite flavors of dip and using Greek yogurt instead of sour cream.

So far I’ve been successful!  The first dip I made was a roasted veggie dip that’s creamy, full of dill punch, and roasted veggie goodness.

Andrea’s Roasted Veggie Dip

  • 1/4 Small or Medium Red Onion, chunked
  • 1/2 Red or Green Pepper, chunked
  • 1 Small or Medium Size Carrot, peeled and chunked
  • 2 Cloves of Garlic
  • 1 1/2C Greek Yogurt
  • 1 1/2TBSP Dried Dill
  • Pinch of Cayenne Pepper
  • Salt and Ground Black Pepper
  • 1/4tsp Garlic Powder
  • 1/4tsp Onion Powder
  • 1/2TBSP Olive Oil

Preheat oven to 400F. Toss veggies with olive oil and a large pinch of salt and pepper.  Roast on a baking sheet in the oven for about 10 minutes or until the onions and peppers have started to brown and caramelize.  Stir once while roasting.  Remove veggies from oven and set aside to cool.

Once veggies are cool, place in a food processor and pulse until the veggies start to break down.  Scrape down the sides, and add in the yogurt, dill, cayenne pepper, a little more salt and pepper, garlic powder and onion powder.  Pulse until smooth leaving the veggies a little chunky so there’s  a little texture to the dip.

Place in a glass bowl, cover and refrigerate for at least 3 hours before serving.  Can be made the day before.  Serve chilled with your favorite veggies and chips!

By letting the dip sit in the fridge for a few hours, this allows the flavors to mingle and get more pronounced.  It’s actually best if you make this a day before you want to serve it.  Before serving, give a taste and see what you think.  If you feel there needs to be more dill added, sprinkle in a bit more.  Some people really love dill and if that’s you, go crazy with it!

What I really enjoy about this dip is that it is made with fresh ingredients along with the added bonus of using Greek Yogurt instead of sour cream.  Greek Yogurt has the benefits of yogurt along with a high protein content.  You can feel good about eating this dip!

You can also switch up the veggies to suite your tastes. Like broccoli? Add it in! You can play around with flavors and use what you have on hand or what you like.

TIPS:

Switch out the Greek Yogurt for cream cheese and now you have your own roasted veggie cream cheese.

This can also be used on sandwichs as a flavor packed spread.

If you can’t find Greek Yogurt or feel it’s too pricey for your budget, you can quick make your own.  Line a fine mesh strainer with paper towels or a cheese cloth and dump in plain 2% yogurt.  Allow to strain for several hours until most of the whey is removed.  You’ll be left with a thicker yogurt or “yogurt cheese”.  Then just follow the recipe for making the dip!

Have fun guys, and remember, always play with your food! Enjoy!

Review: Traderspoint Creamery Yogurt

Let me start off by saying that this was the most difficult thing I have tried to take a picture of so far. I could not get a straight picture and was about to lose my cool while stomping off to get the tripod. Then I realized that the sticker on the bottle was crooked and not my picture taking.

Whew!

So I apologize for the crooked picture but it’s not my fault and I’m okay with that.

I stumbled upon this yogurt from Traderspoint Creamery, while I was picking up some Snowville half and half for Scott’s coffee.  I thought this was just a milk company and then I noticed that this bottle said yogurt on it.

Oh?

I’ve been looking around for a new yogurt for a little while now.  I still love Fage but sometimes I want something a little sweeter and not so thick.  I’ve been displeased with yogurts lately and all about abandoned my mission.  Then the florescent store lights shined down up this gem.

100% grassfed cows and certified organic.  Pretty close since this dairy is just over in Indiana.  I can live with that.  They have different flavors of yogurt and even have a full-fat variety.

Traderspoint advertises that their yogurt is more like European style yogurts and that it has won numerous awards.  I read the ingredient list and that was fine, so I decided to give it a try. I bought the low-fat vanilla yogurt.

Believe me when I tell you that at this point, this is hands-down the best yogurt I have ever tasted.  It is thick and dreamy.  It tastes like vanilla cream.

No really, it tastes like cream.

If this is what European yogurt is like then I want it all the time.  The yogurt I’m used to has a harsh tang to it that I know turns some people off.  I don’t mind it, yogurt is something I really enjoy.  But this? This is amazing yogurt that I swear would turn any yogurt hater into a yogurt eating fool.

I love that it comes in a glass bottle but at the same time it does make it difficult to stir the yogurt.  I used a butter knife the first time and now it’s low enough that I can just gently shake the bottle to combine everything.  It pours right out and is smooth like, well, like good cream.

I can’t get enough of it! When I pull it out, even Scott has to pour himself a couple spoonfuls because you just can’t pass it up.  So good!

If you’re lucky enough to see this creamery in your local dairy section, give it a try because it’s worth every penny.

Disclaimer: I purchased this yogurt on my own and reviewed it on my own. Traderspoint Creamery is in no way associated with this review. 

Fancy Tuna Salad

We didn’t go out to eat a lot when I was growing up. Occasionally we would get hoagies or pizza out. Sometimes hitting up the golden arches but that was rare and my mom really really really didn’t feel like cooking on those instances.

On the off chance that I was out at a restaurant some place, I noticed that the chicken salad and tuna salad sandwichs were always on croissants.

Being at a restaurant and seeing a croissant instantly equaled fancy in my mind.  Dining out was a privilege and meant for special occasions.  Croissants were exotic and Parisian, automatically labeling them as decadent.

I never ordered those sandwiches though, always admiring them but not connecting.

On a recent grocery trip, Scott noticed that the croissants were on sale and suggested picking some up.  The thing to know about Scott is that he doesn’t often suggest getting food.  The only requests are that he will on occasion ask me to prepare a specific dish but otherwise not a peep out of him.

The rare moment when he suggests purchasing something, it immediately goes in the cart.

Croissants on sale and I knew exactly what I was going to do with them.  Fancy tuna salad sandwiches!

Not a specific recipe because I just tossed this together but you’ll get the gist of it.

Andrea’s Fancy Tuna Salad 

  • 2 Croissants
  • 1 can of Tuna, (in oil or water, your choice)
  • Chopped Red Onion
  • Chopped Celery
  • Greek Yogurt (2% Fage for us)
  • Dijon Mustard
  • Sea Salt
  • Ground Black Pepper
  • Garlic Powder
  • Romain lettuce leaves, 2-4

Drain tuna and add to a medium sized mixing bowl. Add all ingredients except for the croissants and lettuce leaves. Gently combine and allow to sit for about 10 minutes in the fridge before serving.

Cut croissants in half, add lettuce and tuna salad.  Serve and enjoy!

If I hadn’t been out of dill, there were have been some of that in the salad as well!

I didn’t put amounts with the ingredients because that is entirely up to you!  I will say that just one small can of tuna, you don’t need much dijon and yogurt.  I probably used about a tablespoon of dijon and may two tablespoons of yogurt.  The onion and celery are just enough for flavor and crunch.  Not too much otherwise they will overpower the tuna.

I like a lot of ground pepper in with salads like these, so I used a bunch and just a pinch of sea salt and garlic powder.

This was a quick and simple lunch to put together.  Of course being on the croissant made the lunch more fancy and special.

Have fun guys, and remember, always play with your food!  Enjoy! 

Loaded Baked Sweet Potato

This is my newest obsession, the loaded baked sweet potato.  A little while back I wanted to try creating a loaded baked sweet potato.

I love sweet potato and pumpkin as savory items more than I do sweet. Hence why I put pumpkin in just about every chili I make now and why I think sweet potato fries should contain chili powder.

Previous meals, I had a little bit of cheese mixed in with my baked sweet potato and it was glorious.  I decided at some point I was going to jump in with both feet and make a savory baked sweet potato.

Last week I tried it out and will never go back to butter and cinnamon on a sweet potato again.

Andrea’s Loaded Baked Sweet Potato

  • Sweet Potato
  • Pepperjack Cheese
  • Sour Cream (I use Greek Yogurt)
  • Hot Sauce of Choice
  • Chopped Green Onions

Bake sweet potato in oven at 400 for about 1.5 hours.  How long will depend on how big your potato is.  Baking a sweet potato is similar to baking a regular potato. Poke holes in it first.  I do not put anything on the skin of the sweet potato. I line a baking sheet with foil, spray with oil and bake the sweet potato as is.

After baking, cut open and top with the above toppings.  Amount is up to you.

Eat and enjoy!

The first time I had it, Scott had a regular sweet potato with butter.  He told me I was crazy.  He said that it was a little odd.

Then he had a bite.

Now he’s converted.

If you’ve never tried sweet potatoes as savory, I highly suggest you give it a taste.  Just to see.  Maybe you’ll surprise yourself.

Have fun guys, and remember, always play with your food!  Enjoy!

Leftover Idea: Fish Po’ Boys

Crispy breaded fish is something that I really enjoy having on occasion.  By making my own breadcrumbs, using local eggs, along with sauteeing the fish in olive oil and a smidge of butter, I can feel good about serving this to my family.

Even though I love it, sometimes leftovers need a little dolling up and superstar treatment.

Enter in the Fish Po’ Boy!

The Po’ Boy is a sandwich popular in New Orleans and consists of a toasty roll with a fried fish fillet and a sauce on top.  That’s the basics of the dish anyway.  So to create a fish po’ boy at home, you just need a few simple things on hand.

Andrea’s Fish Po’ Boy:

  • Leftover crispy fish
  • Crusty Bread of your Choice
  • Lettuce
  • Tomato
  • Red Onion
  • Dressing (Below)

Put together sandwich by layering the lettuce, tomato, onion, and then the fish on top of that.

Andrea’s Fish Dipping Sauce:

  • 2TBSP Greek Yogurt (We like Fage)
  • 1TBSP Grainy Mustard
  • 1TBSP Prepared Horseradish
  • 2TBSP Dill Relish
  • Salt and pepper to taste
  • 1/2 TBSP Dried Dill

Mix together and slather all over the bread for the sandwich. This will make enough for a sandwich, if you want more for dipping, you’ll have to increase the ingredients until you get the desired amount you are looking for.  Also this is all to taste, so if you want more dill and less horseradish, go for it!

PS: This also makes a great dipping sauce for the fish and chips/fries if you have ’em!

Assemble sandwich and serve!  Believe it or not, this tastes even better the next day!

Have fun guys, and remember, always play with your food! Enjoy!