Baked Potato Bar

We’ve talked about my love for potatoes, right? I have so many great memories of potato dishes that I could never give them up.  I also have a soft spot in my heart for the potato since it gets such a bad rap from the low-carb crowd.

Let’s keep things real, a white potato is not evil. It’s a vegetable and has a lot to offer us in terms of nutrition. Let’s embrace the potato!

One of my many favorite ways to eat a potato is by loading up a baked potato. Whenever I got a chance to get a loaded potato out at a restaurant, I always ordered it as a side.  My high school alternated between a salad bar and a baked potato bar during the week, which I loved.  A huge baked potato for lunch? Yes please!

Because of how much I adore loaded baked potatoes, I’ve taken to recreating the experience at home.

By having a loaded baked potato bar at home that means I can control the quality of ingredients and make sure that I get to use all of my favorite toppings. Plus I can control the amount and have as much of the toppings I want!

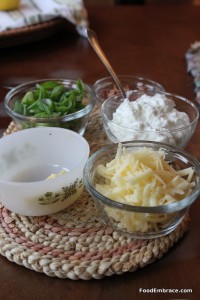
When you create a baked potato bar at home, you get to pick the toppings!  We typically have:

  • Local bacon
  • Extra sharp cheddar
  • Greek Yogurt (sour cream substitute)
  • Chopped Green Onion
  • Grass-fed butter

Those are the favorite toppings for both of us.  I like tons of green onion and Greek yogurt while Scott loves lots of bacon and cheese.

But the topping ideas are endless!  For example you could also have:

  • Steamed or roasted broccoli
  • Small cooked shrimp
  • Different cheeses (Maybe a bleu cheese or perhaps goat cheese)
  • Veggie or meat based chili
  • Rice and beans

That is just a few examples but you get the idea.  Baked potatoes can be topped with anything you like!  It also makes a great idea for a dinner party.  Everyone gets a potato and can top it with what they like.  Serve with a lovely mixed green salad and dinner is served!  Everyone’s happy and it’s a dinner party that won’t break the bank.

With grilling season officially kicked off, try roasting the potatoes in the coals or in your fire pit. Just make sure to wash, poke them with holes, and wrap tightly in foil first.  If you make this a party, everyone can be responsible for handling their own potato from start to finish.  Heck you can even have out different seasonings and oils to rub the potatoes with before wrapping them in foil and baking.

All of the toppings for the baked potato bar can be prepped ahead as well, saving you time on party day.  Or you can use this as a nice meal that you can prep ahead for and have ready to go after a long day at work.
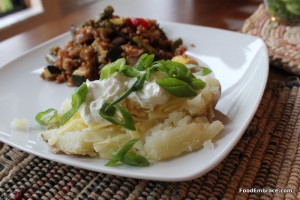
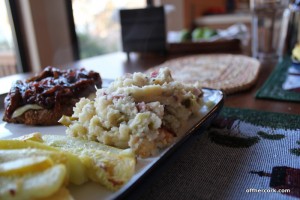
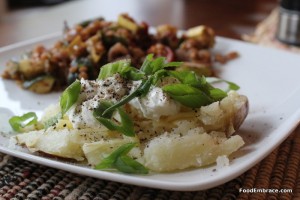
Loaded baked potato bar, a great way to dress up a baked potato and get your family or guests involved in the kitchen!

Do you like baked potatoes? What’s your favorite baked potato topping?

Have fun guys and remember, always play with your food! Enjoy!

Weekend Grilling Recipes

Are you grilling this weekend?  Looking for something a little different to the standard hot dogs and burgers?  Want to shake up the summer grilling season for 2011?

Let Food Embrace help!  Here’s a few recipes that you can try out this grilling season:

Chardonnay Chicken Burgers

Cranapple Turkey Burgers

Grilling steaks? Try giving those babies a little rub down.

Rather have pork?  Beer Brined Pork Chops can be grilled.

Get funky with some chicken, yogurt curry chicken or cocoa-chili rubbed chicken will do the trick nicely.

Then you can wash it down with some super special iced tea.

Have fun this summer and get your grill on!

Chilled Veggie Pizza

Growing up, one of the more popular dishes that I saw at potlucks was veggie pizza and it always excited me.  It was a cold pizza and it had veggies! And cheese! It tasted fantastic and I always felt a big smug as I was gladly eating up all my veggies while others munched on chips and dip.

Then when I moved out on my own, I looked up the recipe for veggie pizza so that I could make some for Scott and I.  This is when I realized that what I thought was healthy was in fact not healthy at all.

Typical “veggie pizza” had a crust made from canned croissants and a sauce made from cream cheese mixed with a packet of ranch dressing.  Tons of pre-shredded cheese on top.  The only saving grace was that it did actually contain raw veggies but man the other processed foods really bring this pizza way down.

I was bummed because I loved it and Scott loved it but once I realized what exactly it was made from, I stopped making it.

A few weeks ago, we got hit with a really hot spell here in Columbus.  It was humid and the temps were in the upper 80s.  Basically it was a sticky mess.  It also happened to be a Thursday (Pizza Thursdays!) and the thought of heating up the oven and pizza stone was not appealing.

However, pizza still was appealing, so what was I to do?

I remembered the “veggie pizza” from my childhood and decided to remake it, Food Embrace Style.

Andrea’s Chilled Veggie Pizza

  • Spelt or Whole Wheat Pizza Crust
  • 1 Green Pepper, chunked
  • 2 Carrots, chunked
  • 1/2 Large Red Onion, chunked
  • 1/2 Head of Broccoli, chunked
  • 1/2C Greek Yogurt (I used 2% Fage)
  • Green Onion, chopped (both white and green parts)
  • Shredded Sharp Cheddar
  • Olive Oil for brushing (about 1/2 TBSP) and roasting (about 1 TBSP)
  • Italian Seasoning
  • Salt
  • Garlic Powder
  • Red Pepper Flakes
  • Ham Cubes (optional)

Preheat oven to 375. When the oven is heated and the dough is ready to be used, grease a cookie sheet either with nonstick spray or olive oil.  Light roll out the dough and then transfer to the cookie sheet.  Using your hands, spread the dough out until it fills in the entire cookie sheet.  Push the dough up the sides so that it fills the entire cookie sheet.  Brush with a bit of olive oil and sprinkle with Italian seasoning.  Place cookie sheet in oven and bake the dough until it’s cooked through, about 15 minutes.  Remove from oven and allow to cool.

Now heat the oven up to 400.  Coat the pepper, carrots, onion, and broccoli with the olive oil and seasoning with. salt, Italian seasoning, garlic powder, and red pepper flakes.  This is to taste, use how much you like.  Line a cookie sheet with foil and spray with nonstick spray or olive oil.  Place the veggies on the cookie sheet and into the oven.  Roast for about 15 minutes or until everything begins to soften.  Remove from oven and allow to cool.

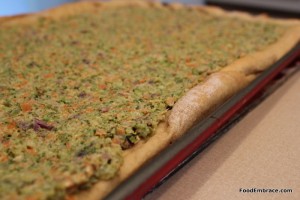
Once the veggies are cool, put them in a food processor along with the yogurt.  Pulse until everything is combined and chunky.  Taste, if you think more seasoning needs to be added, this is where you would add more in.  Spread this veggie mixture all over the pizza crust until the entire crust is covered.

Top with shredded cheese and green onion.  Again the amount is up to you.  Cover and place in fridge.  Allow to chill at least two hours before serving.  Cut and serve chilled.

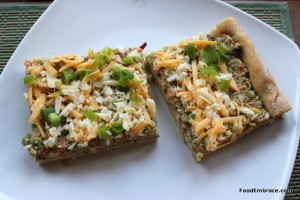
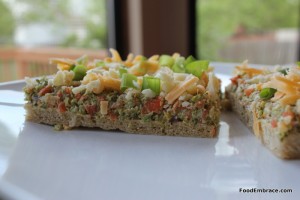
This pizza hit the spot on that humid Thursday evening.  It was a perfectly cool meal full of veggies and whole grains.  And of course cheese!  Scott’s side had ham cubes on it while my side did not.  Next time I’m going to sprinkle on a bit more cheese and green onion.

Shredding your own cheese for this is key.  A great sharp cheddar is what brings this dish together and you need that bite from the cheddar to compliment the veggies.  Cabot and Tillamook are very good cheddars to check out.

If you’re looking for a more “ranch” taste, add in dill to the seasoning mix and maybe some dried chives.  To get a little extra tang, you can also add in 2 oz of goat cheese along with the yogurt.  This will result in a slightly creamier topping and will be reminiscent of the cream cheese base in the original version of this pizza.


The best part about this pizza, aside from not having to heat up the kitchen too much, is that it can be made ahead.  Even up to a day in advance!  Making it perfect for when you’ve got a long day of work ahead of you or just a busy day when you might be too tired too cook at the end of it. Or just go ahead and bring it to your next potluck.

Have fun guys, and remember, always play with your food!  Enjoy!
Leftover Idea: Baked Mashed Potatoes

I’m not sure if we’ve ever discussed how much I love potatoes but I do. I love them more than Paula Deen loves butter and just by that statement alone, you know I mean business.

Potatoes are good for you. Potatoes are a veggie that can be utilized in so many different ways. Pasta? Forget about it. I prefer my carbs and starch from root veggies, thank you.

Leftover mashed potatoes can be just lovely on their own the next day but sometimes they need a little extra love and attention.

Sometimes you just want something a little different with your leftovers.

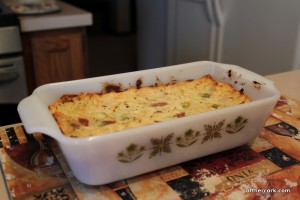
I took some leftover mash that we had, added a few extra ingredients, baked it for about 20 minutes and got an entirely new dish out of some basic leftovers.

Andrea’s Baked Mashed Potatoes

  • Leftover Mashed Potatoes
  • 5 Green Onions, chopped
  • 1/2C Greek Yogurt

Preheat oven to 400. Grease a small baking dish. Combine all above ingredients and place in baking dish. Bake for about 20 minutes or until the the edges and top get a crispy brown.  Serve hot and enjoy!

Pretty simple right? You could add some cheese in there too and maybe some bacon.  Or leftover ham? Heck you could even add some greens in there like spinach for some extra veggie action.  Leftovers are what you make of them, and they can be a completely different dish if you allow your imagination to wander a bit.

The measurements aren’t exact, it depends on how much you have left over and how much other things you want to add it.  It’s also a great way to stretch the use of some potatoes and save some pennies.

Have fun guys, and remember, always play with your food! Enjoy!
Horseradish Cream Sauce

I wasn’t a huge beef eater growing up but I did enjoy a nice deli roast beef sandwich on occasion.  Horseradish was always paired with beef and I never understood that.  Maybe because I didn’t really enjoy that flavor unless it was part of cocktail sauce. I always opted for a light smidge of mayo instead.

I know, shame on me.

For several years now, I have been making my own cocktail sauce so we always have horseradish on hand.  You can purchase fresh grated horseradish in a jar and it’s typically located in the refrigerated section where the shredded cheeses and dips are.  This is not horseradish sauce but fresh horseradish.  Make sure you read the label when you’re purchasing it so you don’t buy the wrong thing by accident.

I buy the HUGE bottles of it because now I can’t get enough horseradish.  A few years back we were having some prime rib for Christmas dinner and I decided to make some cream sauce to go along with it.  We loved it so much that now anytime we have beef (especially grilled steaks), horseradish cream sauce is always made.

It’s super easy and best if you make it ahead of time and let it sit for a few minutes before serving.

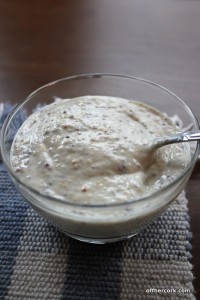
Andrea’s Horseradish Cream Sauce

  • 2% Greek Yogurt (you can use sour cream if you want)
  • Whole Grain Mustard
  • Grated Horseradish

Mix in a bowl and serve!

Crazy simple, right?  No measurements because it depends on how much you need to make and what your taste preferences are.  We like it very spicy and horseradish-y so I use a big heaping spoonful of the mustard and several heaping spoonfuls of the horseradish.

This tastes amazing with steak. The crispy cooked ends and warm earthy tones of beef paired with the cool burn of the sauce are one of my favorite combos, hands down.

This sauce also goes well with grilled veggies and baked potatoes.  And also great sauce for dipping oven fries!  Basically it works well with a lot of stuff.

Do you like horseradish? Have you ever had a cream sauce paired with beef or veggies?

Have fun guys, and remember, always play with your food!  Enjoy!

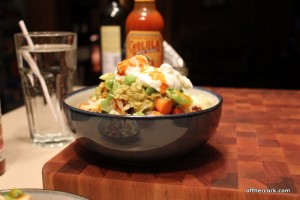
Burrito Bowl

Shaking off yesterday’s heavy topic let’s talk about something fun! And let’s make it about fun food!

Scott and I have a favorite diner that just happens to be very close to us and they have the best veggie burritos.  The. BEST.  The burrito is gigantic and stuffed with beans, cheese, and all manner of veggies.  They won my heart because they actually use a variety of real veggies in their burritos.

Listen, I tend to eat mostly veggie when I’m dining out.  I’ve gotten veggie burritos and such at many places and the “veggies” that restaurants tend to give you are as follows:

  • Onion
  • Green Peppers
  • Mushrooms

That’s it.  Maybe if it’s your lucky day, there will be a sad basement tasting carrot tossed in the mix.  But usually “veggies” are those three things and if we’re being truthful, mushrooms aren’t even a veggie.

Please leave them off my veggie meals!

Anyway, at our favorite diner the veggie burritos are full of:

  • Onion
  • Carrots
  • Peppers
  • Zucchini
  • Squash
  • Broccoli
  • Cauliflower

Ah! Be still my beating heart! Add in that it is fantastically delicious and I’m your newest loyal customer.

I wanted to make something similar at home but I didn’t have big burrito wraps so instead I decided to make a burrito bowl with loads of veggies on top of brown rice.  This bowl is loaded up too!

This is more of a concept than an actual recipe because the veggies are up to you!  Here’s what goes in OHC’s burrito bowls:

Andrea’s Burrito Bowls

  • 1C Brown rice (short or long grain, up to you)
  • Black Beans (I made my own but you can use canned. Drained and rinsed if you do!)
  • 2 Carrots, chopped on a bias
  • 1 Head of cauliflower, chopped and blanched
  • 1 yellow squash, chopped
  • 1 Red pepper, chopped
  • 1 Green pepper, chopped
  • 1 jalapeno pepper, seeded and chopped
  • Salt, pepper to taste
  • Huge pinch of red pepper flakes
  • Garlic powder, to taste
  • Chili powder, to taste
  • Smoked paprika, about 1tsp
  • Your favorite salsa, about 1C

Toppings:

  • Quick and Dirty Guacamole
  • 2% Greek Yogurt (or sour cream)
  • Shredded Pepperjack Cheese
  • Chopped Green Onions
  • Hot sauce of choice (Cholula all the way)

Cook your rice and set aside. In a saute pan, add in some olive oil and heat over medium heat.  Add in all veggies except for the cauliflower.  Stir, and add in all the seasonings.  Stir again.  Sautee until the veggies start to soften, then add in the cauliflower and beans. Stir and add in the salsa.  Stir and allow to cook for about another two minutes.

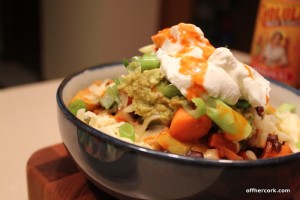
To serve spoon rice into the bottom of a bowl, add veggie mix on top, and then garish with your choice of seasonings.  Eat and enjoy!

Just so you know, this makes A LOT of food.  I wanted plenty for leftovers and to freeze for later.  You will have to make more rice though when you have this as leftovers.

This is completely open to interruption because you can use whatever veggies you want.  Feel free to add more to the “toppings bar” like shredded lettuce, crushed tortilla chips, and extra salsa for example.  Having a “toppings bar” helps those that are picky take a little control over the dish and customize it to suit their tastes.

I’m so happy that we have leftovers!

Have fun guys, and remember, always play with your food! Enjoy!

Apple Cinnamon Baked Oatmeal

I grew up in Pennsylvania. Western PA as a matter of fact. Home of the Steelers, The Penguins (and the Pirates if we must) and the City of Bridges. I didn’t grow up in the city but in a rural coal mining and farming town which was only an hour south of the city. I now live in Columbus, which is only 3 hours away from my hometown.

Doesn’t sound like a huge difference but in terms of weather it totally is! Ohio gets some of the most crazy weather and by crazy I am referring to how extreme it is.  It goes from one end of the spectrum to the other, sometimes in the same day.

This week we have the pleasure of dealing with an ice storm and then more snow.  Good times.

Thankfully Scott and I work from home which means we can stay bundled up.

On the first cold and iced-in day, I decided to kick my normal bowl of morning oats up a notch and make it something special.  I’ve seen others talk about baked oatmeal before and the concept always intrigued me.  Baked oatmeal sounds really decadent and like a lovely winter treat, doesn’t it?

I decided that on a very cold and icy Tuesday morning, this was exactly what we needed.

Andrea’s Apple Cinnamon Baked Oatmeal

  • 2C Plain Soymilk
  • 1 Large Banana
  • 1/3C Greek Yogurt
  • 1tsp Cinnamon
  • 1 Apple, chopped (I used golden delicious)
  • 2C Old Fashioned Oats
  • 1TBSP Ground Flax
  • 1TBSP Wheat Germ (raw)
  • Pecans and Maple Syrup for fun

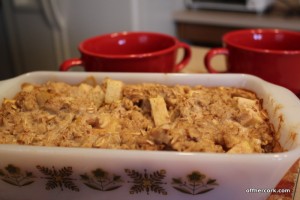
Preheat oven to 375 and in a small casserole or baking dish, spray with olive oil or nonstick spray.  In a large bowl, add in the soymilk and banana.  Mash the banana into the soymilk until it’s fully broken down.  Add in the oats, apple, yogurt, cinnamon, flax, and wheat germ, then mix.  Pour mixture into the baking dish and place in oven.  Bake for about 30 minutes. Stir once halfway through.

Remove, spoon into bowls and enjoy!

I was so excited about this breakfast! Partly because it was new to me and partly because I wanted to EAT! I was hungry when this was done!

Minus the yogurt and the apple, this is my basic oatmeal that I eat almost everyday.  I decided that the Greek yogurt would give it a nice rich background and make things just a tad more fancy for a weekday breakfast. Apples because why not?

The great thing is that this doesn’t cook long enough that the apples breakdown and get mushy.  They just get warmed through.

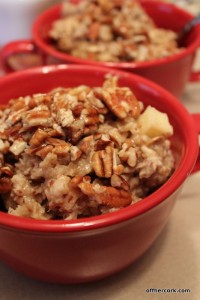
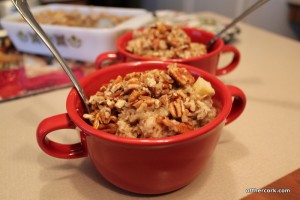
Topped with some crushed pecans and a drizzle of maple syrup takes this baked oatmeal to the top level.  It is a thick oatmeal and reminds me of a lovely custard.  Warm and creamy, with a sweet crunchy topping perfect for when you’re stuck indoors and need some fuel to get you through the day.

This would be a great thing to make for a brunch because it’s easy and quick to put together. Plus since it bakes in the oven, it doesn’t need a lot of fussing or focus while you deal with other things.  If I were to make this for a brunch, I would probably create a crumble type of topping to go with it, just to make things more fun.  Or maybe a “topping bar” so people can make their own style!

Ever have baked oatmeal before?

For another twist on baked oatmeal, checkout Fake Food Free’s Peach Baked Oatmeal.

Have fun guys and remember, always play with your food!  Enjoy!
Chili Cheese Fries

Like Paula Deen, I love potatoes.  LOVE them. Probably a little inappropriately.  Unlike Paula Deen, I don’t think they need to be slathered in butter and cream.  Cheese is always welcome.  So is bacon but he is not invited to this party today.

Ever since I saw Chili Cheese Fries over at White On Rice Couple, I have been chewing at the bit to make them myself.

OHC style.

We recently had chili for a meal but I was unable to use the leftovers for chili cheese fries only because time was against me and I didn’t get around to it.  This week we decided that in order to keep my sanity (we were out of fresh fruit and the veggie count was in the single digits), we made a last minute decision to hit the grocery store.  We were there forever (as is typical) and I picked up a bunch of produce.  Among those were some russet potatoes and some red peppers (5 for $5, heck yes!).

When we got home, Scott was starving and I was seriously hungry myself.  It was a game night (Hello Penguins Hockey, you are awesome!) and we might as well have some game food to comfort us on a very cold snowy evening.

It was the perfect time for some Chili Cheese Fries!

Andrea’s Chili Cheese Fries

  • Leftover Chili
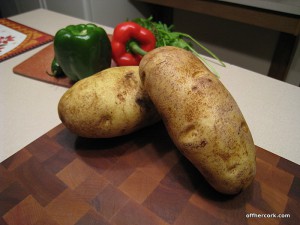
  • 2 Medium to Large Russet Potatoes
  • Olive Oil (about 1.5 TBSP)
  • Garlic Powder
  • Salt and Pepper
  • Chili Powder
  • Greek Yogurt (2% Fage being my choice)
  • Shredded Extra Sharp Cheddar
  • Green onions, chopped
  • Handful of cilantro, chopped

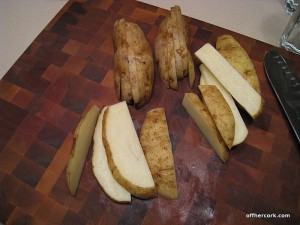
Preheat oven to 425. Line a large baking sheet with foil and spray with nonstick spray.  Wash potatoes and slice into thick slices, like above.  These are steak fry style. In a storage bag (or large mixing bowl) place the sliced potatoes, coat with olive oil and season with garlic, S&P, and chili powder to taste.

In a single layer, place fries on baking sheet and bake for about 25 minutes until potatoes are nice and crispy.

Heat up leftover chili.

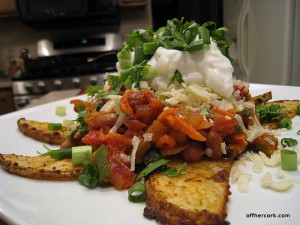
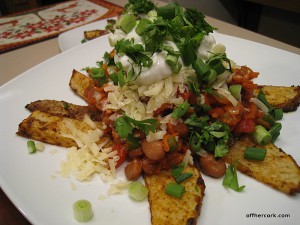
When potatoes are done, place on a plate, top with chili, cheese, yogurt, green onions, and cilantro.  Serve and enjoy!

Serves 2 Hungry People.

Since I didn’t have leftover chili, I turned to my good friend, Lentil Tacos.  I made that filling, substituting pinto beans for the lentils and no chicken stock was used.  Basically I made a quick and dirty skillet chili.  It worked perfectly!

These fries are just amazing.  I seriously stuffed myself silly eating them.  You’re going to want to make extra fries for this, trust me.  Scott was in game food heaven.

I ate mine with a fork and knife like a dignified lady (ahem), and Scott ate his man-style, with his hands using the fries to scoop everything up.

Of course you can use actual sour cream instead of Greek yogurt if that’s your preference.  You can use a meat based chili, toss some bacon on there, or even some guacamole.

I want to have these again already and am trying to plot a way to make that happen!  Next time you’re watching the game, make some to nosh on.  Or heck, make them just because!

I love when food tastes amazing, indulgent, and yet is completely made with whole real foods.  Nothing bad about these chili cheese fries!

Have fun kids, and remember, always play with your food!  Enjoy!
Spinach and artichoke twice baked potatoes

Would you believe me if I told you that I’ve never been to a steak house before?  Like an honest-to-goodness steak house?  I’ve been to Ruth’s Chris once with Scott like a decade ago but that’s a chain so I don’t really count that as a true steak house.

I grew up in the sticks so we didn’t have steak houses.  Unless you count going over to the Elk’s or Moose on steak night and I’m betting you don’t.  Even the bigger towns closest to us (which were all half an hour to 45 minutes away no matter which direction you went) didn’t have steak houses.

But there are some things I know about steak houses like they are crazy expensive if what people tell me is true.  Every time The Double R mentions steak houses on her show she says that for two people it could be like a $200 tab.

That’s a lot of money to be spending on a slice of cow from a factory farm and a baked potato.

I’m just saying.

I also know that when people mention steak houses they also mention creamed spinach as a traditional side along with a baked potato.   I decided to take the spinach and potato as sides idea and run with it.

Growing up in my family we never ever had twice baked potatoes.  Ever.  They were too much work my mom would inform me.  Or too hard.  Or too something but we never had them.  Every time I had them it was out doing something that seemed fancy so that now when I think of twice baked potatoes I think “fancy” and high-end.  Whenever we have steaks I will make us some twice baked potatoes.  Because we are being fancy so we must have a fancy side dish!

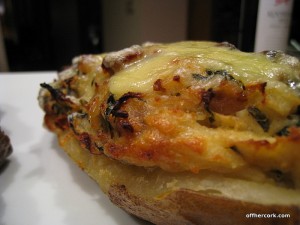
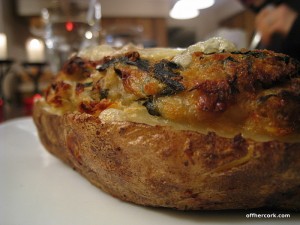
This is the side dish that I made to go with our bison steaks we had for Scott’s birthday meal.  Steakhouse style twice baked pototes.  Or at least I’m assuming since we’ve already discussed how I’ve never been to a steak house before.

Andrea’s Spinach and Artichoke Twice Baked Potatoes

  • 1 Very large Idaho baking potato
  • 2C Chopped baby spinach (heaping)
  • 2-3 Artichokes from a can, stem removed and chopped fine
  • 1 Shallot chopped
  • 1 Clove of garlic grated
  • S&P to taste
  • Pinch Red pepper flakes
  • 1/4C + 1TBSP of Greek Yogurt
  • 1/3C Grated Swiss Cheese + extra for sprinkling
  • Olive oil for sauteeing

Bake the Idaho potato till it is done and soft in the middle. You can do this however you bake potatoes (please say not via microwave).  Cut the potato in half and allow to cool.

In a skillet, heat olive oil (about 1/2TBSP) over medium heat.  Add in shallot and start to sautee.  When the shallot starts getting a bit soft then add in the salt, pepper, red pepper flakes, and grated garlic.  Combine and sautee for about another minute watching the garlic to make sure it doesn’t burn.  Add in the spinach and artichokes, sautee until the spinach is wilted.  Remove from heat and allow to cool.

Scoop out the inside of each half of the potato and add to a medium sized mixing bowl.  Make sure to not scoop out the entire inside but leave about a quarter inch or so border so that the potato will hold together.  Mash the insides of the potato in the mixing bowl till it’s smooth.  Add in the yogurt and the spinach and artichoke mixture.  Stir till combined then add in the 1/3C of grated swiss cheese.

Scoop mixture back into the potato halves, distribute equally between each half.  The potatoes will be stuffed and over-flowing, this is what you want.

At this point you can heat them up and serve or cover and refrigerate until you’re ready for them.

Right before pulling them out of the oven upon reheating, sprinkle with remaining swiss cheese allowing it to melt.  Serve immediately and enjoy!

Serves 2

The method I use for baking my potatoes is high heat and foil wrapped.  I wash and then pierce the potatoes with knife.  I rub it down with olive oil and season the outside.  I wrap it in foil and bake at 400 till they are done which is usually around 45 minutes or so.  It does take some time but it’s totally worth it.  I grew up on microwaved baked potatoes because the microwave was New! and Exciting! when I was young so my mom loved the idea that in 5-7 minutes you could have a baked potato.  Microwaved baked potatoes do not taste the same as oven baked potatoes.  Oven rules and microwaves drool.  Or something.

These potatoes turned out awesome!  Great flavor coming from the shallot and garlic with a slight tang from the yogurt.  You could use plain yogurt if you don’t have Greek yogurt.  I think parm would work well here too.  Scott happens to love Kerrygold Swiss cheese and since I had some on hand, that’s what I used.

Twice baked potatoes are great for entertaining as well because you can make them ahead of time and just heat them up when guests arrive.  If you are reheating them, preheat the oven to about 400 and line a cookie sheet with foil.  Spray sheet with nonstick spray and place potatoes on top.  Cover potatoes with more foil and cook for about 20 minutes or so until they are heated through.  Remove foil and sprinkle with remaining cheese.  Done! :D

The next time you have a fancy-pants dinner at home, give twice baked potatoes a try!

Have fun guys and remember, always play with your food! Enjoy!
Tuesday Tips: Cool treats for your dog

Gimme something cool!

Gimme something cool!

Summer time will soon be upon us bringing very hot and dry weather with it.  One of the lessons we all know is to stay hydrated and one of the things we love are cool treats in the summer.  Right?  Frozen yogurt or ice cream, cool refreshing drinks.  Well humans aren’t the only ones who can dig on cool treats, doggies love them too!

Dogs can only pant to help cool themselves and it’s really not all that effective.  Just like people, some dogs handle hot weather better than others.  I have a boxer and their squishy faces makes it harder for them to breath during extreme heat.  They are also more susceptible to heat stroke.  Because of this I make sure Rocky gets his outdoor exercise early in the morning and after the sun has gone down in the evenings.  I also make sure to have plenty of cool treats for him in the summer.

One of his favorite things is yogurt.  Plain yogurt (dogs don’t need the extra sugar of flavored yogurts) and just like with humans, yogurt helps keep our dog’s digestive tract healthy and in order.  In the summer, I take regular ice cube trays and fill them with plain yogurt and place in the freezer.  Once the yogurt is frozen, I dump the cubes out into a freezer bag and store in the freezer.  Rocky will get a yogurt cube after playing  or when we get back from a walk.  It’s a healthy treat and also cool on a hot day. For smaller dogs, I suggest not filling the individual cubes all the way, which will result in smaller cubes for your smaller kids. :)

Frozen fruit can also be given and provides a nice healthy snack as well.  At the OHC HQ we have frozen pineapple, peaches, raspberries, and blueberries as treats.  Rocky loves them and again they provide a nice cool little treat on a hot day.  Stay away from grapes because grapes and raisins can be toxic to doggies.  Pits and seeds of any kind should also not be fed.

Don’t forget about your doggie family members this summer, and give them some cool treats as well! :D