Status

Bourbon Barrel Maple Vanilla Scones

Bourbon Barrel Maple Vanilla Scones

I was recently contacted by Kite Hill to review their almond milk based yogurts. They are the only company that I’ve come across that makes almond milk based products and I have been wanting to try them out for quite some time.  This gave me the perfect reason to finally dive in!

I know a lot of people who are dairy free for a number of reasons and these products seemed like a nice alternative to dairy based cheeses and yogurts.

I admit that I did go in with some hesitation.  I’ve tried non-dairy yogurts in the past and it hasn’t gone well.  The texture was off and the flavor was a little astringent with a fake sweetness to it.  I put my previous experience aside and went in with optimism.

Kite Hill sent me all of their flavors:

  • Plain
  • Vanilla
  • Blueberry
  • Strawberry
  • Peach

The strawberry I gave to Scott since I’m allergic but all of the other flavors I was able to test out.  I tried it as I normally eat yogurt, by making a yogurt bowl for breakfast.

I have to say this yogurt is pretty spectacular for a dairy free yogurt.  It is a little on the thinner side texture-wise but not by much. It’s creamy and rich with tons of fruit flavor.  It is lightly sweetened and if I had to give a critique, it would be to lessen the sweetness just a tad.

Kite Hill’s yogurts are hands-down the best non-dairy yogurts that I have tried.  These are perfect for those that are avoiding dairy or are looking for an alternative.  Plus there’s no soy in these products either which is a lovely added bonus!

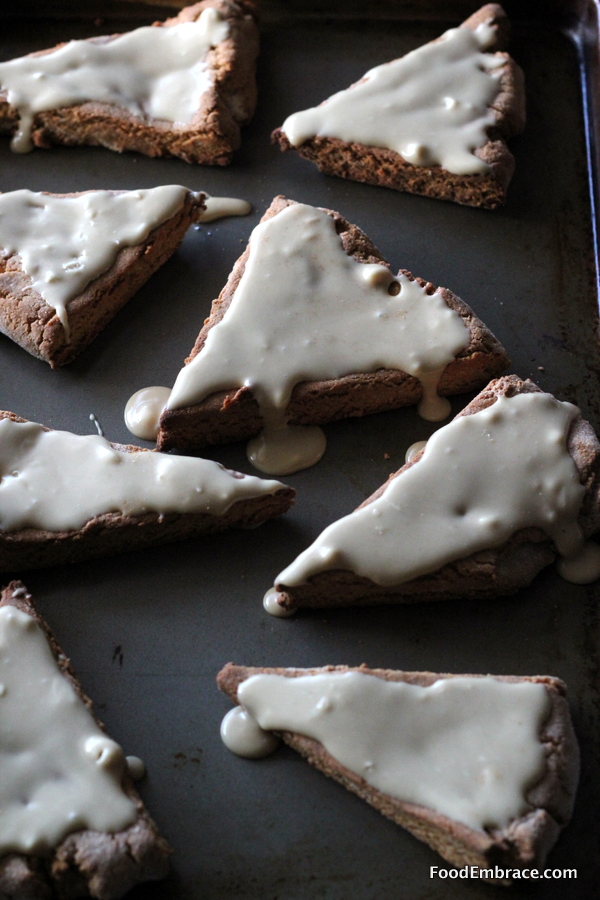
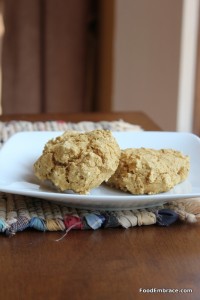
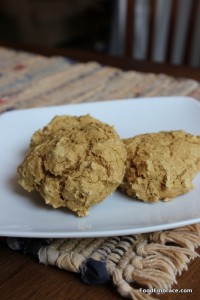
I wanted to see how well these yogurts would work with baking so I decided to make some sweet scones with the vanilla yogurt. These scones are dairy-free, egg-free, grain-free, and vegan.

I win blogger bingo for that!

I also used bourbon barrel aged maple syrup in the recipe.  (drops mic)

Andrea’s Bourbon Barrel Maple Vanilla Scones

  • 2.5 C Almond Flour
  • 1/2 C Tapicoa Flour
  • 1/4 C Coconut Flour
  • 2 tsp Vanilla Extract
  • 2 TBSP Bourbon Barrel Aged Maple Syrup* (see note at bottom)
  • 5 oz Kite Hill  Vanilla Yogurt
  • 2 tsp Baking Soda
  • 1/2 tsp Ground Cinnamon

For the glaze:

  • 1/2 C Powdered Sugar
  • 4 TBSP Bourbon Barrel Aged Maple Syrup

Preheat oven to 400 degrees (If you live at sea level, reduce heat to 375) and line a baking sheet with either parchment or silicone.

In a food processor, combine all ingredients for the scones and pulse until the dough comes together in a ball. Sprinkle the counter with a little extra coconut flour and place the dough on top.  Shape dough into a square about 1/2 an inch in thickness.  Cut dough into 8 triangles and place those on the baking sheet.

Place in oven and bake for about 10 minutes.  Remove and allow to cool before adding the glaze.  For the glaze, mix the sugar with the syrup and spread over scones.  This is a thicker glaze, if you want a thinner glaze add more syrup or a splash of almond milk to the mix.

*I purchased the bourbon barrel aged maple syrup at Trader Joe’s.  If you can’t find any or don’t want to use that, regular maple syrup will work just fine.

These scones are great as a breakfast treat or a little nighttime snack.  If you want to freeze them, then do not glaze them until you are ready to serve.

The yogurt did great in these scones providing a nice little sweetness along with enough acid to kickstart the baking soda.  It also provided enough moisture that I didn’t need to add any eggs to the mix.

Kite Hill yogurts are great straight up or you can use them in recipes in place of dairy yogurt.  I believe that currently these are only available at Whole Foods so you’ll have to swing by your local store to check them out.  Definitely try their products to see what you think!

Disclaimer: Kite Hill sent me these products for review.  All opinions are my own and I was not further compensated for this post.

Cabbage And Radish Slaw

The inspiration for this dish comes from tacos!  Food trucks are a pretty big deal in Columbus and have a huge following.

When Scott and I started frequenting taco trucks, I noticed that a lot of tacos are actually served with shredded cabbage and sometimes sliced radish with a wedge of lime.

This was a new thing for me, I had not seen that before on tacos.  Most likely due to the fact that I had never been to a taco truck before where traditions are kept in tact and simple is the rule.

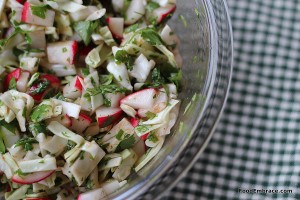
I loved this combo and decided to incorporate that into our tacos at home.  I just took it a step further and created a quick little slaw with the ingredients.

Andrea’s Cabbage and Radish Slaw

  • 1/4 Medium Sized Cabbage, thinly sliced
  • 8-10 Radishes, finely chopped
  • Juice of 1 Lime
  • 2TBSP Red Wine Vinegar
  • Handful of cilantro, chopped
  • 1tsp Hot Sauce
  • 2TBSP Olive Oil
  • 2tsp Cane Sugar
  • Pinch chili powder and garlic powder (no more than 1/4tsp each)
  • Pinch of Salt and Pepper

Combine all ingredients in a bowl and allow to chill for one hour before serving.

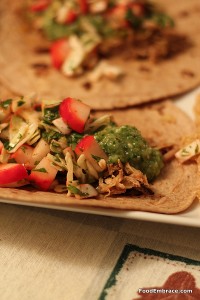
We had ours with some carnitas tacos.  This can be eaten as a side dish as well or pair with my black bean and corn salsa for a veggie taco.

Have fun guys and remember, always play with your food!  Enjoy!

Rum Gingerbread

I know that it might not be the holidays any longer but it technically is still winter and that means winter foods are still acceptable.

One of my favorite flavors of all time is that of gingerbread.  The combination of clove and molassess is a match made in heaven.

Gingerbread is so spicy and not overly sweet which makes it the perfect dessert for me.

I experimented a lot this winter with cooking and baking with bourbon and rum.  This is one of those experiments and it turned out to be a favorite.

Andrea’s Rum Gingerbread
Dry:

  • 1C Whole Wheat Pastry Flour
  • 1C Unbleached All-Purpose Flour
  • 1tsp Baking Soda
  • 1 1/2tsp Baking Powder
  • 1 1/2tsp Ground Cinnamon
  • 1/4tsp Ground Allspice
  • 1/2tsp Ground Clove
  • 1/2tsp Ground Ginger
  • 1tsp Grated Fresh Ginger
  • 2TBSP Brown Sugar

Wet:

  • 1/2C Unsweetened Coconut Milk (the kind found in the dairy aisle)
  • 1/4C Rum
  • 1/2C Molasses
  • 2TBSP Light Olive Oil

Preheat oven to 375 and spray a square baking dish (9×9) with oil or nonstick spray.

In a large mixing bowl combine all dry ingredients and whisk together.  In a medium sized mixing bowl combine wet ingredients and whisk.

Gently pour the wet mixture into the dry mixture and stir.  The batter will be slightly thick and sticky.

Pour gingerbread batter into the greased baking dish and place in oven.  Bake for about 15-20 minutes or until a toothpick inserted in the center comes out clean.

Remove from oven and allow to cool for about five minutes before cutting.  Serve and enjoy!


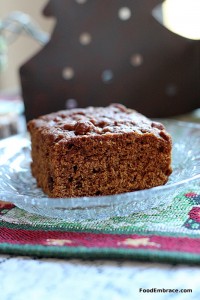
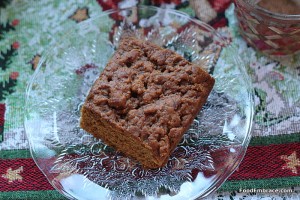
This gingerbread is spicy and a bit denser in texture providing a hearty dessert.  Or breakfast in case you roll that way.  I definitely do sometimes.

I tend to lean more towards the clove and molasses flavor so if you would like more ginger punch, feel free to add in some more.

You can use your favorite nondairy milk of choice or regular milk if you have it.

Perfect for a party or just a lazy Sunday at home.

Have fun guys, and remember, always play with your food! Enjoy!

Banana Nut Pancakes

Me: What kind of pancakes do you want this week?

Him: Something with nuts!

Me: What kind of nuts, pecans or walnuts?

Him: What did we just have with the coffee cake?

Me: Pecans.

Him: Then we should have walnuts.

Me: Done

And this is how Banana Nut or what I lovingly call, my favorite pancakes ever, were born.

Andrea’s Banana Nut Pancakes 

  • 1C Unbleached All-Purpose Flour
  • 1C Buckwheat Flour
  • 1tsp Baking Soda
  • 1tsp Cinnamon
  • 2TBSP Sugar
  • 1C Walnuts, crushed
  • 1 Large banana
  • 1C Unsweetened Coconut Milk (the kind in the dairy section, not from a can)
  • 1C Water
  • 2tsp Vanilla Extract
  • 1/2tsp Apple Cider Vinegar

Preheat grilled over medium heat.  In a large mixing bowl combine the flours, baking soda, cinnamon, and walnuts and whisk together.  In a medium sized mixing bowl combine the water, coconut milk, vinegar, extract, and banana.  Mash the banana in the liquids as much as possible.

Add the liquid ingredients to the dry and stir until everything is combined.  Grease your griddle with a little oil and drop batter by spoonfuls.  The size is up to you!  Cook for about three minutes on the first side or until you start seeing several bubbles pop up in the center.  Flip and cook for another minute to two minutes.  Remove from heat and continue until all the batter has been used.

Serve warm and enjoy!

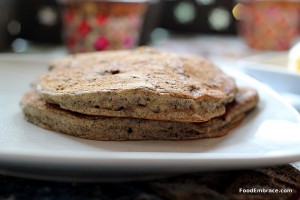
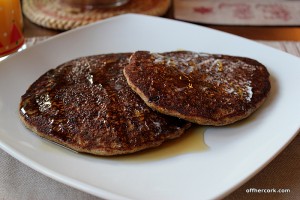
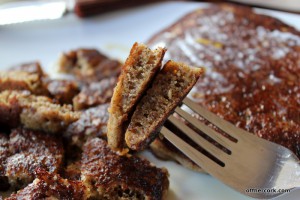
Most favorite pancakes to date.  These are slightly sweet, completely fluffy and full of flavor.  The banana keeps the pancake moist and the crushed walnuts add a little bit of crunch and texture.

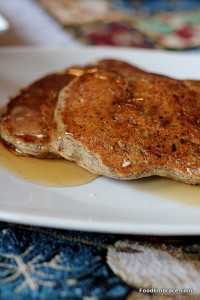
Toppings are your choice, but clearly I used maple syrup for mine.

Leftovers can be frozen and reheated either in a toaster or toaster oven.

Two things are true, I’ve got leftovers and they will be eaten this weekend.

Have fun guys, and remember, always play with your food! Enjoy!

Whole Wheat Drop Biscuits (Vegan)

I love biscuits. They’re warm and they make me want to eat jam. I’m not a jam person at all but when I have a biscuit, there’s only two things that go with it, gravy or jam. Okay sometimes butter but I would rather have gravy than butter on my biscuit.

Growing up, we didn’t have traditional biscuits.  My mom made drop biscuits.  Drop biscuits are made without having to knead the dough and adding in butter.

They’re really easy to make and are a nice addition to a meal.

My mom always made them with Bisquick and in the beginning I did as well.

As I started paying more attention to ingredients and eliminating processed food, Bisquick had to go.

Since drop biscuits are so simple to make, there’s no need to use a boxed mix.

Andrea’s Whole Wheat Drop Biscuits

  • 1 1/2C White Whole Wheat Flour
  • 1/2tsp Baking Soda
  • 1/2tsp Baking Powder

A Pinch Of:

  • Salt
  • Ground Black Pepper
  • Ground Sage

Liquid:

  • 1C Unsweetened Coconut Milk

Preheat oven to 375 degrees.  Line a baking sheet with parchment or a silicone liner.  In a medium sized mixing bowl, add all dry ingredients and whisk.  Slowly add in the coconut milk and stir.  This will be a thick batter, keep mixing until all the dry mixture is incorporated in with the coconut milk.

Drop mixture by the spoonful onto the lined baking sheet.  Size is up to you, smaller biscuits will have a faster cooking time.  Larger biscuits take about 5-7 minutes.

Remove when biscuits are browned on top and a toothpick inserted comes out clean.

These don’t take long at all to cook, so keep an eye on them.

Remove from oven, allow to cool for about a minute and serve.

This is a basic biscuit, once you get the concept and technique down, feel free to play with the flavor!  I was pairing these biscuits with something that had a sage flavor to it, hence the sage in the mix.  However you are free to use what you like!

If you feel the dough is a bit dry, you can add in more coconut milk but not much, start with a tablespoon.

Naturally you can use milk (though they will not be vegan any longer) or your nondairy beverage of choice, I tend to have coconut milk on hand.

These are begging for some jam or gravy!

Do you make biscuits?

Buzzin Bars

Last week Scott left for a business trip that had him away from the house for about a week.  He was flying off to San Francisco to geek out about code and be in his element.

Because I knew that eating times might be odd and because I know Scott, this meant he would need to take some food along with him.

He was taking a carry on which meant that the food had to be small, easy to carry, and not prone to spoilage.  And since I knew that these could very well be a meal source, I knew that they had to be jam packed with good stuff.  Stuff that could get you through a couple of hours.

I like using soaked dates in bars and coffee cakes because it adds a nice sweetness without being over powering.  Plus they are a great source of fiber and potassium.

Plus I wanted to do something fun so I added an extra little kick to these bars.

Andrea’s Buzzin Bars

  • 10, dried and pitted dates
  • 1C Coffee + 2TBSP
  • 2C Oats
  • 1C White Whole Wheat Flour
  • 2TBSP Unsweetened Cocoa Powder
  • 1/2C All Natural Peanut Butter
  • 1/2C Dark Chocolate Chips
  • 1TBSP Maple Syrup
  • 1/2C Unsweetened Coconut Milk (Not the kind in a can, the kind in the refrigerated section)
  • 2tsp Vanilla Extract

In a small to medium sized bowl, add the dates and pour 1C of hot coffee over the dates.  Allow to soak for 1/2 hour to an hour.  You can use leftover coffee that has been reheated.

Preheat oven to 375 degrees and grease an 8×8 baking dish (either with oil or nonstick spray).

Drain dates and add to a food processor.  Pulse just until the dates start to break up.  Add in the oats, flour, cocoa powder, and chocolate chips.  Pulse again until the oats start to break down and the chips start to break down as well.  The chips might not break down as easy, don’t worry about this.

In a medium sized mixing bowl, add in the coconut milk, 2TBSP of coffee, the peanut butter, maple syrup, and the vanilla extract.  Whisk until the PB is well incorporated into the mix.  Add this mixture to the date mixture, and pulse until well combined.

This will be an extremely thick batter.  It will not be a pourable batter and you may have to remove it from the processor and mix with your hands a few times.  Put this mixture into the baking dish, you’ll have to press it into place.  Again, remember this is a really thick batter.

Place in oven and bake for about 10 -15 minutes.  Just till the top starts to get a little browned.  It doesn’t take long at all for these bars to set.

Remove from oven and allow to cool for about 15 minutes before cutting.  Cut into squares and serve immediately.  Or allow to cool longer once cut, place in a storage container and keep in fridge until you’re ready to eat one.  I suggest heating it up slightly before eating.

These also freeze very well.

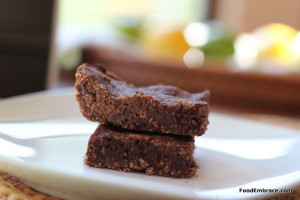
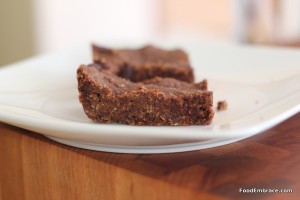
These smell exactly like a no bake cookie.  The peanut butter comes out as a very strong smell and flavor in these bars.  The coffee is just enough to enhance the chocolate and not dominate the flavor in any way.

The bars are very dense because they are so jam packed with goodness.  Fiber from the oats and dates, protein from the peanut butter, and a little fun from the chocolate.

If you don’t have coffee or don’t want to use coffee, you can soak the dates in hot water.  Use 2 TBSP of coconut milk in place of the 2 TBSP of coffee in the bar batter.

Great as a breakfast or a snack.

Bonus, you don’t even have to cook these!  You can roll them into little ball shapes and serve them up as a twist on a truffle. Yes there is flour in here but there is no “uncooked flour” taste when you eat these bars raw.  All you get is a straight forward chocolate and peanut butter combo.

I did give all of these to Scott to take on his trip.  That much chocolate and PB needs to stay close to home as well.  I had some for breakfast and they are chocolatey delish!

Do you make bars at home?  They are perfect for snacks on the go!

Have fun guys, and remember, always play with your food!  Enjoy!

Roasted Veggie and Wheatberry Salad

Roasting veggies and adding it to a grain is one of the simplest ways to make a salad.  This could be a side dish or a main dish.  It can be made ahead of time for a quick meal or for party prep.

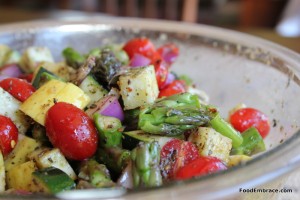
Using veggies that have a lot of moisture in them, like tomatoes and squash will provide you with automatic dressing.  No need to make extra sauce or dressing, it’s already built right in!

I love making dishes like this in the summer because they are so versatile. You can use whatever veggies are in season or what you happen to have on hand.  You can make a huge portion or a small amount. The dish can be served hot or cold.

As you prep the veggies, you can’t help but be amazed by their gorgeous color.  Something that looks that good and also smells good, before you even do anything to it, you know will turn out super tasty.

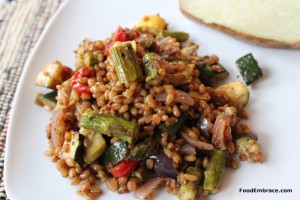
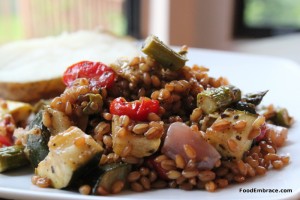
I recently made a roasted veggie and wheatberry salad which is perfect for summer meals.  Once you learn a concept, you can apply it to so many different dishes! Remember, this dish is open to preferences. Use what veggies you like and/or what you happen to have on hand.

Andrea’s Roasted Veggie and Wheatberry Salad

  • 1C Hard Wheat Berries
  • 1 Pint Cherry Tomatoes, cut in half
  • 1 Small Zucchini, chopped
  • 1 Small Yellow Squash, chopped
  • 1/2 Red Onion, chopped
  • 1/2lb Asparagus, chopped
  • Olive Oil
  • Garlic Powder
  • Italian Seasoning
  • Red Pepper Flakes

Preheat oven to 400 degrees.  In a medium sized sauce pan, add wheatberries and cover with water.  Bring to a boil and reduce to a simmer.  Simmer until wheatberries are cooked, about 15 minutes.  They will be soft but very chewy when done.  Drain wheatberries and set aside.

In a large bowl, add vegetables and toss with olive oil.  Use enough olive oil to coat all the veggies.  Add seasoning to taste and toss to combine.  I used probably about a tsp for the garlic powder and Italian seasoning, along with a huge pinch of red pepper flakes.

Line a baking sheet with foil and spray with olive oil or nonstick spray.  Spread the veggies out onto the cookie sheet and place in oven.  Roast for about 10 minutes or until all the veggies are soft.

Place cooked wheatberries in the previously used veggie bowl.  When the veggies are done, add veggies to wheatberries making sure to include all the juice on the baking sheet as well.  Combine all the veggies with the wheatberries.  Serve and enjoy!

Really simple right?  This is a great dish to take to a potluck or BBQ picnic because it can be served chilled or room temperature.  There’s nothing in it that will spoil if it sits out for a while.  Since it can be made ahead not only is it great for parties, but it’s perfect for weekday lunches or a quick dinner.

You could even add some spinach to this by adding fresh spinach to the wheatberries and adding the hot veggies on top of that.  The heat from the veggies will help wilt the spinach as you combine the dish.  Sprinkle with a bit of grated parm and enjoy your gorgeous masterpiece!

Have fun guys, and remember, always play with your food! Enjoy!

Pina Colda Pancakes

Earlier this week, I discussed how a recent kitchen flop then lead me to create one of the best pancake flavors to date. Happy day!

I had been toying around with making a summery-themed pancake one that tasted like the sun and reminds you of the beach and drinks with little umbrellas in them.

Or tasted like the sun and reminded you of being pool-side with drinks that had little umbrellas in them.

I’m flexible.

Once I trashed the failed pancakes, I got busy making some Pina Colada inspired pancakes.  While I don’t like an actual pina colada, the flavors that make one up are fantastic and can be used in other applications (like smoothies!).

I knew that I could use those flavors in a pancake as well!

Andrea’s Pina Colada Pancakes

  • 1C Spelt Flour
  • 1C Buckwheat Flour
  • Pinch Ground Cinnamon
  • 1/2C Unsweetened Shredded Coconut
  • 2TBSP Cane Sugar
  • 1/2tsp Baking Soda
  • 1C Pineapple Juice
  • 1/2C SO Delicious Unsweetened Coconut Milk
  • 1/2C Water
  • 1tsp Vanilla Extract

Preheat griddle over medium heat.  In a large mixing bowl, combine all dry ingredients and whisk.  In a medium sized mixing bowl, combine all liquid ingredients and stir.  The coconut milk will curdle in the pineapple juice, this is OK. Acid mixing with a cream will create this reaction. It’s not bad or sour, so don’t freak out.  Slowly add the liquid mixture to the dry ingredients, gently stir until everything is well combined.

Grease the griddle (I brush on olive oil) with your choice of oil or butter, and then spoon some of the batter onto the griddle.  The size of pancakes you want is up to you. Cook on one side until you start to see bubbles popping in the middle of the pancake, about 2-3 minutes. Flip and continue to cook until done, about 1-2 minutes.  Remove from griddle and repeat with remaining batter.  Serve warm!

Light and sweet pancakes that taste like summertime fun. The pineapple and coconut come out in full force in these pancakes but not so much as to be overwhelming. Both Scott and I enjoyed these a great deal and I’m happy to have found another way to use pineapple juice.

I like keeping the coconut milk to a small amount because I don’t want it to weight down the pancakes. By only using 1/2 a cup, the pineapple juice and water make up the rest of the liquid and help to keep the pancakes fluffy.

Have fun guys, and remember, always play with your food! Enjoy!

Sunrise Cookies

When I tell you about these cookies, I’m pretty sure that you are going to think that I have crossed over into crazy land.  Let me assure you that I have not.

I have been dreaming of a cookie that I could eat for breakfast for a long time now.  Something that I could make ahead and keep in the freezer where I could pull out one or two, heat up quick in the microwave and eat.  With my hands and not a fork or spoon.

I wanted a cookie that would make a great on-the-go snack that was low in sugar but loaded with flavor and good stuff.

I wanted something that could be legitimately called a cookie because they were made and eaten just like a regular cookie.

I wanted it to have whole grains and veggies in it.

Stay with me, remember I promised you I wasn’t crazy.

I’m calling these Sunrise Cookies because you can have them first thing in the morning and feel good about starting you day off with a cookie.

Andrea’s Sunrise Cookies

  • 1C Carrot Juice
  • 1Small Handful of Spinach or 1C Packed Spinach
  • 1 Large ripe banana
  • 1 1/2C Oats
  • 1 1/2C White Whole Wheat Flour + 4TBSP
  • 2TBSP Ground Flax Seed
  • 2TBSP Wheat Germ
  • 2TBSP Packed Brown Sugar
  • 1/2tsp Baking Powder
  • 1/2tsp Baking Soda
  • 1tsp Cinnamon

Preheat oven to 350. In a blender, combine the carrot juice, spinach, and banana. Blend until smooth.  In a large mixing bowl, combine all other ingredients EXCEPT for the 4TBSP of flour. Whisk ingredients together. Slowly add the liquid mixture to the dry and gently combine with a mixing spoon.  Sprinkle in the remaining 4TBSP of flour and stir again.

On a lined baking sheet (either parchment or silpat) drop the mixture by large spoonfuls.  Place in oven and bake for about 10-12 minutes.  They are large cookies and the dough is thick so they will take some time to cook.  They are down when a toothpick inserted comes out clean.  Remove from oven and allow to cool.

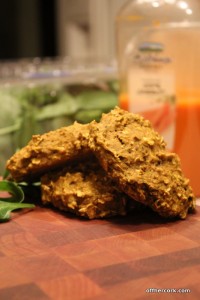
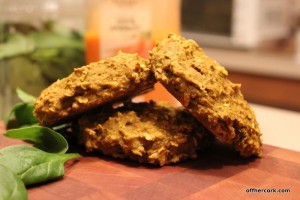
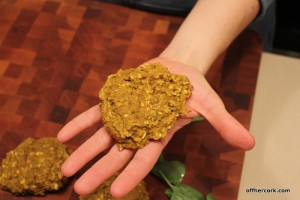
Now when you’re making these, I realize you might have some doubts especially when you smell the spinach and carrot juice mixture. But remember my promise! If you click and make this picture bigger, you’ll be able to see some flecks of spinach in the cookies.

I love that! Green flecks in a cookie are fantastic!

I admit I had my doubts too but then I nibbled on one and all doubts went out the window. These cookies totally delivered! Even Scott loves them so they passed the guy test as well!  I did in fact have them for breakfast not that long ago and was so happy. A great little cookie packed with tons of yummy things and very low on sugar.

Next time I’ll probably add in some vanilla extract, 1tsp, I got so excited as I was making these that I forgot.


UPDATE, January 2014:

I recently made this again with a few adjustments.

Added:

  • 1tsp Vanilla Extract
  • 1/2tsp Cinnamon
  • 2TBSP Coconut Sugar

Left Out:

  • Baking Powder
  • Flax Seed
  • Wheat Germ
  • Brown Sugar
  • 4TBSP White Whole Wheat Flour

I didn’t have the flax or wheat germ on hand and since that got reduced I left out the remaining flour. I also don’t use brown sugar much anymore and subbed coconut sugar instead.  Adding the cinnamon and vanilla gave it a little extra sweetness and depth.

Since I now live at a higher altitude, I baked these at 400 degrees also for about 10-15 minutes.

They came out beautifully!  I will be making a large batch of these to keep in the freezer for quick breakfasts or snacks.


I buy large bottles of carrot juice at the store, or you certainly can juice your own carrots. Add some of the pulp back into the cookies!  You could also add an egg for extra protein or some raisins for some extra sweetness.  Play around and see what combo you like!

I wanted these for breakfast so I made them huge, the size of my palm but you can make them whatever size you like.  Maybe you want small ones for a snack (which I’m also going to do!), if so, just make a bunch of little babies. They also won’t take nearly as long to cook.

I cannot wait to make more of these, that’s how much I love them. In fact I would eat them as a dessert as well, that’s how tasty I think they are.  See what happens you when experiment, fun things!

Have fun guys, and remember, always play with your food! Enjoy!

Multigrain Pancakes

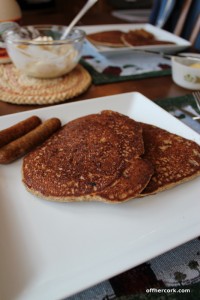
Our most recent breakfast outing had Scott and I sharing a plate of multigrain pancakes.  These were new to the restaurant and I definitely wanted to give them a try.  They were delicious and full of wheat germ sprinkled on top.  Fluffy and huge making it the perfect thing to share over coffee and conversation.

However I wanted to make my own and you all know that I love me some pancakes.  First chance I had, (the following Sunday actually), I made my own batch of multigrain pancakes and they were fab!

Andrea’s Muligrain Pancakes

  • 1C Buckwheat flour
  • 1/2C White Whole Wheat Flour
  • 1/2C Unbleached All-Purpose Flour
  • 2 Heaping TBSP of Ground Flax
  • 2 Heaping TBSP of Wheat Germ
  • 2TBSP Brown Sugar
  • 1tsp Baking Soda
  • Sprinkle Cinnamon
  • 2 1/4C Apple Cider

Heat griddle over a medium heat.  In a large mixing bowl, combine the dry ingredients and whisk together.  Add in the apple cider and gently stir folding and combing everything.  Grease the griddle by your method of choice and drop by spoonfuls some of the batter onto the griddle.  When bubbles start forming in the middle (about 2-3 minutes), flip the pancake over, gently.  Finishing cooking on the second side, about 1-2 minutes.  Remove from heat and serve!

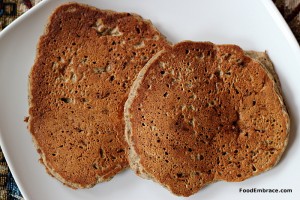
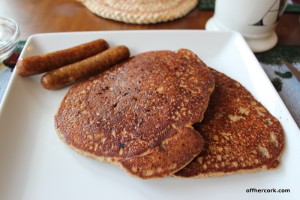
Butter and maple syrup went on top of my pancakes and I could not eat them quick enough.  Fluffy, sweet, and full of multigrain goodness, I was in pancake heaven.  Next time I might use half white whole wheat flour and half buckwheat flour.  I may reduce the sugar just a touch as well.

Or not because these were pretty perfect.

If you use water or milk in place of cider, add in some vanilla extract and maybe a tad more sugar.

Leftovers freeze well and can be reheated in a toaster oven.  This recipe can make a lot or a little depending on how large you make the pancakes.