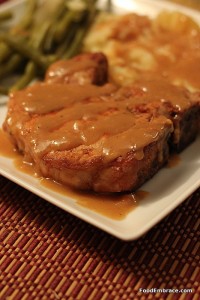
Cider and Beer Brined Chops

As promised, this post is all about my most recent experiment with brining; combining cider and beer.

First, you all know that I love to brine. And if you’re eating pork or poultry, my opinion is always to brine that baby first.

I’ve done cider brines and I’ve done beer brines, but I have not combined them.

Last Sunday I decided to do just that.  I had some cider that needed used up and I had a fall inspired pecan beer that would pair well with the cider.

I used up the last of the cider so I don’t know exactly how much was left but I’m going to guess about two cups or thereabouts.

Andrea’s Cider and Beer Brined Chops

  • 2 Thick cut, bone-in pork loin chops (Blues Creek)
  • 2C Apple Cider (get fresh and local!)
  • 1 12oz Bottle of Abita Pecan Harvest Ale + 1/4C (more if you make gravy)
  • 1/4C Brown Sugar
  • Slightly more than 1/4C Kosher Salt
  • 2 Jalapenos, sliced in half
  • 1/2 Small onion, + 1/4 Small Onion, sliced
  • 2 Garlic Cloves
  • Red pepper flakes
  • Chili powder
  • Garlic Powder
  • Smoked Paprika

*As much as you want of the seasonings

In a large bowl combine the cider, 12oz beer, salt, and sugar.  Stir until the sugar and salt are dissolved.  Add in the other seasonings, garlic, 1/2 onion, and jalapenoes and stir.  Add in the chops. Top mixture off with more water until the chops are completely submerged.  Quick stir and place in fridge.

Let brine in fridge for at least 5 hours.

Remove from brine, gently rinse chops under cold water and pat dry.  Sprinkle with garlic powder, chili powder, and smoked paprika on both sides.  Allow to rest for at least a half an hour to take the chill off the chops.

Preheat oven to 400.

In a sautee pan, drizzle in a little olive oil and heat over medium heat.  Add in chops and sear chops on each side.  Add the 1/4 of an onion, and about 1/2C of Pecan Ale.  Place in oven and roast until cooked through.  About 15-20 minutes.

Remove from oven and let chops rest for about 5 minutes before serving.

I also made a quick pan gravy for the chops.  In a blender, I blended up the beer and onions that were in the skillet with the chops.  I then added that mixture to a roux of olive oil, butter, and flour.  I added in more chicken stock and another 1/2C of beer to create the gravy.  A little pinch of salt and pepper brought it all together.

These chops turned out really well.  Leaving the bone in meats is automatically going to guarantee you more flavor and a juicier bite, by adding a brine to that makes those attributes even more prominent.

Both Scott and I were really pleased with the way these turned out and the chops were so HUGE that neither of us could finish our portions.  Scott had the leftovers the next day for dinner.

They are also flavorful enough on their own that you don’t need gravy but well, it was a gravy kind of day so I went for it.  It was my first time making gravy with beer and it didn’t turn out too shabby.

These would be great for grilling too.  Add in some hickory chips for extra umph!

What are your thoughts on brining? What is your favorite brine?

Have fun guys, and remember, always play with your food! Enjoy!

Buzzin Bars

Last week Scott left for a business trip that had him away from the house for about a week.  He was flying off to San Francisco to geek out about code and be in his element.

Because I knew that eating times might be odd and because I know Scott, this meant he would need to take some food along with him.

He was taking a carry on which meant that the food had to be small, easy to carry, and not prone to spoilage.  And since I knew that these could very well be a meal source, I knew that they had to be jam packed with good stuff.  Stuff that could get you through a couple of hours.

I like using soaked dates in bars and coffee cakes because it adds a nice sweetness without being over powering.  Plus they are a great source of fiber and potassium.

Plus I wanted to do something fun so I added an extra little kick to these bars.

Andrea’s Buzzin Bars

  • 10, dried and pitted dates
  • 1C Coffee + 2TBSP
  • 2C Oats
  • 1C White Whole Wheat Flour
  • 2TBSP Unsweetened Cocoa Powder
  • 1/2C All Natural Peanut Butter
  • 1/2C Dark Chocolate Chips
  • 1TBSP Maple Syrup
  • 1/2C Unsweetened Coconut Milk (Not the kind in a can, the kind in the refrigerated section)
  • 2tsp Vanilla Extract

In a small to medium sized bowl, add the dates and pour 1C of hot coffee over the dates.  Allow to soak for 1/2 hour to an hour.  You can use leftover coffee that has been reheated.

Preheat oven to 375 degrees and grease an 8×8 baking dish (either with oil or nonstick spray).

Drain dates and add to a food processor.  Pulse just until the dates start to break up.  Add in the oats, flour, cocoa powder, and chocolate chips.  Pulse again until the oats start to break down and the chips start to break down as well.  The chips might not break down as easy, don’t worry about this.

In a medium sized mixing bowl, add in the coconut milk, 2TBSP of coffee, the peanut butter, maple syrup, and the vanilla extract.  Whisk until the PB is well incorporated into the mix.  Add this mixture to the date mixture, and pulse until well combined.

This will be an extremely thick batter.  It will not be a pourable batter and you may have to remove it from the processor and mix with your hands a few times.  Put this mixture into the baking dish, you’ll have to press it into place.  Again, remember this is a really thick batter.

Place in oven and bake for about 10 -15 minutes.  Just till the top starts to get a little browned.  It doesn’t take long at all for these bars to set.

Remove from oven and allow to cool for about 15 minutes before cutting.  Cut into squares and serve immediately.  Or allow to cool longer once cut, place in a storage container and keep in fridge until you’re ready to eat one.  I suggest heating it up slightly before eating.

These also freeze very well.

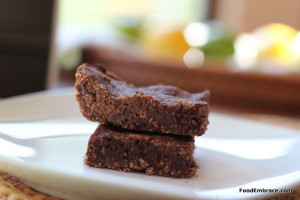
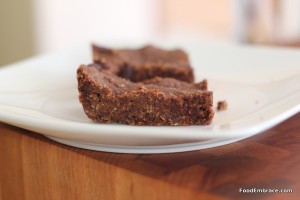
These smell exactly like a no bake cookie.  The peanut butter comes out as a very strong smell and flavor in these bars.  The coffee is just enough to enhance the chocolate and not dominate the flavor in any way.

The bars are very dense because they are so jam packed with goodness.  Fiber from the oats and dates, protein from the peanut butter, and a little fun from the chocolate.

If you don’t have coffee or don’t want to use coffee, you can soak the dates in hot water.  Use 2 TBSP of coconut milk in place of the 2 TBSP of coffee in the bar batter.

Great as a breakfast or a snack.

Bonus, you don’t even have to cook these!  You can roll them into little ball shapes and serve them up as a twist on a truffle. Yes there is flour in here but there is no “uncooked flour” taste when you eat these bars raw.  All you get is a straight forward chocolate and peanut butter combo.

I did give all of these to Scott to take on his trip.  That much chocolate and PB needs to stay close to home as well.  I had some for breakfast and they are chocolatey delish!

Do you make bars at home?  They are perfect for snacks on the go!

Have fun guys, and remember, always play with your food!  Enjoy!
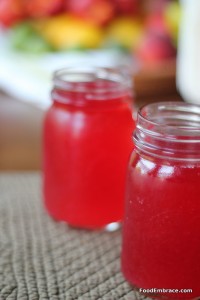
Blackberry Lemonade

Remember a short while ago we discussed making lemonade at home? I decided to take that lemonade up to another level by making blackberry lemonade!

Earlier this summer I saw a recipe on another blog featuring blackberry lemonade and I was intrigued by this and immediately read the recipe only to be disappointed in the results.

The person used store bought lemonade.

Ugh.

Being that it is so easy to make lemonade, it’s silly to purchase lemonade.  I made a mental note that once I mastered making lemonade, that I would then turn my efforts to blackberry lemonade.

This time I was greatly rewarded.

Andrea’s Blackberry Lemonade

  • 5 Lemons
  • 1/2 Pint Blackberries
  • 3/4C Cane Sugar

Follow the basic lemonade recipe, this time add 1/2 a pint of fresh blackberries in with the lemons.

The blackberries are going to get steeped in with the lemons.  Blackberries are delicate berries so you can expect them to fade and start to fall apart.

This is normal and acceptable! While the blackberries will fade, that color is going to seep into the lemonade mixture.  This is exactly what you want.

After a half hour of steeping, squeeze out the lemon halves and discard.  In a large gallon beverage container add in sugar then strain the lemonade and blackberry mixture with a fine mesh strainer as you pour it into the gallon container.  Discard any lemon pulp and blackberry bits.  Stir mixture and add in cold water to help dilute the lemon and blackberry mixture.

Stir, pour into glasses and serve!

Just to reiterate, to make the blackberry lemonade, you’re going to do all of the same things that you do to make regular lemonade.  The only change is adding in 1/2 a pint of blackberries.  Make sure you look over or print out the lemonade recipe so you have that on hand.

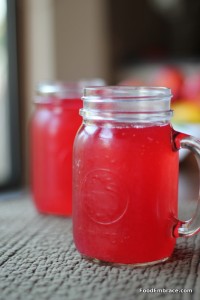
With it being blackberry season right now, this is a perfect thing to make to quench summer thirsts.  The blackberries create a gorgeous color for the lemonade and add a bit of sweetness to the drink as well.

Everyone will be a fan of this drink and you can make it even more fun by adding in some seltzer to it for a bit of fizzy action.

Have fun guys, and remember, always play with your food! Enjoy!
Homemade Lemonade

Lemonade was not something that I grew up drinking.  In fact we never had it.  Ever.  The first time I had lemonade was at some point during my teenage years.  My sister and her then boyfriend (now husband), owned a boat and we headed out on the water one day.  She brought food and drinks to go with us and one thing she made was lemonade.

It was the basic instant mix kind but one sip on a very hot Western PA summer day and I was hooked.  It was amazing.

Sweet and slightly tangy, to me it was perfection.

After that point I started making lemonade on my own using the same instant mix.  Then flavors started appearing and raspberry lemonade was about the best thing on earth at that point.

Eventually I realized that instant lemonade is not good for you at all.  Much like instant tea, it’s full of icky things we don’t need.  I stopped making lemonade for years after that.  A few times we’ve purchased lemonade at the store. The kind that’s located next to the OJ in the fridge section.  It was alright but I thought to myself, “It can’t be that hard to make lemonade.  It’s just lemons, water, and sugar.”

And indeed it is just that simple.

Andrea’s Lemonade

  • 5-6 Lemons
  • 8C Boiling Water
  • 1/2-3/4C Cane Sugar

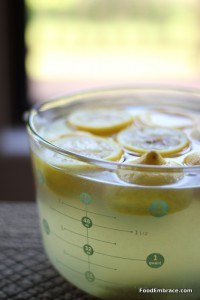
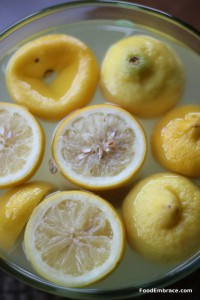
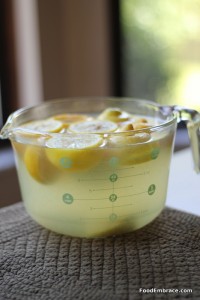
Fill a tea kettle and place it on the stove to boil.  Cut the lemons in half and squeeze the juice into a very large glass pitcher. After squeezing, place the lemon halves in the pitcher as well.  Once the water reaches a boil, pour the boiling water into the glass pitcher with the lemon juice and lemons.

Allow to steep for at least a half an hour.

In a large gallon container (pitcher, beverage container, whatever you have), add in the sugar.  Start with a half cup, taste when you’re done and see if you have to adjust the sweetness from there.  Squeeze the lemon halves again to get all the remaining juice and water out, then discard.  Place a fine mesh strainer over the gallon container. Gently pour the lemon infused water into the gallon container allowing the mesh strainer to strain out all the pulp and seeds.

Stir the lemon water and combine with the sugar.  Top off with more cold water until the container is full.  Stir, taste and see if more sugar needs to be added.

Serve immediately in a glass with ice or place in the fridge to chill.  Drink and enjoy!

I let the lemons steep in the boiling water because I wanted as much lemon flavor as I could get.  Since the rind has a bunch of flavor and oils, I thought steeping would yield me the most lemon power and I was right!

I’ve also done this with a combo of lemons and limes.  The limes add a lot more tartness and require a little bit more sugar but the taste is refreshing, especially on a hot summer day.

It’s easy and an very inexpensive to make lemonade at home.  You can drink it as is or you can add some seltzer to it for a little fizziness and fun.

Have fun guys, and remember, always play with your food! Enjoy!
Pina Colda Pancakes

Earlier this week, I discussed how a recent kitchen flop then lead me to create one of the best pancake flavors to date. Happy day!

I had been toying around with making a summery-themed pancake one that tasted like the sun and reminds you of the beach and drinks with little umbrellas in them.

Or tasted like the sun and reminded you of being pool-side with drinks that had little umbrellas in them.

I’m flexible.

Once I trashed the failed pancakes, I got busy making some Pina Colada inspired pancakes.  While I don’t like an actual pina colada, the flavors that make one up are fantastic and can be used in other applications (like smoothies!).

I knew that I could use those flavors in a pancake as well!

Andrea’s Pina Colada Pancakes

  • 1C Spelt Flour
  • 1C Buckwheat Flour
  • Pinch Ground Cinnamon
  • 1/2C Unsweetened Shredded Coconut
  • 2TBSP Cane Sugar
  • 1/2tsp Baking Soda
  • 1C Pineapple Juice
  • 1/2C SO Delicious Unsweetened Coconut Milk
  • 1/2C Water
  • 1tsp Vanilla Extract

Preheat griddle over medium heat.  In a large mixing bowl, combine all dry ingredients and whisk.  In a medium sized mixing bowl, combine all liquid ingredients and stir.  The coconut milk will curdle in the pineapple juice, this is OK. Acid mixing with a cream will create this reaction. It’s not bad or sour, so don’t freak out.  Slowly add the liquid mixture to the dry ingredients, gently stir until everything is well combined.

Grease the griddle (I brush on olive oil) with your choice of oil or butter, and then spoon some of the batter onto the griddle.  The size of pancakes you want is up to you. Cook on one side until you start to see bubbles popping in the middle of the pancake, about 2-3 minutes. Flip and continue to cook until done, about 1-2 minutes.  Remove from griddle and repeat with remaining batter.  Serve warm!

Light and sweet pancakes that taste like summertime fun. The pineapple and coconut come out in full force in these pancakes but not so much as to be overwhelming. Both Scott and I enjoyed these a great deal and I’m happy to have found another way to use pineapple juice.

I like keeping the coconut milk to a small amount because I don’t want it to weight down the pancakes. By only using 1/2 a cup, the pineapple juice and water make up the rest of the liquid and help to keep the pancakes fluffy.

Have fun guys, and remember, always play with your food! Enjoy!
Smoothies and Juices

Smoothies and Juices, both have found a home here at the HQ and we love them equally.  Is there a difference between the two? Yes and it’s a pretty big difference but it has nothing to do with nutrition or if one is healthier than the other.

Smoothies:

Are made in a blender typically with a liquid, greens, and some frozen fruit.  Smoothies generally have a thicker consistency, think frozen daiquiri style but obviously without the alcohol.

The benefit to smoothies is that you are getting in fruit and veggie servings while also benefiting from the fiber of the ingredients.  By putting everything in the blender, the fiber gets broken up making it unnoticeable yet still highly beneficial.

The upside to the fiber is that you are getting in your fiber servings for the day, it helps to keep your digestive tract squeaky clean, and it helps you feel full.

You need fiber in your diet.  Even if you don’t think that you need much, YOU DO.  Fiber is highly important for colon health and for overall health.  Fiber comes in many forms and fruits and veggies have a high amount of it.

Since smoothies are made in a blender, clean-up is easy going.  Smoothies can be made with whatever combos of fruits and veggies you like!

Juices:

Are made by using a juicer with any combo of fruit and veggies you like.  Usually there is a greens base and then you build off of that.  They are a juice so they are a thin beverage, just like a regular drink.  The difference between juice and smoothie is that in a juice, there is no fiber from the fruits or veggies.  All the fiber has been removed leaving you with only the juice of the fruit or veggie.

The fiber is pushed out another end and can be used for whatever you like.  Some people throw it away and some people save it for other purposes.

While you are not getting fiber from juicing, you are still getting in nutrients from the fruits and veggies along with a serving of fruits and veggies for the day.  The upside to juicing is that since it’s liquid, your body can utilize the nutrition a little faster since it isn’t processing fiber at the same time.

Unlike smoothies, juicing is not a quick task.  It takes a long time to juice the items and clean-up is not a fun chore.  I’m very thankful that Scott helps and will clean the juicer because we might be juicing a lot less otherwise! I love juices but cleaning one is not fun.

Is one better than the other?

Everybody has a difference of opinion on this.  Mine is that each version has its place in life.  For me personally, some days I feel like a smoothie and some days I feel like a juice.  There are days when I want a cold thick drink full of fiber and there are days when my body wants to take it a little easier and a juice is perfect.  Today as I’m feeling a tad under the weather, a juice is perfect whereas a smoothie would be a little too much.

There is no right or wrong, each has it’s benefits.  It’s up to you to decide what you like and what suits your lifestyle the best.  If you have not had a juice before, I highly suggest trying out a juice from a juice bar a few times first before investing in a juicer.  If you do decide to purchase a juicer, research and find one that fits your needs and lifestyle.  We like items that can multitask, so the Omega is our juicer of choice.

The same goes with blenders.  Don’t buy a Vitamix just because everyone else seems to be in love with them.  Research and find one that fits your needs AND your budget.

Do you do either of these at home? Have you had a smoothie or a juice before?

And Now For The Juicing

Remember last month when I posted this picture of this interesting little thing?  It was a birthday gift from Scott that blew me away.  First of all because we don’t normally purchase “big” gifts for birthdays and second of all because he’s been spoiling me like crazy with gifts such as this.

By the title of this post, I’m sure you can now guess that this little guy is a juicer.  He’s completely adorable because he honestly looks like a little creature that sits on your counter waiting to take care of all your juicing needs!

He needs a name. I’m working on it.

If you’ve been reading OHC for any length of time, then you probably know how much I love my smoothies.  I have one almost everyday with my lunch.  Lately I have taken a fondness to juicing as well.

Whenever I found myself at North Market, I would get a juice.  Nothing too crazy, orange, carrot, and spinach.  It was tasty and sometimes my body just wanted a juice.  I had been talking with Scott for a while about how nice a juicer would be to have because then I could juice whenever I wanted.  Imagine my surprise when on my birthday I was presented with a juicer!

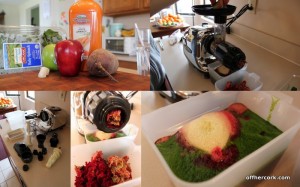
Juicing collage! You can click on it to see it full scale!  Here’s the stats:

I have an Omega J8005 juicer which you’ll notice looks much different than the Breville juicers that most people use.  Scott researched the heck out of juicers and decided that this would be the best one for us.  The Omega is different from the Breville in that it is a Masticating juicer whereas the Breville uses centrifugal force to separate the juice from the pulp.  The Omega actually grinds and crushes the fruits and veggies creating more juice and a much drier pulp.

The Omega can also crush frozen fruits and veggies, make pasta, and make nut butters.  Oh yeah!

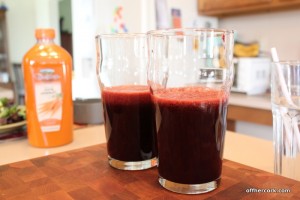
I went a little hardcore with the first juice.  It contained:

  • Spinach
  • Ginger
  • A very large red beet
  • A green apple
  • A red apple
  • Carrot Juice

I buy carrot juice for my smoothies so obviously I already had some on hand.  That picture shows how much juice I got before adding in some carrot juice.  Not bad!

This juice was intense as the beet took over all of the other flavors.  The apples didn’t help sweeten things up either.  I love beets with all my heart but juicing them is too much for me.  On my second juice I tried using half a beet and it still was a little potent for me.

I’ve been playing around with combos now and have figured out my favorite:

  • Spinach
  • Orange
  • Lime
  • Frozen Banana
  • Frozen Mango

It’s super green and divine!

Of course there is a big difference between juicing and making smoothies.  I’ll get into that in another post where we can discuss the pros and cons of juicing.

Have you ever had a juice before? Did you like it? Do you have your own juicer?

Pina Colada Smoothie

It’s the end of March and yesterday Columbus was blessed with a snowstorm that lasted all afternoon.  It was the last thing that any of us wanted. Okay, well there might be a few residents who don’t mind but the rest of us were cursing and shaking our fists in the air.

So to beat the winter blues, I’m posting something springy and fun!  Something that nourishes both the body and spirit.

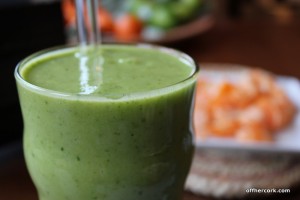
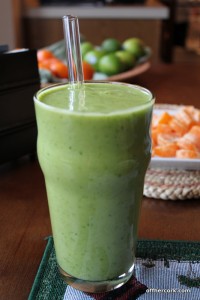
Pina Colada smoothie!  Super green in color to perk up any blah winter day and tasty enough that you might start looking around for some rum.

Andrea’s Pina Colada Smoothie

  • 1C OJ
  • 1C Unsweetened Coconut Milk (like SO Delicious)
  • 2 Large handfuls of baby spinach
  • 1 Frozen Banana
  • 1/2 C Frozen Pineapple
  • 1/4C Frozen Mango

Add all ingredients to a blender and blend until smooth.  This will be a thicker smoothie, like milkshake or frozen drink style.  Makes enough for two large glasses.

Perfectly tart and creamy. It tastes just like a pina colada but looks like spring. The amounts of frozen pineapple and mango are estimates because I didn’t measure those out.  Go by what you like.  The pineapple is more tart while the mango is more sweet.  You need to use enough pineapple to ensure you get the pina colada taste because that’s what makes the smoothie.

I’m telling you it’s tart so be prepared! But it’s refreshing and will remind you of the warmer temps that will be arriving soon!

Have fun guys, and remember, always play with your food! Enjoy!
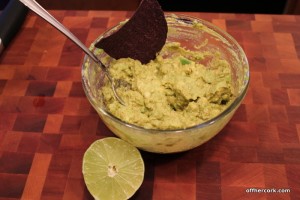
Quick and Dirty Guacamole

Guacamole is one of those things that I instantly fell in love with. I didn’t grow up eating it and only ever had it out in restaurants which was nothing fantastic I promise you. But to me it was creamy green heaven.

It took me a while to figure out how to make a guacamole that I liked and I tried everything.  With chunks, without chunks. With tomatoes, with cilantro, and so on and so on. I discovered that what Scott and I really like is just a basic and simple guac that isn’t fancy but highlights the avocado well.

This version seriously takes maybe five minutes and then you can get busy stuffing your face with goodness.

Andrea’s Quick and Dirty Guacamole

  • 2 Avocados
  • 1/2 a Lime
  • Hot Sauce (I like Cholula, but whatever floats your boat)
  • Salt
  • Garlic Powder
  • Chili Powder

In a medium sized bowl, cut the avocados and remove the seeds. Scoop out the flesh with a spoon and place in bowl.  With a sturdy fork, mash the avocado until it’s smooth or as smooth as you like it.  Add in the juice of the 1/2 a lime, hot sauce, and all the seasonings.  Stir and taste to see if it’s seasoned enough to your liking. If not add more and stir again until it’s right.

Serve immediately with chips or vessel of choice!

No measurements on the seasonings because it’s totally to taste. I like a lot of salt, a good bit of hot sauce, and just a dash of garlic powder and chili powder. If you really dig on lime, you can add in the juice of a whole lime.

Quick because it takes no time to make and you’re eating right away. Dirty because the hot sauce and chili powder give it a darker hue.

This is great for tacos, nachos, or just spread on bread as a sandwich glue.  It’s great just eating straight with chips and an icy cold brew.

Or ‘rita if you’re down with that.

Do you like guacamole? Do you make your own version at home?

Have fun guys, and remember, always play with your food! Enjoy!
Apple Cinnamon Baked Oatmeal

I grew up in Pennsylvania. Western PA as a matter of fact. Home of the Steelers, The Penguins (and the Pirates if we must) and the City of Bridges. I didn’t grow up in the city but in a rural coal mining and farming town which was only an hour south of the city. I now live in Columbus, which is only 3 hours away from my hometown.

Doesn’t sound like a huge difference but in terms of weather it totally is! Ohio gets some of the most crazy weather and by crazy I am referring to how extreme it is.  It goes from one end of the spectrum to the other, sometimes in the same day.

This week we have the pleasure of dealing with an ice storm and then more snow.  Good times.

Thankfully Scott and I work from home which means we can stay bundled up.

On the first cold and iced-in day, I decided to kick my normal bowl of morning oats up a notch and make it something special.  I’ve seen others talk about baked oatmeal before and the concept always intrigued me.  Baked oatmeal sounds really decadent and like a lovely winter treat, doesn’t it?

I decided that on a very cold and icy Tuesday morning, this was exactly what we needed.

Andrea’s Apple Cinnamon Baked Oatmeal

  • 2C Plain Soymilk
  • 1 Large Banana
  • 1/3C Greek Yogurt
  • 1tsp Cinnamon
  • 1 Apple, chopped (I used golden delicious)
  • 2C Old Fashioned Oats
  • 1TBSP Ground Flax
  • 1TBSP Wheat Germ (raw)
  • Pecans and Maple Syrup for fun

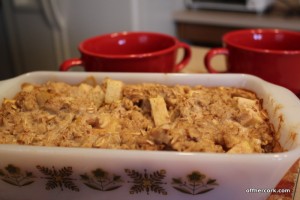
Preheat oven to 375 and in a small casserole or baking dish, spray with olive oil or nonstick spray.  In a large bowl, add in the soymilk and banana.  Mash the banana into the soymilk until it’s fully broken down.  Add in the oats, apple, yogurt, cinnamon, flax, and wheat germ, then mix.  Pour mixture into the baking dish and place in oven.  Bake for about 30 minutes. Stir once halfway through.

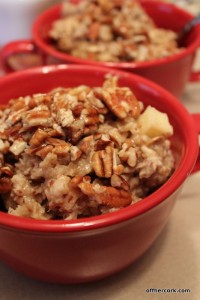
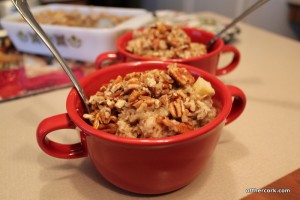
Remove, spoon into bowls and enjoy!

I was so excited about this breakfast! Partly because it was new to me and partly because I wanted to EAT! I was hungry when this was done!

Minus the yogurt and the apple, this is my basic oatmeal that I eat almost everyday.  I decided that the Greek yogurt would give it a nice rich background and make things just a tad more fancy for a weekday breakfast. Apples because why not?

The great thing is that this doesn’t cook long enough that the apples breakdown and get mushy.  They just get warmed through.

Topped with some crushed pecans and a drizzle of maple syrup takes this baked oatmeal to the top level.  It is a thick oatmeal and reminds me of a lovely custard.  Warm and creamy, with a sweet crunchy topping perfect for when you’re stuck indoors and need some fuel to get you through the day.

This would be a great thing to make for a brunch because it’s easy and quick to put together. Plus since it bakes in the oven, it doesn’t need a lot of fussing or focus while you deal with other things.  If I were to make this for a brunch, I would probably create a crumble type of topping to go with it, just to make things more fun.  Or maybe a “topping bar” so people can make their own style!

Ever have baked oatmeal before?

For another twist on baked oatmeal, checkout Fake Food Free’s Peach Baked Oatmeal.

Have fun guys and remember, always play with your food!  Enjoy!