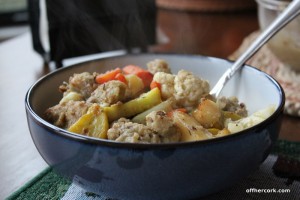
Leftover Idea: Veggie Stuffing Bowls

What do you do when the only leftovers you have from a roast dinner are stuffing and gravy? This is the task I faced the other night when I was deciding on our dinner options.

I love stuffing and gravy, both of which are treats that we don’t have very often. I’ll be darned if I was going to let it go to waste!

But what to do with it?

That evening was a very cold and rainy night. Complete with freezing rain and then snow, all of which screamed for a big bowl of something warm and comforting.  Then the idea came to me, why not make a stuffing bowl?

I had veggies and decided to combine that with the stuffing.

I didn’t measure anything, so the following are guesstimates.

Andrea’s Veggie Stuffing Bowls

  • Leftover Stuffing
  • Leftover Gravy
  • 1 Small Head of Cauliflower, chopped up into bite size pieces
  • 1 Yellow Squash, chopped into bite size pieces
  • Leftover roast veggies if you have them
  • 1/2 TBSP Olive Oil
  • Salt and Pepper to taste
  • 1/2tsp All Purpose or Poultry Seasoning
  • 1tsp Garlic Powder

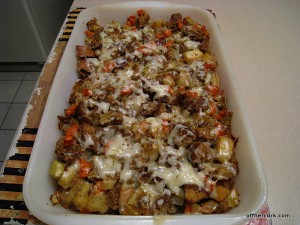
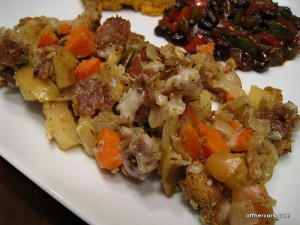
In a sautee pan, add the olive oil and heat over medium heat.  Toss in the squash and cauliflower, season with seasonings and stir.  Sautee until the squash starts to soften. Add in the leftover stuffing and heat through. Spoon into bowls and serve! Top with heated up leftover gravy.
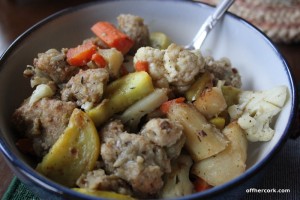
Super easy, right? Very comforting and yummy as well! The cauliflower stays crunchy which provides a nice texture since everything else is on the softer side.  This is really just a concept idea more than an exact recipe because you can use whatever veggies you have on hand in this dish. Even adding in some beans would be a great idea and give you a little protein boost.

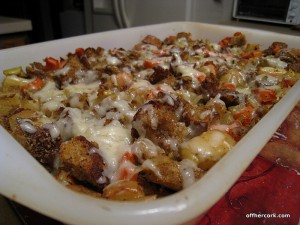
This also might be great done casserole style. Combine everything in a casserole dish (except the gravy) and add in a little liquid of choice.  Bake for about 1/2 and hour to let the veggies soften up, then serve!
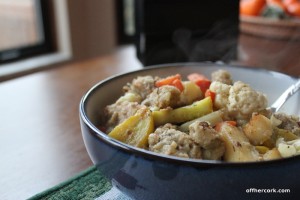
Perfect bowl of delicious on a cold wintery evening!

Do you like leftovers? I like being able to get creative with them!

Have fun guys, and remember, always play with your food! Enjoy!

Quick and Dirty Guacamole

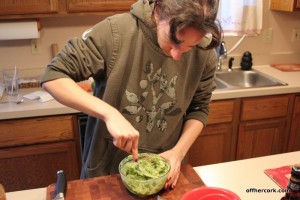
Guacamole is one of those things that I instantly fell in love with. I didn’t grow up eating it and only ever had it out in restaurants which was nothing fantastic I promise you. But to me it was creamy green heaven.

It took me a while to figure out how to make a guacamole that I liked and I tried everything.  With chunks, without chunks. With tomatoes, with cilantro, and so on and so on. I discovered that what Scott and I really like is just a basic and simple guac that isn’t fancy but highlights the avocado well.

This version seriously takes maybe five minutes and then you can get busy stuffing your face with goodness.

Andrea’s Quick and Dirty Guacamole

  • 2 Avocados
  • 1/2 a Lime
  • Hot Sauce (I like Cholula, but whatever floats your boat)
  • Salt
  • Garlic Powder
  • Chili Powder

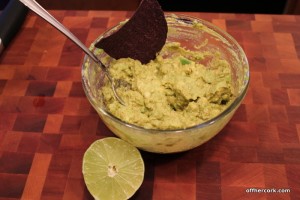
In a medium sized bowl, cut the avocados and remove the seeds. Scoop out the flesh with a spoon and place in bowl.  With a sturdy fork, mash the avocado until it’s smooth or as smooth as you like it.  Add in the juice of the 1/2 a lime, hot sauce, and all the seasonings.  Stir and taste to see if it’s seasoned enough to your liking. If not add more and stir again until it’s right.

Serve immediately with chips or vessel of choice!

No measurements on the seasonings because it’s totally to taste. I like a lot of salt, a good bit of hot sauce, and just a dash of garlic powder and chili powder. If you really dig on lime, you can add in the juice of a whole lime.

Quick because it takes no time to make and you’re eating right away. Dirty because the hot sauce and chili powder give it a darker hue.

This is great for tacos, nachos, or just spread on bread as a sandwich glue.  It’s great just eating straight with chips and an icy cold brew.

Or ‘rita if you’re down with that.

Do you like guacamole? Do you make your own version at home?

Have fun guys, and remember, always play with your food! Enjoy!
Farm House Tossed Salad

I had on Food TV in the background, not really paying attention to it when I heard Claire Robinson talk about a salad that had a warm bacon dressing and was topped with a fried egg.

Oh really?

Now that did have my attention!  Sadly not enough to stop what I was doing and see how she did it though.  Admittedly I have always been intrigued by the “warm bacon dressing” trend and was never really sure how to achieve. I did notice that the bacon grease was used a lot and as much as I love bacon, I really don’t want to eat the drippings.

I know it sounds weird but well there it is.  I couldn’t escape this idea though of a tossed salad with an egg on top and bacon dressing so I decided to make my own version for lunch.

I’m guessing on the measurements for you as this is more of a concept type of dish and can be adjusted how you see fit.

Andrea’s Farm House Tossed Salad

  • Mixed Greens
  • Chopped Tomato
  • Chopped Cucumber
  • Shredded Carrot
  • 1/4 Red Onion, chopped
  • 4 Slices of bacon, chopped
  • 2 Farm Fresh Eggs
  • 2 TBSP, Heaping of Dijon Mustard
  • 1/4C Balsamic Vinegar
  • Light Olive Oil

On two plates, pile up the mixed greens and add on the other veggies, except the onions.  Set aside.

In a skillet, drizzle in a little olive oil and heat over medium heat.  Fry up the eggs and season with salt and pepper on both sides.  Cook to your preferred doneness.  Remove and set aside.  In the same skillet drizzle in more olive oil, about 1 TBSP and add in the onions and bacon.  Sautee just until the onion starts to soften, then add in the mustard and balsamic vinegar and whisk together.  You may need to add in some more olive oil, it depends on how thick you want the dressing.

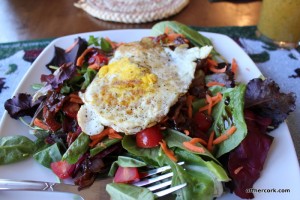
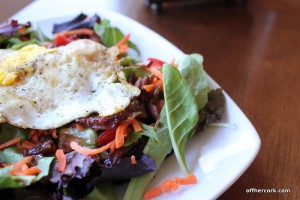
Turn off heat and drizzle the dressing over each salad.  Place egg on top of the salad and eat!

The salad won’t be super coated with dressing but it will be enough that it will give you great flavor and coat the salad.  This salad blew me away with the flavor combinations.  This was actually the first salad I had with a fried egg on top.  Normally if I have egg in a salad, it’s chopped hard boiled egg.  A fried egg was a whole new experience for me and it was a lovely one!

I’m not sure if I would want hard boiled egg now on a salad if I have the choice of fried!

I served this up for Scott and I one day for lunch and both of us didn’t speak to each other because we were too busy eating.  That’s always a good sign.

I’ve also done this minus the bacon with just sauteed onions and balsamic and mustard. Still excellent!

If you’ve never had a fried egg on top of a salad before, I suggest you try it soon!

Have fun guys, and remember, always play with your food!  Enjoy!
Chili Cheese Fries

Like Paula Deen, I love potatoes.  LOVE them. Probably a little inappropriately.  Unlike Paula Deen, I don’t think they need to be slathered in butter and cream.  Cheese is always welcome.  So is bacon but he is not invited to this party today.

Ever since I saw Chili Cheese Fries over at White On Rice Couple, I have been chewing at the bit to make them myself.

OHC style.

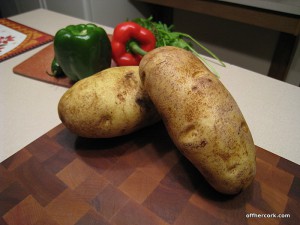
We recently had chili for a meal but I was unable to use the leftovers for chili cheese fries only because time was against me and I didn’t get around to it.  This week we decided that in order to keep my sanity (we were out of fresh fruit and the veggie count was in the single digits), we made a last minute decision to hit the grocery store.  We were there forever (as is typical) and I picked up a bunch of produce.  Among those were some russet potatoes and some red peppers (5 for $5, heck yes!).

When we got home, Scott was starving and I was seriously hungry myself.  It was a game night (Hello Penguins Hockey, you are awesome!) and we might as well have some game food to comfort us on a very cold snowy evening.

It was the perfect time for some Chili Cheese Fries!

Andrea’s Chili Cheese Fries

  • Leftover Chili
  • 2 Medium to Large Russet Potatoes
  • Olive Oil (about 1.5 TBSP)
  • Garlic Powder
  • Salt and Pepper
  • Chili Powder
  • Greek Yogurt (2% Fage being my choice)
  • Shredded Extra Sharp Cheddar
  • Green onions, chopped
  • Handful of cilantro, chopped

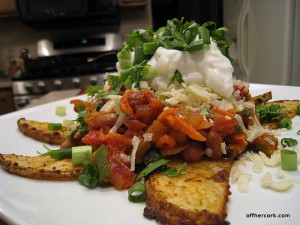
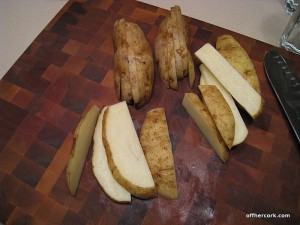
Preheat oven to 425. Line a large baking sheet with foil and spray with nonstick spray.  Wash potatoes and slice into thick slices, like above.  These are steak fry style. In a storage bag (or large mixing bowl) place the sliced potatoes, coat with olive oil and season with garlic, S&P, and chili powder to taste.

In a single layer, place fries on baking sheet and bake for about 25 minutes until potatoes are nice and crispy.

Heat up leftover chili.

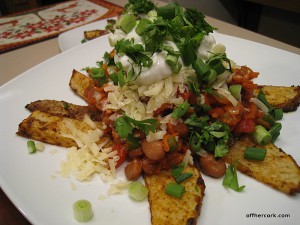
When potatoes are done, place on a plate, top with chili, cheese, yogurt, green onions, and cilantro.  Serve and enjoy!

Serves 2 Hungry People.

Since I didn’t have leftover chili, I turned to my good friend, Lentil Tacos.  I made that filling, substituting pinto beans for the lentils and no chicken stock was used.  Basically I made a quick and dirty skillet chili.  It worked perfectly!

These fries are just amazing.  I seriously stuffed myself silly eating them.  You’re going to want to make extra fries for this, trust me.  Scott was in game food heaven.

I ate mine with a fork and knife like a dignified lady (ahem), and Scott ate his man-style, with his hands using the fries to scoop everything up.

Of course you can use actual sour cream instead of Greek yogurt if that’s your preference.  You can use a meat based chili, toss some bacon on there, or even some guacamole.

I want to have these again already and am trying to plot a way to make that happen!  Next time you’re watching the game, make some to nosh on.  Or heck, make them just because!

I love when food tastes amazing, indulgent, and yet is completely made with whole real foods.  Nothing bad about these chili cheese fries!

Have fun kids, and remember, always play with your food!  Enjoy!

Holiday Party Foods 2010 Edition

Tis the season! Now is the time when everyone is out and attending holiday parties left and right.  Heck perhaps you are even hosting one!  If you need some ideas on what to make for your next gathering, OHC is here to help you out!

Just out of the oven

You can’t really go wrong with bacon and cheese right?  Bacon wrapped jalapenos are the answer! Very portable and can be made ahead of time.  Just heat right before serving!

Ham and Cheddar Potato Puff

Got leftover mashed potatoes?  Quick and easy potato puffs are great for appetizers! Even if you don’t have leftover mashed, use fresh!  These also can be made ahead of time and just need to be heated up before serving.

Pear and Brie Crostini

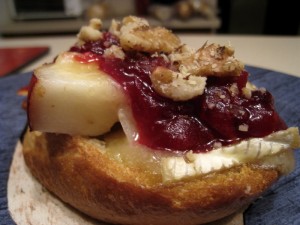
Maybe you’re going to a fancier party? Or maybe you just want to wow your friends? Pear and Brie Crostini is a great combo and a perfect way to put that cranberry sauce to use.  It looks gorgeous and tastes just as amazing.

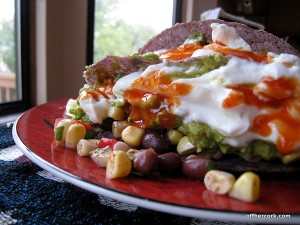
Salsa is always a winner! And super easy to transport! Black bean and corn salsa will bring a fresh twist and taste to the party table.

Switch up pasta salad with some Orzo and Roasted tomato. Can be served warm or room temperature.  This also transports easily and can be made ahead of time!

These are just a few ideas for your next party or gathering but feel free to search OHC for even more ideas.

Happy Holidays from OHC!

Thanksgiving Apple Stuffing

I have been cooking with apples more and more lately.  Before I couldn’t stand the taste and texture of cooked apples and now I’m finding that I can tolerate it a bit more.

I still don’t want any apple pie though!  You all can have that.

I’ve also been toying around with new ideas for some holiday dishes and one I played with was stuffing.  Oh man both Scott and I love stuffing.  Mmmmm!  I love it super seasoned with crispy edges.  My mom made alright stuffing but you know, I used to really like the box mix stuff!  I used to make that for Scott and I all the time.  Then about nine years ago, I started researching how to make stuffing from scratch and I discovered that it’s not hard at all.

From that point on, I started making homemade stuffing.  This allows me to control the ingredients and how much seasoning I want, it’s a win-win for us all!  Plus you know homemade is better than any box of whatever.

Since I was playing around with stuffing ingredients I decided to add in some chopped apples.  I have a bunch in my fridge and I’ve been using them in lots of dishes lately.  I have seen a lot of talk about apples in stuffing before but never gave it a second thought until now.  In went some apples and out came a great stuffing!

Andrea’s Thanksgiving Apple Stuffing

  • 1/2 Onion, chopped
  • 2 Large Sweet Apples (I used a combo of honeycrisp and Macintosh)
  • 2 Large Carrots, peeled and chopped
  • 1 Clove garlic, grated
  • 1/2 Whole Grain Baguette, cubed
  • 1tsp Garlic Powder
  • Big pinch of Red Pepper flakes
  • Salt and Pepper to taste
  • 2tsp All-Purpose Seasoning (Or poultry seasoning)
  • 1C Chicken Stock (May need additional)
  • Olive Oil for sautéing
  • Shredded Cheddar (optional)

Preheat oven to 400 degrees and grease a large casserole dish.  In a medium high-sided skillet, drizzle in some olive oil, about 1 TBSP and heat over medium heat.  Add in onions, apple, and carrots.  Coat with oil and season with all of the above seasonings.  Sauté for about 3-4 minutes until all the veggies and apples start to soften.  Add in the bread cubes and combine.  Slowly add in the chicken stock, 1/2C at a time.  Allow the bread to absorb the stock and then add in some more.

The mixture should pull together and start to combine.  If not, add in a touch more stock.  Once everything is combined, remove from heat and place in the casserole dish.  Heat in oven for about 15 minutes until it starts to crisp up.  Then top with shredded cheddar and allow to melt, about another 5 minutes.  Remove and serve immediately!

If I would have had some celery I would have used that here also, but I didn’t have any one hand.  Aside from the missing veg, this stuffing turned out amazing.  It was full of flavor and had plenty of texture from the different ingredients.  The whole grain bread made it way more filling and satisfying.

Of course you can use white bread here if you can’t find whole grain baguette.  The cheddar is optional, I used it because we were having this as a standalone side dish and there was no gravy or sauce to accompany it.  When we have this with Thanksgiving, it should pair really well with the turkey gravy!

If you have turkey stock from your roasting turkey, feel free to use that instead of chicken.

I found a lovely seasoning, called All-Purpose seasoning and it is like a poultry seasoning just with a few extra things tossed in.  Poultry seasoning would be completely fine in this dish if that is what you have available to you.

I never thought I would be eating apples in a stuffing and yet here I am and I can’t get enough!  I’m now desperately excited for Thanksgiving so that I can make this again!

Have fun guys, and remember, always play with your food!  Enjoy!
Creamy Cauliflower

Growing up, cauliflower wasn’t one of my favorite vegetables.  I would eat it if I came across it on a veggie tray but that was with the help of some serious ranch dressing.  Otherwise I didn’t touch the stuff.

Developing into an adult and with my ever expanding list of “Foods I Didn’t Eat But Do Now”, I decided to give cauliflower another try.  I liked it well enough but then I discovered roasted cauliflower and fell immediately in love.  We’ve been having roasted cauliflower at the HQ a lot this year!

Recently Scott and I were discussing Thanksgiving plans and possible side-dishes to make.  The topic revolved around either sticking with the same old stuff or branching out and trying something new.  One of the things he suggested was a creamy cauliflower type dish.

Hrm….

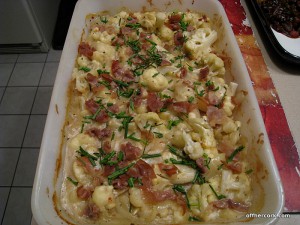
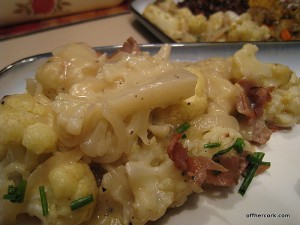
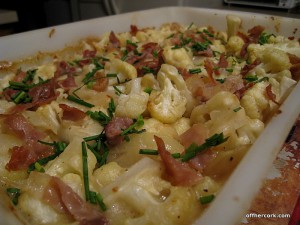
That got my wheels spinning and I decided to do a test run that very night!  I came up with this creamy cauliflower casserole that both of us adored.  It’s got a cheese sauce and prosciutto, so how can you go wrong?

Andrea’s Creamy Cauliflower

  • 1 Small Onion, thinly sliced
  • 1 Medium Head of Cauliflower, core removed and chunked
  • 1/2C Unsweetened Coconut Milk (not from a can)
  • 1C Chicken Stock
  • 4 TBSP All-Purpose Flour
  • 1/2C Shredded Sharp Cheddar
  • Sprinkled of grated Parmesan cheese
  • 4-5 Prosciutto slices, chopped
  • 1/2 TBSP Butter
  • Pinch Red Pepper Flake
  • Salt and Pepper to taste (I like a lot of pepper)
  • 1tsp Garlic Powder

Preheat oven to 375 and grease a large casserole dish.  Heat a medium sized skillet over medium heat, add in just a touch of olive oil, about 1 TBSP.  Sprinkle in the chopped prosciutto and allow to crisp up.  Keep an eye on the prosciutto because it crisps fast and can burn.  Once crisp, remove from pan and place on a paper towel.  Check to see if you need to add more oil and if so, about another TBSP or so.  Add in the butter at this point and the sliced onions.  Let the onions sauttee for about 3 minutes just until the start to get soft.  Add in your seasonings and stir.  Add in the cauliflower and sautee for about 3-4 minutes.  Add in the flour and stir, making sure to coat the cauliflower and the onions.  Cook for about 2 minutes.  Add in the chicken stock and stir.  Let it thicken up a bit and then add in the coconut milk.  This should result in a creamy sauce.  Now add in the cheddar and stir.

Remove pan from heat and dump contents into the greased casserole dish.  Sprinkle some parm on top (however much you want), and the crispy prosciutto.  Bake in oven for about 10 minutes, just till the cauliflower is completely cooked through.  Serve up immediately and enjoy!

I added some chopped chives on top just for a punch of color but you can leave them out or add in some fresh herbs.  Some parsley and sage would work well with this.  Both of us adored this dish!  It was creamy and full of flavor but not so heavy as to cause your stomach to feel weighed-down.  Sometimes that can happen with cream based dishes but using a mix of stock and coconut milk kept this dish a tad lighter.

Of course you can use any unsweetened nondairy liquid of your choice or you can use milk.  Totally up to you and your preference.

The cheddar gives the dish a bit of tang but doesn’t make it overly cheesy.

The onions are what make this dish I think.  Without them the cauliflower wouldn’t have a partner to compliment it so nicely.

Of course the prosciutto tastes fantastic!  I happened to have that on hand as well, so I used it.  Certainly you can sub in bacon or even some ham cubes here if you wanted to.  If you have ham at your Thanksgiving table, this would make a great idea for using the leftovers.

This dish certainly will be making a repeat appearance here at the HQ!

Have fun guys, and remember, always play with your food!  Enjoy!
Cranberry Apple Sauce

While growing up, cranberry sauce was a staple at our Thanksgiving meal and truth be told I didn’t like it.  We always had the canned version and there was just something about it that didn’t really sit quite right with me.  I don’t know if it was the taste or texture, regardless it was a dish that I passed over.

When I started making Thanksgiving dinner for Scott and I, he told me that they always had cranberry sauce too and that he liked it.

Say wha?!

This meant that I needed to supply him with some  cranberry sauce.  In the beginning, I just bought the canned version and let him go to town.  Eventually I came around and stared being able to tolerate it.  When OHC was in it’s infancy and before we cut out HFCS, I even used it to make this salad.

Now taking a look at the ingredient list, yikes!  Corn syrup and HFCS are the first two ingredients.  Ick! That means we stay far away from the canned grocery store version and I had to start experimenting on my own to make cranberry sauce.

Do you know it’s really easy to make cranberry sauce?  Like 10 minutes easy and you only need a few ingredients that you can find anywhere?

Ever since I started making my own, not only do I love it but I also feel a lot better about providing Scott with some cranberry sauce at Thanksgiving.

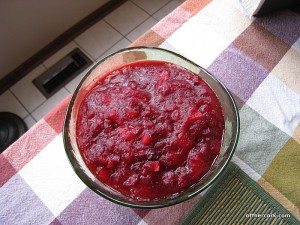
Andrea’s Cranberry Apple Sauce

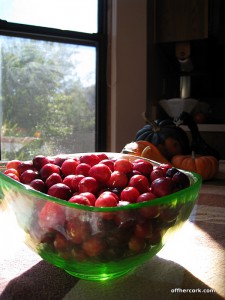
  • 1 pkg Whole Cranberries (12oz)
  • 1 Large Sweet Apple, chunked (I used a huge honeycrisp)
  • 1/2C Organic Cane Sugar
  • Pinch Cinnamon
  • 1C Cider

Rinse off the cranberries and remove any that have started to turn (they get mushy).  In a medium sized sauce pot, add all ingredients, stir, and bring to a boil.  Then reduce heat to a simmer and allow to simmer for about 5 minutes.  With a masher, go through and mash the berries and apples to your desired texture.  Continue to simmer for about another 5 minutes.  Remove from heat, pour into a glass bowl and allow to cool.  Serve warm, at room temperature, or cold.

I like a little bit of texture so I don’t make a completely smooth sauce.  I just use the masher to help break down the apple and cranberries just a touch.  While I’m not big on using a lot of sugar in recipes, cranberries kind of call for that because they are just so very tart.  To me, they can leave a bitter taste on the tongue that is not very pleasant.  I combat that with the sugar and also the apple.

By adding in the apple it brings in another fruit and therefore another taste level to the cranberry sauce.  I prefer this method but of course you can leave out the apple and sub in a tad more sugar if you wish.  You are also free to peel or not peel the apple, that’s completely up to you!

Now, what can you do once you have sauce in your possession?

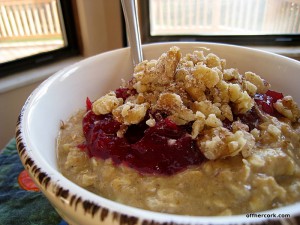
It makes a great mix-in for some pumpkin oatmeal!  Oats not your thing?

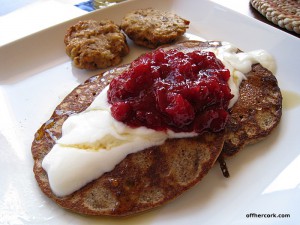
How about some Pumpkin Cider Corn Cakes?  Uh-huh!

You can make a salad dressing with it, you can slap it on a sandwich and I hear through the grapevine that it goes well with some mashed sweet potato as well.  So many options for this simple little sauce!

Want to kick this sauce up even more?  Add in:

  • The juice of one orange
  • Some orange zest
  • Some orange liquor

Oh yeah!

Have fun guys and remember, always play with your food!  Enjoy!
Pumpkin Polenta

Polenta is a “new to me” dish.  It wasn’t something I grew up with and the first time I came across it was watching Food TV.  I’m also not from the south, so grits never crossed my path either.

Whenever I saw it mentioned though, it was always very creamy with lots of cheese.  It looked amazing and people talked about it like it was a dish from the heavens.  I finally found some in the store and decided to make my own.

What a horrible experience!  The polenta smelled like dirty feet and it wasn’t creamy at all but gritty.  Perhaps why the term grits came about?  I really disliked the experience, so much so, that I tossed it all and pushed the idea of polenta aside.

With my food knowledge and experience growing, polenta came back to the forefront again.  Because I try to be fair with foods, I decided to give it another try.  I played around with it and became more familiar with it.  This time there was success!

Polenta still smells like dirty feet as it cooks but once you add in the cream base, some cheese, and butter if you’re feeling punchy, that smell turns into something very tempting and enticing.

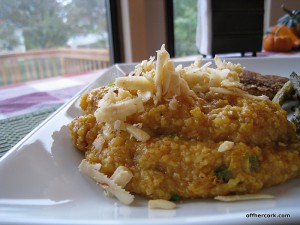
Polenta can be made to take on lots of different flavors so I thought, why not use pumpkin?  It’s creamy and I bet it would provide a creamy texture to the dish.  I tested the waters and it took me a bit of experimenting, but I finally got a great pumpkin polenta dish!

Andrea’s Pumpkin Polenta

  • 1C Polenta (Regular, not quick cooking)
  • 3C Chicken Stock
  • 1/2C Pumpkin puree
  • 4 Green onions, chopped
  • 1 Jalapeno, chopped
  • 5-6 Slices of crispy bacon, crumbled
  • 1C Chipotle Cheddar Cheese, shredded
  • 2 tsp Chili Powder
  • 1 tsp Garlic Powder
  • Salt and Pepper to taste
  • Olive Oil for sauteeing (about 2 tsp)

In a medium sized sauce pot, heat olive oil over medium heat, and add in the jalapeno.  Sautee for about two minutes, then add in the chicken stock.  Bring stock to a boil and add in the polenta. Reduce your heat down to medium at this point.  Stir continually until the polenta starts to thicken up.  It should resemble the consistency of a hot cereal, like cream of wheat.  Add in the salt, pepper, chili powder, and garlic powder and stir.  Once you have the right consistency, turn the heat down to low and add in the pumpkin.  Stir until well incorporated.  Add in the cheese and stir.  Now add in the bacon and green onion.  Mix to combine, and serve!  Sprinkle a little extra cheese on top for added flavor.

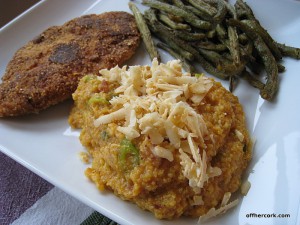
You can see that this is not a sweet or dessert type polenta.  But one with some spiciness and a touch of salty sass from the bacon.  The pumpkin gives the polenta it’s trademark orange color while making the dish extra creamy.  Using more than 1/2 a cup of pumpkin will result in a polenta that is too runny and it will not set up nice for you.

I used Cabot Chipotle Cheddar but if you can’t find that or don’t want to use that, you can sub in some pepperjack for kick or regular cheddar.

This can easily be made veggie friendly by using a vegetable stock and omitting the bacon.

I wouldn’t have minded if this actually had a bit more spice to it, next time I might use a chipotle pepper plus some sauce instead of the jalapeno.

This dish makes a nice fall inspired side dish that’s full of flavor and I bet would surprise many that it contains pumpkin.

Keep in mind that this makes a lot of polenta!  Great for a party!  If you have leftovers, place it in a shallow baking dish.  The next day, cut into squares and sautee up in a bit of oil.  That will give the polenta a nice crispy outside and make leftovers a little more exciting.

Do you like polenta?   When was the first time you had it?

Have fun guys, and remember, always play with your food!  Enjoy!
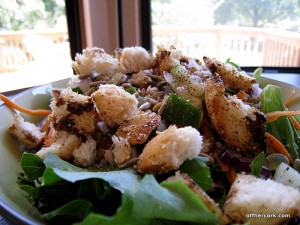
Tuesday Tip: Homemade Croutons

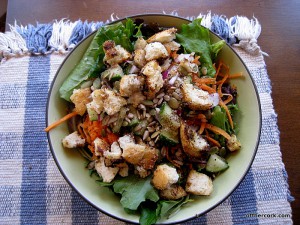
Ever since I started eating salads as a wee lass, I have loved croutons.  No scratch that, I adore croutons!  Crispy crunchy little bits of bread that are loaded with flavor adding a nice texture to salad.  Sometimes they’ll soak up a bit of the dressing acquiring even more flavor!  I prefer smaller bite sized pieces but I won’t turn down a crouton when presented to me.

I used to buy croutons all the time at the store.  I had my favorite brands and favorite flavors.  Garlic was a must and cheese was optional.

Croutons that came on salads from a restaurant seemed even more special.  No doubt they were the same croutons I was buying myself but when you’re out to dinner everything always seems a little more decadent and special.

I rarely meet a crouton that I don’t like.  Oh it happens, just not often.

For some reason it never occurred to me to make my own until I saw Ina do it several years ago.  Then the lightbulb went off, “I can do that too!”

The best part about making your own croutons is that you are in control of what goes on them and how much you use.  If you are using bread that you made yourself, bonus points because you have even more control of what goes into your food!

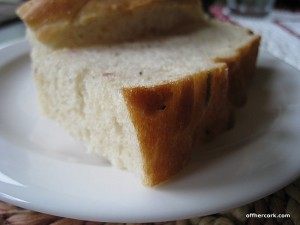
While I love all bread, I prefer a nice whole grain for eating.  Yet when it comes to making croutons, a good old French baggette does the job nicely.  I love the baguette because it’s got a nice texture to work with.  The day of purchase it’s crusty with a softer inside, perfect for dipping and making bruschetta.  The next day?  It’s hard enough to knock one out of the park or defend yourself against an intruder.  Perfect for making croutons.  You have to love versatility.

I’m also going to let you in on a little secret, you do not have to use day old or stale bread to make croutons.  You can use fresh bread.

Totally true!

All you need is some bread of your choice and then cut it up into bite sized pieces.

Here’s how to make croutons at home.  Keep in mind that I’m passing along a concept and not an exact recipe.  Amounts depend on your taste preferences and how much bread you have.

Andrea’s Homemade Restaurant Style Croutons

  • 1 French Bagguette, cut into bite size pieces
  • Olive Oil
  • Balsamic Vinegar
  • Garlic Powder
  • Italian Seasoning ( I use Mrs. Dash)

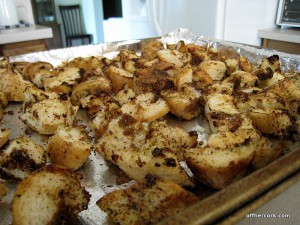
Preheat oven to 350 and line a large baking sheet with foil.  Spray with olive oil or non-stick spray.  In a large mixing bowl add the bread cubes, drizzle olive oil and vinegar on top, toss using your hands or using a large spoon.  Add in garlic powder and Italian seasoning, again, toss using your hands or a large spoon.

Place bread pieces on the baking sheet and into the oven for about 10-15 minutes.  Keep an eye on the bread to make sure it doesn’t burn.  Stir it occasionally and test the bread to see if it is hard and crispy.  When it has reached that stage and it picked up some golden brown color, remove from oven and allow to cool.  Add to soups and salads!

I told you it was easy to do!  The trickiest part is to make sure the bread doesn’t burn which is really simple.  You just have check the bread every few minutes to make sure it isn’t toasting up too far.

This works for both fresh and stale bread.  Fresh bread will still toast up and get crispy in the oven.  Use what you have on hand, and if that means stale or day old bread, go for it!  You can even do this with cornbread!  Cornbread will require a gentler hand because it can be crumbly, but will make croutons for you.

The balsamic gives the croutons a little bit of a darker color and also adds some tang to the taste.  Totally optional though, if you would rather straight olive oil that’s okay too!

If you want to get even fancier, you can grate some parm on the croutons before baking to give them a little hint of cheesy goodness.

For me, it’s like having mini garlic bread bites in your salad!

Now who’s going to make some croutons this week? :D