Loaded Baked Sweet Potato

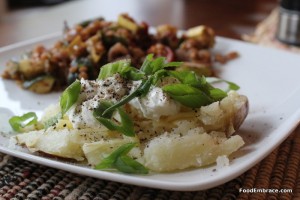
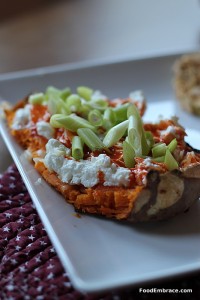
This is my newest obsession, the loaded baked sweet potato.  A little while back I wanted to try creating a loaded baked sweet potato.

I love sweet potato and pumpkin as savory items more than I do sweet. Hence why I put pumpkin in just about every chili I make now and why I think sweet potato fries should contain chili powder.

Previous meals, I had a little bit of cheese mixed in with my baked sweet potato and it was glorious.  I decided at some point I was going to jump in with both feet and make a savory baked sweet potato.

Last week I tried it out and will never go back to butter and cinnamon on a sweet potato again.

Andrea’s Loaded Baked Sweet Potato

  • Sweet Potato
  • Pepperjack Cheese
  • Sour Cream (I use Greek Yogurt)
  • Hot Sauce of Choice
  • Chopped Green Onions

Bake sweet potato in oven at 400 for about 1.5 hours.  How long will depend on how big your potato is.  Baking a sweet potato is similar to baking a regular potato. Poke holes in it first.  I do not put anything on the skin of the sweet potato. I line a baking sheet with foil, spray with oil and bake the sweet potato as is.

After baking, cut open and top with the above toppings.  Amount is up to you.

Eat and enjoy!

The first time I had it, Scott had a regular sweet potato with butter.  He told me I was crazy.  He said that it was a little odd.

Then he had a bite.

Now he’s converted.

If you’ve never tried sweet potatoes as savory, I highly suggest you give it a taste.  Just to see.  Maybe you’ll surprise yourself.

Have fun guys, and remember, always play with your food!  Enjoy!

Quick Sidedish: Sauteed Greens With Beans And Corn

Sometimes life dictates dinner.  We need something fast and quick to get on the table.  Sometimes we need to bulk up leftovers or supply a quick dish to go along with something else we already have on hand.

Needing something quick doesn’t mean that it has to come from a box or be a processed food item.  Or even something premade.  We can make quick dishes at home with only a few ingredients.

This dish fits those requirements. It uses few ingredients and can be made very quickly.

I’m sharing an idea and a concept with you which means the measurements aren’t exact.  The amounts are up to you!

Andrea’s Sautteed Greens with Beans and Corn

  • Greens, finely chopped (Whichever greens you like)
  • 1 15oz Can of Black Beans, drained and rinsed
  • Frozen or Fresh Corn Kernels
  • Olive Oil for sauteeing
  • Garlic Powder
  • Chili Powder
  • Red Pepper Flakes
  • Salt

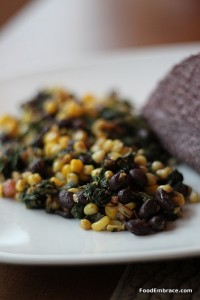
In a sautee pan, heat olive oil over medium high heat.  Add in greens and start sauteeing.  Sautee for about 5 minutes.  Add in the beans and corn along with the seasonings.  Continue to sautee for about another 5 minutes or until everything is cooked and heated through.

Plate and serve!

You can use fresh greens for this or you can use frozen chopped greens.  The amount of seasonings are up to you and you can use which ever you like!

Adding a touch of butter and a little hot sauce to this dish would probably be a good idea but of course it’s totally up to you!

Beans, frozen corn, and frozen greens are all great things to have on hand at all times.  They can easily be added to bulk up dishes or used to make quick meals.

Putting quick dishes on the table for yourself and your family can be easy and only take a few ingredients.  Not being afraid to try different combinations will open up a lot of new dishes and cooking experiences.

Pickled Jalapeno With Red Onion

I love pickled things. Ever since I was a kid, I have loved pickles. The texture and taste could not be more perfect in my opinion. Crunchy, salty, tangy, and tart.

But the flavorings of pickled things can change and become whatever you want them to be.

  • Spicy
  • Garlicky
  • Dilly

And as I grew up and started expanding my food knowledge, I realized that pickled is a term.  A concept.  A technique.  It isn’t just a green cucumber slice, but in fact, it can be whatever you want it to be.

You can go through the whole canning process in creating your pickled concoction or if you want quick results, there’s  a quick refridgerator pickling method.

I bet you can guess which I go for.

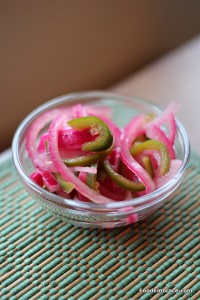
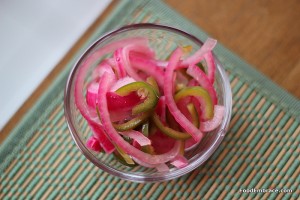
A recent viewing of Guy’s Big Bite is the inspiration for my quick pickled Jalapeno with Red Onions.  This took no time to make at all and were ready to eat by dinner time.

Andrea’s Quick Pickled Jalapenos with Red Onions

  • 1/2 Small Red Onion, thinly sliced
  • 2 Jalapenos, thinly sliced
  • 3/4C Apple Cider Vinegar
  • 3/4C Water
  • 1/2TBSP Salt
  • 1/2TBSP Brown Sugar

In a medium sized glass bowl, add in the onion and jalapeno slices.  In a small sauce pan, add in the vinegar, water, salt, and sugar.  Bring up to a boil and reduce to a simmer.  Cook just long enough that all the sugar and salt is dissolved.  Remove from heat, and pour mixture over the onions and jalapenos.  Allow to cool, then cover and place in refridgerator.

Let sit for several hours before serving.

This quick pickle turned out better than I anticipated.  It was perfectly crunchy, cool, and delicious.

I choose to use ACV instead of white vinegar because I wanted that little extra sweetness you get from the apple cider vinegar.

I seeded the jalapenos but if you prefer things a bit spicier, leave the seeds in for extra kick.

The beauty of this quick pickle is that this is just a base recipe. You can add in extra seasonings and spices that suit your tastes.

Next time I make this, I’m going to go for some extra kick.  I’m going to add in some garlic and red pepper flakes.  Oh yes!

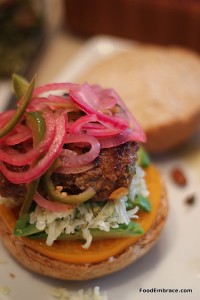
I’ll let you in on a little secret.  Not only is it great to eat straight up or on a salad, it makes for a lovely sandwich or burger topper.

Have you tried pickling at home?

And I mean that in a completely G-rated family friendly kinda way, of course.

Have fun guys, and remember, always play with your food! Enjoy!

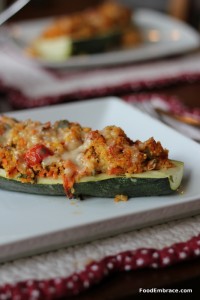
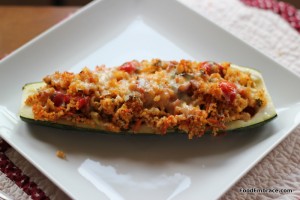
Stuffed Zucchini

We are in full swing with the summer season around here and one thing that is abundant at the farmer’s markets is zucchini.

Not just any zucchini, but HUGE ones, longer than the length of my forearm.

Those kinds of zucchini demand the need for stuffing.  A lot of people stuff zucchini with ground meat, and this was highly typical where I grew up.  Ground beef was usually the meat of choice stuffed into the zucchini along with maybe some tomato sauce.

I like the flavor of cooked tomato along with zucchini but I wanted to do a meatless version of stuffed zucchini.  Instead of meat, I used my favorite grain, millet.

Andrea’s Stuffed Zucchini

  • 1 HUGE zucchini, (literally like a foot in length, or as big as you can find)
  • 1/2C Uncooked Millet
  • 1 1/2C Chicken Stock (or veggie broth)
  • 2-3 Green onions, chopped (both white and green parts)
  • 1/2C Shredded Carrot
  • 1C Cherry Tomatoes, quartered
  • 1tsp Garlic Powder
  • 1tsp Italian Seasoning
  • Shredded mozzarella or provolone (optional)
  • Olive Oil for sauteeing

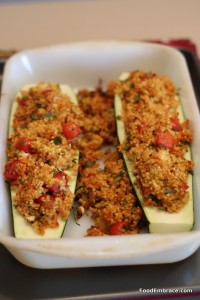
Preheat oven to 400 degrees and grease a baking dish by rubbing some olive oil around it. In a small sauce pan, heat over medium high heat and add about a teaspoon of olive oil to it.  Add in the uncooked millet and brown for about 2 minutes.  Add in the chicken stock and bring to a boil then reduce to a simmer.  Simmer until the millet is cooked and has absorbed the liquid.

Trim the edges of the zucchini and cut in half lengthwise.  Scoop out the insides being careful not to scoop down too far.  You want to create a long dent in the zucchini so you can stuff it with millet later.  Place zucchinis in the baking dish once they have been fully scooped out.

Once the millet has cooked, place in a medium sized glass mixing bowl.  Add in the tomatoes, carrot, and green onions. Add in the seasonings as well.  Mix until well combined.  Stuff the millet mixture into the zucchinis, packing them tightly.  If you have leftover stuffing, sprinkle that along the bottom of the baking dish.

Place in oven uncovered and bake until you hear the stuffing sizzling and the top is a golden brown color. The zucchinis should be cooked through by this point.  About 15 minutes.

Remove from oven and top with shredded cheese.

Because the zucchinis are so large, this can easily be a meal on it’s own.  If you want more, you can supplement with a side salad or maybe some sauteed greens.

This is a perfect make ahead dish as well.  You can prep everything in the morning before work (or even the night before) and bake it when you get home.  I would still bake at 400 but it will take a tad longer since the dish would be cold.  I would bake covered for about 15 minutes, and then uncovered for another 10-15.

I love millet and it works perfectly as a stuffing.  If you’ve never had millet before but have been curious (millet is also a great grain for those that have wheat intolerances), this would be a good way to get familiar with it.  The texture is like rice but it has a taste similar to polenta.

You could easily add some beans to the stuffing, if you wanted some extra protein kick.  Black beans or a white bean would work well with it.

Stuffed zucchini is a great way to use up some of abundance of veggies that are around this time of year.

Do you like zucchini? Have you ever had stuffed zucchini?

Have fun guys, and remember, always play with your food!  Enjoy!
Perfect Baked Potato

Recently, we discussed the baked potato bar and how it provides a great side dish to a meal.  Everyone can pick their own toppings and you can get creative with those as well!  In the comments, Monica asked me if I would explain how to make a baked potato.

I love questions from readers and will do my best to address any questions or concerns that you might have. So of course I can talk about how to make a baked potato! This method works for me every time and always presents a potato baked to perfection.

Andrea’s Perfectly Baked Potatoes

This is a method more than it is an exact recipe, keep that in mind as you follow along.

Preheat your oven to 400 or 425 degrees.  HOT! This works for one potato or several potatoes, the amount doesn’t affect the outcome nor the cooking time.

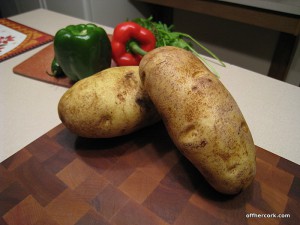
Scrub your potatoes so that the skins are clean and most of the dirt is gone.  You will need a sheet of foil large enough to wrap the potato in.  With a knife, poke holes in the potato. You will want a few good holes around the potato.  The reason for this is because potatoes have a huge water content and by poking holes in them, that allows steam to escape the potato as it cooks.  If you don’t do this, you risk the potato exploding on you.

This is not the desired result we are looking for.

Once you have holes poked in the potato, rub it down with a little bit of olive oil.  Then sprinkle it with salt, pepper, and garlic powder.  If you’re feeling funky, toss some grill seasoning on there as well.

Wrap the potato up in the foil and then place the potato right on the cooking rack in the oven.  The rack should be in the middle of the oven and the potato should be in the middle of the rack.

Bake for about one hour. If the potatoes are really large, it might take slightly longer than that.  To test doneness, remove from oven, unroll the foil and poke with a knife.  The knife should go in cleanly with no resistance.

When they are done, remove from oven, unwrap and place on plates.  Eat and enjoy!

Top baked potato with your favorite toppings and enjoy!

By wrapping the potato and rubbing it down with some oil, that helps the potato steam cook. This provides a really fluffy and creamy inside texture.  Because the oven is so hot, this helps crisp up the skin and speed along the cooking process.

Seasoning the skin creates a lovely smell as it bakes and gives the skin a little umph when you eat it.  Feel free to play with the seasonings and use what flavors you like.

Have fun guys, and remember, always play with your food!  Enjoy!
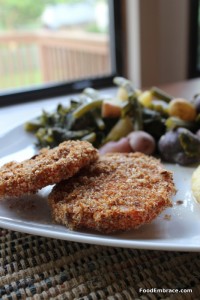
Unfried Green Tomatoes

The first time I ever heard about fried green tomatoes was because of the movie by the same name.  Before that they had not crossed my radar.  Like most things from the south, I was not exposed to them until much later in my adult life. Thank goodness for college, traveling, and cooking shows!

The idea of a fried green tomato intrigued me. The closest thing to it I did have was fried zucchini.  There was good fried zucchini and then there was horrible fried zucchini. If you’ve ever had fried zucchini, you know exactly what I’m talking about. I looked into making fried green tomatoes and realized the technique between the two was very similar.

Plus what a great way to use up unripe tomatoes! They are always in abundance come the end of summer, right?  Breaded warm tomatoes are amazing, maybe with a little cheese on top and you’ve got a really great side dish.

However I wanted to lighten them up a bit because I don’t like a lot of fried things.  I can handle a little but not too much.  Since I didn’t want to fry up the tomatoes, how could I make fried green tomatoes unfried?

The solution is simple; a metal cooling rack and a really hot oven.

Andrea’s Unfried Green Tomatoes

  • 2 Large Green Tomatoes, sliced thick
  • 1/4C Unbleached All-Purpose Flour, plus another 1/4C
  • 1/4C-1/2C Breadcrumbs (or cornmeal)
  • 1 Large egg, beaten plus some water
  • Hot sauce
  • Garlic Powder
  • Chili Powder
  • Salt and pepper

Preheat oven to 400 degrees.  Line a baking sheet with foil and place a metal cooling rack on top of that.  Spray the cooling rack with oil or nonstick spray.

Get out 3 large bowls and set up a breading station.  In one bowl goes 1/4C AP Flour.  In another bowl goes the beaten egg with water.  To the egg add your hot sauce, and mix a little more.  As much hot sauce as you like, just not so much that it makes the egg too liquidy.  In the last bowl add in the 1/4C AP flour along with breadcrumbs.  Add in seasonings to this bowl, to taste.  I like a lot of garlic powder and a touch of chili powder.  Mix.

Dip the tomato in the AP flour, then the egg mixture, then the AP flour and breadcrumb mixture.  Place on cooling rack.  Repeat until all the tomato slices have been breaded. If you need more of any of the ingredients, add along as you go.

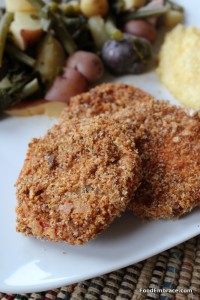
Once all the slices are breaded, spray or lightly brush the tops with olive oil.  Place in oven and allow to bake for about 10 minutes or until the breadcrumbs are nice and crispy.  Remove baking sheet from oven, plate the tomatoes and serve immediately.  Enjoy!

They come out crispy every time! They are slightly tangy from the green tomato but have a very savory note because of the seasoned egg mixture and seasoned breadcrumbs.  You can use this same method with zucchini as well.

The next time you find yourself with an abundance of green tomatoes give the unfried version a try, I think you’ll be pleased!

Roasted Veggie and Wheatberry Salad

Roasting veggies and adding it to a grain is one of the simplest ways to make a salad.  This could be a side dish or a main dish.  It can be made ahead of time for a quick meal or for party prep.

Using veggies that have a lot of moisture in them, like tomatoes and squash will provide you with automatic dressing.  No need to make extra sauce or dressing, it’s already built right in!

I love making dishes like this in the summer because they are so versatile. You can use whatever veggies are in season or what you happen to have on hand.  You can make a huge portion or a small amount. The dish can be served hot or cold.

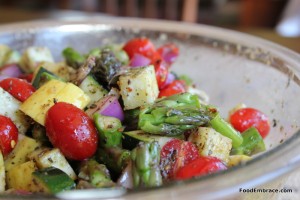
As you prep the veggies, you can’t help but be amazed by their gorgeous color.  Something that looks that good and also smells good, before you even do anything to it, you know will turn out super tasty.

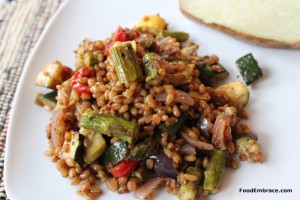
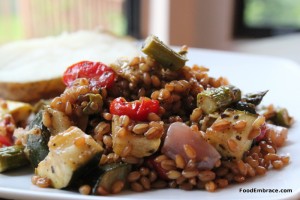
I recently made a roasted veggie and wheatberry salad which is perfect for summer meals.  Once you learn a concept, you can apply it to so many different dishes! Remember, this dish is open to preferences. Use what veggies you like and/or what you happen to have on hand.

Andrea’s Roasted Veggie and Wheatberry Salad

  • 1C Hard Wheat Berries
  • 1 Pint Cherry Tomatoes, cut in half
  • 1 Small Zucchini, chopped
  • 1 Small Yellow Squash, chopped
  • 1/2 Red Onion, chopped
  • 1/2lb Asparagus, chopped
  • Olive Oil
  • Garlic Powder
  • Italian Seasoning
  • Red Pepper Flakes

Preheat oven to 400 degrees.  In a medium sized sauce pan, add wheatberries and cover with water.  Bring to a boil and reduce to a simmer.  Simmer until wheatberries are cooked, about 15 minutes.  They will be soft but very chewy when done.  Drain wheatberries and set aside.

In a large bowl, add vegetables and toss with olive oil.  Use enough olive oil to coat all the veggies.  Add seasoning to taste and toss to combine.  I used probably about a tsp for the garlic powder and Italian seasoning, along with a huge pinch of red pepper flakes.

Line a baking sheet with foil and spray with olive oil or nonstick spray.  Spread the veggies out onto the cookie sheet and place in oven.  Roast for about 10 minutes or until all the veggies are soft.

Place cooked wheatberries in the previously used veggie bowl.  When the veggies are done, add veggies to wheatberries making sure to include all the juice on the baking sheet as well.  Combine all the veggies with the wheatberries.  Serve and enjoy!

Really simple right?  This is a great dish to take to a potluck or BBQ picnic because it can be served chilled or room temperature.  There’s nothing in it that will spoil if it sits out for a while.  Since it can be made ahead not only is it great for parties, but it’s perfect for weekday lunches or a quick dinner.

You could even add some spinach to this by adding fresh spinach to the wheatberries and adding the hot veggies on top of that.  The heat from the veggies will help wilt the spinach as you combine the dish.  Sprinkle with a bit of grated parm and enjoy your gorgeous masterpiece!

Have fun guys, and remember, always play with your food! Enjoy!
Baked Potato Bar

We’ve talked about my love for potatoes, right? I have so many great memories of potato dishes that I could never give them up.  I also have a soft spot in my heart for the potato since it gets such a bad rap from the low-carb crowd.

Let’s keep things real, a white potato is not evil. It’s a vegetable and has a lot to offer us in terms of nutrition. Let’s embrace the potato!

One of my many favorite ways to eat a potato is by loading up a baked potato. Whenever I got a chance to get a loaded potato out at a restaurant, I always ordered it as a side.  My high school alternated between a salad bar and a baked potato bar during the week, which I loved.  A huge baked potato for lunch? Yes please!

Because of how much I adore loaded baked potatoes, I’ve taken to recreating the experience at home.

By having a loaded baked potato bar at home that means I can control the quality of ingredients and make sure that I get to use all of my favorite toppings. Plus I can control the amount and have as much of the toppings I want!

When you create a baked potato bar at home, you get to pick the toppings!  We typically have:

  • Local bacon
  • Extra sharp cheddar
  • Greek Yogurt (sour cream substitute)
  • Chopped Green Onion
  • Grass-fed butter

Those are the favorite toppings for both of us.  I like tons of green onion and Greek yogurt while Scott loves lots of bacon and cheese.

But the topping ideas are endless!  For example you could also have:

  • Steamed or roasted broccoli
  • Small cooked shrimp
  • Different cheeses (Maybe a bleu cheese or perhaps goat cheese)
  • Veggie or meat based chili
  • Rice and beans

That is just a few examples but you get the idea.  Baked potatoes can be topped with anything you like!  It also makes a great idea for a dinner party.  Everyone gets a potato and can top it with what they like.  Serve with a lovely mixed green salad and dinner is served!  Everyone’s happy and it’s a dinner party that won’t break the bank.

With grilling season officially kicked off, try roasting the potatoes in the coals or in your fire pit. Just make sure to wash, poke them with holes, and wrap tightly in foil first.  If you make this a party, everyone can be responsible for handling their own potato from start to finish.  Heck you can even have out different seasonings and oils to rub the potatoes with before wrapping them in foil and baking.

All of the toppings for the baked potato bar can be prepped ahead as well, saving you time on party day.  Or you can use this as a nice meal that you can prep ahead for and have ready to go after a long day at work.

Loaded baked potato bar, a great way to dress up a baked potato and get your family or guests involved in the kitchen!

Do you like baked potatoes? What’s your favorite baked potato topping?

Have fun guys and remember, always play with your food! Enjoy!
Leftover Idea: Baked Mashed Potatoes

I’m not sure if we’ve ever discussed how much I love potatoes but I do. I love them more than Paula Deen loves butter and just by that statement alone, you know I mean business.

Potatoes are good for you. Potatoes are a veggie that can be utilized in so many different ways. Pasta? Forget about it. I prefer my carbs and starch from root veggies, thank you.

Leftover mashed potatoes can be just lovely on their own the next day but sometimes they need a little extra love and attention.

Sometimes you just want something a little different with your leftovers.

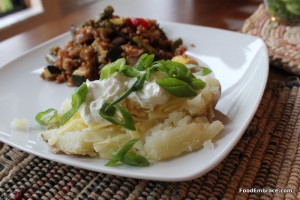
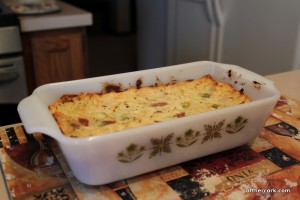
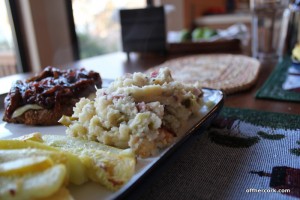
I took some leftover mash that we had, added a few extra ingredients, baked it for about 20 minutes and got an entirely new dish out of some basic leftovers.

Andrea’s Baked Mashed Potatoes

  • Leftover Mashed Potatoes
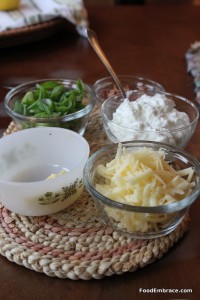
  • 5 Green Onions, chopped
  • 1/2C Greek Yogurt

Preheat oven to 400. Grease a small baking dish. Combine all above ingredients and place in baking dish. Bake for about 20 minutes or until the the edges and top get a crispy brown.  Serve hot and enjoy!

Pretty simple right? You could add some cheese in there too and maybe some bacon.  Or leftover ham? Heck you could even add some greens in there like spinach for some extra veggie action.  Leftovers are what you make of them, and they can be a completely different dish if you allow your imagination to wander a bit.

The measurements aren’t exact, it depends on how much you have left over and how much other things you want to add it.  It’s also a great way to stretch the use of some potatoes and save some pennies.

Have fun guys, and remember, always play with your food! Enjoy!
Pina Colada Smoothie

It’s the end of March and yesterday Columbus was blessed with a snowstorm that lasted all afternoon.  It was the last thing that any of us wanted. Okay, well there might be a few residents who don’t mind but the rest of us were cursing and shaking our fists in the air.

So to beat the winter blues, I’m posting something springy and fun!  Something that nourishes both the body and spirit.

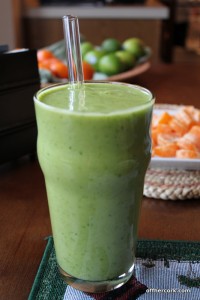
Pina Colada smoothie!  Super green in color to perk up any blah winter day and tasty enough that you might start looking around for some rum.

Andrea’s Pina Colada Smoothie

  • 1C OJ
  • 1C Unsweetened Coconut Milk (like SO Delicious)
  • 2 Large handfuls of baby spinach
  • 1 Frozen Banana
  • 1/2 C Frozen Pineapple
  • 1/4C Frozen Mango

Add all ingredients to a blender and blend until smooth.  This will be a thicker smoothie, like milkshake or frozen drink style.  Makes enough for two large glasses.

Perfectly tart and creamy. It tastes just like a pina colada but looks like spring. The amounts of frozen pineapple and mango are estimates because I didn’t measure those out.  Go by what you like.  The pineapple is more tart while the mango is more sweet.  You need to use enough pineapple to ensure you get the pina colada taste because that’s what makes the smoothie.

I’m telling you it’s tart so be prepared! But it’s refreshing and will remind you of the warmer temps that will be arriving soon!

Have fun guys, and remember, always play with your food! Enjoy!