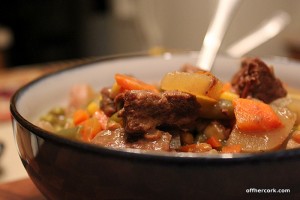
Making Stock

Recently I’ve taken to making my own stocks. I’ve made chicken and a pork and beef combo stock. I haven’t tried veggie although I should start since I always have a bunch of leftover trimmings.

I use stock a lot in cooking, everything from cooking rice to making soups.  I have it on hand at all times and it’s a pantry staple.

We don’t eat enough meat to keep us supplied with stock but I’ve been saving the bones after meals and storing them in the freezer.  Once I’ve got enough, I’ll make a pot of stock.

I admit that I was initially intimidated about making stock because people always stress (to the point of almost freaking out it seems) about making sure to properly cool the stock.

Most recommend sticking a bowl of the stock either in a sink full of ice or another bigger bowl full of ice.

I don’t have that much ice.

And truth be told, I’m not buying or making that much ice just to cool some liquid.

Sorry.

I talked to others, ones that make stock all the time, and no one mentioned the ice method.  Most people it seems just allow the stock to cool on it’s own.

Well I can do that.

And so I’ve started making stock as soon as I’ve got enough bones and scraps on hand.  It always smells amazing and tastes way better than store bought variety.

Not enough to warrant an increase in our meat consumption though!  Right now this works perfectly.

In a follow-up post I’ll tell you my approach to making stock and how easy it actually is!

French Onion Soup For Two

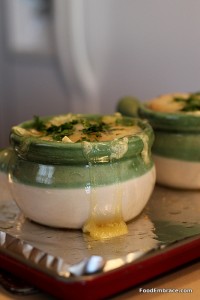
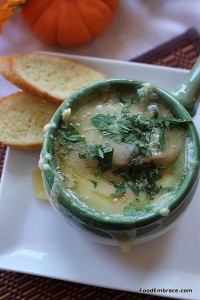
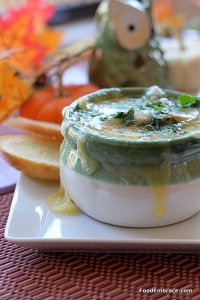
I adore French Onion soup. It’s warm and loaded down with caramelized onions. It’s got bread that helps thicken it up and then it’s topped with melty cheese. Plus served to you in a little crock pot! Can it get any better?

When Scott and I were dating, I would order this soup as a starter whenever I saw it on the menu.  It wasn’t the best “date” soup to be eating but Scott never minded me slurping away or when I had cheese dangling from my chin.

He’s a keeper!

Once I started making it at home, I stopped getting it out at restaurants.  For some reason I have not made this soup in ages and recently decided that I needed to change that.

My version is not traditional at all but it gets the job done.  When I’m craving French Onion soup, this is where I turn.

Andrea’s French Onion Soup For Two

  • 1QT Beef Stock
  • 1/3C Merlot (or another dry red wine)
  • 2-3TBSP Worcestershire Sauce
  • 1 1/2 Medium Onion, sliced thin
  • 1 Large Shallot, sliced thin
  • 2C Frozen, chopped greens
  • Salt and pepper to taste
  • Large Pinch of Red Pepper Flakes
  • Dash of Sage
  • Sprinkle of Garlic Powder
  • Olive Oil for sauteeing, about 1-1 1/2 TBSP
  • 1/2 of a baguette
  • Olive Oil for baguette, about 1TBSP
  • Swiss Cheese Slices, about four thick slices
  • Chopped Parsley for garnish

Preheat oven to 400 degrees.  Slice baguette on an angle and place on a baking sheet either lined with parchment paper or silipat.  Brush slices with a bit of olive oil and place on baking sheet.  Slide baking sheet into oven and bake until the slices are toasty and golden in color.  May take between 7-10 minutes.  Keep an eye on them so they do not burn.

Heat a soup pot over medium heat and add in the olive oil.  Once that is heated, add in the onion slices and the shallot.  Stir, add in salt, pepper, and red pepper flakes.  Stir again and reduce heat to medium low.  Cook onions and shallot for about 15-20 minutes, stirring occasionally.  They will soften and start to caramelize.  Once they have reached a nice light brown color, add in the sage, garlic powder and stir.  Add in worcestershire sauce, and stir. Cook for two minutes. Add in the merlot and stir.  Let cook for about three minutes.  Then add in the beef stock, the greens, and bring up to a simmer.  Simmer the soup for about 20 minutes.

While the soup is simmering, prep your soup crocks.  Brushing the tops of them with a bit of oil will help keep the cheese from sticking too much to the outside.

Once soup has simmered, ladle soup into the soup crocks.  Add in a few of the toasted baguette slices and top with slices of swiss cheese.

Place crocks on a baking sheet and very carefully place in the oven.  Let heat just until the cheese is melty and bubbling.  About 5-10 minutes.

Very carefully remove from oven and very carefully place soup crocks on a small serving plate.  Sprinkle tops with chopped parsley and add a few more baguette slices on the side.  Serve immediately and enjoy!

It was a cold Saturday afternoon and this soup made the perfect lunch.  It was warm and very filling!

Swiss cheese isn’t traditional but it was what I had on hand at the time.  I have made this with a lovely aged provolone as well, which gives the soup a nice little sharp bite to it.  The swiss was very creamy and melted perfectly over the crock.

The addition of the greens is because I wanted this soup to have a vegetable added to it, but not something that would over power or take away from the main flavor.  The greens gave it a little more umph and a little more balance.

Parsley on top just because it makes for a nice garnish!

Have fun guys, and remember, always play with your food! Enjoy!

Coffee and Cocoa Rub

You all know that I love a good rub down. Personally I’ll take a well rubbed hunk of animal over a marinated one any day of the week.

And twice on Sundays please.

Because of this I’m constantly creating new rubs and trying out different seasoning combos.

One that I couldn’t get out of my head was using coffee grounds in the rub.

If we had a compost pile or actually planted things around the house, those coffee grinds would be put to good use.  For now they end up getting tossed and I feel like that is such a waste.  I’ve been looking for new uses for them.

Some are to eat and some are for the body.

I decided to try out some of the grounds in a rub and both of us were pretty pleased with the results.

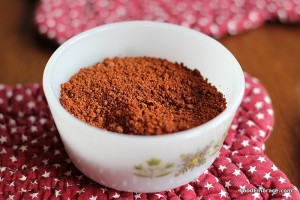
Andrea’s Coffee and Cocoa Dry Rub

  • 1TBSP Coffee Grounds (whatever you used that morning is fine)
  • 1TBSP Unsweetened Cocoa Powder
  • 2tsp Garlic Powder
  • 1TBSP Brown Sugar
  • 3tsp Chili Powder
  • 2tsp Smoked Paprika
  • Pinch Salt

Combine all ingredients in a bowl and use on chicken, beef, or pork.  You can even use this on veggies or tofu!

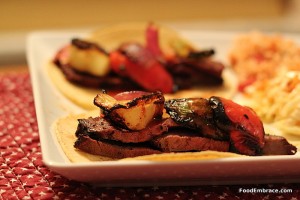
I’ve used this rub on a rack of ribs and also on some flank steak.  I prefer it on the steak!  It gave the steak an very lovely deep color as it grilled, along with providing a nice crust on the outside.

I fought Scott over the crispy ends!  We made tacos with the flank steak, grilling up some onions and peppers on the side.

You can also add a bit of oil to the rub to make a paste and use that on veggies or tofu, cooking them however you choose.

The coffee provided more color than it did flavor but the combo of coffee and cocoa did provide a more intense beef taste.

If you drink coffee, try using the grounds in recipes and experiment a little.

And if you’re going to be getting in some grilling because you’re not ready to let that go just yet, give this rub a try!

Have fun guys, and remember, always play with your food! Enjoy!

Weekend Grilling Recipes

Are you grilling this weekend?  Looking for something a little different to the standard hot dogs and burgers?  Want to shake up the summer grilling season for 2011?

Let Food Embrace help!  Here’s a few recipes that you can try out this grilling season:

Chardonnay Chicken Burgers

Cranapple Turkey Burgers

Grilling steaks? Try giving those babies a little rub down.

Rather have pork?  Beer Brined Pork Chops can be grilled.

Get funky with some chicken, yogurt curry chicken or cocoa-chili rubbed chicken will do the trick nicely.

Then you can wash it down with some super special iced tea.

Have fun this summer and get your grill on!

Skillet Burger Mac

Both Scott and I grew up with those meals that had a big hand as a mascot and wanted to “help” you out with dinner.  You know what I’m talking about. The meal ended up looking like runny cat vomit on a plate.

There’s a great image for ya!

But let’s be serious, that is totally true. It was also yummy once you stopped looking at it too closely.  In fact it was one of the few ways I would actually eat beef growing up.  I wasn’t much of a fan and ground beef was yucksville as far as I was concerned.

But add in some crap pasta and cheap powder preservative laden cheese sauce and I was all over it!

Years ago, when I started cooking full time for Scott and I, most boxed items went out the window. Once I learned the technique for making a basic cheese sauce, making a homemade version of “helper” anything became easy peasy.

Now we have an upscale, much healthier version that I bust out from time to time.  Or when Scott asks.

Andrea’s Skillet Burger Mac

  • 1lb Ground Sirloin (or ground meat of your choice)
  • 3C Whole Wheat Elbows
  • 1/2 Large Onion Chopped
  • 1 Green Pepper, 1 Red Pepper, chopped
  • 2C Shredded Carrot
  • 4 Huge handfuls of spinach
  • 4 TBSP White Whole Wheat Flour
  • 1/2C Unsweetened SO Delicious Coconut Milk
  • 1 1/2C Chicken Stock
  • 2TBSP Worcestershire Sauce
  • Salt and Pepper to taste
  • Big Pinch of Red Pepper Flakes
  • 2tsp Garlic Powder
  • 2tsp Chili Powder
  • 1 1/2C Shredded Cheddar
  • Olive Oil for cooking

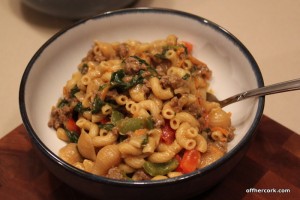
In a large pot, bring water to a boil and add in the pasta.  Cook until just half way down, drain and set aside.  In a medium sized, high sided skillet, add in olive oil, about 1/2TBSP and heat over medium heat.  Add in the ground beef and cook until done.  As it’s cooking sprinkle with a touch of salt, pepper, and garlic powder.  When it is done cooking, remove by putting in a bowl lined with some papertowels.  If the skillet has a bunch of oil in it, drain in a glass heat proof container.  Put back on medium heat and add in some fresh olive oil, about a TBSP.  Add in the onions, peppers, and carrots.  Stir and add in the seasonings, salt, pepper, red pepper flakes, garlic powder, and chili powder.  Cook until the onions and peppers soften.  Add in the worcestershire sauce and stir.  Add the ground meat back into the skillet.  Sprinkle in the flour and combine until everything is coated.  Allow to cook for about 2 minutes then add in the chicken stock, slowly.  Stir and add in the coconut milk.  Bring this mixture to a simmer and add in the spinach.  Stir until the spinach is wilted, then add in the cheese.  Stir until the cheese is melted.  Add in the pasta and combine.  Remove from heat, dish into bowls and serve!

I ran out of elbows so I had to improvise with some shells! Still got the job done though.  This also makes a lot resulting in plenty of leftovers for the next day or you can freeze and reheat for later.

The dish isn’t heavy or overly sauced like the old school inspiration nor is it a very heavy dish.  You would think with pasta, beef, and cheese it would feel and sit a little hard in the stomach but I promise it’s a light pasta dish.

You can use whatever ground meat you like, we have access to some great local beef so that’s what I stuck with to keep it more traditional.

Feel free to use milk or another nondairy liquid of your choice in place of the coconut milk.  Totally up to you! You can play around with the veggies too, maybe you want some corn or even some asparagus tossed in. Your call!

Perfect one pot dinner that takes a short time to make and pleases just about everyone!

Have fun guys, and remember, always play with your food! Enjoy!

Beef Stew

I have fond memories of some foods growing up and some not so fond memories.  Beef stew wasn’t one of those things that I looked forward to when my mom made it, sorry mom!

I always thought of beef stew as a hearty dish with lots of veggies, tender beef, and most of all a super thick gravy.  When I moved out, this is what I always strived for when making beef stew.  It took me a few years, some experiments, but I finally came up with a great beef stew that simmers away in the crockpot filling the house with enticing smells and the comfort of coziness.

I will forewarn you that while this does cook in a crockpot it does take some effort to get it there.  You have to be willing to work and love it a bit before allowing it to go off on it’s own and do it’s thing.

If you do that, then you’ll get a great bowl of stew at the end of the day!

Andrea’s Beef Stew

  • 2lbs Beef Stew Meat, cut into bite sized pieces
  • 1 Large Onion, chopped
  • 4 Large Carrots, peeled and chopped
  • 1 1/2C Frozen Peas
  • 2C Frozen Corn
  • 1/2C Green Lentils, uncooked
  • 2C Frozen Green Beans
  • 5-6 Potatoes, chopped into bite sized pieces
  • 2TBSP Unbleached All-Purpose Flour plus 4TBSP, Heaping
  • 1 Quart of Beef Stock
  • 1C Dry Red Wine
  • Salt and pepper to taste
  • 3tsp Garlic Powder, plus additional
  • 1tsp Ground Sage, plus additional
  • 2TBSP Worcestershire Sauce
  • Olive Oil for cooking

Set your crockpot to low and add in the potatoes, peas, corn, lentils, and green beans.  Once the stew meat is cut into bite sized pieces, place in a storage bag (or glass bowl) and sprinkle with some salt, pepper, and garlic powder. Not much, just a touch.  Then add in 2TBSP of flour.  Shake until all the pieces are coated.  In a medium sized sautee pan, heat olive oil, about 1TBSP over medium heat.  Add in a few pieces of stew meat, do not crowd the pan.  This may take two or three batches to get all the stew meat seared.  Sear meat on each side for about a minute then remove from pan and place in a bowl.  Repeat until all stew meat is seared.  You aren’t cooking the meat here but just giving it a nice little crust on the outside.  Add the stew meat to the crockpot.

Add in the onions and carrot to the hot sautee pan.  If you need to add in more oil, do so but not too much.  Sautee and add in the seasonings, including the Worcestershire sauce.  Cook just until you can smell the onions and they just start to soften. Add in the 4 TBSP of flour, stirring until the veggies are coated.  Cook for another minute or two.  Add in the red wine and half of the beef stock.  Cook until the mixture thickens and starts to simmer.  Remove from heat and pour mixture into the crockpot.

Stir all ingredients together, place lid on the crockpot and cook for at least 6 hours.

Stir, taste to see if more seasoning needs added, then spoon into bowls and serve hot.
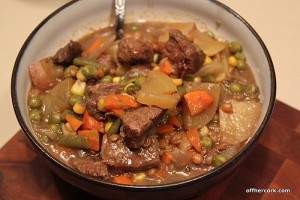
So while it does take some prep work, I promise you that by the end of the day when you’re tired and dinner is ready, you’ll be thankful you took that time.  Everything is tender and the red wine adds some depth to the dish that you won’t get just from using stock.

You might think sage is an odd herb to use but I really love it paired with earthy dishes.  Beef is deep in flavor and full of earthy tones. Sage goes great with that and the red wine makes everything stand out.

You’ll want to use a red wine that you would drink and you want it to be a spicy dark one, like a merlot or cab.

Of course if you don’t drink wine, or don’t have any on hand just use more stock. If you can though, I highly encourage you to use the wine.
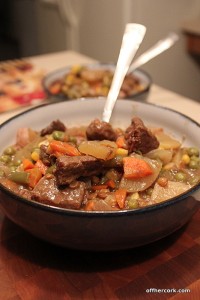
This is definitely considered one of my “Go Big or Go Home” dishes because this makes a lot.  Always perfect for leftovers and always perfect for freezing and using later.

Make sure to have some bread on hand for dipping and helping to get the last bits out of the bowl!

Winter comfort food at it’s best!

Have fun guys, and remember, always play with your food! Enjoy!
Pita Pizzas

Just like old times

Just like old times

When I was in middle school it was the 80s.  Hair bands and mall teen pop queens were in their prime.  And the thing to do back then was hit up the skating rink on Friday night.  Especially when you lived in a super small town and there was nothing else for you to do at that age.  The skating rink was a happening place and I taught myself how to skate.  And backwards skate.  And skate going around the corners with my feet turned out, heels touching.  My favorite thing to do was skate backwards and stop with my stoppers coming to a sliding halt.  My skates were white with blue wheels and a blue stopper.  And Velcro because when you are at the skating rink, it is all about the skating and not about wasting time lacing up your skates.  Oh and secretly crushing on the boys who preferred video games until the couples skate was announced.  Eventually I out grew my Velcro skates and moved on to bigger, more “adult” skates that I did have to lace up. I figured out a way to do it quickly with flair and grace.  I was still sporting blue wheels and a blue stopper though.  And, no, never pom-poms on my skates. I preferred the smooth classic chic look.

My favorite drink that I got every time I was at the rink was a “graveyard”.  This was a slushy that had all the syrups mixed in.  It became this deep purple color and it was the best drink a 12 year old could ask for.  The straw of course had the little scooper at the bottom so you get to the extra ice.  If I had extra money burning a hole in my jeans pocket then I got a slice of pizza.  Oh it was just some cheap frozen cardboard pizza run through a little toaster but to me it was perfection.  The cheese was all melty and stringy while the crust was crunchy and perfectly toasted.  I loved when I was able to get skating rink pizza!  Never had it again in my adult life until one day I got the bright idea to make a pita pizza.

It was a late night that found Scott and I both hungry.  We didn’t want anything huge but needed something substantial.  “Pita pizzas!” I said.  How easy is that, and pitas are good for you too!  So I made us some and heated them in the oven.  When they turned golden brown I pulled them out and served them up.  My first bite was heaven and I yelled, “OMG these taste exactly like skating rink pizza!” which I think I scared Scott a bit with my unbridled enthusiasm.  Immediately I was transported back to the rink with my blue and white skates eating a slice of pizza and sipping on my graveyard.  What a nice memory.

And I’ve been making pita pizzas for us ever since (I made one for Scott today!).  It’s a quick thing to make and pretty healthy when you break it down.  Even white pitas have loads of protein, are low fat, and low in carbs.  So today I bring you a concept more than a specific recipe.

Pita Pizzas!

You will need:

  • Pitas
  • Pizza sauce
  • Shredded cheese of your choice
  • Toppings of your choice

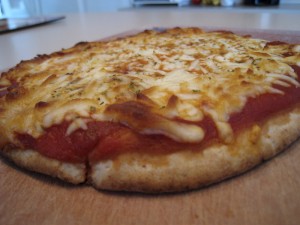
Preheat your oven to 400 and line a cookie/baking sheet with foil.  Spray with nonstick spray.  Put pitas on the cookie sheet and top with sauce, cheese, and toppings.  Bake for about 10 minutes or so until the cheese is bubbly and golden.  Remove, cut into 4 slices and serve!

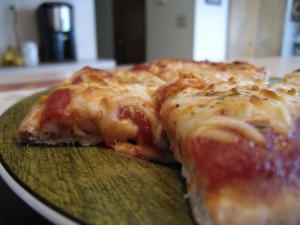
Pita Pizza

Pita Pizza

My favorite way to make a pita pizza is sauce and plain old shredded moz cheese. Sprinkle some Ms. Dash Italian blend on top and call it a day. These are great for parties and get-togethers because everyone can make their own! Have out a bunch of different cheeses and toppings so that people can pick what they like. Making sure to have plenty of meat options (sausage, ham, pepperoni) and veggie options (onions, peppers, spinach, tomatoes).  You can put out salsa and beans as well for topping choices. Since people are making their own they have more freedom over what they would like to eat. It makes for a fun activity and gets everyone in on the cooking!

And you can also grill these.  The side that’s going to be on the grill, brush with a little olive oil or veggie oil.  Top how you like, toss on the grill and cover for a few minutes till the cheese is melted and the pita is crispy.

These are simple, quick, and awesome to eat.  And if you’ve had skating rink pizza then perhaps these will bring back memories for you as well!

Enjoy guys! And remember: always play with your food!

Steak and Potato Frittata

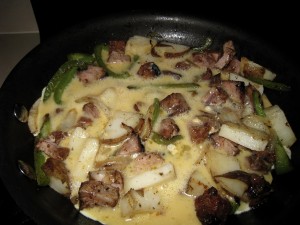
Frittata on the way to the oven

Frittata on the way to the oven

One of our favorite meals is a nice steak dinner. Marinated grilled steak with a baked potato and all the fixins. Classic. However, I cannot eat an entire steak. And depending on the size of the baked potato, I might not be able to eat a whole one of those either. We always have leftovers and I try to come up with different ways I can transform that classic meal into something else.

Enter the frittata. A frittata is a quick dish to make and it can take on any flavor or style you want to throw at it. So many different things one can do with a skillet and some eggs. The day after a nice dinner of grilled steak and baked potato, I decided to use those leftovers in a frittata. This is my version of a steak and eggs breakfast with a side of homefries.

Andrea’s Steak and Potato Frittata

  • 1 C of cooked potato, cubed
  • 1 1/2 C of cooked steak, cubed
  • 1/2 green pepper, chopped
  • 1/4 of a medium onion chopped
  • 1/2 C of shredded cheddar
  • 1/2 TBSP of dijon mustard
  • 1 TBSP of unsalted butter
  • 3 eggs
  • Salt and pepper to taste

Preheat oven to 400 degrees F. Heat an oven safe skillet over medium heat. Add butter, then when melted, add in the peppers and onions. Season with salt and pepper and cook for about 3 minutes until soft. As the peppers and onions are cooking, whisk together the eggs and mustard. This will take a minute or so but the mustard will incorporate into the eggs. When the onions and peppers are soft, add in the steak and potato. Stir and allow to just heat through, about 2 minutes. Pour egg mixture into skillet making sure to spread it out evenly. Allow to cook for a minute. Turn off heat and put skillet into oven. Cook until the frittata is set and cooked through, about 7-10 minutes. When the frittata is cooked, pull out the skillet and top with the cheddar. Put back in oven for another 2 minutes or until the cheese is melted and bubbly.

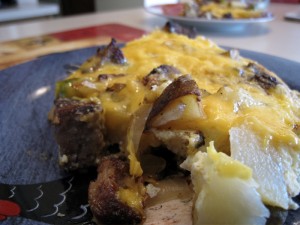
Remove from oven and allow to sit for one minute. Cut into quarters and serve!

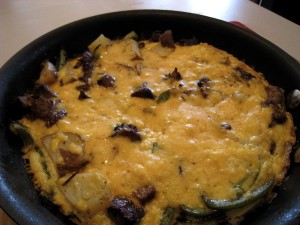
Just out of the oven

Just out of the oven

So far this is probably one of my favorite frittatas that I have made. Adding in the peppers and onions accentuates the steak and brings out the flavor of the potato. The mustard adds just a hint of something going on the background, a nice subtle kick at the end. And cheese just goes with everything!

Slice

Enjoy guys! And remember, always play with your food!