Root Veggie Mash with Sauteed Kale and Caramelized Onions

Root Veggie Mash with Sauteed Kale and Caramelized OnionsThis dish seems like it has all the veggies in it, and I guess it kind of does.  I wanted a hearty side dish that could stand on it’s own next to some roast chicken or pork chops.

Something that you could add gravy to or do nothing with and it would taste amazing.  I was also looking for another way to use kale.  As much as I love some sauteed kale, I do think it is one of those veggies that works better when paired with something else.

Like grits or maybe on some pasta.

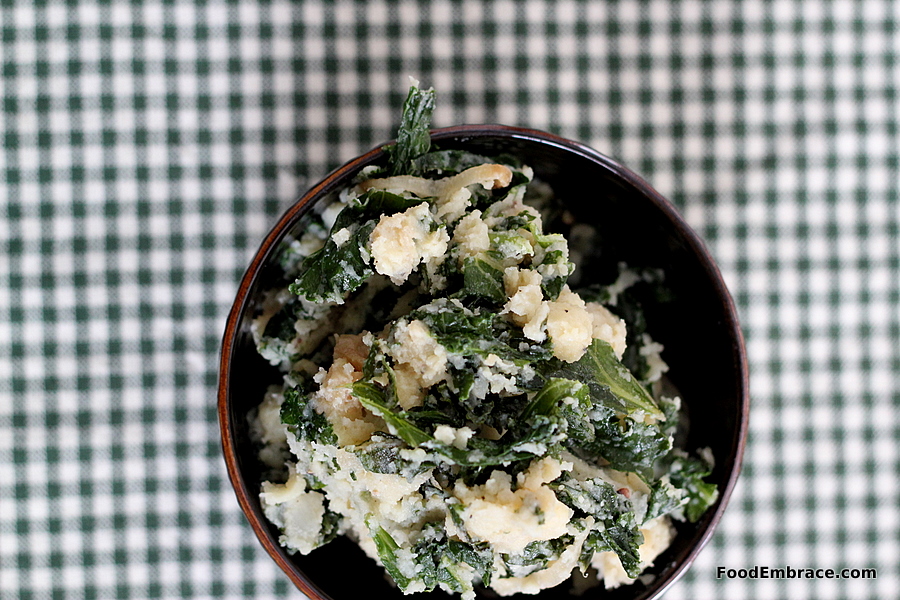
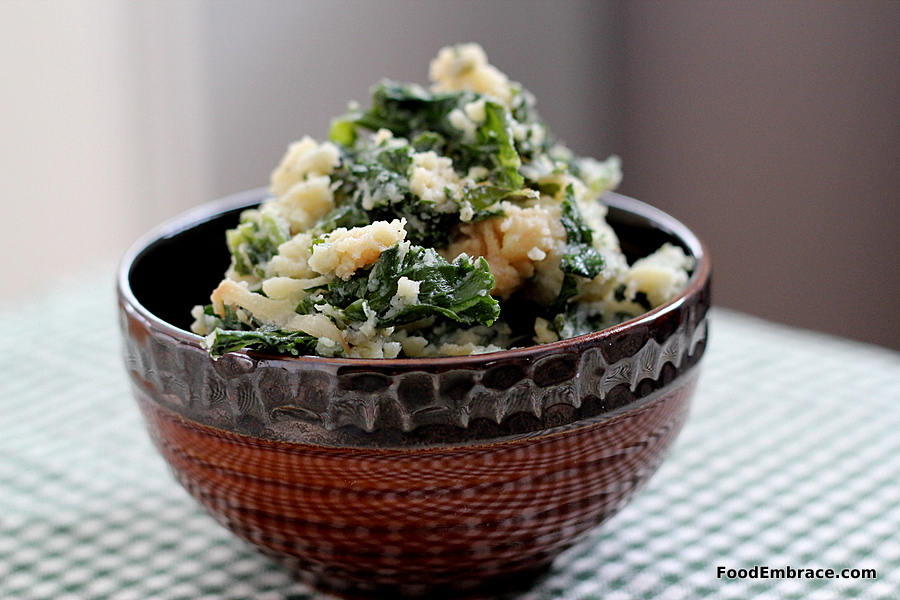
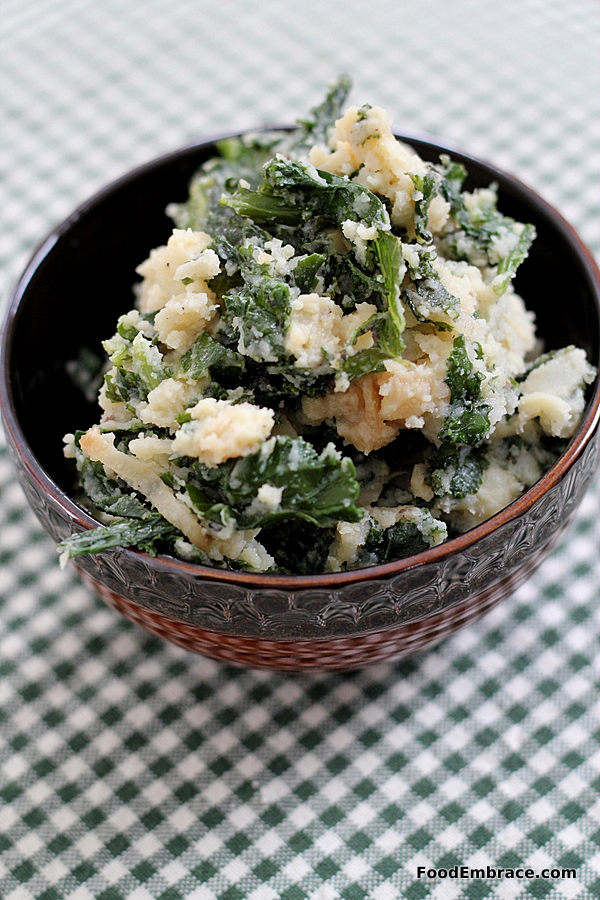
Eventually I thought about dressing up some mashed potatoes and making that a more substantial dish.  Add in the kale and this side dish became a rock star.

Andrea’s Root Veggie Mash with Sauteed Kale and Caramelized Onions

For The Onions:

  • 1 Small Onion, thinly sliced
  • 3TBSP Butter
  • 1/2tsp Kosher Salt

In a medium skillet, heat the butter over medium to low heat.  When the skillet is hot, add the onions and stir.  Sprinkle with salt and stir.  Reduce the heat to low and stir the onions every so often.  To caramelize onions, this takes a while.  It will be about 30 minutes until the onions are brown and ready.  Remove from heat and set aside.

For The Kale:

  • 2 Small Bunches of Kale, stemmed and chopped
  • 1TBSP Olive Oil

In the same skillet you cooked the onions, heat over medium heat.  Slowly add in the kale and toss with the oil.  You will have to cook this in batches (or use a larger skillet and cook the whole bunch).  Sautee the kale for about 5 minutes until it’s wilted.

If the skillet seems dry, add in more oil a teaspoon at a time.  Or you can use a tablespoon or two of water to help steam the kale.  Just make sure the water evaporates fully.

Remove kale from heat and set aside.

For The Root Veggies:

  • 1 1/2-2 pounds of Russet Potatoes, scrubbed, peeled and chopped
  • 4 Medium Sized Parsnips, peeled and chopped
  • 2TBSP Butter
  • 1/2C Whole Milk
  • 1tsp Salt
  • 1tsp Ground Black Pepper

In a strainer, rinse the potatoes thoroughly to remove the extra starch.  Add the potatoes and parsnips to a large pot and fill with cold water.  Bring to a boil and cook until the parsnips are fork tender (parsnips take longer than potatoes).  Remove from heat and drain the potatoes and parsnips.  Add them back to the hot pot and stir to remove any extra moisture.

Place potatoes and parsnips in a stand mixer bowl with the paddle attachment.  Start on lowest setting, and add in the butter, milk, salt, and pepper.  Up the setting to 2 until the mixture is creamy.  Reduce setting back to 1 (or the lowest setting) and add in the **kale and onions.

Turn off the stand mixer, stir the veggies with a spoon to make sure everything is combined.  Serve up immediately and enjoy!

**If you prepped the kale and onions earlier and they are cold, put the mash back in the large pot and heat over low heat until everything is back up to temperature.

Root Veggie Mash with Sauteed Kale and Caramelized Onions

I know this seems like a lot of work just for a side dish but I promise that it’s worth it!  Plus everything can be broken down into stages. The caramelized onions and kale can be prepped ahead of time or even the day before.  Heck, you can even prep them the week before and freeze them until you’re ready.  Just thaw, and lightly cook in a skillet to remove any extra water from thawing.  Then add to the mash when ready.

This dish can even be transformed into a baked dish.  Just add one egg to the mixture and place mixture into a greased casserole dish.  Bake at 400 for about 15-20 minutes until it’s bubbly and golden brown on top.  Add in some cheese (cheddar or parmesan would work great) for extra kick.  Do this with leftovers (as this makes a lot of veggies) or prep this whole dish ahead of time and easily reheat in the oven for dinner.

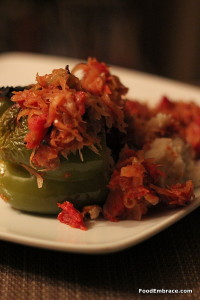
It’s a great side dish but also hearty enough to have as a standalone meal if you wanted (or it can even be stuffed into some peppers or squash).

Goodness you could even top it with a fried egg and have it for any meal!

Have fun guys, and remember, always play with your food! Enjoy!

Curry Cabbage Slaw with Sauteed Curry Shrimp

Curry Cabbage Slaw with Curry ShrimpIt was midweek and we needed something for lunch.  It was late in the day and I had a craving for shrimp. I was wondering if there was a way I could make some sort of shrimp and veggie salad.

Light enough for lunch but hefty enough to keep you full and satisfied for the rest of the day.

I’ve made a cabbage and radish slaw as a topper for fish tacos.  So I wondered if I could make a curry based slaw?  Full of curry spice but no heavy sauces to weight down the dish.

Crunchy cabbage and carrot slaw with curry topped with some curry spiced shrimp turned out to be one of the best dishes I’ve made recently.

Light enough for a late lunch but substantial enough that you can have this for dinner on a warm evening.

Andrea’s Curry Cabbage Slaw with Sauteed Curry Shrimp

For the Slaw:

  • 1/2 of a small to medium head of cabbage, thinly sliced
  • 2 Large Carrots, shredded
  • 1 handful of cilantro, chopped
  • 4 Green Onions, chopped, white and green parts
  • Juice of 1 large lime
  • 1TBSP Light Olive Oil
  • 1/2 tsp Curry Powder
  • 1/2 tsp Garlic Powder
  • 1/2 tsp Cane Sugar

In a large mixing bowl, add in the cabbage, carrots, and green onions.  In a small mixing bowl add the remaining ingredients and whisk until the sugar is dissolved.  Pour dressing over the veggies and toss until everything is coated.  Set aside for at least half an hour before serving.  Gently stirring every few minutes.

For the shrimp:

  • 16 Raw EZ Peel Shrimp, remove also the tail
  • 1/2 tsp Garlic Powder
  • 1/2 tsp Curry
  • 1/2 tsp Light Olive Oil
  • 1/2 tsp Soy Sauce
  • 1/2TBSP Light Olive Oil for sauteeing

In a medium mixing bowl, add all ingredients except for the 1/2TBSP olive oil, and gently toss together.  Heat the 1/2 TBSP of oil over medium heat and then add the shrimp in.  Cook shrimp about 2 minutes on each side and remove from heat.

Scoop out large spoonfuls of the slaw onto a plate and then top with the shrimp.  Serve and enjoy!

This makes two large servings with a little bit of slaw leftover.

Curry Cabbage Slaw with Curry ShrimpI’m not sure if Scott and I even talked with each other the entire time we were eating this dish!  It hit the spot perfectly and made for a great late lunch.

I think some extra chopped cilantro and maybe some crushed peanuts on top would be great additions and kick the dish up a little bit.

Have fun guys and remember, always play with your food!  Enjoy!

Leftover Ideas: Mashed Potato Stuffed Peppers

Pork chop with sauerkraut and mashed potatoesFor New Year’s Day, our tradition is to eat pork and sauerkraut for good luck and health in the upcoming new year. Normally I do country ribs in the slow cooker but I didn’t have any this year.  We had some bone-in pork chops instead but that left things off balance in terms of leftovers.

The pork chops were eaten leaving us with leftover mashed potatoes and sauerkraut.

What to do?

I had some green peppers that needed used up and figured that I could stuff those with the leftover mashed potatoes.


Mashed potato stuffed peppers with a tomato and sauerkraut sauce.I added a can of diced tomatoes to the sauerkraut and a little pinch of brown sugar (to help cut the tartness a bit), mixed that all up and poured it over top of the stuffed peppers.  I baked the stuffed peppers in a casserole dish at 400 for about 45 minutes.

The resulting dish was comforting and filling, perfect for a chilly evening.  I was able to utilize the leftovers in a new way and use them all up! I’m calling that a leftover success.

I’m pretty sure this might be a go-to dish now whenever we have leftover mashed potatoes.

Eggnog Oatmeal Cookies With Rum Raisins

Eggnog Oatmeal Cookies with Rum RaisinsSince eggnog is a staple in our house around the holidays I’m constantly trying to come up with new ways to use it.

Besides sipping some by the Christmas tree.

Rum is a pretty standard addition to eggnog and I wondered if I could some how incorporate that into some cookies.

Rum raisin popped into my head and I was off experimenting in the kitchen.

Chewy with a little warm holiday spice, these oatmeal cookies turned out just as I had hoped.

Andrea’s Eggnog Oatmeal Cookies with Rum Raisins

For the raisins:

  • 1C Raisins
  • 1/2C Rum
  • 1/4C Water

Place the raisins in a medium sized glass bowl.  Put the rum and water into a small sauce pan and gently heat until the mixture is warm.  Do not bring to a boil or a simmer, just heated through.  Pour over raisins and let steep for one hour.

Drain the raisins and set aside.

Keep the rum mixture! You can use that in waffles or even add it back into some eggnog later.  It’s now infused with the sweetness from the raisins so don’t toss it, use it up!

For The Cookies:

  • 1 1/2C White Whole Wheat Flour
  • 2C Old Fashioned Oats
  • 1/2C Cane Sugar
  • 1tsp Baking Soda
  • 1/2tsp Ground Cinnamon
  • 1/4tsp Ground Clove
  • 2 Large Eggs
  • 1/4C Molasses
  • 3/4C Eggnog
  • 5 TBSP Butter, room temperature
  • 2tsp Vanilla
  • 1C Rum Soaked Raisins

Preheat oven to 400 degrees**.  Line a baking sheet with parchment or grease with some butter.

In a large glass mixing bowl, combine the oats, flour, sugar, baking soda, cinnamon, and clove.  Whisk until everything is combined.

In a stand mixer using the paddle attachment, add in the eggs, butter, and sugar.  Mix until the butter and eggs are combined.  Add in the molasses, vanilla, eggnog, and combine.

With the stand mixer on low, slowly add in the flour and oat mixture.  Increase speed slowly until everything is mixed together.  Next add in the raisins and mix until the are just incorporated into the cookie batter.

Drop by the tablespoonful on the lined or greased baking sheet.  Create space between the cookies as they will spread while baking.

The size of the cookies will determine their bake time.  I made very large cookies and they took 20 minutes to bake through.  If you make smaller cookies, the bake time will decrease.  You will need to keep an eye on them as they bake.  Insert a toothpick in the center, if it comes out clean, the cookies are done.

Remove from heat and allow to cool.  Serve and enjoy!

**Above sea level, use 400 degrees as the baking temp.  At sea level, drop down to 375 for baking.

Eggnog Oatmeal Cookies with Rum RaisinsThe cookies are darker in color because I used molasses in the batter.  This gives a nice richness to the cookie and a little bit of a gingerbread feel.  The raisins add a little pop of sweetness and only a slight hint of rum.  You won’t be overpowered by alcohol flavor and it’s totally safe for kids to eat as well.

These also go great with coffee in the mornings. If you decide to roll that way.  And of course they are perfect with some eggnog!

Have fun guys, and remember, always play with your food!  Enjoy!

Butternut Squash Hummus

Butternut Squash HummusIn October I was at an event over at Whole Foods and I was lucky enough to be one of the judges in a contest between some local chefs.

The food was fantastic!  One dish in particular that I really enjoyed and found to be very unique was the squash hummus.  It was light, creamy, and slightly sweet.

Delicious!

I decided to try my hand at making something similar because I thought it would be the perfect dish to take to gatherings and potlucks.  Something familiar yet a little different.

While my version isn’t nearly the same as The Kitchen’s, it came out how I wanted and makes for a lovely party dip.  It’s also super simple to make!

Andrea’s Butternut Squash Hummus

  • 1 can of Chickpeas, drained, rinsed (and if you feel inclined, remove the skins)
  • 2C of Peeled and Cubed Butternut Squash
  • 1tsp Olive Oil
  • 1 3/4C Honey Yogurt (I used Noosa, but you can use Greek Honey as well)
  • 1/2tsp Ground Cinnamon
  • 1TBSP Maple Syrup

Preheat oven to 400.  Toss the squash with the oil and place on a baking sheet.  Roast until the squash just starts to soften and turns a little brown around the edges.

Remove from oven and allow to cool.

In a food processor place the chickpeas, pulse just until the chickpeas start to break down.  Scrape down the sides of the bowl, add in the squash, yogurt, syrup, and cinnamon.  Pulse until the mixture becomes smooth and creamy.

Store in the fridge for at least 30 minutes before serving.  Serve with graham crackers or lightly salted pita chips.

Butternut Squash HummusSee, easy peasy!

I had a large squash that I peeled and chopped.  I used two cups from that bunch and the rest I put in a bag in the fridge to use later.

If you do have this dip out at a party, it’s best to put it out in small batches and refill when needed. You don’t want the yogurt to turn.

This will last about 4 days in the fridge.

I made it sweet because I wanted a little something different but squash plays very nicely with spice as well.  You could use curry or even some chili powder here if you wanted to try and make a savory version.

Now you have something fun and easy to take to your holiday parties!

Have fun kids, and remember, always play with your food!  Enjoy!

Curry Butternut Squash Mac And Cheese

Butternut Squash Mac and CheeseIt’s cold out and winter is officially here, at least in our neck of the woods.  Which means all I want is the most comfortable of comfort foods.

Mac and cheese totally hits the spot but I wanted a little something different.  A little way to toss in some veggies and make it taste slightly more indulgent.

I thought if I pureed up some butternut squash and some coconut milk this might work to form a really creamy sauce.  It worked beautifully and we had a creamy cheesy dish to to eat while we snuggled on the couch in our jammies watching TV.

Andrea’s Curry Butternut Squash Mac and Cheese

To Roast:

  • 1 2 1/2 pound Butternut squash, peeled, seeded, and cut into chunks.
  • 1 Small onion, cut into chunks.
  • 1/2TBSP Olive Oil
  • 1tsp Curry Powder
  • 1tsp Garlic Powder
  • Sprinkle of salt and pepper
  • 3C Elbow Pasta

Preheat oven to 400 degrees.  Put the onion and squash in a bowl and toss with the olive oil and seasonings.  Place on a greased baking sheet and roast in the oven for about 25 minutes.

You can also cook the pasta at this time as well, 3C of elbow pasta.  Bring a large pasta pot to boil and cook pasta for 3 minutes. Don’t cook the pasta all the way, only take it to where the pasta is just beginning to soften just a bit.  It will finish cooking in the oven when the dish is fully together.  Drain pasta, put back in pasta pot, and set aside.

For the Sauce:

  • 1 Can Coconut Milk, full fat (you can use reduced fat if you like)
  • 1 1/2C Water
  • 1/2 tsp Curry Powder
  • 1/2tsp Garlic Powder
  • Pinch Red Pepper Flakes
  • Roasted squash and onion
  • 1 1/2C Shredded Jack Cheese
  • 2C Shredded Sharp Cheddar

Place the first five ingredients in a blender and blend till mixed.  Then add in the squash and onion and blend until everything is creamy and smooth.  You might need to stop along the way and use a spoon to help break things up.

In a large sauce pot, add the sauce and heat over low-medium heat.  Slowly add in the cheese until all the cheese is used and melted into the sauce.

Grease a 12×8 casserole dish. Add the sauce to the pasta in the pasta pot and stir until everything is mixed.  Then add that mixture to the casserole dish.

Place in the 400 degree oven and let bake for about 15 minutes.  Stir and bake for another 15 minutes.  Sprinkle the topping (see below) all over the top of the dish, give it another 5 minutes and remove from oven.

Topping:

  • 1C Breadcrumbs
  • 1/2C Grated Parmesan
  • 4 Slices of crispy cooked bacon, crumbled
  • 4TBSP Olive Oil

Mix all ingredients in a small bowl.

Allow the mac and cheese to cool for two minutes then serve and enjoy!

Butternut Squash Mac and Cheese

It’s going to seem like a lot of sauce but it will cook down once it’s in the oven.  That’s the reason for not cooking the pasta all the way.  The pasta will finish in the oven and absorb some of that sauce.

Creamy and slightly different with the curry powder.  Yeah, ok I used a lot of cheese and if you’d like to reduce that amount you can.  I used the jack for melty goodness and the cheddar to give it some bite.

The coconut milk provides the perfect base for the sauce because you don’t need to use any thickeners like flour.  You don’t even need to take the time to make a roux!  It also isn’t noticeable in the taste, no one is going to suspect you used coconut milk in this dish.

I had bacon on hand so why not?  You can omit that too if you’d like to keep it veggie friendly.

This makes a good bit of mac and cheese and is perfect for leftovers the next day.  It won’t last longer than that though so make sure to eat it up!

I was pleased how this dish turned out though I think I might tweak with it a little more and see what else I can do with it.  That’s the best part of cooking, just playing around with recipes and methods!

Have fun kids, and remember, always play with your food! Enjoy!


Eggnog Waffles

Eggnog WafflesA local dairy, Morning Fresh, makes eggnog for the holidays and it’s fantastic.

It’s thick, creamy, and full of holiday spice like nutmeg and allspice.  It’s hands down one of the best dairy eggnogs that I’ve tasted and during the holidays I always have a quart of it in the fridge.

We drink it but I also use it to bake with because it provides fantastic flavor.  I promise this is not an ad for Morning Fresh, I just really like their nog.

So on one of my days off, I decided to use some nog in waffles.  Oh and some rum.

This was a good decision.

Andrea’s Eggnog Waffles

  • 2C Unbleached All Purpose Flour
  • 1tsp Baking Soda
  • 3TBSP Cane Sugar
  • 1tsp Cinnamon
  • 1/2tsp Allspice
  • 1/4tsp Clove
  • 2 eggs
  • 1 1/2C Eggnog (can use non-dairy eggnog**)
  • 1/2C Water
  • 1/2C Rum
  • 2tsp Vanilla Extract
  • Melted butter or coconut oil to brush on the waffle iron.

Start to heat up the waffle iron. In a large mixing bowl combine all of the dry ingredients and whisk.  In a medium sized bowl, combine all of the wet ingredients and mix well.  Slowly add the wet mixture to the dry and gently whisk until everything is incorporated.

Allow the waffle mixture to set for about five minutes.

Brush the waffle iron with butter/coconut oil and pour a 1/2C of batter into the center of the waffle iron.  Close and cook for about three minutes or until the iron indicates the waffles are ready.

Repeat with remaining batter.

Serve while the waffles and toasty and warm!

Eggnog WafflesWe inhaled these waffles.  With grace though, we are civilized human beings even if we have bedhead and wear our jammies most of the day.

This makes several waffles which can be frozen and reheated easily either in a toaster or toaster oven.

**You can use non-dairy eggnog but since it isn’t as thick as the dairy version, you’ll probably need to reduce the water down to 1/4C or less.

It’s the holidays! Crack open the nog and the rum for breakfast.  Why not?

Slow Cooker Chuck Roast with Red Wine Sauce

Chuck Roast with Tomato Wine SauceI had an open bottle of red wine and a little two pound chuck roast, both of which needed to be used up.

I decided to try to combine the two and see what I could come up with.  I added some tomato sauce to the wine to help extend it, added some veggies, tossed everything in the slow cooker and hoped for the best.

It turned out delicious!

I love using the slow cooker especially on days when I’m at work all day long.  Coming home to dinner practically ready and serving itself is a huge time saver.

Andrea’s Slow Cooker Chuck Roast with Red Wine Tomato Sauce

  • 1 2lb Chuck Roast
  • 1 8oz Can of Tomato Sauce (your favorite brand)
  • 1C Red Wine (Whatever you have on hand)
  • 1/2 Medium Onion, cut in chunks
  • About 4 Large Carrots, also cut in to chunks
  • About 5-6 Small-Medium Potatoes, chuck in to chunks
  • 1/2tsp Salt
  • 1/2tsp Ground Black Pepper
  • 1tsp Ground Garlic
  • 2tsp Italian Seasoning

Pour the tomato sauce and red wine in the slow cooker and mix.  Add in the chuck roast followed by the veggies.  Sprinkle with the seasonings and cover with the slow cooker lid.

On low, cook for about 6-7 hours.

If you’re home, every few hours bast the veggies and roast with the sauce.  If you’re not around, don’t worry about it.

When the roast and veggies are done, strain as much of the juice from the slow cooker as possible.  Add to a medium sized sauce pan and bring to a simmer.  Reduce by half.

Cut the meat into portions and serve along with the veggies.  Use the sauce on top and enjoy!

Chuck roast with root veggies

This dish really couldn’t be easier and it’s totally adjustable.  You can use a bigger roast, just add in more wine and sauce.  You can add in as much veggies as you like.  I didn’t really keep track of how much I used, my goal was to have enough for leftovers.  The above amounts are guesstimates.

I served up the leftovers as sandwiches.  I shredded the roast, added that to the sauce and heated.  Placed that on buns with a little swiss and heated it up in the oven till the cheese was melty.  Served with leftover veggies, it was a great meal!

Easy slow cooker meal that looks and sounds fancy!

Have fun guys, and remember, always play with your food!  Enjoy!

Sloppy Joe Bowls

Sloppy Joe BowlsSloppy Joes made an appearance frequently at our house.  My mom made them frequently but it was always with some sort of mix.

Not the canned Manwich mix because that was a little too fancy for our household.  My mom used some sort of packet seasoning and the addition of tomato sauce.

I wasn’t really a fan of it but I ate it.

I couldn’t even tell you the last time I had a Sloppy Joe or was even interested in eating one.  But last week I craved that tangy and slightly spicy tomato sauce that goes with Sloppy Joes.

So what the heck, I decided to create a Sloppy Joe dish that also has veggies and served it over rice. Filling and perfect for getting snug on the couch and watching a little hockey.

Andrea’s Sloppy Joe Bowls

For The Rice:

  • 1C Long Grain or Jasmine Rice
  • 2C Water

Bring water to a boil and add the rice.  Reduce to a simmer and cook for about 10 minutes or until rice has absorbed all the water.  Remove from heat and cover.

For The Sloppy Joes:

  • 1lb Ground Pork (or any ground meat of your choosing)
  • 1-2 Large Carrots, shredded
  • 1 Large Red or Green Pepper, diced
  • 1 Yellow Squash, diced
  • 1/2 Medium Onion, diced
  • 2C Frozen Chopped Greens
  • 2 8oz Cans of Tomato Sauce
  • 1 14.5oz Can of Diced Tomatoes (do not drain)
  • 5TBSP Apple Cider Vinegar
  • 4TBSP Worcestershire Sauce
  • 1TBSP Cane Sugar
  • 4tsp Ground Chili Powder
  • 3tsp Garlic Powder
  • 1/2tsp Kosher Salt
  • 1tsp Ground Black Pepper
  • Big Pinch of Red Pepper Flakes
  • 1/2TBSP Olive Oil for cooking

In a large skillet (preferably cast iron if you have it), heat the oil up over medium heat.  Add in the ground pork and cook through.  Remove pork from the skillet and set aside.

Add in the carrot, pepper, squash, and onion.  Cook until everything starts to soften up, about 5-7 minutes.  Add the pork back in along with the frozen greens.  Add the seasonings and gently combine everything.  Add in the tomato sauce along with the diced tomatoes and combine.  Then add in the apple cider vinegar, the Worcestershire sauce, and the sugar.  Stir everything together and allow to simmer for about 20-30 minutes.

Once the mixture has thickened up, remove from heat and serve over rice.

Sloppy Joe BowlTangy, slightly sweet, and a little bit of heat brought this dish together.  The addition of veggies provides some heft to the dish. We had it over rice and the next night we had it over cheddar grits.

This could be served over baked potatoes or even stuffed in some taco shells.

You could also sub in lentils if you didn’t want to do a ground meat. About 3-4C of cooked lentils should do the trick.

This makes a good size portion of Sloppy Joes.  Enough for us to each have two meals and then some leftover for freezing.

When was the last time you had a Sloppy Joe?

Have fun guys, and remember, always play with your food!  Enjoy!

Ham Hock Bean Soup

Bean SoupGrowing up I didn’t really like beans.  The only beans I really willingly ate were green beans.

My mom and dad loved bean soup and they would eat it often for lunch during the winter months.  As a kid, I couldn’t wrap my head around the concept of bean soup.

Who wants to eat a huge bowl of only beans?

The answer now is me! I love beans as an adult and make up big batches of them to have on hand.  Cooking beans in a slow cooker is a breeze and it’s much cheaper to buy dried beans over canned beans.

Since the weather is turning colder, I decided to tackle making some bean soup from scratch starting with cooking up the beans.

I recently saw this recipe from Lori over at Fake Food Free where she used a wheat beer while cooking her beans.  This sparked the idea to use some beer while cooking up the beans for this soup.

Andrea’s Ham Hock Bean Soup

For The Beans

  • 1lb Navy Beans
  • 1 Large Smoked Ham Hock (or 2 if you want more ham)
  • 1/2 Large Onion, cut into chunks
  • 1 Bottle Dark Beer, (I used New Belgium’s 1554)
  • 10C Water
  • 3 Cloves of garlic

The day before you make this soup, soak the beans in water for 24 hours.  Drain, remove any debris and add the beans to the slow cooker.  Add in the ham hock and the remaining ingredients.  Cook on high for about 6-8 hours or until the beans are soft to the bite.

Remove the ham hock and drain the beans.  Be sure to save the liquid from the beans, you’ll need this for the soup (plus you just made awesome ham hock stock).

Once the ham hock cools, shred and set the meat aside.

For The Soup

  • 1/2 Large Onion, chopped
  • 3 Large Carrots, peeled and chopped
  • 4C Navy Beans
  • 4C Ham Hock Stock
  • 4C Chicken Stock
  • Pinch of salt and ground black pepper
  • 2tsp Ground Garlic
  • 1/2tsp Worcestershire Sauce
  • 1TBSP Olive Oil for sauteeing

In a large soup pot, heat oil over medium heat and add in the onions and carrots.  Sautee for about 5-7 minutes until everything starts to soften.  Add in the seasonings and stir.  Add in the stocks, the beans, and the ham. Stir and then add in the Worcestershire sauce.  Bring to a simmer and simmer for about an hour or until the carrots are cooked through.  Stirring occasionally.

Once the soup is ready serve with cornbread or biscuits and enjoy!

Bean SoupThis soup was everything I hoped it would be.  The dark smokey beer paired perfectly with the ham hock.  If you want, you can sub out some of the stock in the soup with another bottle of the beer.

Yes this took all day but it was totally worth it.  You can break this up and cook the beans one day and the soup the next.  Or you can freeze the cooked beans and shredded ham hock so that they are ready when you would like to make this soup.

I think the addition of maybe some greens would be great in this soup and I might do that next time.  Perfect soup for a chilly fall day.

You’ll have more ham hock stock then you’ll need for the soup so keep the leftovers for other uses or freeze to save for later.  And keep that bone so you can make more stock with it later!

Have fun guys, and remember, always play with your food! Enjoy!