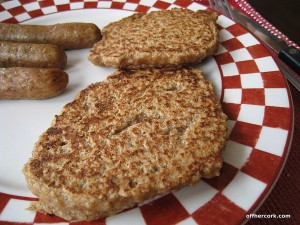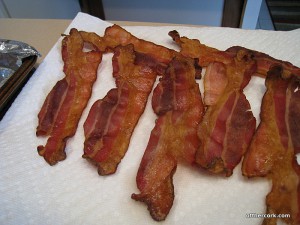
Maple Bacon Pancakes

Bacon is popular. And with good reason, it is mighty fine eats.  It’s crispy (unless you like limp bacon, which if you do, let’s not discuss that), salty, and smoky. Bacon has seen a new popularity though popping up in things like cupcakes and ice cream.

Or maybe that’s always been the case but now it’s getting more press.  Regardless it was time to jump on the train and do something with bacon.  We love bacon at the HQ and Scott is always tossing hints my way about putting more bacon on top of things.

I took the challenge.

As I was assembling things in the kitchen you could hear him muttering, “What’s going on Rocks?” (He always pretends to be talking to Rocky when he’s trying to work something out.) “She’s got bacon out but it looks like she’s making pancakes.”

All he had to do was put two and two together which would have given him maple bacon pancakes!

Andrea’s Maple Bacon Pancakes

  • 1/2C Cornmeal
  • 1 1/2C White Whole Wheat Flour
  • 1tsp Baking Soda
  • 1tsp Ground Cinnamon
  • 4 Slices of Cooked Bacon, chopped (the bacon needs to be crispy)
  • 2C Apple Cider
  • 1TBSP Maple Syrup
  • 1tsp Vanilla Extract

Preheat griddle on medium.  In a large mixing bowl combine cornmeal, flour, baking soda, and cinnamon. Whisk together.  In a smaller bowl, combine the cider, syrup, and vanilla.  Slowly add the wet mixture to the dry ingredients and gently stir until everything is combined.

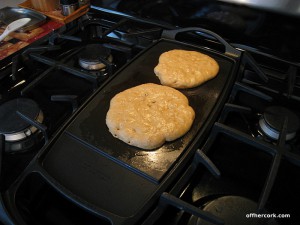
Drop by the spoonful on a greased griddle (I use olive oil) and cook until you see bubbles popping up in the middle of the pancake.  About 2 minutes.  Flip and finish cooking on the other side.  Roughly 1-2 minutes. Remove from griddle and serve warm.
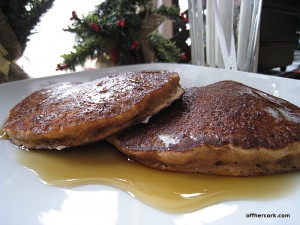
These pancakes turned out way better than I anticipated! They are fluffy and full of flavor making them perfect for a very cold and blustery winter morning.  The bacon and maple flavor is very subtle.  You get hints of smokiness and saltiness throughout the pancake.  The maple syrup on top helps keep everything balanced out.

The bacon softens a bit during cooking so there isn’t any hard crunchy pieces that catch you by surprise.  These are creamy and fluffy pancakes.
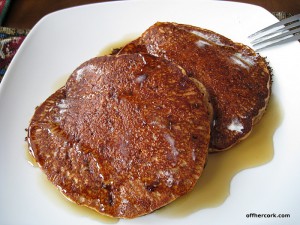
When I make pancakes my philosophy is the same as when I make soup or stews.  Go big or go home.  This batch makes a good bit of pancakes which can be frozen and toasted up later.  I reheat pancakes in the toaster oven this way they get a little crispy around the outside edges.

If you don’t have cider, you can use water.  You might have to add in a touch more syrup through to give some extra sweetness to the mix.  I find that milk, both dairy and nondairy, make pancakes heavy.  However if you want to use those instead of cider or water, go for it!

I can’t wait to toast up the leftovers and have them all over again! My first bacon inspired dish was a success!

Have fun guys, and remember, always play with your food! Enjoy!

This recipe was featured on Maple Syrup World.

Pumpkin Cider Corn Cakes

Pancakes are pretty much on the menu each Sunday here at the HQ.  Yes, occasionally we have eggs and sometimes waffles but nothing warms my heart and fills my belly as well as pancakes.

It’s an interesting turn of events really because I was never a real big pancake eater.  I ate them and liked them well enough but I didn’t seek them out or love them.  My mom would make pancakes from a boxed mix and make them into small silver dollar size rounds.

When I started making pancakes for myself and Scott over a decade ago (holy cow!), I did it the same way my mom did.  Then I gave up on pancakes for a while and didn’t really pay much attention to them anymore.

Until now.  Now I cannot get enough of the fluffy goodness.  I’ve learned that you don’t have to use a box mix.  Heck, you don’t even need eggs, milk, or butter to make them!

A few simple ingredients can yield yourself a great pancake.  I have found that I really like using cornmeal in pancakes.  It makes them a little fluffier and lighter to me.

With this being Pumpkin Month what better time to create a fall and pumpkin inspired pancake!

Andrea’s Pumpkin Cider Corn Cakes

  • 1 1/2C Whole Wheat Flour
  • 1/2C Cornmeal
  • 1/2C Pumpkin puree
  • 2C Apple cider
  • 1 tsp Baking Soda
  • 1tsp Ground Cinnamon
  • 2TBSP Sugar
  • 2tsp Vanilla Extract

In a large mixing bowl combine the flour, cornmeal, baking soda, and cinnamon.  Whisk together until everything is incorporated.  In a medium sized mixing bowl, add the cider, pumpkin, and vanilla.  Whisk that together until blended and then gently pour the liquid mixture into the flour mixture.  Stir to combine.

On a preheated and greased griddle, drop a large spoonful of batter onto the griddle.  Spread out the batter a bit with a spoon and allow to cook about 4 minutes or until you start to see bubbles popping up in the middle.  Flip and let the other side cook for about another 2-3 minutes.  You can stick a toothpick in the pancake to double check it’s done.

Remove from griddle, plate up and serve immediately!

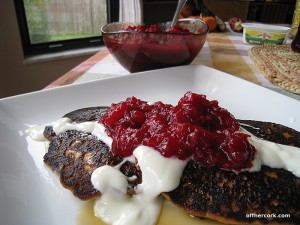
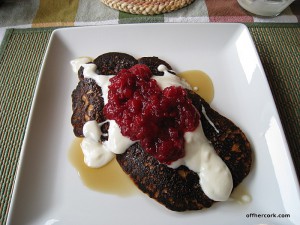
I like a lot of toppings on my pancakes!  The cider along with the cornmeal helps keep these pancakes light and fluffy.  They puff up a good bit as they cook but don’t let that fool you into thinking you are going to have a huge stack of cakes.  Once flipped they drop down, so don’t worry!

They also brown up a great deal which makes them look burnt, but they are not, just tasty!

Scott and I loved these pancakes and I’m going to be sad when cider is no longer in season because it gives a nice twist to the pancakes.

Make them big or make them small, just be sure to make some because they are a lovely tasty treat!

Have fun guys, and remember, always play with your food!  Enjoy!

Quinoa Pancakes

For those of you that read Mama Pea’s blog, you got a sneak peak of these babies last month.

I had a bit of leftover quinoa that I needed to use up and wasn’t quite sure what I wanted to do with it.  Seeing as how it was Sunday and Sunday Breakfast time, I decided, what the heck, and tried making pancakes out of it.

I was really pleased with the way these turned out!  Healthy pancakes with added protein punch?  I’ll take it!

Andrea’s Quinoa Pancakes:

  • 1 1/2C Cooked Quinoa
  • 1C Whole Wheat Pastry Flour
  • ½ tsp Baking powder
  • 1tsp Ground cinnamon
  • 1TBSP Maple Syrup
  • 1 1/4C Soymilk
  • 2TBSP Wheat Bran
  • 2TBSP Ground Flax
  • 2tsp Vanilla Extract

In a small mixing bowl combine the soymilk, vanilla extract, and maple syrup. In a large mixing bowl, combine all other ingredients. Gently add the liquid mixture to the quinoa mixture. Stir just until everything is combined.

Heat a griddle over medium heat. Brush with light olive oil and drop pancake mixture by the spoonful onto the griddle. Amount is up to you and what size pancakes you want to make. Cook for about 4 minutes on one side or until the middle starts to pop with air bubbles. Gently flip and allow to finish cooking on the other side. About another 3 minutes or so.

Makes roughly 8 medium sized pancakes.

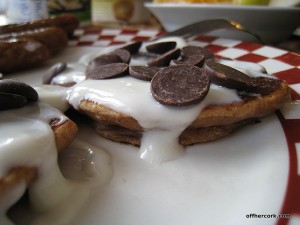
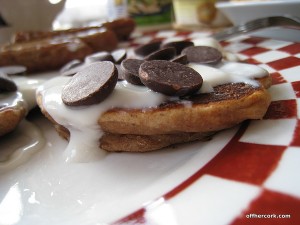
I dipped these babies in some yogurt and was really excited about the way they turned out!

Cooked quinoa can be heavy and weigh things down causing the cooking time to go up.  Eating the end result does not taste heavy or leave you feeling like you have a brick in your belly.  It just increases the cooking time, so keep that in mind if you make these pancakes.

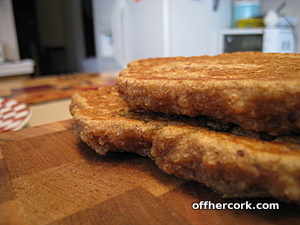
The texture of the quinoa melts into the pancake.  There’s a bit more of a chew to them but otherwise it’s just like a regular ole’ pancake.

They freeze and reheat well, just pop them in a toaster or toaster oven for a few minutes to warm and get crisp (all my pancakes freeze well! FYI!).

Got leftover quinoa, give some pancakes a try!

Have fun guys and remember, always play with your food!  Enjoy!

Peanut Butter and Banana Pancakes

Naturally since I got a brand spanking new fantastic waffle maker for Christmas, I have been in the mood for nothing but pancakes.

Figures.

Pancakes are in big rotation here at the HQ as a Sunday Breakfast staple.  I love coming up with new creations and flavor combos.  This newest pancake has the awesome combo of bananas and peanut butter!

Andrea’s Peanut Butter and Banana Pancakes

  • 1C Spelt Flour
  • 1C Unbleached All Purpose Flour
  • 1tsp Baking Powder
  • 1TBSP Ground Flax
  • 2tsp Cinnamon
  • 2 Bananas
  • 1 3/4C Soymilk
  • 1/4C All Natural Peanut Butter
  • 2tsp Vanilla Extract
  • Olive oil for cooking

In a large mixing bowl combine the flours, baking powder, flax, and cinnamon.  Stir with a whisk to combine and aerate the flours.  In a medium sized mixing bowl combine soymilk and banana.  Mash the banana with a masher until totally demolished.  Add in the peanut butter and vanilla, whisk till combined.  Gently pour the liquid mixture in with the flour mixture, stir with mixing spoon to combine.  Will need to add the liquid mixture a bit at a time.

On a griddle heated over medium heat, brush with some olive oil.  Drop pancakes by the spoonful onto griddle.  Cook on the first side about 4 minutes, until the middle starts to pop bubbles.  Flip and cook on the other side for about two minutes.  Remove from heat and serve!

Spelt flour is easily my favorite flour to work with, oat flour coming in to a close second.  I like using a mixture of spelt and all purpose because I think the all purpose flour helps to keep things light and fluffy.

You’ll notice that there is no added sugar to these pancakes.  The bananas help to sweeten them and if you use a vanilla soymilk (or flavored non-dairy milk of your choice) you will get some sweetness from that.  I used a vanilla soymilk here but plain works or whatever you want to use works!  I listed it as just soymilk in the ingredients but use what knocks your socks off.

The pancakes were light with just a touch of peanut butter taste in the background.  Yogurt and chocolate chip topping optional!

Enjoy guys! And remember, always play with your food!

Homemade Granola

I love granola and am pretty sure that I have always loved it.  I was never much into the chewy granola bars, I loved the crunchy more sturdy ones.  I always felt oh so healthy when eating granola.  It’s oats and nuts and sometimes fruit!  How can that be bad?

I also always purchased granola because for some reason I had it in my head that it was hard to make.  Eventually I started realizing how much money I was spending on granola because granola is flipping expensive!  I also became aware of how much sugar was in the granola.  I’m not a big sugar person anyway and when I realized just how much sugar is in manufactured granola, I sort of silently freaked out. I personally don’t want or need that much sugar in my life.

It was at this point that I started making my own granola.  It was a rocky start that resulted in plenty of burnt batches.  Lesson learned, granola is a project of love. Slow, easy, and steady will get you the results you want.  Aggression and haste will just leave you frustrated and unsatisfied.  None of us want that!

Andrea's Granola

Andrea’s Homemade Granola

  • 4C Old Fashioned Oats
  • 2TBSP Light Olive oil
  • 1/4C Maple Syrup
  • 3tsp of ground cinnamon
  • Fresh grated nutmeg, to taste (I do about 1/2 tsp)
  • 1C each crushed raw pecans and raw walnuts
  • 1/2C Unsweetened shredded coconut
  • 1C dried cranberries

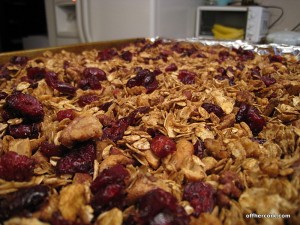
Preheat oven to 300 degrees.  In a large mixing bowl combine, oats, nuts, cinnamon, nutmeg, oil and maple syrup.  It takes about 3 minutes of stirring for everything to combine.  Allow to sit for 10 minutes.

On a large cookie sheet, line with foil and spray with nonstick spray (or use a mister with oil of your choice).  Dump oat mixture onto the cookie sheet and spread out.  Place in the oven and stir the mixture about every 10 minutes.  Bake the oat mixture for about 25-30 minutes.  The last five minutes of baking, mix in the coconut.

When the granola is browned and crispy remove from oven and allow to cool.  About 15 minutes.  When the granola is cooled, mix in the cranberries.  Store the granola in an airtight container.  Mixture keeps for ages so no worries about it turning on you.

Once I started making my own granola, I have turned into a huge granola snob.  Either I don’t care for the taste of other granolas or the ingredient list isn’t something that appeals to me.  Recently I came across some granola that had powdered milk as an ingredient.  Wha the what?  Why in the world is there powdered milk in granola?

So yeah, I’m totally picky now.

This is a loose granola.  This granola will not provide you with big cluster pieces.  In order to get that kind of granola, a lot of oil and liquid sugars are needed and that’s not something I’m down with.  If that’s what you like, feel free to up the oil and maple syrup amounts and see what happens. :)

This granola is awesome with yogurt, sprinkled on top of oatmeal, or even salads.  In fact I’m currently out and need to make more!  I suppose I should get moving.  The smell of baking granola is amazing and instantly makes the house that much cozier.

Leftover Idea: Stuffing Frittata

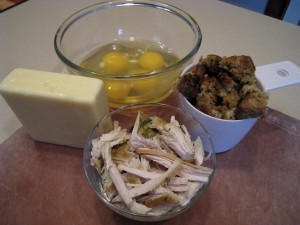
The cast

The cast

Still plowing your way through leftovers? This is one of my very favorite leftover recipes. I look forward to this all year long! I started doing this a few years back with leftover stuffing and have made it every year since. It’s so easy and so yummy! Perfect if you are hosting guests at your house and they are threatening bodily harm if you feed them another leftover. Disguise it!

Andrea’s Stuffing Frittata

  • 1 C overloaded with stuffing
  • 1 C of leftover chopped turkey
  • 4 eggs
  • 1 TBSP of olive oil
  • Shredded Cheddar for topping

Preheat oven to 400 degrees. In a medium sized skillet, drizzle in the olive oil and heat over medium heat. Then add in the turkey and stuffing. Whisk the four eggs and pour that mixture over the turkey and stuffing. Making sure the egg mixture covers the whole thing. Turn off heat and plop in the oven for about 5 minutes until just slightly shy of being set. Turn off oven and remove frittata. Sprinkle top with as much shredded cheddar as you like. Put back in the oven for about 3 minutes until the cheese is melted and frittata is fully set.

Remove from oven, cut into four slices and serve!

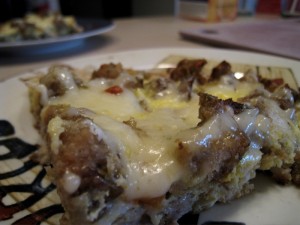
Out of the oven

Out of the oven

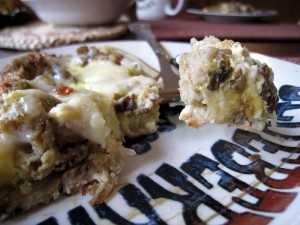
This dish is so easy to make and takes leftover stuffing to that next level of awesomeness. Stuffing is my favorite part of Thanksgiving dinner, so I’ll look for any excuse to keep eating it! I have made this with just stuffing and no turkey. This year I had a few bites of turkey still in the fridge so I dumped it in. But omitted, the frittata is still just as yummy.

If you have leftover cranberry sauce, some of that warmed and drizzled over top would make a really nice sauce for the frittata. You could also use egg whites in this as well. It’s up to you! Even playing around with the cheese and maybe using a pepper jack for some kick would be great! Get creative with those leftovers!

Stuffing Frittata

Stuffing Frittata

Have fun guys! And remember, always play with your food!

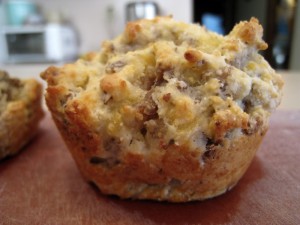
Sage Sausage Biscuits

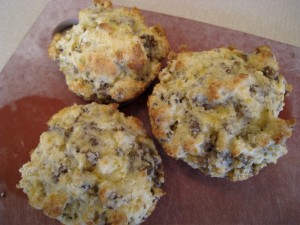
Right out of the oven

Right out of the oven

One of the things I love making are handheld food stuffs. Especially if it’s for a party, potluck, or just something simple to have on hand for holiday gatherings.

Another thing I love is sausage. I grew up eating all kinds and being Polish, you know you have to eat kielbasa as required by law. Back in the day on the rare occasions that I had a McDonald’s breakfast (I know, totally ew, but hey who hasn’t had one? Uh huh.) naturally it was all about the egg sandwiches right? I took off the egg and tossed it because it was icky. I only ate the muffin and sausage. That’s where it was at for me because it was all about the sausage.

I still like that combination but worked on making it a little more healthy. Yes, the dish has sausage but that doesn’t mean the dish has to be a total unhealthy fest. I worked on looking at it from a different perspective and presenting in a different form. Sage Sausage Biscuits are the result!

Andrea’s Sage Sausage Biscuits

  • 1pound of bulk sage breakfast sausage, cooked, drained and cooled
  • 1 C self-rising cornmeal
  • 1 C of all-purpose flour
  • 1 C of shredded cheddar
  • 1 C of half & half
  • 1 egg
  • Garlic powder to taste

Preheat oven to 350. With nonstick spray, spray a 12 count muffin tin. In a medium sized mixing bowl combine the cornmeal, flour, half & half, egg, and garlic powder. Then add in the sausage and cheese and mix until well blended. Spoon into the muffin tin and fill about 3/4 of the way full. Bake for around 15-20 minutes until the biscuits are brown and start to pull away at the sides of the tin. A toothpick inserted should come out clean.

Remove from oven and allow to cool for about 2 minutes then remove from the muffin tin. Serve warm. Makes 12 biscuits. If it seems like you have more mixture, make more biscuits!

Sage Sausage Biscuit

Sage Sausage Biscuit

I prefer using self-rising cornmeal because it makes life easier. But if you can’t find it or don’t use it, you will need to add 2 tsp of baking powder to the recipe so the biscuits will fluff up.

I love this little biscuit. The muffin tin makes them the perfect sized portion. They are a great dish to serve at brunch and can be made the day ahead. Just gently rewarm before serving. They can even be frozen and reheated right before serving. Or freeze and pull out one (or two) when needed.

They are also a great little treat to have during the holidays. Heat up and serve as an easy breakfast on Thanksgiving day. Since they can be made ahead, it’s one less thing to worry about on the big day.

Feel free to play around with it too! Maybe use spicy breakfast sausage and add some chopped jalapeno. Or shredded pepper jack instead of cheddar. Or both! It can be adapted to your personal tastes.

Enjoy guys! And remember, always play with your food!

Happy Holidays from OHC!

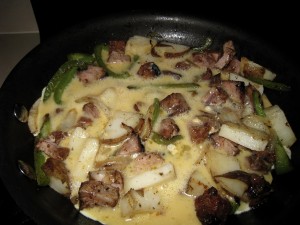
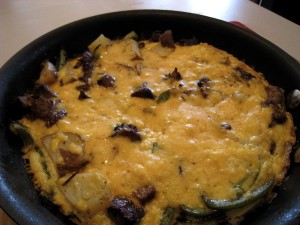
Steak and Potato Frittata

Frittata on the way to the oven

Frittata on the way to the oven

One of our favorite meals is a nice steak dinner. Marinated grilled steak with a baked potato and all the fixins. Classic. However, I cannot eat an entire steak. And depending on the size of the baked potato, I might not be able to eat a whole one of those either. We always have leftovers and I try to come up with different ways I can transform that classic meal into something else.

Enter the frittata. A frittata is a quick dish to make and it can take on any flavor or style you want to throw at it. So many different things one can do with a skillet and some eggs. The day after a nice dinner of grilled steak and baked potato, I decided to use those leftovers in a frittata. This is my version of a steak and eggs breakfast with a side of homefries.

Andrea’s Steak and Potato Frittata

  • 1 C of cooked potato, cubed
  • 1 1/2 C of cooked steak, cubed
  • 1/2 green pepper, chopped
  • 1/4 of a medium onion chopped
  • 1/2 C of shredded cheddar
  • 1/2 TBSP of dijon mustard
  • 1 TBSP of unsalted butter
  • 3 eggs
  • Salt and pepper to taste

Preheat oven to 400 degrees F. Heat an oven safe skillet over medium heat. Add butter, then when melted, add in the peppers and onions. Season with salt and pepper and cook for about 3 minutes until soft. As the peppers and onions are cooking, whisk together the eggs and mustard. This will take a minute or so but the mustard will incorporate into the eggs. When the onions and peppers are soft, add in the steak and potato. Stir and allow to just heat through, about 2 minutes. Pour egg mixture into skillet making sure to spread it out evenly. Allow to cook for a minute. Turn off heat and put skillet into oven. Cook until the frittata is set and cooked through, about 7-10 minutes. When the frittata is cooked, pull out the skillet and top with the cheddar. Put back in oven for another 2 minutes or until the cheese is melted and bubbly.

Remove from oven and allow to sit for one minute. Cut into quarters and serve!

Just out of the oven

Just out of the oven

So far this is probably one of my favorite frittatas that I have made. Adding in the peppers and onions accentuates the steak and brings out the flavor of the potato. The mustard adds just a hint of something going on the background, a nice subtle kick at the end. And cheese just goes with everything!

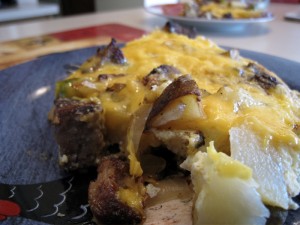
Slice

Enjoy guys! And remember, always play with your food!