Quinoa Cornbread

I love cornbread and I mean LOVE it.  Like real love and not just like-like, you know?  I’m also really picky about my cornbread.  I like it sweet, not too sweet, but it definitely needs to have some sweet background to it.  I also do not like things in my cornbread.

Things include:

  • Corn
  • Jalapenos
  • Bacon
  • Green onion

And any other variety of “things” that have the potential of throwing off the texture of the sweet divine bread.  Also?  Do you know when I like to eat cornbread?

For breakfast or for dessert.  Although if you ask me to pick a favorite time, it’s going to be with breakfast because sweet cornbread goes amazingly well with morning coffee.

At least in my world it does.

When I discovered that I could make cornbread on my own, goodness I was ecstatic! We rarely had cornbread at my parent’s house growing up.  In fact the best memories I have of eating cornbread were the little mini loaves that you got with your Boston Market meal.  I know, isn’t that totally sad?  What a bummer of a memory!  The upside is that the majority of the time that I ate Boston Market were with Scott because we didn’t have a Boston Market in my little rinky-dinky town I grew up in.  We didn’t even have a Boston Market where I went to college.  Boston Market didn’t become a common establishment known to me until Scott and I moved in together after college.  Our first apartment in the very first town we lived in together had a Boston Market.

And some of the best memories one can have are of your first apartment, am I right?  You know it!

Okay, and bringing it back to cornbread.  I had some leftover quinoa and pondered if I could make cornbread out of it.  Well I wouldn’t know till I tried!

Andrea’s Quinoa Cornbread

  • 1C Cornmeal
  • 1C Whole Wheat Pastry Flour
  • 1 1/2 C Soymilk
  • 1/2C Cooked Quinoa
  • 1TBSP Ground Flax
  • 1TBSP Cane Sugar
  • 2tsp Baking Powder
  • 1/2tsp Baking Soda
  • Pinch Salt

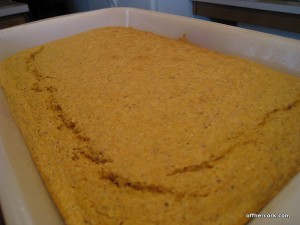
Preheat oven to 375.  In a small mixing bowl combine soymilk and ground flax.  In a large mixing bowl, combine remaining ingredients and mix.  Slowly add the the soymilk mixture to the dry ingredients.  Gently stir until everything is combined.  This will be a thicker batter.  Pour batter into a greased baking dish.  The one I used is roughly a 8×12 dish.  Spread the batter out to make sure it is forms an even layer in the dish.

Bake until a toothpick inserted in the center comes out clean, about 10 minutes or so.  Remove from oven and allow to cool for about five minutes.  Slice and serve.

Ultimately I would have used more quinoa but that’s all I had as leftovers.  The cornbread turned out really tasty and the quinoa melts right in.  You don’t even notice that there is something else added to the bread.  This bread came out light and dense at the same time.  I know that sounds totally strange but when you hold a piece, it feels like a hefty slice of bread.  However as you eat it, it is light and slightly crumbly.

If you are the type who can dig on things in their cornbread, then go crazy and add in jalapenos and so on.  This bread can definitely handle whatever you want to throw at it!  Some pepperjack cheese maybe?  Or some honey or maple syrup drizzled on top?  Mmmmm!

The bread freezes and reheats well.  And is also perfect for dunking into your favorite chili or accompanying that morning mug of coffee.

Have fun guys, and remember, always play with your food!  Enjoy!

Quinoa Spice Cookies

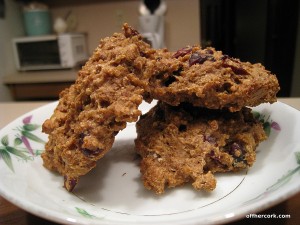
Naturally when I started playing around with quinoa, I immediately went the dessert route.  “Hey I bet I could make cookies.  How awesome would that be? Protein powered cookies!”

This was actually my first baking experiment with quinoa.  I wanted something that sort of reminded me of fall, cozy times, and early sunsets.

These cookies totally deliver and are actually one of the few cookies that get better with time!

Andrea’s Quinoa Spice Cookies

  • 1.5C Cooked Quinoa
  • 1C Whole Wheat Pastry Flour + 4 TBSP
  • 2tsp Cinnamon
  • 1/2tsp Allspice
  • 1/2tsp Ground Clove
  • 1/2tsp Baking Powder
  • 1/4tsp Baking Soda
  • 2TBSP Sugar
  • 2TBSP Ground Flax
  • 1/2C Dried Cranberries
  • 1/2C Crushed/chopped Walnuts
  • 1C Soymilk
  • 2TBSP Molasses
  • 2tsp Vanilla Extract

Preheat oven at 350 degrees.  In medium sized mixing bowl, combine soymilk, vanilla, and molasses.  Whisk until combined, set aside.  In a large mixing bowl combine all remaining ingredients.  Mix until everything is combined.  The flour will start to coat the quinoa.  Add in the liquid mixture to the quinoa mixture slowly.  Stir until everything is combined.  If the mixture seems thick and like you might need more liquid, add a splash more of soymilk.

On a lined or greased cookie sheet, drop the cookie mixture by the spoonful. These take a little bit longer to cook than regular cookies.  About 12 minutes or a few minutes longer.  Just until the cookies firm up and a toothpick comes out clean.

Allow to cool for a few minutes and then serve.

I know that looks like a lot of ingredients but don’t let it scare you away!  It’s mostly spices and these cookies are really easy to put together.

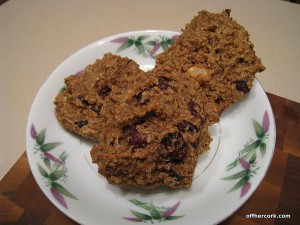
These cookies turned out exactly like I was hoping they would! They remind me of a nice spice or gingerbread cookie that are common around the holidays.  Every time Scott and I eat these cookies, the phrase, “Dang this are some good cookies!” is frequently heard. :p

What I’m finding with quinoa is that it does make batters heavy and increases the cooking time.  This is the case the with the cookies, they cook longer than regular cookies.  Just keep an eye on them to make sure you don’t over cook them.

Just an FYI, all the cookies (and most everything actually) I make freeze wonderfully.  This cookies will last in the freezer and just zap them quick in the microwave when you want a nibble.

These cookies are chewy, crunchy, and spicy.  They are perfect little bites of a healthy dessert.

Have fun guys and remember, always play with your food!  Enjoy!
Quinoa Pancakes

For those of you that read Mama Pea’s blog, you got a sneak peak of these babies last month.

I had a bit of leftover quinoa that I needed to use up and wasn’t quite sure what I wanted to do with it.  Seeing as how it was Sunday and Sunday Breakfast time, I decided, what the heck, and tried making pancakes out of it.

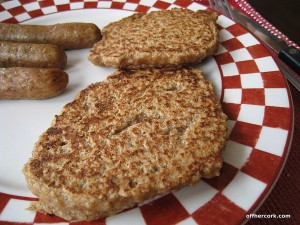
I was really pleased with the way these turned out!  Healthy pancakes with added protein punch?  I’ll take it!

Andrea’s Quinoa Pancakes:

  • 1 1/2C Cooked Quinoa
  • 1C Whole Wheat Pastry Flour
  • ½ tsp Baking powder
  • 1tsp Ground cinnamon
  • 1TBSP Maple Syrup
  • 1 1/4C Soymilk
  • 2TBSP Wheat Bran
  • 2TBSP Ground Flax
  • 2tsp Vanilla Extract

In a small mixing bowl combine the soymilk, vanilla extract, and maple syrup. In a large mixing bowl, combine all other ingredients. Gently add the liquid mixture to the quinoa mixture. Stir just until everything is combined.

Heat a griddle over medium heat. Brush with light olive oil and drop pancake mixture by the spoonful onto the griddle. Amount is up to you and what size pancakes you want to make. Cook for about 4 minutes on one side or until the middle starts to pop with air bubbles. Gently flip and allow to finish cooking on the other side. About another 3 minutes or so.

Makes roughly 8 medium sized pancakes.

I dipped these babies in some yogurt and was really excited about the way they turned out!

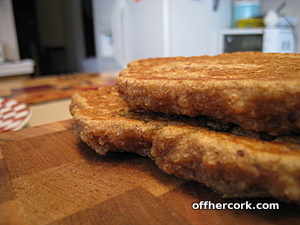
Cooked quinoa can be heavy and weigh things down causing the cooking time to go up.  Eating the end result does not taste heavy or leave you feeling like you have a brick in your belly.  It just increases the cooking time, so keep that in mind if you make these pancakes.

The texture of the quinoa melts into the pancake.  There’s a bit more of a chew to them but otherwise it’s just like a regular ole’ pancake.

They freeze and reheat well, just pop them in a toaster or toaster oven for a few minutes to warm and get crisp (all my pancakes freeze well! FYI!).

Got leftover quinoa, give some pancakes a try!

Have fun guys and remember, always play with your food!  Enjoy!
Cranberry Irish Soda Bread

I used to buy Irish Soda Bread at Whole Foods all the time when they had it out.  It was fantastic! It was also the first time I had tasted it before.  Irish Soda Bread wasn’t something I grew up with nor heard of until I saw it at Whole Foods.  I guess I just didn’t run around in circles where it was mentioned.

At some point I think Whole Foods might have changed their recipe because I don’t care for their version anymore.  Something about it just tastes off and I can’t quite put my finger on it.  I never really thought about soda bread again after that until I came across Happy Herbivore’s recipe for Irish Soda Bread.

It was her recipe where I learned that one could curdle non-dairy milk with a little bit of acid, either lemon juice or apple-cider vinegar.  Did you know that?  I didn’t so I was excited to learn something new!

Why curdle non-dairy milk? Because traditional soda bread calls for buttermilk but if you are looking to keep things vegan you need an alternative.  I remembered from my smoothie making that cranberry juice will also cause soymilk to curdle, although you need equal parts of cranberry juice and soymilk.  I decided to run with that concept and make my own version of Irish Soda Bread.

Andrea’s Cranberry Irish Soda Bread

  • 3C Whole Wheat Pastry Flour
  • 1C Unbleached All Purpose Flour
  • 1C Unsweetened Cranberry Juice
  • 1C Soymilk
  • 1 tsp Baking Powder
  • 1/2 tsp Kosher Salt
  • 1C Dried Cranberries
  • 2TBSP Organic Cane Sugar

Preheat oven to 350.  In a small mixing bowl, combine cranberry juice and soymilk, set aside for about five minutes.  The soymilk will start to curdle and separate.  In a large mixing bowl, combine all the other ingredients and whisk together.    Slowly add in the liquid mixture and stilr until everything is combined.  The dough will be sticky but will come together to form a heavy dough.  If needed, a splash more soymilk will help the dough form if there is still some flour not incorporated.

Sprinkle flour on a flat surface and kneed the dough for about a minute.  Dough will still be sticky.  Form into a large round loaf and place on a cookie sheet lined with parchment paper.  You can make a large X across the top of the dough with a knife to create the look of four sections.

Bake for about 40 minutes (could be longer) or until the bread has set.  A toothpick should come out clean.  Allow to cool before slicing.

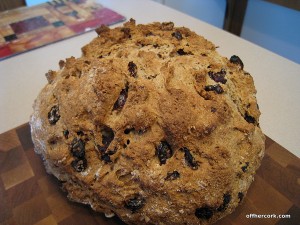
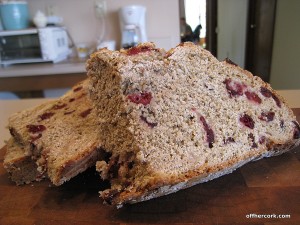
I expected the bread to be tasty but didn’t quite expect it to be amazing, which it is.  Both of us love this bread!  It has just the right amount of sweetness to it that makes you want to keep eating and eating.  I used cranberries because I like them over raisins in baked goods.  Plus they have a great color which leads well to presentation.  Raisins don’t have a lot going for them in the aesthetic department.

The Irish Soda Bread that I’ve had before had been really dry.  This bread is not.  It is not a super moist bread like a quick bread but it is not dry like a biscuit.  It holds together well and has a nice soft chewy bite to it.

It’s great at room temperature and also slightly toasted.  Goes well with coffee and a nice accompaniment with yogurt and granola.  I sliced mine up and froze the slices for easy access when the mood strikes.

Now that I have the method of curdling soymilk under my belt, who knows what else is in store!

Have fun guys, and remember, always play with your food!  Enjoy!
Spinach and Sundried Tomato Dip

This is a concept that I came up with a few years ago when it dawned on me that “pesto” can be made using a variety of ingredients.  I always have spinach on hand and (at the time) occasionally had sundried tomatoes on hand.  I decided to mix the two to see what would happen.

When I originally made this, I did add in some grated parm but left out the nuts.  This turned into an amazing spread and dip.  We instantly fell in love with the smooth spinach and the sweet chewiness of the sundried tomatoes.  The concept is super easy and can be adjusted to fit your tastes!

I never measure when I make this recipe, so this is more of a concept type post than an actual recipe with measurements.

Andrea’s Spinach and Sundried Tomato Dip

  • Fresh baby spinach
  • Sundried tomatoes (marinated or unmarinated, it’s up to you)
  • 1 garlic clove
  • Olive oil
  • Black Pepper
  • Red pepper flakes

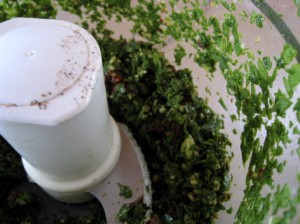
You will need a food processor to make this dip.   In the food processor combine about three large handfuls of spinach and roughly 8-9 sundried tomatoes along with the garlic clove (peeled of course).  Pulse a few times to get things moving along and broken down.  Then add in the black pepper, just a touch, and a pinch of the red pepper flakes.  If using marinated tomatoes in oil, drizzle in a bit of that oil.  Otherwise use a bit of your own olive oil, just a touch, about 1 tsp.  Pulse until everything is well combined and almost smooth looking.  You want to be able to see bits of spinach and tomato together.

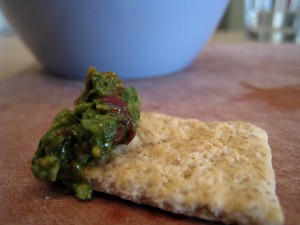
Scoop in a dish and serve! Either as a dip with crackers, on pizza instead of sauce, or even as a sandwich spread.

The first time I made this I did use it as a sandwich spread for a chicken sandwich and it was probably one of the best chicken sandwiches we ever had!  I now use it as a base for my pizzas on occasion.  I always have sundried tomatoes on hand now, or at least I try to.  Whole Foods actually has some great ones they put out but you have to seriously look for them.  They are in little containers and usually found around the olive and antipasto station.

I have served this as a dip at parties with crackers and chips.  I’ll add in some cheese if no one has an allergy to it.  I’ve mixed this with some cream cheese to make a lovely little spread for crackers and bread as well.  Mixed with the cream cheese it looks pretty and tastes fantastic.  II have also mixed this into some scrambled eggs for a different twist to breakfast.  And I’ve added it to polenta just for kicks.  There’s so much you can do with this mixture!

I don’t add salt because I use marinated tomatoes which have plenty of seasoning.  If using plain, I would add in a pinch of salt and maybe some Italian seasoning.

You can make this ahead of time, up to a day before you need it.  Possibly two, but I wouldn’t go longer than that or the spinach starts to turn on you.

If you like pesto style dips and spreads, give this a try!

Have fun guys, and remember, always play with your food!  Enjoy!
Cinnamon Vanilla Cupcakes

Last month for Scott’s birthday we discussed what sort of special dessert/snacky thing he wanted.  A lot of ideas were tossed around and he finally decided on Cinnamon Vanilla Cupcakes.

Those were his exact words.

Dude.  I don’t even know where he pulled that from! But in this house, whatever my hunny wants is what he’s going to get.

I poured over some websites and several of my favorite cookbooks and came up with a game plan.

This is how I work. I review several recipes to get an idea of how something is done and then I make my own version.

I fully expect that everyone else operates this way as well.  In my head no one follows a recipe exactly, we are all just a bunch of Kitchen Rogues blazing a path with a chef’s knife in one hand and a kitchen blow torch in the other.

Or something like that.

Andrea’s Cinnamon Vanilla Cupcakes

  • 1/2C Unbleached All-Purpose Flour
  • 1/2C Whole Wheat Pastry Flour
  • 1tsp Baking Powder
  • 1/4tsp Baking Soda
  • 2tsp Ground Cinnamon
  • 3TBSP Cane Sugar
  • Pinch salt
  • 2/3C Vanilla Soymilk + 1 TBSP
  • 2 1/2tsp Vanilla Extract
  • 2TBSP Light Olive Oil

Preheat oven to 350.  In a large mixing bowl, add all dry ingredients and whisk together until everything is combined and “fluffy” looking.  In a smaller mixing bowl, combine soymilk, vanilla extract, and olive oil.  Mix and then slowly add that to the flour mixture.  Gently stir the ingredients together.

Line muffin tins with cupcake liners.  Fill with cupcake batter about halfway full.  Bake for about 7-10 minutes or until a toothpick inserted comes out clean.  Remove from oven and allow to cool

Makes about 10 cupcakes.

These were my first attempt at vegan cupcake making (remember I prefer to bake vegan).  I’ve been making cookies and such for a while now so I figured it was time to branch out.  Good suggestion Scott!

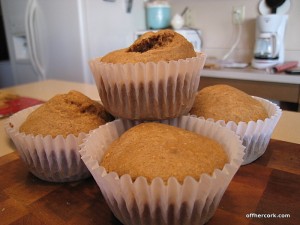
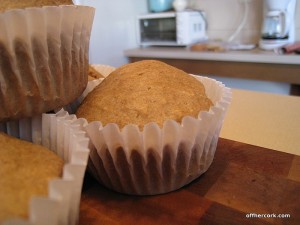
Aside from the fact that these stuck to the liners a bit more than I would have liked, they came out totally awesome.  Due to the WW flour they are slightly denser than a regular cupcake but that’s okay because we like that taste.

We ate them unfrosted but you could totally top them with a chocolate ganche of some sort.  I’m still working on making a great vegan icing that doesn’t include a ton of powdered sugar and fake shortening (ew).

Hooray cupcakes!

Have fun guys and remember, always play with your food!  Enjoy!
Spelt Pizza Dough

Pizza!!  I don’t know why it took me so long to finally post my dough recipe but here we are, woo!

Scott and I started Pizza Thursday I think in early 2009.  We love pizza and we decided that if we have it every week then we would be more open to playing with toppings and sauces.

Also because we have had trouble finding pizza we like in Columbus.  I know everybody has places they like but some of them are a little too far for us to travel for pickup for a Thursday night.

In order to satisfy our love for pizza we had to make our own.  I originally started out buying pizza dough from Whole Foods which was fine but it wasn’t awesome.  Plus it was pricey.  Yes it was still cheaper than buying a pizza out but if I made my own crust, I could save us loads of cash.

I searched around for dough recipes and started playing around with what I found.

It took me a few months to fully develop this dough and find out what worked for me and what flavors we really liked.  Once I got this down, I haven’t even looked at any other dough.

Andrea’s Spelt Pizza Dough

  • 2C Spelt Flour
  • 1C Unbleached All-purpose flour
  • 1C Warm water + extra
  • 1TBSP Active Yeast
  • 1TBSP Cane Sugar
  • 1TBSP Olive Oil + extra

You need a stand-mixer for this, it makes life a lot easier.  If you don’t have one, you can probably mix this by hand but I haven’t tried that so I cannot make any promises!

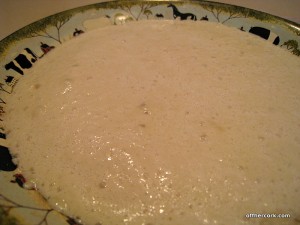
In a small non-reactive bowl (like glass) pour in the cup of warm water.  Slightly warmer than room temperature but not “hot”.  You should be able to stick your finger in the water and keep it there without feeling like the water is too hot.  To the warm warm add in the yeast and sugar, gently stir.  Allow yeast mixture to sit for about five minutes so it can bloom.  The picture above is that of bloomed yeast.

Fit your stand mixer with the dough hook and add in the yeast mixture to the mixing bowl.  Add in the unbleached AP flour and gently mix for about 2 minutes.  Stop mixer and add in the spelt flour and 1TBSP of olive oil.  Continue to mix on a low speed.  At this point you will notice that more water needs to be added to help the flour bind and stick together.  Again with warm water, slowly add some to the mixture as it mixes.  About 1TBSP at a time.  Some days you might not need much and other days you might need a few.  Keep an eye on it as it mixes.  You’ll see the dough start to pull together and form a ball. You should be able to touch the dough and it shouldn’t stick to your fingers.

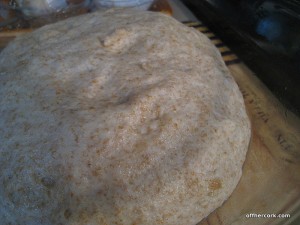
In a large mixing bowl, drizzle it with some olive oil and smear it around the bowl.  Once the dough has reached the ball stage, put it in the mixing bowl and turn it so that it’s coated in oil.  Drape the bowl with a warm damp towel and let it do it’s thing rising and going.

Let it rise for at least an hour and a half then do as you please with it.  Roll it out and start topping it for pizza!

You don’t have to use spelt, you can use whole wheat, whole wheat pastry, or all AP flour if you want.  We just prefer the taste and texture of spelt.

You can also flavor the dough.  I’ve added herbs, hot sauce, and loads of different seasonings.  You will want to add those when you add in the spelt flour.  Not too much, you just need a bit to season the dough.

This makes a good bit of dough, enough for me to roll out to a rather large pizza.  It provides enough that I can have three pieces, Scott has four, and then there are four to five slices leftover for Scott to have later.  You can split it and make smaller pizzas.

Sometimes I let it rise for an hour, turn it over punching it down and let it rise again.  Sometimes I let it rise for hours before pulling it out to start the pizza.  It’s really forgiving and very easy to play around with.

Once you get used to making dough it literally takes at most 10 minutes and you’re done.  Easy peasy!

Just a tip, for those that are vegan, you don’t necessarily have to look for vegan specific dough recipes.  Most straight pizza dough recipes are already vegan because there’s no dairy or animal products in the dough.

Now there’s no excuse for you to not try making pizza at home!

Have fun guys and remember, always play with your food!  Enjoy!
Coleslaw

I love coleslaw and I’m also extremely picky about my coleslaw.  I like it sweet and tart with just a hint of some heat at the end.

While I don’t mind mayo, I don’t want it swimming in mayo.  Really soupy coleslaw is gross.  I like coleslaw to have just a touch of dressing giving flavor to the veggies but not crushing them so they lose their crunch.

Speaking of crunch, I want to crunch and chew my way through coleslaw, not slurp it up.

Coleslaw needs to have some onion background.  Not overpowering but it needs to be present.  Coleslaw is also more than just cabbage, it can be a great opportunity to introduce some new veggies to the scene!

Now even though I don’t mind mayo, I have started making my coleslaw without.  One reason being is that I want to be able to make slaw for my vegan friends and friends who have dairy allergies.  Also because I want a slaw that can sit out at a party or BBQ without a time constraint and one that doesn’t strike fear into the very heart of my guests if it has been sitting out.

And finally because mayo, while alright, isn’t really that necessary.  Sorry mayo, not this time buddy!

I don’t have an exact recipe for you today, what I do have is more of a concept.  This is how I prepare coleslaw and what I like it to contain.

Andrea’s Coleslaw

Veggies:

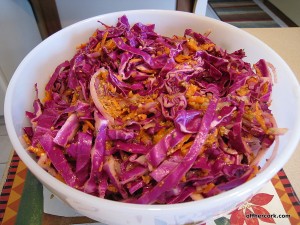
Cabbage:  It’s key and it doesn’t matter if it’s purple, green, or Napa.  It just needs to be cored and sliced thinly. Use the whole head because it will be delish and you will want extra.  Also because the cabbage will start to break down and soften a bit on you due to the dressing, so use a bit more than you think you’ll need.  Mixing cabbage is totally okay because everyone is welcome to the party.

Onions: I like red onion because it’s pretty and slightly sweeter than white onion.  Slice it as thin as the cabbage.

Carrots: It adds another color and more crunch plus bringing another veggie to the party.  I like it shredded.

Optional: Adding in some shredded zucchini or shredded beet.  Zucchini brings another texture while beets bring color and sweetness.  Just keep in mind that if you do use beets, everything will turn purple.  It happens.

Dressing:

Mustard, I love mustard and mustard makes up the base of my dressing.  I like to use a combo of whole grain and dijon.  Whole grain is spicy adding in some heat along with additional texture while the dijon makes things creamy.  Equal parts whole grain mustard with dijon.

Apple cider vinegar because it’s sweet and tart.  It just screams backyard BBQ to me. You just need a splash, enough to break up the mustard and make it a little more dressing like.

Cane sugar, just a pinch.  Maybe two teaspoons, this will help take out some of the tartness of the vinegar and mustard.

Olive oil, less than the vinegar amount.  While most will tell you that dressings call for more oil than vinegar, I don’t play that way.  I like vinegar more than I like oil, for me the perfect balance is less oil and more vinegar because I like the tartness.

Salt, just a pinch and lots of black ground pepper.  I love black pepper in coleslaw!  Add in a pinch of red pepper flakes to help bring out that heat at the end that I mentioned earlier.

Last, dried dill.  And lots of it!  Dill is amazing and smells like summer.  Add it to your coleslaw and you will never look back.

Optional add-in, some horseradish.  It blends well in the dressing and gives a nice kick in the background.

How much dressing you need will depend on how much veggies you have.  Keep in mind that carrots, zucchini, and beets contain a lot of liquid.  If you do use those veggies, they will add liquid to the dressing.

I make the dressing in the bottom of a very large mixing bowl, tasting along the way to make sure everything is tastes how I want it to.  Then I add in my veggies and toss till everything is coated.  Once everything is mixed, I transfer it to a smaller bowl and allow it to hang out for a few hours in the fridge before serving.

You can serve it immediately but allowing it the chance to sit will help the veggies take on the dressing and mingle nicely.

Coleslaw can be gorgeous AND tasty.  Coleslaw doesn’t have to be swimming in a mayo based dressing where you can’t even see the veggies.  Coleslaw can be as fun as it can be healthy.  Most of all, coleslaw can be whatever you want it to be.  Play around with ingredients and see what you come up with!

Enjoy guys! And remember, always play with your food!

Peanut Butter and Banana Pancakes

Naturally since I got a brand spanking new fantastic waffle maker for Christmas, I have been in the mood for nothing but pancakes.

Figures.

Pancakes are in big rotation here at the HQ as a Sunday Breakfast staple.  I love coming up with new creations and flavor combos.  This newest pancake has the awesome combo of bananas and peanut butter!

Andrea’s Peanut Butter and Banana Pancakes

  • 1C Spelt Flour
  • 1C Unbleached All Purpose Flour
  • 1tsp Baking Powder
  • 1TBSP Ground Flax
  • 2tsp Cinnamon
  • 2 Bananas
  • 1 3/4C Soymilk
  • 1/4C All Natural Peanut Butter
  • 2tsp Vanilla Extract
  • Olive oil for cooking

In a large mixing bowl combine the flours, baking powder, flax, and cinnamon.  Stir with a whisk to combine and aerate the flours.  In a medium sized mixing bowl combine soymilk and banana.  Mash the banana with a masher until totally demolished.  Add in the peanut butter and vanilla, whisk till combined.  Gently pour the liquid mixture in with the flour mixture, stir with mixing spoon to combine.  Will need to add the liquid mixture a bit at a time.

On a griddle heated over medium heat, brush with some olive oil.  Drop pancakes by the spoonful onto griddle.  Cook on the first side about 4 minutes, until the middle starts to pop bubbles.  Flip and cook on the other side for about two minutes.  Remove from heat and serve!

Spelt flour is easily my favorite flour to work with, oat flour coming in to a close second.  I like using a mixture of spelt and all purpose because I think the all purpose flour helps to keep things light and fluffy.

You’ll notice that there is no added sugar to these pancakes.  The bananas help to sweeten them and if you use a vanilla soymilk (or flavored non-dairy milk of your choice) you will get some sweetness from that.  I used a vanilla soymilk here but plain works or whatever you want to use works!  I listed it as just soymilk in the ingredients but use what knocks your socks off.

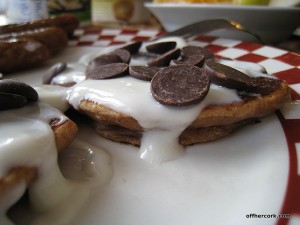
The pancakes were light with just a touch of peanut butter taste in the background.  Yogurt and chocolate chip topping optional!

Enjoy guys! And remember, always play with your food!

Vegan Chocolate Pudding

The first time I had vegan chocolate pudding was when I picked up a small container of it from Whole Foods.  I read the ingredient list which was not scary nor was it long, so I dumped into the cart.  It did use silken tofu as a base and while I don’t really dig on tofu, I decided to be open-minded and give it a try.

From that point we were hooked and would purchase it on occasion when making a Whole Foods trip.  However, like most things at Whole Foods, their pudding was overpriced and on the small side (sorry WF but you know it’s true).  I decided to look into making my own.  I checked a few recipes online just to get a basic idea of what is needed, reviewed the ingredient list of the Whole Foods version and started experimenting.

What I am currently doing takes no more than like five minutes prep time and uses only four ingredients.  It’s still a work in progress but so far it’s damn tasty and when your husband begs you to make him some Vegan Chocolate Pudding, it’s safe to assume you are on the right track.

Andrea’s Vegan Chocolate Pudding

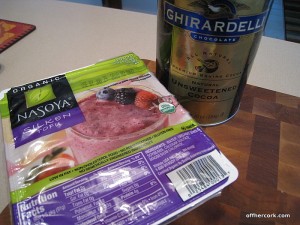
  • 1 pkg. (1lb) of organic silken tofu
  • 4TBSP (heaping) Unsweetened Cocoa Powder
  • 4TBSP Maple Syrup
  • Pinch (1/2tsp) of Organic Unrefined Cane Sugar

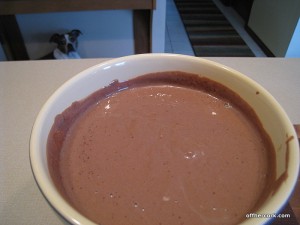
Drain as much of the liquid off of the tofu that you can and dump into a blender.  Add in the other ingredients and blend until everything is well combined.  Pour into a bowl, cover and refrigerate for about 2 hours.  Allowing the tofu to set back up.  Spoon into dishes and enjoy!

P.S. Or just eat straight from the bowl like we do!

I’m trying to experiment with different tofu textures because while this is a great pudding, it isn’t quite as thick as I would like it to be.  The one from Whole Foods was extremely thick and decadent but they also used silken tofu so I’m not sure how they achieved that.  I tried straining the tofu to get as much liquid out as I could but that didn’t really help matters.  I think maybe I need to not use the silken and try a slightly firmer tofu.

The pinch of cane sugar gives it just the right amount of sweetness that you won’t get from only using maple syrup.  I tried using only cane sugar and the texture ends up being a little bit grainy.  This combo works out really well, if you like sweeter though, then by all means use more sugar to suit your tastes.

You can use a food processor to mix if you don’t have a blender.

I like the concept because it presented me with a different way to view tofu.  Like I mentioned, I’m not a huge tofu fan.  The texture is weird and even marinaded, it tastes bland to me.  Creating this pudding gave me a chance to work with tofu in a new way and I realized that tofu doesn’t just have to be baked or stir-fried.  It has loads of possibilities!

This is a great tasting treat!  A lovely dessert that you can feel good about eating.  Pair it with some red wine and you have a great dessert on your hands.

Enjoy! And remember, always play your food!