Tuesday Tip: Time to start your holiday planning

gmail screenshot Hi gang!  I apologize in advance for the picture on the left, I thought it would have turned out a lot better than it did!  You can click on it though and see a larger image. :D

I realize that you probably are going to think I’ve dipped into the eggnog a bit on the early side but I assure you that is not the case.  Yes I am here to tell you that, like it or not, the holidays are upon us.  Once we hit September the rest of the year just flies on by, because of that, it’s time to start holiday planning.

No, I’m serious.  Listen friends, I’m already in the middle of planning a holiday party for November.  The reality is November isn’t that far away and to plan a holiday party means I need to be on it NOW.   Planning takes time and I am not a last-minute let’s-scramble-and-get-it-done kinda gal.

Perhaps you were aware of this character trait already?

Regardless, the holidays are a busy busy time.  Parties, meetings, get-togethers, dinners, it all starts happening right about now.  And if you’re traveling, even more planning needs to take place and start happening.

If you need some assistance, I recommend Google Calendar and I even think I talked about it last year.  Oh yes, here! :D   Google Calendar is amazing, especially since you can share calendars with other people.  You can create many different calendars for different activities, which you can see an example of some of mine if you click the link.

You can usually sync this with your phone as well if your phone has a calendar app.  This is a great feature!  With more and more people using Smartphones and iPhones, having your calendar within very easy access helps keep you on track and plan other appointments because you can check and cross-reference dates.  Or easily add an event right to the calendar via your phone.  I also have my phone set up to send me alerts when something in my calendar is coming up.  You can configure Google Calendar to send you email reminders about upcoming events as well.

Handy!

I am a calendar fanatic.  I must have a calendar within a glance at all times.  I like month views, not daily views.  Month views give me a better sense and grasp on how to plan and how my schedule is going.

This really isn’t a advert for Google Calendar, but I do urge you to try it out!  ;)  Really I’m here to tell you that — don’t fight it — the holidays are here and to make things run a bit smoother start planning and organizing now.  It will save you stress and headaches later!  This way you can enjoy the eggnog and punch because it’s tasty, not as a tool to help you cope with the stress of just now realizing you have three parties to attend that night!  With four more the following week!

Tuesday Tip: Blanching green beans

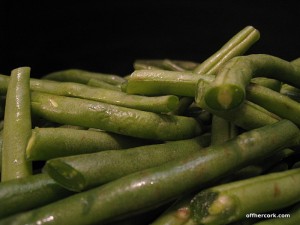
Green beans Green beans happen to be a favorite here at the HQ.  Scott and I love them and feel that fresh green beans are just about a perfect food.

The downside of fresh green beans is that they can turn quickly.  Going from bright green to a mottled color in just a few days.

Yuck.  No one wants to eat that.  Well except for Rocky, he doesn’t care what the green beans look like, he’ll eat ’em up.

For me, green beans take a lot of prep time.  Going through pounds of beans and trimming them takes a lot of work.  See I trim both ends because I don’t like the stringy pointy parts.  They must be dealt with!  And because processing green beans takes me a good bit of time, I’m not looking to it several times over the course of the week.  Once and I’m done.  Over and out.

I have found that if I blanch my whole pile of green beans after washing and trimming them, they are ready to go for the rest of the week.  I don’t have to worry about them turning on me getting that mottled color.  And if I feel like maybe I’m not going to get to them in a timely fashion once they are blanched, I can just toss them in the freezer for another time.

Blanching veggies is super easy.  A big pot of boiling water and toss the veggies in.  Allow to boil for a few minutes (time depends on the type of  veggies, cauliflower takes longer than green beans for example).  I do not salt my water because I add salt later before I serve them. :)

Blanching my green beans ahead of time makes later prep work a breeze.  All I have to do is drizzle them with a little olive oil and seasonings, then toss in an oven to heat through.  Super fast and simple!  Especially when you’re dealing with super hungry people who just got done with some intense working out.  These can go from fridge to bellah relatively quickly!

Prep work is a huge factor in helping us make it through the week.  Allowing us to put together homemade fresh meals each day fairly quickly.  Try blanching some green beans as part of your prep work!  And remember they can always be frozen for later as well!

Tuesday Tip: Reuse citrus peels

LimeOur house came with a garage disposal.  Brand new! Just updated! Said the little flyer talking about all the great features of this house.

We don’t really consider a garbage disposal a great feature.  We don’t use it and in fact I’ve cursed it more than I’ve praised it.  It’s annoying.  It clogs very easily, causing dishwater to back up in my sink.  It drains slowly.  The only way to alleviate these frustrations is to run the disposal.

Garbage disposals are loud.  Not only does the sound assault my ears, but goodness it makes my whole sink shake and my faucet suddenly turns into something going through stage one detox.

But as frustrating as those things are, the thing that irritates me the most about this stupid disposal is that it will start to smell.

Lovely.

Stupid disposal!  Do people really toss food down their kitchen sink?  I suppose so since that is the point behind the disposal’s whole existence.

One way I’ve found to combat this is to toss in my leftover citrus remains.  We go through a lot of limes at the HQ so that is what normally deodorizes the disposal.  In the winter our orange intake increases and the disposal sees orange peels as well.

The essential oils in the peels help clean and deodorize the disposal.  If the smell is particularly potent because the disposal just happens to be angry for whatever reason, I’ll toss in some baking soda with the peels.  Toss in the peels, run cold water, and run your disposal until it stops making grinding noises.  Turn off the disposal and run cold water for another second and then you’re done.  Disposal is clean and the smell of fresh lime or orange or whatever you used will waft up from the sink.

Peels can be frozen and used later too!

Another use for peels — I personally really like orange but feel free to use what floats your boat. — is to toss them in a pot with some water, cinnamon, and cloves then heat it up.  Let it boil for a few minutes and then simmer for another little while.  Instant room deodorizer and air freshener.  Plus it’s cheap!  And once you’re done, that whole mess can clean your stupid garbage disposal if you’re unlucky enough to have one.

Of course if you don’t have a disposal, the peels can go in the compost pile!

Tuesday Tip: New uses for toothbrushes

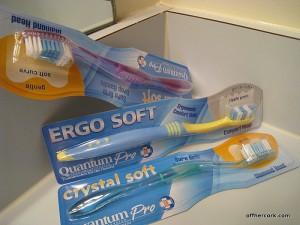
Toothbrushes for household cleaning jobs I don’t know about you but my dentist gives me a free toothbrush with every visit. Which is nice but we were starting to accumulate a bunch here at the HQ.  I have an electric toothbrush that I use and Scott has a preferred brand of toothbrush that he uses.  These toothbrushes from the dentist were not our style and weren’t getting used.  But I didn’t want to throw them away because that seemed like a waste.
I have discovered that a lot can be done with those toothbrushes!  I use them for cleaning, not my teeth, but my house!  They are perfect for fitting into widow sills to scrub those out after a long winter.  Great for cleaning tile and getting into the nooks and crannies of a shower stall.

They also come in handy for cleaning drains.  I don’t particularly like sticking my hand down a drain to clean it, that’s where the toothbrush comes in.  It’s got reach and can scrub and rid the drain of any messes without me getting dirty.

They are also great for cleaning computer keyboards and the mouse to the computer!  There are loads of other uses for toothbrushes, those just happen to be a few of my favorite.

The next time you get a new toothbrush from your dentist, or when you’re about to toss out your old one for new, recycle and reuse instead! :D

Tuesday Tip: Using foil to clean a grill

Foil How many of us grill outdoors?

One, two, three…

Wow, okay so a lot of us seem to- Yes, you in the back with the red, Real Men Grill shirt. I got you too.  And just a small suggestion, you may want to send that shirt off to its final resting place. It looks like maybe it’s seen too many beer brat cook-offs.

Anyway, as I was saying, it seems a lot of us like to grill.  Whether our choice is a lovely T-bone (or brat! I got ya!) or some veggies, grilling gives our food a different twist.  It’s a nice way to spend an evening or day.  Hanging out, getting back to our roots cooking over fire.  Plus it gives us a chance to be outside, something I think a lot of us need more of, face time with nature.

The downside to grilling is the dirty grill.  Eww, right?  Greasy or just plain stuck on food.  Gotta get rid of it before you grill again.  But how to go about it efficiently?

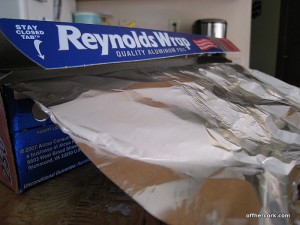
Scott handles the grill at the HQ and by handle I mean, he gets it going, lights it and monitors the fire.  We have a charcoal grill and love it!  We have looked at several other cleaning “devices” but either they were pricey or seemed a little strange.  One thing he decided to do was use foil to scrub the grate.

I realize this sounds odd and I thought maybe the charcoal fumes had touched him in the head a bit.  But he took foil, balled it up, and used that to clean the grill.  And it worked!

Now it’s not going to make the grate all silver shiny brand new looking but it will remove all the dried cooked bits.

Pretty handy, right?  Scott says he uses about a foot of foil to clean the grill grate.  But feel free to test it out and see what works best for you and your grill!

And savor the last days of summer by having a grill feast! I think that might be in the works for us soon!

Tuesday Tip: Freezing Tomato Paste

Freeze tomato pastOne thing that I saw mentioned constantly on the Food Network was how handy it was to purchase tomato paste in a tube.  That way you can squeeze out the exact amount you need, seal it up, and go about your business.  I too thought this concept was handy and I began a search to seek out the mythical tomato paste in a tube.

It took me a while to find some because at the time it wasn’t a very common thing.  When I found some, I did a little happy dance in aisle.  Until I saw the price.

Seven bucks for a tube of smashed up tomatoes?!

Um, to be blunt, hells no I’m not paying seven smackers for tomato paste.  Especially since a small can of tomato paste is like 79cents.

But the thing with tomato paste is that sometimes you don’t need to use an entire can for whatever you’re making.  Even though it’s a small can, it still contains a good amount of paste.  And a little goes a long way.  Probably why the tube of tomato paste was created but again, seven bucks.  I’ll think of something on my own, thanks.

So what to do with leftover tomato paste?  I came across another tip that mentioned freezing the leftovers in ice cube trays.  Good idea in theory but I think it would be a bit messy and you would have to have designated trays just for that purpose because the tomato paste would stain the plastic. This was not a practical solution to me.

But freezing was clearly the answer.

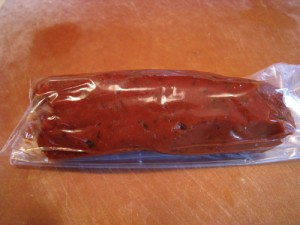
And then it dawned on me to make my own tomato tube (yeah I said it) and freeze that.  I scooped out the leftover paste into a sandwich baggie, shaped into a tube and froze it.  This works beautifully!  Whenever I need tomato paste, I can just pull this from the freezer, cut off how much I need (say a TBSP or so) and then seal it back up and toss in the freezer. Ta-da!

One could even use parchment paper instead of a plastic baggie to help reduce plastic use.  Just roll tightly and seal with masking tape.

To be fair, the price has gone down on the tube paste and I have seen it priced for 4 dollars.  But even at 4 dollars, that’s too steep for me.  I’ll stick with the cans and freezing the leftovers.

So the next time you’re wondering what to do with the remaining tomato paste, remember you can freeze it! :D

Tuesday Tip: Vinegar in the laundry

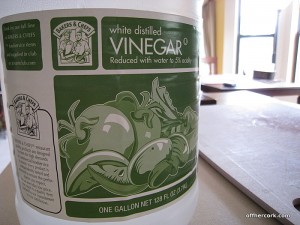
Vinegar Have we discussed how much I love vinegar as a household staple?  Oh I think we might have touched on that a bit.  Another one of my favorite uses of vinegar is in the laundry.  It helps keep clothes fresh smelling by killing odors.  And since vinegar is a natural antibacterial and kills mold and germs, it’s perfect.  Because let’s face it, dirty clothes are exactly that, dirty,  We don’t wash clean clothes, right?  Okay, if it’s something you just bought and brought home from the store. But even that isn’t clean, because who knows how many people tried it on before you bought it.

Vinegar works wonders on workout clothes as well.  I don’t know about you, but I reuse my workout gear before it hits the dirty clothes pile.  That means by the time I’m about to toss it in the dirty clothes pile, it is ripe for picking and about to walk there on its own.

A few years ago I started eliminating unnecessary chemicals from our lives.  Liquid fabric softener was one of the first things to go.  It’s expensive and what is it really doing?  Nothing.  At least nothing fancy at my house.  Plus I was paying for something that was water and perfume.  That’s it!

I will pass on that.  Instead I put some vinegar in the liquid softener slot.  It works at keeping our clothes soft and static free.  And as I mentioned above, it totally gets rid of the stank.

Even food smells that you can get from restaurants or markets.  Smoke smell you can get from grilling outside.  And workout odor you get from working your thing.  It also helps clear up stains and loosen dirt from clothes. It’s basically amazing.

It pretty much does a whole bunch of things for a lot cheaper than that silly water and perfume stuff.

I purchase vinegar by the gallon jugs.  Vinegar is super cheap and most warehouse (Costco, Sam’s for example) stores sell them in pairs.

Grab yourself some vinegar and try using it the next time you’re washing clothes!

Tuesday Tip: Reuse Dryer Sheets

Reuse dryer sheets Is this a familiar situation in your household:

You’re doing laundry and you reach for a dryer sheet to add in with the clothes that are about to get dried. The cycle ends, you pull out the sheet, use it to clear the lint from the lint trap and then toss it.  Rinse, repeat with all loads that go in the dryer.

That’s how my situation was! I always used a new sheet for each load that went in the dryer. Why did I do that?

I have no idea.

I guess I just thought that a new load in the dryer meant I needed a brand new dryer sheet.  I’ve come to realize that this isn’t true. Dryer sheets are reusable!

I know, I was shocked too.  I sort of just had this lightbulb moment and reused a dryer sheet to see what would happen.  And it worked or at least as far as I could tell it did.  I now use dryer sheets a total of three times before using it to clear the lint trap and tossing in the trash.

Once for the initial cycle, and then two more times after that.  In this day and age of trying to conserve not only the planet but also the money in our wallets, it’s nice to know that we can recycle and reuse products.

I now keep used dryer sheets on top of my dryer so I can grab one when I need it.  Give it a try and see what you think!

Tuesday Tip: To Catch a Gnat

Fruit fly trap The thing I love most about summer is the wide variety of fresh fruit that becomes available.  Peaches, nectarines, and cherries just to name a few.  Oh and all the berries and melons too!  The thing I hate most about summer is the fruit flies that come with all that fresh fruit.
I don’t know about where you live but here at the HQ we become fruit fly and gnatty central.  It becomes craziness, causing me to have temper tantrums with made up curse words as I try to bat, swat, and swing the gnats into oblivion.  My husband has researched and thus tried every idea to help us battle the gnat and fruit fly problem.

We have only found one solution that works for us, Apple Cider Vinegar.  I will now let my husband explain how to create your own gnat trap at home (Because I’m lazy and I also have no idea how to make one!):

1. Select a glass

You’ll want something that isn’t too wide or skinny, or too tall or short. If you choose a drinking glass, you probably want to choose one you no longer actively use (unless you don’t mind later drinking out of the glass you drowned a bunch of fruit flies in…). You may also be able to reuse a jar (though be sure it is clean and odorless).

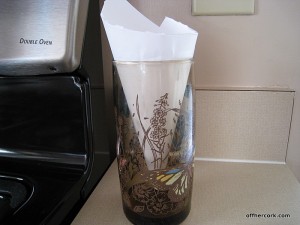
Fruit Fly Trap 2. Make the barrier

The goal with the barrier is to provide an opening through which the fruit flies can enter (attracted by the bait) but which prevents them from being able to leave.

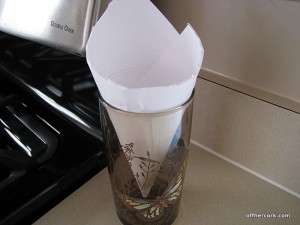
A simple and effective barrier is a piece of paper rolled into a funnel/cone shape. You’ll need the glass from step 1 handy as you work out the exact cone to suit the glass. The tip of the cone should provide a small opening no bigger than a coffee bean, maybe even half that size. The large opening of the cone will need to be of a wider diameter than the top of the glass so that the funnel can rest on its sides inside the glass. When in the glass, the funnel tip should be about an inch from the bottom, and its opposite side should extend at least an inch over the lip of the glass.

Once you’ve worked the piece of paper into the proper shape, tentatively tape it to retain its shape. Try it out in the glass again. Again ensure that the tip is about an inch from the bottom of the glass, and especially now ensure that the cone is truly round and that when set into the glass, it provides a “seal” around the lip of the glass. With the funnel in place, the only way in and out should be through the small opening in the tip of the funnel.

Add more tape to the paper to secure the shape once it has been finalized.

(As an alternative barrier: you may be able to get away with just covering the top of the glass with plastic wrap and using a toothpick to poke a few holes in the wrap.)

3. Pour in the bait

Our bait of choice is apple cider vinegar (ACV). Some people use wine, which we’ve tried with less success, but who wants to waste wine on killing insects? Be sure the funnel has been removed from the glass and pour in a slight amount of ACV. When you put the funnel in place in the glass, you’ll want a gap between the tip of the funnel and the ACV.

You can also add a couple drops of dish soap into the ACV to break the surface tension (to prevent the fruit flies from treading the surface). We have success even without adding dish soap.

4. Place and Monitor

Place the trap in the vicinity of the fruit, trash, or other area that seems to be attracting the fruit flies. Relocate if after most of a day you stop seeing any more fruit flies entering the trap.

5. Repeat

If after a few days you begin to notice a resurgence in fruit flies flying about, the potency of the ACV may have diminished and you may need to pour the contents of the glass down the drain and refill with the same level of more ACV. Of course, if the contraption is especially successful, then a change and refill will be warranted.  The funnel can continue to be reused.

How It Works

The fruit flies are attracted to the smell of the ACV.  They’ll fly down the funnel and through the smaller hole.  Once in the glass, they are essentially trapped.  They’ll crawl around the inside of the glass and try to find an opening near the top, which is blocked by the funnel.  They aren’t smart enough (or as able) to fly back through the small hole.  If not outright, eventually they’ll land or fall into the ACV and meet their maker.

There you have it guys! Step by step instructions from OHC HQ’s official Gnat and Fruit Fly Wrangler. The summer season and early part of fall is when we have the most gnats and fruit flies so we always have a trap out and about. Sometimes two depending on how much fresh produce I have out on the counters. If you’ve got fruit fly issues, give this a try and see how it works out for you! :D

Tuesday Tip: Olive Oil dipping sauce

Olive oil and spices The first time I’ve ever had bread and oil as part of a meal was back in North Carolina, about 7 years ago.  Scott and I had just purchased our first house and we were out having a celebratory lunch.  The server brought out a basket of warm bread and a little dish that she poured seasoned olive oil into, then quickly scurried away.

Me: What do we do with this? Do I just dip the bread into the oil?

Scott: I think so. I’m not sure what other options there would be.

Me: Okay. Although dipping bread into oil and eating it is a little odd.

Scott: Totally weird.

The concept was so foreign to me.  “You want me to what?! Dip this bread into some fat and munch away?”, was my thought process.

But you know what? It was fabulous.  And of course olive oil is full of good heart healthy fats, so it all worked out!  From that point on I started looking more at flavored olive oils and olive oils labeled as “dipping oil”.  And you know what I found?

That stuff is flipping expensive!  Most were over $10 for a very small bottle of flavored oil.

Um, no. I’m not spending that much unless it’s also going to wash the dishes when I’m done eating.

At this point I realized that I could make my own.  I like having oils and vinegars multi-task at the HQ.  Because of that I don’t flavor a whole bottle of oil.  I do a quicker trick that is just as tasty and beautiful!

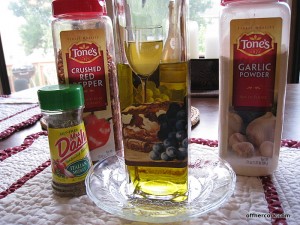
I pour a good quality olive oil onto a small plate.  An oil that I would also use in salads specifically for the flavor.  Then I sprinkle in some seasonings, whatever floats my boat that day.  Typically they are:

  • Garlic powder
  • Red pepper flakes
  • Italian Seasoning (salt free, Ms. Dash is the best in my opinion)
  • Chili powder or a pinch of cayenne for extra heat
  • Fresh ground black pepper

All of those to taste. I’m usually more heavy on the garlic and red pepper flakes.  Give it a quick stir and surround the oil with your favorite type of bread.  It’s unbelievably tasty and a very quick appetizer to put together.  Since oil can be stored at room temperature, you can make this ahead of time for guests and the flavors will just mingle and increase the longer it sits.

Try making your own olive oil dipping sauce for bread! It’s quicker, cheaper, and darn tastier!