Status

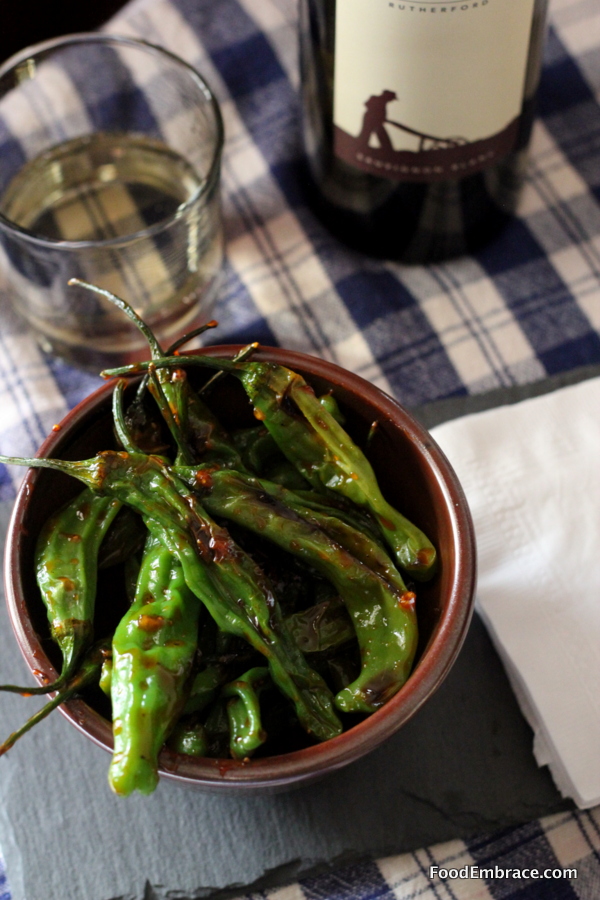
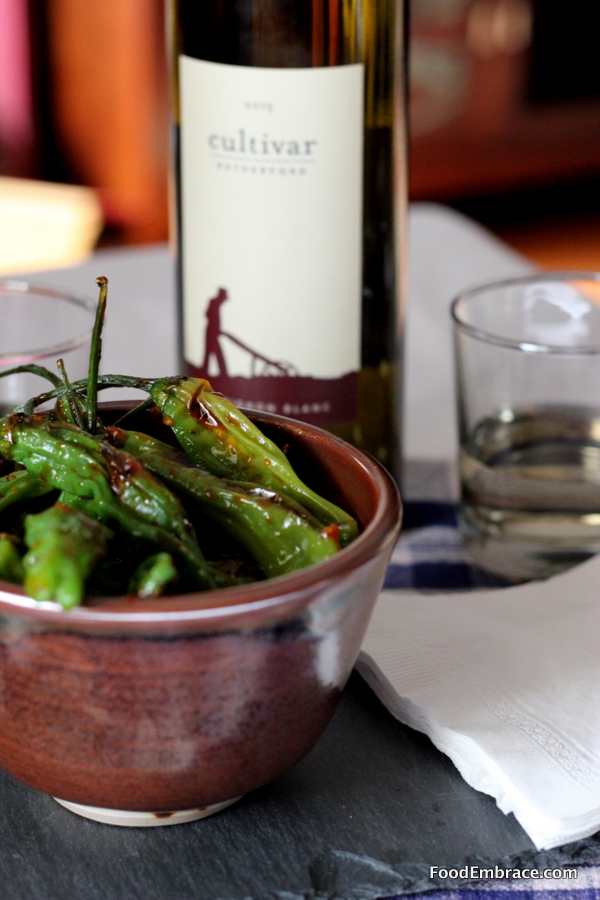
Sweet and Smoky Shishito Peppers

With all the holiday functions and parties that happen during this time of year, I wanted to create a quick and simple appetizer that would be great for entertaining, parties, or as a way to kick off an intimate date night at home. While out shopping I came across some awesome looking shishito peppers and knew they would be perfect to use. Most times the peppers are paired with a dipping sauce but I wanted to wrap the peppers is a sweet and sticky sauce making them easier to prepare and eat.

In a recent shipment from Cultivar Wines, I received a 2014 Cultivar Rutherford Sauvignon Blanc that I thought would pair nicely with this dish.

Sweet Smoky Shishito Peppers

Andrea’s Sweet and Smoky Shishito Peppers

  • 6oz Shishito Peppers
  • 1/2TBSP Light Olive Oil
  • Juice of 1 Large Lime
  • 2 Cloves of Garlic (Either use a garlic press or finely chop them)
  • 1 TBSP Honey
  • 1/2 tsp Smoked Paprika
  • Pinch of Salt (no more than 1/4 tsp)

In a bowl, combine the lime juice, garlic, honey, paprika, and salt, whisk until everything is combined and set aside. In a medium sized skillet, heat up the olive oil over medium to medium high heat for about 2 minutes (do not let the oil smoke), then add in the peppers in a single layer.  Cook peppers on each side for about 3 minutes until they blister and start to soften.  Reduce heat to medium and add in the sauce, stir and make sure all the peppers are covered.  Continue to gently stir and cook the sauce for about two minutes.  The sauce should cook down and start to coat the peppers.  Allow to cool for one minute and give another stir before plating.

Plate and serve!


Sweet Smoky Shishito Peppers

These peppers are great hot right out of the pan but can also be served at room temperature, making them perfect for entertaining and parties.

Having the sauce on the peppers means there’s less to handle and turns them into a fabulous finger food appetizer, just right for mingling and eating while standing.

You can make the sauce ahead of time making the cooking time on these even quicker.  I would recommend making a double batch because these will go quick!

These peppers and the 2014 Cultivar Rutherford Sauvignon Blanc really worked well together.  The crisp citrus notes of the wine balances out the smoky sweet sauce while the oaky herby notes compliments the earthy pepper flavor.

Have fun, and remember, always play with your food.  Enjoy!

Disclosure: I’m required to disclose a sponsored partnership between our site, Food Embrace, and Cultivar Wine. I have been compensated in exchange for this post in the form of product. All opinions presented are my own. I receive wine from Cultivar Wine as a member of the Cultivar Wine Bloggers group.

Status

Roasted Hatch Green Chili and Corn Fritters

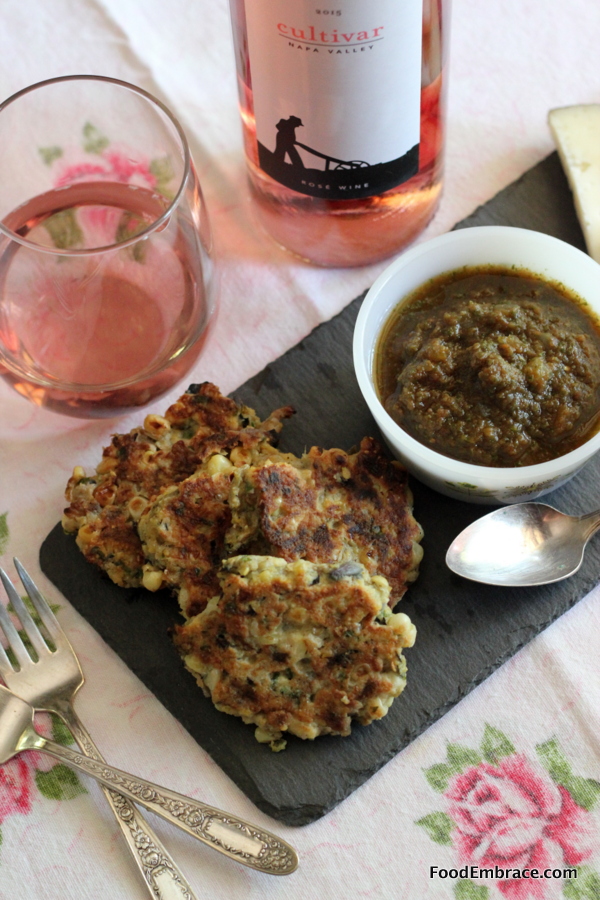
I wanted to create a dish that utilized some of the staples from the summer farmer’s market.  I decided to combine sweet corn and roasted chilies into a fritter.  This paired nicely with some Rosé that Cultivar Wine recently sent me.

Hatch Green Chili and Corn Fritters

Summer time at our farmer’s market is filled with the smell of chilies roasting over a big flame.  Hatch green chilies are a big deal and when they are in season, everyone is rushing to get their hands on some.

I thought the smokey chilies would go nicely with local sweet corn and decided to combine them into a fritter.  Perfect little side dish to summer cookouts.

Andrea’s Roasted Hatch Green Chili and Corn Fritters

  • 3 Ears Fresh Corn, kernels cut off the cob
  • 5 Roasted Hatch Green Chilies, seeds removed and chopped (Heat level optional)
  • 1/2 Small Red Onion, finely chopped
  • 1 TBSP Chopped Parsley
  • 1/2C Corn Meal
  • 1/4C All Purpose Flour
  • 1/2tsp Salt
  • 1tsp Ground Black Pepper
  • 1tsp Garlic Powder
  • 2 Eggs
  • 1/4C Water
  • Olive Oil for frying

In a medium sized mixing bowl combine the corn, chilies, onion, parsley, and spices.  Toss together then add in the corn meal and flour, gently mix until everything is distributed and coated with the flours.

In a small bowl beat the eggs and water until frothy.  Add egg mixture to the corn and chilies mixture and combine until everything is coated and a light batter forms.

In a large skillet, heat about 2 TBSP of olive oil over medium heat.  When the oil is hot, spoon some of the batter onto the skillet.  About a heaping TBSP size, as you want to keep the fritters on the smaller side.

Do this until the skillet is full but keep the fritters spaced out and do not crowd the pan.  I was able to do four fritters at a time.

Cook the fritter about 3 minutes on each side.  Remove from skillet and place on a cooling rack.  Repeat until all the batter is gone.  Adding more oil to the skillet when needed.

Amount of fritters will vary depending on size but should yield at least 12 fritters.

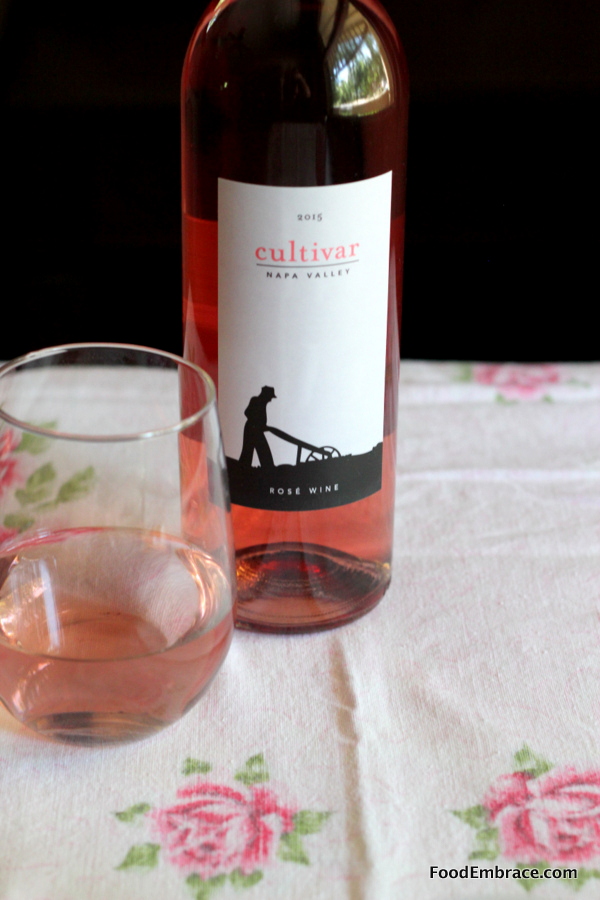
Cultivar 2015 Napa Valley Rosé

I wanted something light and summer fresh to pair with the Cultivar 2015 Napa Valley Rosé and these fritters fit the bill.  The sweetness of the corn highlighted the light sweetness of the wine while the smokey earthiness of the chilies complimented the tart fruit notes and a touch of spice on the end.

Even if you use the hot hatch green chilies, that heat will pair nicely with this Rosé.

These fritters are a fun way to take advantage of the chilies and corn that are in season right now.  Perfect for your next gathering or cookout!  They also freeze well and can be reheated in a toaster oven or in the oven at 350 for about 5 minutes.

If you’d like to try Cultivar Wine , they are offering a special promotion to my readers. Use the code CultivarWineFoodEmbrace when you order and you’ll receive 10 percent off your purchase.

Disclosure: I’m required to disclose a sponsored partnership between our site, Food Embrace, and Cultivar Wine. I have been compensated in exchange for this post in the form of product. All opinions presented are my own. I receive wine from Cultivar Wine as a member of the Cultivar Wine Bloggers group.


Status

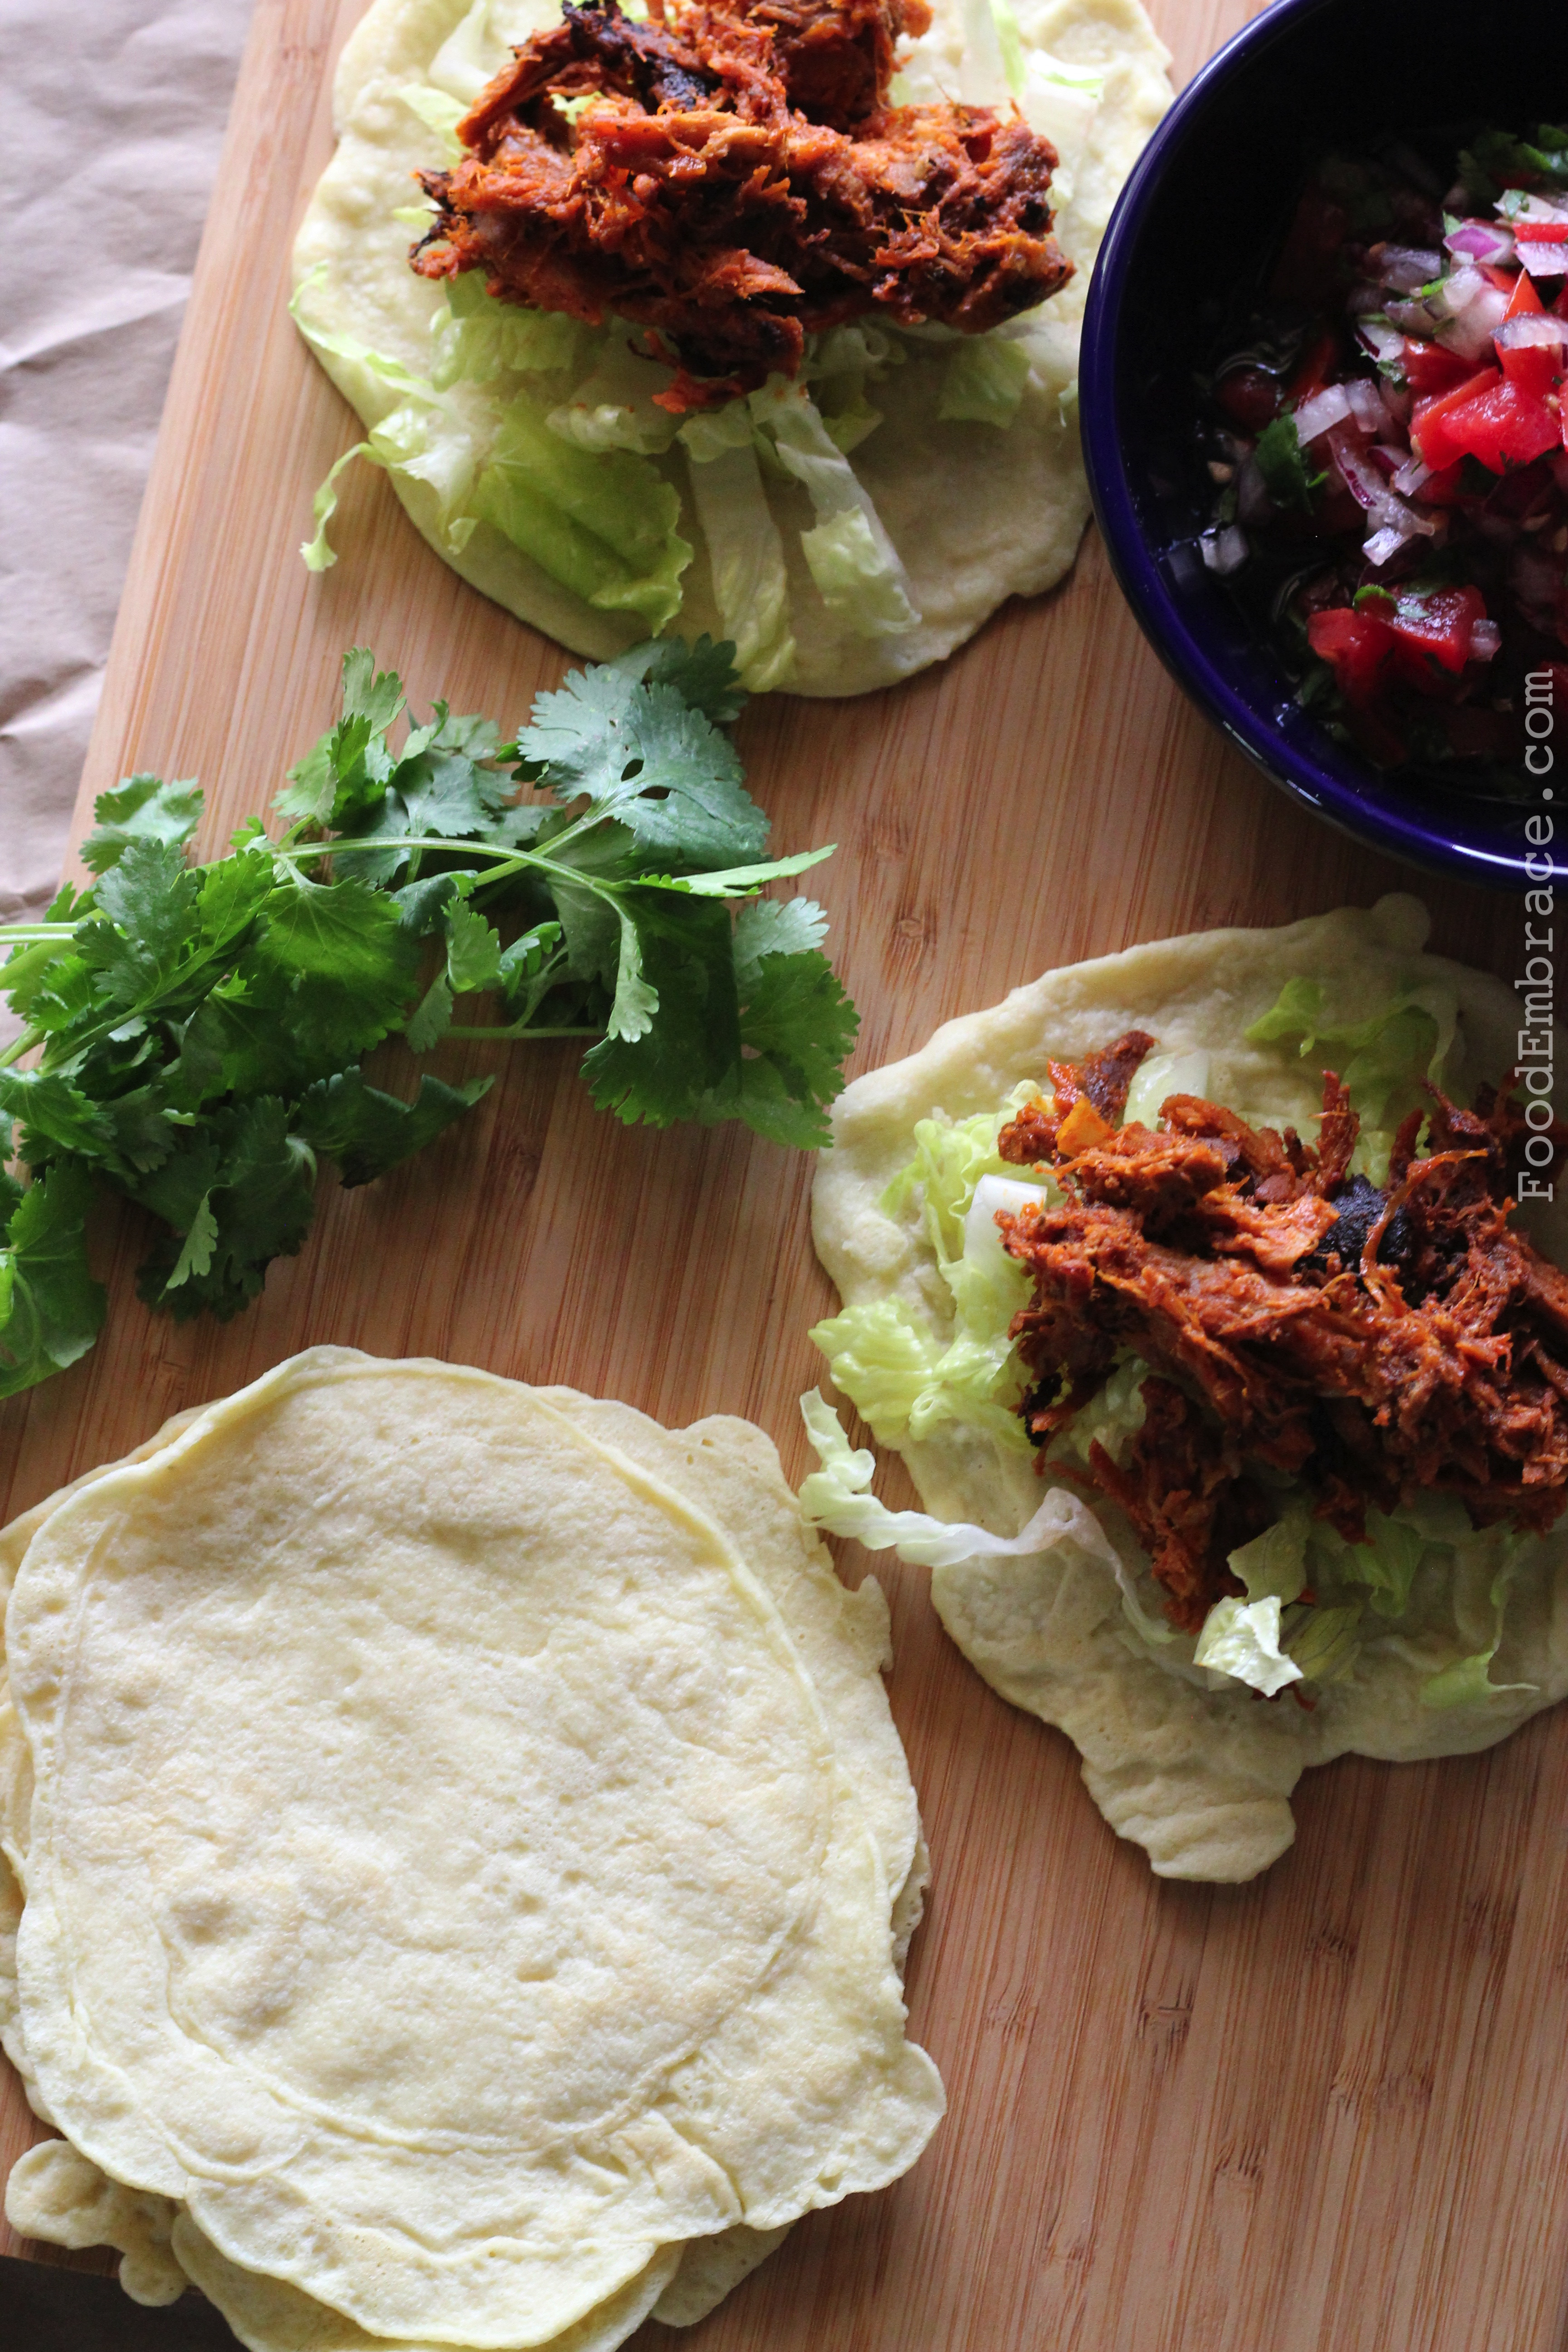
Almond Flour Tortillas


Almond Flour Tortillas

I have made some grain free tortillas before but due to the amount of coconut flour in them they lean more towards the sweeter side.  Making them perfect for sweet crepes or toasted up and used for ice cream sandwiches.

I wanted something a little more neutral in flavor to use for tacos and sandwich wraps so I fiddled around with my recipe and created a winner!

Andrea’s Almond Flour Tortillas

  • 1 1/2C Almond Flour
  • 1/2C Tapioca Flour
  • 1 TBSP Coconut Flour
  • 1 1/4C Water
  • 4 Eggs
  • Pinch of salt (sea salt or Himalayan preferred but not necessary)
  • Ghee or fat of choice for cooking


In a large mixing bowl, add in the flours and whisk together to remove any lumps and to fluff up the flours.  In a medium sized bowl add in the eggs, water, and salt, and whisk until the mixture is blended and frothy.

Add the liquid mixture to the dry mixture and mix well.  This will be a thin runny mixture, similiar to a crepe batter.

In a large skillet, over medium heat, add in a very small amount of ghee and spread that around the skillet.

Use a 1/4C scoop for street taco size tortillas or a 1/3C scoop for wrap and enchilada size tortillas.

Pour batter into center of skillet and using a spatula spread the batter around making a very thin circle.  This takes time!

Allow to cook for 2-3 minutes on each side.

Remove from skillet and repeat process until you’ve used all the batter.

The amount of tortillas you get depends on the size you make.  For wrap size tortillas, this should make about 10.

Store in the refrigerator or you can also freeze them as well.  Gently reheat right before serving.

The are great for wraps and tacos.  Can also be toasted up to use as tostadas or quesadillas.  They have a neutral flavor but you can add some lime zest and lime juice if you want to make them more flavorful for tacos.

They do take some time to make so have patience because it’s worth all the effort!  You’ll have great tasting grain-free wraps with out fillers or junk.  I usually make a big batch at once and store them in the freezer.

Have fun guys, and remember, always play with your food!  Enjoy!

Status

Shaved Brussels Sprouts and Sweet Potato Salad

Salads.  It’s one of those dishes that when I hear it, a few things come to mind.  I automatically assume it’s either lettuce or grain based.  Unless it’s at a summer gathering, then I think it’s either going to be potato or macaroni salad.  I’m trying to change my perception of what makes a salad so that I can experiement a little more.  Salads don’t have to be lettuce or grain based!  This might not be some amazing revelation to you but for me it opened up a lot more possibilities.

I was looking for something that I could create that would yield leftovers.  I wanted something to have at lunch that was veggie packed but not your standard boring mixed greens salad.

Since it was fall, I decided to incorporate a bunch of traditional fall ingredients like sweet potatoes and cranberries to create a salad that is great for lunch or as a side dish.  It’s also perfect for traveling so it can be taken to work (mason jar salad!) or to a party or picnic.  It’s grain free, it’s vegan, it’s Paleo.  It’s all the buzz words.

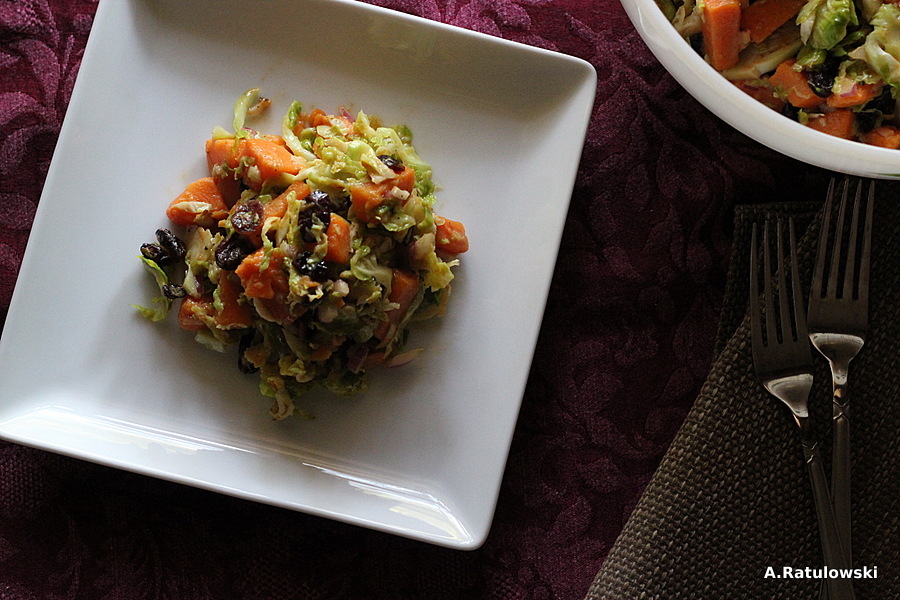
Shaved Brussels Sprouts and Sweet Potato Salad


Andrea’s Shaved Brussel Sprouts and Sweet Potato Salad

For the salad:

  • 2 Medium Sweet Potatoes, peeled and chopped
  • 1 1/2lb Brussels Sprouts, trimmed
  • 1/2 Red Onion, finely chopped
  • 1C Dried Cranberries
  • 1 tsp of Olive Oil for cooking

For The Dressing:

  • 2TBSP Dijon Mustard
  • 2TBSP Maple Syrup
  • 1/4C Balsamic Vinegar
  • 1/4C Light Olive Oil
  • 1/2tsp Salt
  • 1/2tsp Ground Black Pepper


In a small glass bowl, whisk together all the ingredients for the dressing and set aside.  Bring a large pot of water to a boil and add in the cubed sweet potatoes.  Boil until the sweet potato is just fully cooked through so that a knife pierces it easily but the sweet potato isn’t mushy.  About five – 10 minutes.  Drain the sweet potatoes making sure to remove as much water as possible.  Add to a large mixing bowl.

Using the fine grate or thin slice blade for your food processor, shred or shave (either works here) the Brussels Sprouts.  In a large skillet add in 1 tsp of light olive oil and heat over medium heat.  Add in the sprouts and cook for about 3 minutes.  Remove and add to the sweet potatoes.

Add in the cranberries and the red onion, toss to combine.  Pour the dressing over top of the salad and gently mix until everything has been coated in dressing.

Serve immediately or cover and place in fridge until ready to serve.  Serves 4 meal size portions or 8 as a side dish.

A couple of notes:

I slightly cooked the sprouts to help bring out more flavor and reduce their bitterness a bit.  This is a taste preference.  If you like raw sprouts then it’s OK to skip this step.  If you allow the salad to sit for several hours before serving, that will help breakdown the sprouts a bit.

This dish gets better the longer it has time to marinade in the dressing.

It does make for a big salad and this served two people as a meal for two lunches.

Leftovers are great but make sure to eat this in at least three days, otherwise the sprouts start getting a little funky.

Adding in some nuts, seeds, or even a little feta or goat cheese on top would make great additions to this salad!  A little twist on the traditional veggie side makes it perfect for holiday gatherings.

Have fun guys, and remember, always play with your food!  Enjoy!

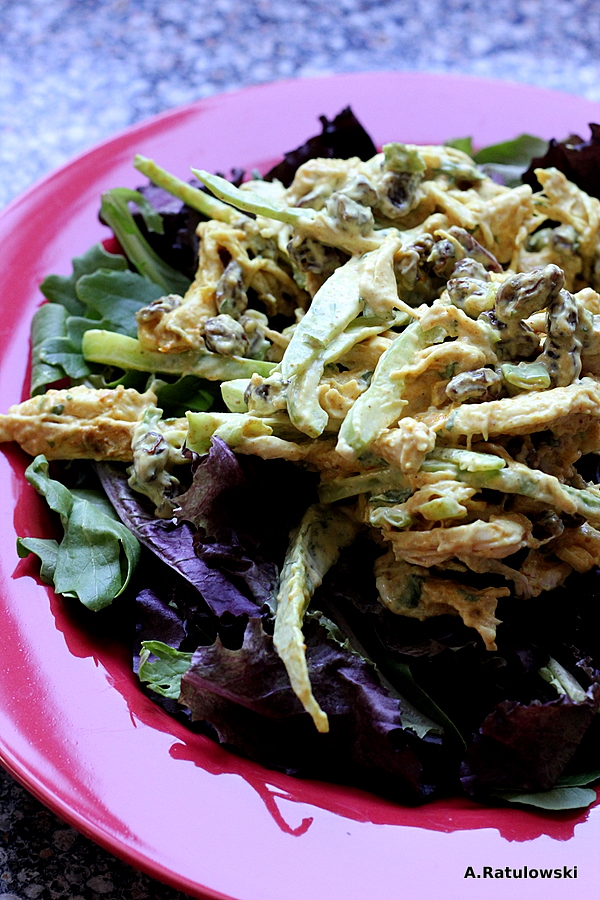
Curry Chicken Salad

Curry Chicken Salad

The first time I had a curry chicken salad was at a Whole Foods in North Carolina.  It kind of blew my mind.  It was my first experience with anything “curry” and was a whole new flavor sensation to me.  I immediately wanted to recreate it and I have finally succeeded!

It’s an easy recipe and the amounts can be adjusted to however much chicken you have.  There are always leftovers when I roast a chicken and this is my go-to recipe to transform those leftovers into something tasty.

I’m going to provide rough estimates for the amounts I use for leftovers but definitely play around with this recipe to fit your tastes and for how much you want to make.

Andrea’s Curry Chicken Salad

  • 1 Large Chicken Breast, cooked and shredded
  • 3 Green Onions, chopped
  • 1 Green Pepper, sliced thin
  • 1/2C Raisins
  • 3/4C Mayo
  • 1TBSP Curry Powder (I like Simply Organic)

In large bowl combine all ingredients.  Make sure to mix well so the mayo and curry covers everything.  It can be served immediately but is best when left to sit for an hour or more.

Eat it on a sandwich, in a wrap, on top of a salad!  Or just out of the bowl, like I sometimes do. A little different than your standard chicken salad, curry brings some warmth while that little bit of raisin keeps things sweet.   It’s great for lunch during the week or for dinner on a hot summer day.  Heck, or even breakfast! No judging here.

Have fun, and remember, always play with your food!  Enjoy!

Potato Nests

Potato NestsI am not much of a fan of hash browns. For whatever reason restaurants do not like to cook hash browns fully to make them crispy and delicious.

Instead I often receive a gluey grey pile of potatoes that aren’t seasoned and are always undercooked.  It’s gross. Recently out to breakfast with a friend at a very popular place here in town, her order came with a side of hash browns.  On her plate arrived exactly what I just described.  Oh they tried to make it pretty by putting it in a round pile similiar to how some places plate rice.

Yeah, it was still a gluey undercooked pile of potatoes.  She didn’t eat it.  I couldn’t blame her.

Why do restaurants insist on serving this mess?  Give me home fries or fried potatoes any day over hash browns.

But there has to be something that can be done with hash browns.  Maybe the restaurants never get it right but that doesn’t mean we have to eat the same thing at home, right?

So my stance has been changed.  If I’m in charge of the hash browns then I’ll eat them.

I wanted to make hash browns fun and also wanted to make a batch that could be frozen or reheated through out the week.  That’s when I came up with making potato nests.  Oh I have no delusions that I’ve created something new.  I’m sure there are other recipes out there but this is my version.  Crispy potatoes with lots of garlic!

Andrea’s Potato Nests

  • 1 1/2 Pounds of Russet Potatoes, peeled, shredded, and drained** (about 3 medium potatoes)
  • 1 egg + 1tsp water, scrambled
  • 1/2tsp salt
  • 1/2tsp ground black pepper
  • 1/2tsp garlic powder
  • 1/2tsp onion powder
  • Fat for greasing the pan (Lard, butter, or olive oil)

Preheat oven to 400 degrees.

**Make sure that you remove as much water from the potatoes as possible.  It easiest to lay the shredded potatoes on a dish towel and squeeze out as much of the water out as possible.

Grease a muffin pan with your choice of fat.  In a large mixing bowl combine the potatoes and the seasonings, gently mix.  Then add the egg mixture and mix until the potatoes are completely covered.  Scoop up a small handful and start to line the muffin tin.  You will have to play around a bit with the amount so that you have enough for each section.  Line it much like you would line a pie pan with pie dough.

This will make enough for 12 nests.

Place muffin tin in the oven and bake for 30 minutes or until the potatoes are crispy and the nests are holding their shape.  Remove from oven and cool for about 3 minutes before trying to remove the nests from the pan.  Remove them gently so the bottoms don’t stick.  Serve immediately or allow to cool to room temperature before storing.

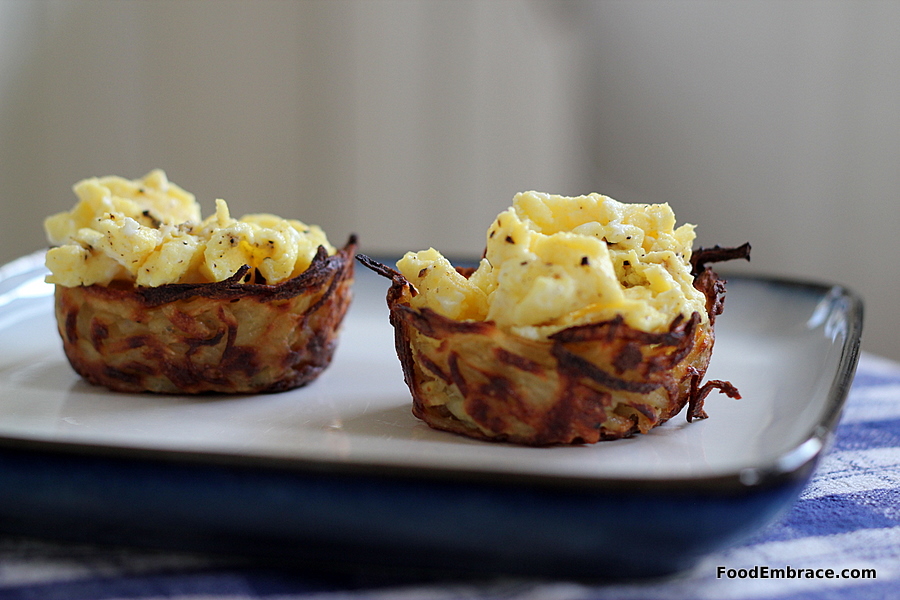
Potato nests with scrambled eggsI used a lot of seasoning on these and they are potent.  If you feel that might be too much for you, reduce the garlic and onion powder to 1/4 tsp each.

I filled the nests with scrambled eggs just to give you and idea of shape and size.  But they can be filled with whatever you like!  You could even make a frittata filling and pour it in the nests and bake them.  It will take longer but would make a great dish for brunch.

Potato nests and scrambled eggs

Also the nests don’t just have to be for breakfast.  Fill it with sausage bites and sauerkraut for dinner.  Or lunch!  You could even make this bigger by lining a pie pan with the potato mixture and then adding a frittata filling and baking.  Really, this is a blank slate that is open to possibilities.

I kept these in the fridge and reheated them in my toaster oven.  They could be reheated in the oven as well, at 350 for a few minutes.  They kept all week just fine.

Now go do something fun with potatoes!

Have fun guys, and remember, always play with your food! Enjoy!


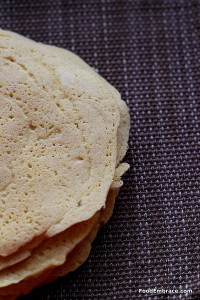
Grain Free Tortilla Wraps

Grain Free Tortillas This tortilla recipe was born out of frustration and desire.

During the Spring Clean Eats challenge limiting carbs was one of the goals.  I also used this as a way to challenge myself in the kitchen and develop new skills (grain free cooking isn’t such a mystery anymore!).  Because I was reducing carbs, I had to come up with alternatives.

I wanted a tortilla or wrap that fit the guidelines of the challenge so off to the interwebs I went.  All the recipes I found didn’t really appeal to me for two reasons.

Either they used a ridiculous amount of eggs (I’m talking like 18 eggs for one batch) and/or the recipe only resulted in like 6 tortillas.

If you think I’m using close to 2 dozen eggs to make 6 wraps, you have lost your damn mind.

I decided to take matter into my own hands and create my own tortillas.  One that would use an acceptable amount of eggs and also made more than 1/2 dozen wraps.

Andrea’s Grain Free Tortillas

  • 1C Almond Meal
  • 1/2C Coconut Flour
  • 1/2C Tapicoa Starch
  • 4 Eggs
  • 1 1/2C Almond Milk
  • Pinch of salt
  • Ghee or lard for frying

In a large mixing bowl, combine the flours and the salt.  Whisk so that all the flours combine.  In a medium sized mixing bowl, combine the almond milk and the eggs.  Whisk until the eggs and almond milk combine.

Slowly add the egg mixture to the flours and stir until everything is mixed and a batter has formed.

Heat a medium sized nonstick skillet** over medium (to medium low) heat.  Add in just a small amount of lard or ghee (no more than half a teaspoon), let the fat melt and brush it around the pan.  Pour in 1/3C of batter and spread around with a spatula.  Making the tortilla as thin as possible.  Cook for 2-3 minutes and then flip cooking for another 2-3 minutes.

Remove tortilla from heat and set aside.

Repeat until you have used all the batter.

Makes about 13 tortillas.

**Please see notes at bottom.

Grain Free TortillasNOTES:

Some things to keep in mind as you make these tortillas.  They are a work of love, they will take you some time to make.  But you’ll be left with a big batch of tortillas that work great as wraps, or for things like enchiladas, or even crepes.  They also freeze and reheat well.

A nonstick skillet is key, I would not recommend cooking these with stainless steel.  If you have a very well seasoned cast iron, you could probably use that.

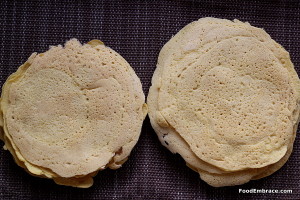
You need to use as little fat as possible per tortilla.  I was able to get thinner and larger tortillas but making sure the fat in the pan was minimal.  The picture above, the tortillas on the right are noticeably larger than the ones on the left.  The ones on the right were cooked with barely any fat in the skillet where the ones on the left were cooked with a teaspoon of fat.  This is why a nonstick skillet is key because it makes it easier to make these wraps.

Coconut flour tastes sweet and has a vanilla flavor to it.  If you are going to use these for a Mexican inspired dish, some lime zest and a squeeze of some lime juice would go nicely.  I would also recommend using lard for cooking, it will provide a more savory flavor.

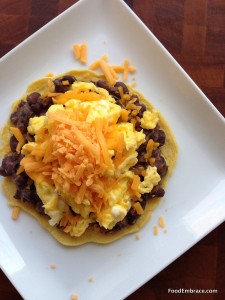
Grain Free tortilla with beans and eggsI’ve made enchiladas with these wraps as they fold and roll really nicely without breaking.  I’ve also topped them with beans and eggs to have at breakfast.

Since these tortillas freeze really well that makes them perfect when you want to make a quick sandwich or use for taco night.  Reheat them easily in a toaster oven or in a 300 degree oven for only a couple of minutes.


Slow Cooker Collards

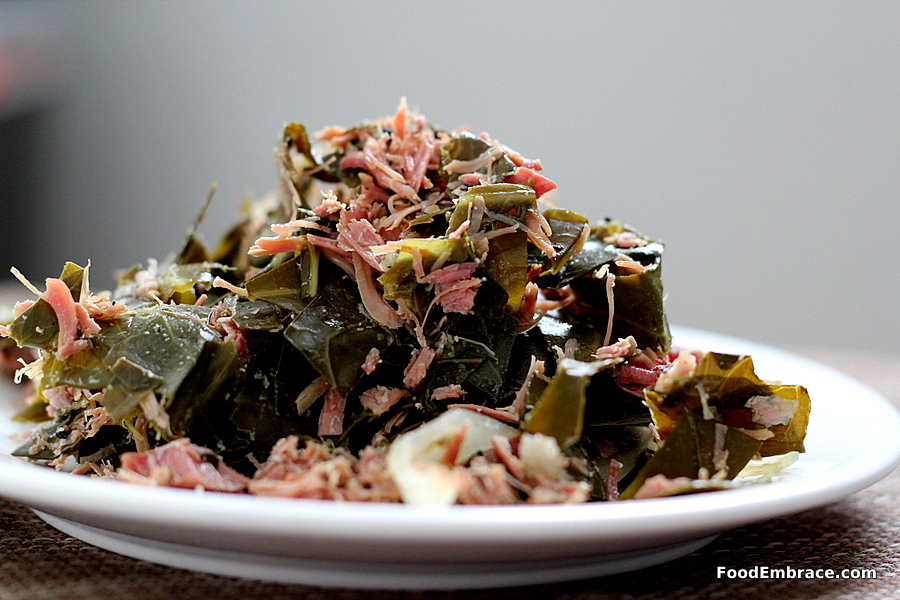
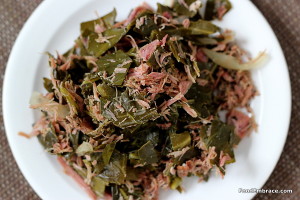
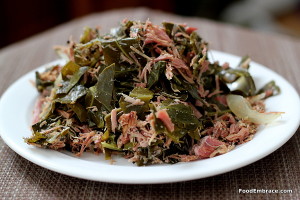
CollardsWe eat greens a lot over here at the HQ.  They are one of my favorite side dishes to make!  Greens are pretty budget friendly, full of flavor, and you can make a lot at one time very easily.

Collards are my favorite.  They take on flavor so well and become tender with long slow cooking. Plus they are one of the few cooked veggies that taste better the next day.

I used to make them on the stove in a big stock pot and then one day it occurred to me that using a slow cooker would be even better.

I don’t think I’ll go back to the stove top method again unless I absolutely have to.  The slow cooker is the perfect vessel for collards!

Prepping collards for the slow cooker is simple and doesn’t take much time at all. Can easily be done in the morning before work or early on a Sunday morning to have ready in time for Sunday Supper.  I love having the collards with some ham hock for some extra smokey goodness.

Andrea’s Slow Cooker Collards with Ham Hock

  • 4 Bunches of Collards, rinsed, stemmed, and chopped
  • 1-2 Ham Hocks (depending on how much you want)
  • 1 Large Onion, Sliced
  • 2tsp Kosher Salt
  • 2tsp Black Pepper
  • 2TBSP Apple Cider Vinegar
  • Water, enough to fill the slow cooker to the top (about 8C or slightly more)
  • 3tsp Hot Sauce
  • 1TBSP Maple Syrup

In a large crock pot add in the ham hocks, collards, and onion.  Then add in the apple cider vinegar, salt, and pepper.  Add in water, enough to fill the slow cooker to just about the top.  Give the collards a good stir and set the slow cooker to low.

Cook for about 6-8 hours.

When collards are done, remove the ham hocks and set aside.  Using a colander, strain the collards as much as possible.   Place the collards back into the slow cooker and turn the slow cooker off.  Shred the meat off the ham hocks and add that back in with the collards.  Add in the hot sauce and maple syrup.  Toss until everything is well combined.

Serve up immediately and enjoy!

CollardsThis makes a lot because we love having leftovers.  I’ve been known to eat the leftovers for breakfast the next day.  Also?  Collards on top of a waffle with a little more maple syrup is an amazing breakfast.  Promise.

This can be a hearty side dish or you can make it a main dish by adding in some more veggies (carrots, zucchini?) and some beans.  I think white beans paired with collards is a tasty combo.

Of course you can make this a completely vegetarian side dish by removing the ham hocks.

When straining the collards, you can reserve the broth to use for another time.  Perhaps as a base for some soup?  Or you can freeze the broth in ice cube trays and use them when you want to add a little more flavor to another dish.

Even during the warmer months, a big pile of collards will make just about everyone happy!

Have fun guys, and remember, always play with your food!  Enjoy!

Fry Sauce

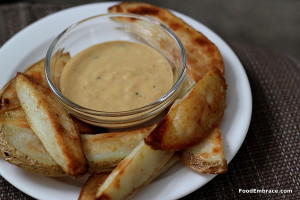
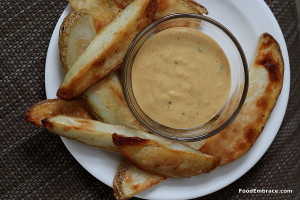
Fry SauceFrench fries from Common Link are my favorite in town!  Especially if you get them from the food truck because you have the option of getting some cajun fries.  Which are crispy and slightly spicy.

And if you are getting them from the food truck then you’re probably at Odell Brewing which means you are having a great weekend.

The offer several sauces for the fries but my favorite is their club sauce. Creamy and tangy, it goes perfect with their fries.

I wanted to create a similar sauce for when we are eating fries at home so I got busy experimenting.

This Fry Sauce is a good substitute when you can’t get your hands on some of the best in town.

Andrea’s Fry Sauce

  • 1/4C Mayo
  • 1TBSP Ketchup
  • 1TBSP Yellow Mustard (not dijon, must be yellow)
  • 2TBSP Prepared Horseradish
  • 1/2tsp Garlic Powder
  • 1/2tsp Onion Powder
  • 1/8tsp (dash) Worcestershire Sauce
  • Pinch of salt and black pepper

Mix everything together in a small bowl and store in the fridge for about an hour before serving.  Serve with your favorite fries!

Fry SauceThis makes enough for two people to have some dipping sauce with their homemade fries.  It was perfect!  Some slight heat from the horseradish with just enough tang from the mustard and Worcestershire sauce to keep you coming back for more.

Don’t just stop at fries though! Put this sauce on a burger with some relish or use it as a dip for chicken tenders.

This sauce comes together easily and can be adjusted to make more if you need to feed a crowd.

I’m turning to this fry sauce to fulfill the craving when I can’t get the original stuff!

Have fun guys, and remember, always play with your food! Enjoy!

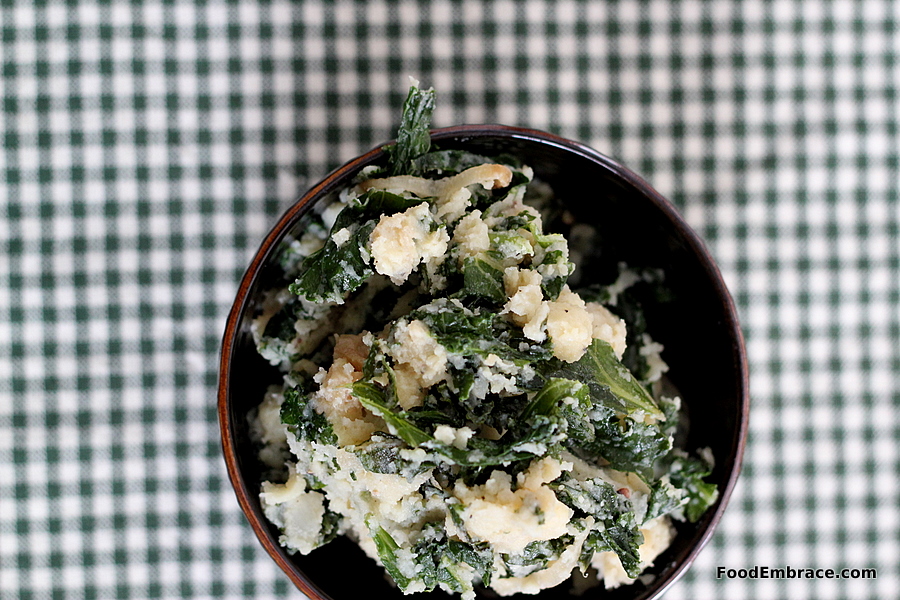
Root Veggie Mash with Sauteed Kale and Caramelized Onions

Root Veggie Mash with Sauteed Kale and Caramelized OnionsThis dish seems like it has all the veggies in it, and I guess it kind of does.  I wanted a hearty side dish that could stand on it’s own next to some roast chicken or pork chops.

Something that you could add gravy to or do nothing with and it would taste amazing.  I was also looking for another way to use kale.  As much as I love some sauteed kale, I do think it is one of those veggies that works better when paired with something else.

Like grits or maybe on some pasta.

Eventually I thought about dressing up some mashed potatoes and making that a more substantial dish.  Add in the kale and this side dish became a rock star.

Andrea’s Root Veggie Mash with Sauteed Kale and Caramelized Onions

For The Onions:

  • 1 Small Onion, thinly sliced
  • 3TBSP Butter
  • 1/2tsp Kosher Salt

In a medium skillet, heat the butter over medium to low heat.  When the skillet is hot, add the onions and stir.  Sprinkle with salt and stir.  Reduce the heat to low and stir the onions every so often.  To caramelize onions, this takes a while.  It will be about 30 minutes until the onions are brown and ready.  Remove from heat and set aside.

For The Kale:

  • 2 Small Bunches of Kale, stemmed and chopped
  • 1TBSP Olive Oil

In the same skillet you cooked the onions, heat over medium heat.  Slowly add in the kale and toss with the oil.  You will have to cook this in batches (or use a larger skillet and cook the whole bunch).  Sautee the kale for about 5 minutes until it’s wilted.

If the skillet seems dry, add in more oil a teaspoon at a time.  Or you can use a tablespoon or two of water to help steam the kale.  Just make sure the water evaporates fully.

Remove kale from heat and set aside.

For The Root Veggies:

  • 1 1/2-2 pounds of Russet Potatoes, scrubbed, peeled and chopped
  • 4 Medium Sized Parsnips, peeled and chopped
  • 2TBSP Butter
  • 1/2C Whole Milk
  • 1tsp Salt
  • 1tsp Ground Black Pepper

In a strainer, rinse the potatoes thoroughly to remove the extra starch.  Add the potatoes and parsnips to a large pot and fill with cold water.  Bring to a boil and cook until the parsnips are fork tender (parsnips take longer than potatoes).  Remove from heat and drain the potatoes and parsnips.  Add them back to the hot pot and stir to remove any extra moisture.

Place potatoes and parsnips in a stand mixer bowl with the paddle attachment.  Start on lowest setting, and add in the butter, milk, salt, and pepper.  Up the setting to 2 until the mixture is creamy.  Reduce setting back to 1 (or the lowest setting) and add in the **kale and onions.

Turn off the stand mixer, stir the veggies with a spoon to make sure everything is combined.  Serve up immediately and enjoy!

**If you prepped the kale and onions earlier and they are cold, put the mash back in the large pot and heat over low heat until everything is back up to temperature.

Root Veggie Mash with Sauteed Kale and Caramelized Onions

I know this seems like a lot of work just for a side dish but I promise that it’s worth it!  Plus everything can be broken down into stages. The caramelized onions and kale can be prepped ahead of time or even the day before.  Heck, you can even prep them the week before and freeze them until you’re ready.  Just thaw, and lightly cook in a skillet to remove any extra water from thawing.  Then add to the mash when ready.

This dish can even be transformed into a baked dish.  Just add one egg to the mixture and place mixture into a greased casserole dish.  Bake at 400 for about 15-20 minutes until it’s bubbly and golden brown on top.  Add in some cheese (cheddar or parmesan would work great) for extra kick.  Do this with leftovers (as this makes a lot of veggies) or prep this whole dish ahead of time and easily reheat in the oven for dinner.

It’s a great side dish but also hearty enough to have as a standalone meal if you wanted (or it can even be stuffed into some peppers or squash).

Goodness you could even top it with a fried egg and have it for any meal!

Have fun guys, and remember, always play with your food! Enjoy!