Cheddar Beer Bread

Cheddar Beer Bread

Cheddar Beer Bread

I have seen people here and there talk about beer bread but that’s about as far as I went in giving it any attention.  Then over the holidays I saw it pop up again and thought, “Hell Yes!  Beer Bread!”

New Years at OHC HQ means sauerkraut and some sort of pork dish.  I wanted to make the beer bread to go with that meal but then I forgot.  And when I remembered about dear old beer bread we were past the holiday.  I still wanted to make it though and started doing some research.

Most of what I found was pretty basic.  Beer, flour, and some baking powder.  Well that’s lovely but can’t we pump this up a little bit.  Where’s the seasonings and extra kick?  I decided to try my hand at making some beer bread with some umph!

Andrea’s Cheddar Beer Bread

  • 1 C All purpose flour
  • 2 C whole wheat pastry flour
  • 1 TBSP of baking powder
  • 3 TBSP of sugar
  • 1 tsp of salt
  • 2 tsp of garlic powder
  • 1 tsp of chili powder
  • Pinch red pepper flakes
  • 1 C of shredded cheddar cheese
  • 1 bottle of your favorite beer

Preheat oven to 375 and spray a bread pan with nonstick spray.  In a large mixing bowl, combine all of the dry ingredients and mix it all together.  Then add in the beer and 1/2 C of the cheddar and mix until everything is combined.  This will be a nice thick dough.  Put the dough into the bread pan and even out the mixture in the pan.  Place in oven.  At about 30 minutes, brush the top of the bread with a little bit of olive oil and then sprinkle on the remaining 1/2 C of cheddar.  Continue baking until bread is done.  You will notice it starting to pull away at the sides.  Test with a toothpick, which should come out clean.  Takes about 40 minutes total baking time.  Remove from oven, allow to cool, then serve!
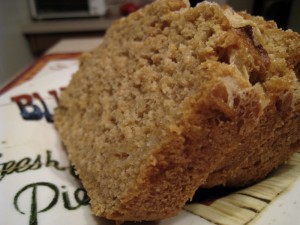
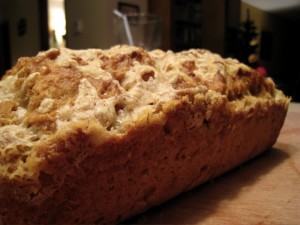
Sliced and ready for serving

Sliced and ready for serving

I can usually tell how well something turns out by the noises Scott makes as he eats.  This bread got, “Mmmm beer bread.  Mmmm beer bread” sung to me as he ate it.  I’m taking that as a sign it turned out pretty well.  I have to agree with him, this bread was amazing!  It’s a moist and flavorful bread sure to please the people in your life.

You can use 3 cups of all purpose flour if you don’t have, or don’t want to use, the whole wheat pastry flour.  The type of beer you use will affect the coloring and the flavor.  I used a darker beer for this bread.  A Killian’s to be exact.  I’m definitely going to play around with this recipe using different styles of beer to see what kind of results I get.

I recommend using a very nice cheddar, the sharper the better.  But if you can’t find a good cheddar, use whatever you have on hand.

This bread can turn quickly on you so if you don’t think you’ll get through the whole loaf, slice it off and freeze the rest.

I have found that this bread is best served slightly warm, so before eating I recommend warming it slightly in the toaster oven.

Mmmm beer bread.

Have fun guys! And remember, always play with your food!

Pita Pizzas

Just like old times

Just like old times

When I was in middle school it was the 80s.  Hair bands and mall teen pop queens were in their prime.  And the thing to do back then was hit up the skating rink on Friday night.  Especially when you lived in a super small town and there was nothing else for you to do at that age.  The skating rink was a happening place and I taught myself how to skate.  And backwards skate.  And skate going around the corners with my feet turned out, heels touching.  My favorite thing to do was skate backwards and stop with my stoppers coming to a sliding halt.  My skates were white with blue wheels and a blue stopper.  And Velcro because when you are at the skating rink, it is all about the skating and not about wasting time lacing up your skates.  Oh and secretly crushing on the boys who preferred video games until the couples skate was announced.  Eventually I out grew my Velcro skates and moved on to bigger, more “adult” skates that I did have to lace up. I figured out a way to do it quickly with flair and grace.  I was still sporting blue wheels and a blue stopper though.  And, no, never pom-poms on my skates. I preferred the smooth classic chic look.

My favorite drink that I got every time I was at the rink was a “graveyard”.  This was a slushy that had all the syrups mixed in.  It became this deep purple color and it was the best drink a 12 year old could ask for.  The straw of course had the little scooper at the bottom so you get to the extra ice.  If I had extra money burning a hole in my jeans pocket then I got a slice of pizza.  Oh it was just some cheap frozen cardboard pizza run through a little toaster but to me it was perfection.  The cheese was all melty and stringy while the crust was crunchy and perfectly toasted.  I loved when I was able to get skating rink pizza!  Never had it again in my adult life until one day I got the bright idea to make a pita pizza.

It was a late night that found Scott and I both hungry.  We didn’t want anything huge but needed something substantial.  “Pita pizzas!” I said.  How easy is that, and pitas are good for you too!  So I made us some and heated them in the oven.  When they turned golden brown I pulled them out and served them up.  My first bite was heaven and I yelled, “OMG these taste exactly like skating rink pizza!” which I think I scared Scott a bit with my unbridled enthusiasm.  Immediately I was transported back to the rink with my blue and white skates eating a slice of pizza and sipping on my graveyard.  What a nice memory.

And I’ve been making pita pizzas for us ever since (I made one for Scott today!).  It’s a quick thing to make and pretty healthy when you break it down.  Even white pitas have loads of protein, are low fat, and low in carbs.  So today I bring you a concept more than a specific recipe.

Pita Pizzas!

You will need:

  • Pitas
  • Pizza sauce
  • Shredded cheese of your choice
  • Toppings of your choice

Preheat your oven to 400 and line a cookie/baking sheet with foil.  Spray with nonstick spray.  Put pitas on the cookie sheet and top with sauce, cheese, and toppings.  Bake for about 10 minutes or so until the cheese is bubbly and golden.  Remove, cut into 4 slices and serve!

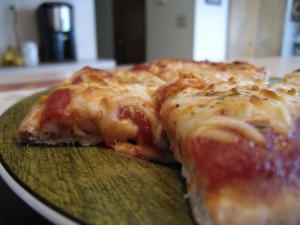
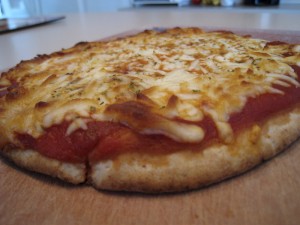
Pita Pizza

Pita Pizza

My favorite way to make a pita pizza is sauce and plain old shredded moz cheese. Sprinkle some Ms. Dash Italian blend on top and call it a day. These are great for parties and get-togethers because everyone can make their own! Have out a bunch of different cheeses and toppings so that people can pick what they like. Making sure to have plenty of meat options (sausage, ham, pepperoni) and veggie options (onions, peppers, spinach, tomatoes).  You can put out salsa and beans as well for topping choices. Since people are making their own they have more freedom over what they would like to eat. It makes for a fun activity and gets everyone in on the cooking!

And you can also grill these.  The side that’s going to be on the grill, brush with a little olive oil or veggie oil.  Top how you like, toss on the grill and cover for a few minutes till the cheese is melted and the pita is crispy.

These are simple, quick, and awesome to eat.  And if you’ve had skating rink pizza then perhaps these will bring back memories for you as well!

Enjoy guys! And remember: always play with your food!

Pear and Brie Crostini

Cranberry Sauce

Cranberry Sauce

I am a lover of cheese, but I’m not a lover of all cheese. Blue cheese or anything that has a mold as an ingredient is not something I really want to eat. Stinky cheeses and sheep’s milk cheese are also not cheeses I care for much.

This may surprise you, but brie is also not a cheese I care for too much. I know people love it but for me, brie basically tastes like what an old musty basement would taste like if you could spread it on a cracker and serve it during cocktail hour.

However I can appreciate the creamy perfection of this cheese and how when melted, it envelops everything it touches. I have discovered that I like and enjoy brie when something sweet is accompanying it.

Because brie is a cheese that almost everyone else on the planet loves and it shows up often during the holidays, I wanted to create a recipe that could be served as an appetizer. Something other than brie en croute because let’s face it, that is an old worn out technique. I also wanted something where the color would stand out and incorporated classic fall/winter flavors. Pear and Brie Crostini is the answer.

Andrea’s Pear and Brie Crostini

  • French Baguette
  • Red Pear
  • Brie slices
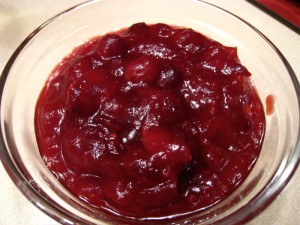
  • Cranberry sauce
  • Chopped or crushed walnuts
  • Olive oil

This is a recipe where you determine how much you want to make, that’s why I didn’t provide specific amounts. You can make this for a crowd or for a couple of friends, or just for you!

Preheat your oven to 400 degrees. Slice the baguette into 1/2 inch or slightly thicker slices. You want it thick enough to hold the ingredients but not so thick it becomes difficult to take a bite. Place slices on a cookie sheet that is lined or sprayed with nonstick spray. With a pastry brush, brush a bit of olive oil on the slices and place in the oven till golden brown, about 3-5 minutes. Remove from oven. Slice the red pear into thin slices. Use a pear that is ripe but not too soft. Place slices of pear on the baguette slices, about 2-3 per piece. Top that with brie slices and place back in the oven until the brie is melted, about 2-3 minutes. Remove from oven, drizzle with cranberry sauce and top with walnuts. Serve warm and enjoy!

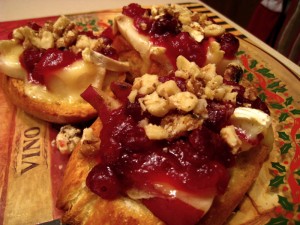
About to be served

About to be served

This recipe exceeded all of my expectations and that makes me drunk with happiness. I love when an idea I have swirling around comes together more perfectly than I could have imagined. This little appetizer is amazing and as my husband put it, “This is really smooth. Everything flows together.”

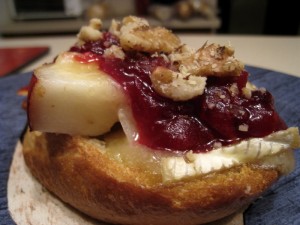
The pear gives the dish a little more umph and the brie provides a nice creamy warm cheesy goodness. The cranberry sauce creates a nice sweet-tart contrast to the smooth pear and cheese while the walnuts bring crunch and added texture. The brie slices make it feel very indulgent while the nuts and pear provide the protein and fruit boost.

Pear and Brie Crostini

Pear and Brie Crostini

I used red pears because they are my favorite and I wanted to stick with the red and white colors. However a green pear would be fine as well. You could probably even use apple slices here if you prefer. Serve this up on a pretty serving dish, maybe garnish with some whole cranberries and you’ve got a very fancy appetizer that only took a few minutes to make!

Enjoy guys! And remember, always play with your food!
Happy Holidays from OHC!

Leftover Idea: Stuffing Frittata

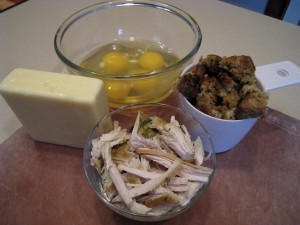
The cast

The cast

Still plowing your way through leftovers? This is one of my very favorite leftover recipes. I look forward to this all year long! I started doing this a few years back with leftover stuffing and have made it every year since. It’s so easy and so yummy! Perfect if you are hosting guests at your house and they are threatening bodily harm if you feed them another leftover. Disguise it!

Andrea’s Stuffing Frittata

  • 1 C overloaded with stuffing
  • 1 C of leftover chopped turkey
  • 4 eggs
  • 1 TBSP of olive oil
  • Shredded Cheddar for topping

Preheat oven to 400 degrees. In a medium sized skillet, drizzle in the olive oil and heat over medium heat. Then add in the turkey and stuffing. Whisk the four eggs and pour that mixture over the turkey and stuffing. Making sure the egg mixture covers the whole thing. Turn off heat and plop in the oven for about 5 minutes until just slightly shy of being set. Turn off oven and remove frittata. Sprinkle top with as much shredded cheddar as you like. Put back in the oven for about 3 minutes until the cheese is melted and frittata is fully set.

Remove from oven, cut into four slices and serve!

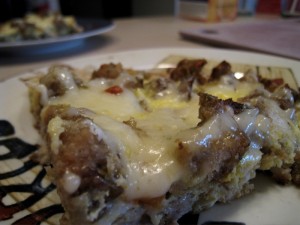
Out of the oven

Out of the oven

This dish is so easy to make and takes leftover stuffing to that next level of awesomeness. Stuffing is my favorite part of Thanksgiving dinner, so I’ll look for any excuse to keep eating it! I have made this with just stuffing and no turkey. This year I had a few bites of turkey still in the fridge so I dumped it in. But omitted, the frittata is still just as yummy.

If you have leftover cranberry sauce, some of that warmed and drizzled over top would make a really nice sauce for the frittata. You could also use egg whites in this as well. It’s up to you! Even playing around with the cheese and maybe using a pepper jack for some kick would be great! Get creative with those leftovers!

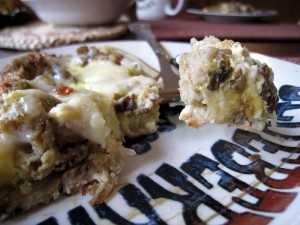
Stuffing Frittata

Stuffing Frittata

Have fun guys! And remember, always play with your food!