Garlic Teriyaki Wings

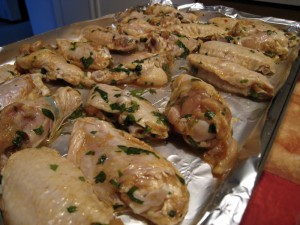
Ready for the oven

Ready for the oven

Alright the first recipe of 2009!  Woo!  I would have had this up sooner but there were technical difficulties to be dealt with but everything is peachy now.

How are we all doing post-holiday?  We’re doing pretty darn good over here at the HQ.  Snackies were indulged in but not embarrassingly so.  Or at least I think so, it was the holidays and wine was involved which means it’s possible I’m forgetting something.  My big question is, do we have room for more snacks?

Yes!

Excellent my friends.  Here’s the deal, because my site was still new around the holidays my theme related stuff was just not happening.  One of my 2009 goals is to be more on the ball and make sure that doesn’t happen again.  Yes the holidays are over but there is still one more big thing that people usually get together for so they can party, eat, drink, and yell obscenities.  It’s just like Christmas really.

Naturally I’m referring to the Superbowl!  I will be honest and tell you that we do not watch the Superbowl, not even the commercials.  However, pretty much everyone else does and because I will jump through fire to get a chance to make snacks and party foods, I thought this would be a good chance to post some of our favorite party pleasing recipes.  Things that are simple to make and simple to serve.  By simple to serve, I mean they are easy to keep warm or can be served room temperature.

First up is wings!  Wings are a pretty standard party fare, yes?  I did not used to be a wing person.  Too much work.  But then I hit college where funds were tight and 10-cent wing night ruled.  Oh yes back when Scott and I were in college, it was 10-cent wings.  Or if you were really lucky, 5-cent wing night.  None of this 25-cent bidness.  We loved wing night!

But now that we are old farts who would rather stay home and not ingest cheap beer and deep fried chicken, I’ve taken to making wings myself.  And the amazing thing about making them yourself is that you can make them any flavor you want.  I’ve experimented plenty and we are particularly fond of ones that sit in a marinade for a while.

Andrea’s Garlic Teriyaki Wings

  • 2 dozen wings
  • 2/3 C of pineapple juice
  • 5 TBSP of teriyaki sauce
  • 1 TBSP of olive oil
  • 2 big cloves of garlic grated
  • 2 tsp of chili powder
  • 1 tsp of garlic powder
  • 1 tsp of smoked paprika
  • Big pinch of salt
  • Pinch of red pepper flakes
  • 1/2 tsp of ground black pepper
  • 2 TBSP of chopped cilantro

Place the wings in a plastic storage bag.  In a small bowl, mix all other ingredients to make the marinade.  Then pour mixture over the wings in the bag.  Seal the bag and massage the wings, moving the marinade all around the wings.  Place sealed bag in a large casserole dish so the wings are laying flat.  Place in refrigerator and allow to sit for several hours.  About 6-8.  Flip the wings over at the half way mark.

Half an hour before you plan on cooking them, remove from fridge and allow to sit out so the chill comes off and they start to come to room temp.  Preheat oven to 400 degrees.

When the oven is ready, line a cookie or baking sheet with foil and spray with nonstick spray.  Or brush a little oil over the foil to help keep the wings from sticking.  Place the wings on the baking sheet in a single layer.  Place in oven and bake for about 15 minutes, flipping once.   Serve and enjoy!

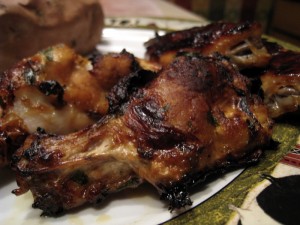
Garlic Teriyaki Wings

Garlic Teriyaki Wings

What I learned by starting to make my own wings is that wings don’t have to be bad for you.  When we hear “wings” some of us cringe and think “Oh what an awful junky food.”  But it doesn’t have to be that way.  Baking the wings instead of frying them is loads better.  Marinating provides tons of flavor without having to coat them in breadcrumbs and then toss them in a bunch of sauce.  Yes there is still chicken fat on the wing but no one says you have to eat it.  I pick it off.  I like having the fat on there as it provides more flavor and keeps the chicken from drying out as it cooks, but that’s as far as my love goes.  When it comes time to eat, I pick the fat off and plug away at my lil’ wing.

Wings are a great party food and for good reason, as they can be served warm or at room temperature.  You could even jazz these up a little more by adding some lime juice and lime zest to the marinade.  Sprinkle with some toasted sesame seeds before serving.

We have fallen in love with wing night all over again.  Healthier wings, good beer, and no lines for the bathroom. Give these a try and I bet no one will even miss the sauce!

Have fun guys!  And remember always play with your food!

Pear and Brie Crostini

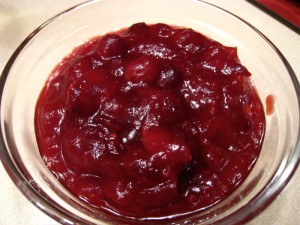
Cranberry Sauce

Cranberry Sauce

I am a lover of cheese, but I’m not a lover of all cheese. Blue cheese or anything that has a mold as an ingredient is not something I really want to eat. Stinky cheeses and sheep’s milk cheese are also not cheeses I care for much.

This may surprise you, but brie is also not a cheese I care for too much. I know people love it but for me, brie basically tastes like what an old musty basement would taste like if you could spread it on a cracker and serve it during cocktail hour.

However I can appreciate the creamy perfection of this cheese and how when melted, it envelops everything it touches. I have discovered that I like and enjoy brie when something sweet is accompanying it.

Because brie is a cheese that almost everyone else on the planet loves and it shows up often during the holidays, I wanted to create a recipe that could be served as an appetizer. Something other than brie en croute because let’s face it, that is an old worn out technique. I also wanted something where the color would stand out and incorporated classic fall/winter flavors. Pear and Brie Crostini is the answer.

Andrea’s Pear and Brie Crostini

  • French Baguette
  • Red Pear
  • Brie slices
  • Cranberry sauce
  • Chopped or crushed walnuts
  • Olive oil

This is a recipe where you determine how much you want to make, that’s why I didn’t provide specific amounts. You can make this for a crowd or for a couple of friends, or just for you!

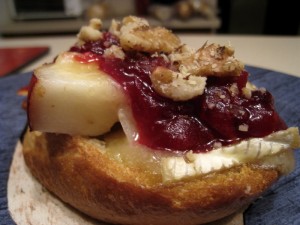
Preheat your oven to 400 degrees. Slice the baguette into 1/2 inch or slightly thicker slices. You want it thick enough to hold the ingredients but not so thick it becomes difficult to take a bite. Place slices on a cookie sheet that is lined or sprayed with nonstick spray. With a pastry brush, brush a bit of olive oil on the slices and place in the oven till golden brown, about 3-5 minutes. Remove from oven. Slice the red pear into thin slices. Use a pear that is ripe but not too soft. Place slices of pear on the baguette slices, about 2-3 per piece. Top that with brie slices and place back in the oven until the brie is melted, about 2-3 minutes. Remove from oven, drizzle with cranberry sauce and top with walnuts. Serve warm and enjoy!

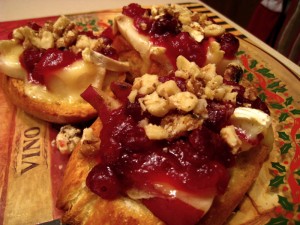
About to be served

About to be served

This recipe exceeded all of my expectations and that makes me drunk with happiness. I love when an idea I have swirling around comes together more perfectly than I could have imagined. This little appetizer is amazing and as my husband put it, “This is really smooth. Everything flows together.”

The pear gives the dish a little more umph and the brie provides a nice creamy warm cheesy goodness. The cranberry sauce creates a nice sweet-tart contrast to the smooth pear and cheese while the walnuts bring crunch and added texture. The brie slices make it feel very indulgent while the nuts and pear provide the protein and fruit boost.

Pear and Brie Crostini

Pear and Brie Crostini

I used red pears because they are my favorite and I wanted to stick with the red and white colors. However a green pear would be fine as well. You could probably even use apple slices here if you prefer. Serve this up on a pretty serving dish, maybe garnish with some whole cranberries and you’ve got a very fancy appetizer that only took a few minutes to make!

Enjoy guys! And remember, always play with your food!
Happy Holidays from OHC!

Leftover Idea: Potato Puffs

Thanksgiving OHC Style

Thanksgiving OHC Style

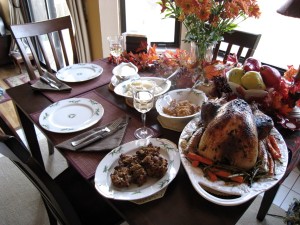
Hi guys!  I hope you all had a fantastic Thanksgiving full of yummy food, laughs, and naps!  Over at OHC HQ we had a beautiful day, the skies were clear with a very mild temperature outside.  Perfect for an afternoon stroll to help digest the big meal.

Here we are the day after and while some of you may be shopping and scoring deals, others of you may be wondering how to handle all those leftovers in your fridge.  My suggestion is to turn them into something else!

For example, if you have leftover mashed potatoes and the last thing you want is another scoop of them, try my little Potato Puff recipe!

This is a recipe you can play around with and discover new combinations!  Possible mix-in ideas can include:

  • Leftover greenbean casserole
  • Leftover corn or corn pudding
  • Turkey and cranberry sauce
  • Corn and stuffing

Or you can even make a sweet potato puff!  Don’t get in a leftover rut, use your imagination and get creative with leftovers!

Happy Holidays from OHC!

Ham and Cheddar Potato Puffs

Jazz up leftovers

Jazz up leftovers

It never fails, whenever I make mashed potatoes I always make way too much. Then I have leftovers and I wonder what I’m going to do with them. Sometimes they get eaten with the next night’s dinner but sometimes they don’t. I hate throwing out food and have since vowed to always try and do something with my leftovers.

Thankfully mashed potatoes are a dish that can be easily and quickly turned into something else. They can go the savory route or, believe it or not, the sweet route. I typically stick with the savory road myself. I love mashed potatoes. A comfort food for me that I often turn to when I need a big comfy sweatshirt and a hug.

This is a recipe I created so that I could use up the small amount of leftover mashed that was sitting in my fridge. The rest of the meal that accompanied the potatoes had been eaten and they were all that remained. I pulled out some other things from the fridge to add to the potatoes and my little potato puffs were born.

Andrea’s Ham and Cheddar Potato Puffs

  • 1 1/4 C of mashed potatoes
  • 1 egg
  • 3 TBSP of sour cream
  • 1/4 C shredded cheddar
  • 3 slices of deli ham chopped
  • 6 chives chopped

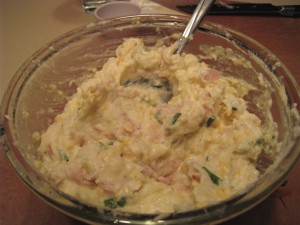
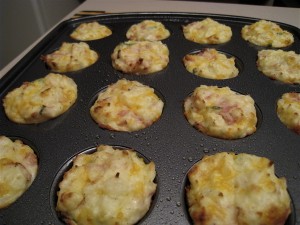
Preheat oven to 375 and with some nonstick spray, grease a mini-muffin pan. In a medium sized mixing bowl combine all of the above ingredients until everything is well mixed. Spoon into the mini-muffin pan, filling the each area to the top. Bake for about 15-20 minutes until the potatoes are puffed, browned, and set. Makes about 15 mini potato puffs.

From the oven

From the oven

These make perfect little appetizers or a nice side to a meal. You can mix in whatever strikes your fancy. Perhaps doll them up a bit more with some parm and prosciutto. Maybe add some swiss and bacon. The possibilities are endless with these.

You can freeze them and reheat them whenever the mood strikes or as a make ahead dish to a party. Just put the oven on at 350 and heat until they are warmed back through. Enjoy guys! And remember, always play with your food!
Ham and Cheddar Potato Puff

Ham and Cheddar Potato Puff

Apple Cheddar Quesadillas

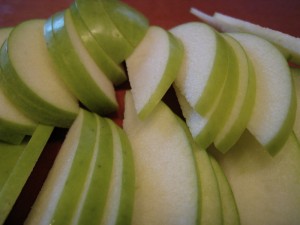
Crisp Apples

Crisp Apples

A big indicator that fall is on the way can be marked by the arrival of apples. Apples become cheaper at the grocery store, there is more of them, and they are huge because they are in season. I love apples. Raw or just warm please, I do not like cooked apples. And yes that means I don’t like apple pie. My favorite combination is peanut butter with an apple. Can be a tart or sweet apple, I’m not picky. I used to not care for the tart apples much but have since gotten over that and now will gladly eat whatever apple comes my way.

I recently saw Paula Deen make this grilled apple sandwich and it had me intrigued. I have recently started mixing fruit in with savory dishes. I didn’t use to be a big fan of that but having apples with cheese fondue converted me. The sweet crispness of the apple combined with salty garlicy cheese sent me to the moon. I loved it! And it caused me to start experimenting by combining fruits with other things I normally would have avoided.

One thing I used to avoid was mixing apples with onions. I know it’s a classic combination but as I mentioned above, I don’t like cooked apples. And most apple and onion dishes involve cooking the apple. Paula’s sandwich was heated enough to make everything toasty warm without cooking the apple. This sold me on the concept. I wanted to take the main ingredients and see if I could come up with a lighter version that would still be full on flavor. Apple Cheddar Quesadillas were born.

Andrea’s Apple Cheddar Quesadillas

  • 2 flour burrito sized tortillas
  • 1 granny smith apple, thinly sliced
  • 12 1/4 inch slices of good sharp cheddar
  • 1/4 of a small to medium red onion, thinly sliced
  • 2 tsp of unsalted butter or spreadable butter
  • Nonstick cooking spray

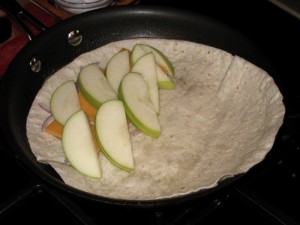
Heat up a medium sized skillet over medium heat. Spread 1 tsp of butter on one side of each tortilla. Spray the skillet with cooking spray (just to make sure there will be no sticking). Lay one tortilla, butter side down in the skillet. On half of the tortilla, layer it with some sliced onion, then four slices of cheddar, and then a handful of the apple. Then two more slices of cheddar on top of the apple. Fold the remaining half of the tortilla over the side with the fillings. Cook for about 4 minutes. Carefully flip the quesadilla over and cook the other side for 4 minutes or until the cheese is all melted and the tortilla is brown and crispy. Cut into thirds and eat!

I had a block of my favorite cheddar on hand (Helluva Good Extra Extra Sharp Cheddar) so I used that. But you can use whatever cheddar you like or have on hand at the time. I did have leftover apple, which we ate with our dinner, but it could be used to make a third quesadilla. Just slice a little more onion and cheese to stretch the recipe.

About to get more cheese on top

About to get more cheese on top

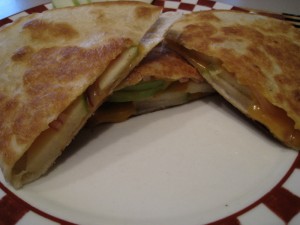
Both Scott and I loved this quesadilla. It had really nice flavor combination to it without the onions overpowering everything. The apples gave the quesadilla a nice crunch and were just warmed through perfectly. It made for a perfect light meal. We were left full and satisfied, without being overfull or weighted down by a heavy main dish.

Perfection

Perfection

This is definitely something that will move into rotation here at OHC HQ. This is a nice light dish that I can feel good about eating and serving. This would also make a great appetizer or as part of a tapas bar for a party. Make a bunch, cut them up into smaller pieces and keep them warm in your oven or toaster oven.

Enjoy guys! And remember, always play with your food!