Coffee and Cocoa Rub

You all know that I love a good rub down. Personally I’ll take a well rubbed hunk of animal over a marinated one any day of the week.

And twice on Sundays please.

Because of this I’m constantly creating new rubs and trying out different seasoning combos.

One that I couldn’t get out of my head was using coffee grounds in the rub.

If we had a compost pile or actually planted things around the house, those coffee grinds would be put to good use.  For now they end up getting tossed and I feel like that is such a waste.  I’ve been looking for new uses for them.

Some are to eat and some are for the body.

I decided to try out some of the grounds in a rub and both of us were pretty pleased with the results.

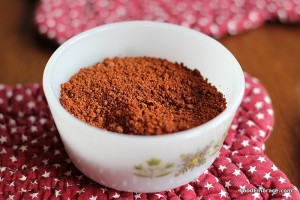
Andrea’s Coffee and Cocoa Dry Rub

  • 1TBSP Coffee Grounds (whatever you used that morning is fine)
  • 1TBSP Unsweetened Cocoa Powder
  • 2tsp Garlic Powder
  • 1TBSP Brown Sugar
  • 3tsp Chili Powder
  • 2tsp Smoked Paprika
  • Pinch Salt

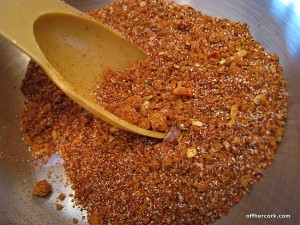
Combine all ingredients in a bowl and use on chicken, beef, or pork.  You can even use this on veggies or tofu!

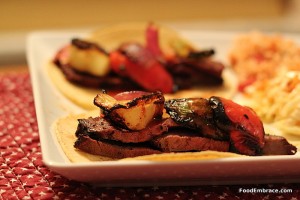
I’ve used this rub on a rack of ribs and also on some flank steak.  I prefer it on the steak!  It gave the steak an very lovely deep color as it grilled, along with providing a nice crust on the outside.

I fought Scott over the crispy ends!  We made tacos with the flank steak, grilling up some onions and peppers on the side.

You can also add a bit of oil to the rub to make a paste and use that on veggies or tofu, cooking them however you choose.

The coffee provided more color than it did flavor but the combo of coffee and cocoa did provide a more intense beef taste.

If you drink coffee, try using the grounds in recipes and experiment a little.

And if you’re going to be getting in some grilling because you’re not ready to let that go just yet, give this rub a try!

Have fun guys, and remember, always play with your food! Enjoy!

Homemade Bread Crumbs

Most of us are accustomed to seeing that canister of “Italian Style” breadcrumbs in the grocery store.  Most of us have probably even purchased it a time or two.

Or several times.

I’m as guilty as the next person, I used to have them on hand all the time.  Then a light bulb went off and I realized I could make my own at home with the bread that I liked.

Making breadcrumbs couldn’t be easier, you only need two things:

  • Bread
  • Food Processor

That’s it!  I like to use the end pieces of bread to make bread crumbs but you can use whatever you like.  After I slice up bread that I brought home, I usually put the end pieces in their own bag.  Unless I eat one right away!  I take the bag of end pieces and tuck them in the freezer until I’m ready or until I gather enough to make bread crumbs.

When the time comes, I pull the bread out and let them sit out in the kitchen for about a day so they get nice and stale.  Then I plop them in the food processor and pulse until I get the desired consistency for my bread crumbs.  I like them small and fine, so I pulse quite a few times.

You have the option of seasoning the breadcrumbs at that point or waiting until you use them and season them to accent the dish you are using them for.  Dried herbs like oregano and basil with some garlic powder will get you the “Italian Style” breadcrumbs that you see at the market.

When you make breadcrumbs at home you are in the driver’s seat and have control of the situation.  You know what bread was used and what it was made of. If you bought local, you know where it was made as well! Plus you know when exactly those breadcrumbs were made and you know exactly what’s in them.

This can provide great peace of mind when you are trying hard to provide healthy meals to your family and friends.

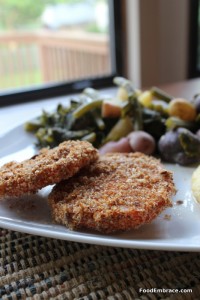
Then you can use your breadcrumbs to make fabulous dishes like “unfried green tomatoes”.  Recipe for those tomorrow!

Tuesday Tip: Olive Oil dipping sauce

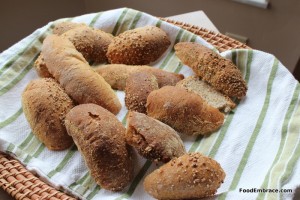
Olive oil and spices The first time I’ve ever had bread and oil as part of a meal was back in North Carolina, about 7 years ago.  Scott and I had just purchased our first house and we were out having a celebratory lunch.  The server brought out a basket of warm bread and a little dish that she poured seasoned olive oil into, then quickly scurried away.

Me: What do we do with this? Do I just dip the bread into the oil?

Scott: I think so. I’m not sure what other options there would be.

Me: Okay. Although dipping bread into oil and eating it is a little odd.

Scott: Totally weird.

The concept was so foreign to me.  “You want me to what?! Dip this bread into some fat and munch away?”, was my thought process.

But you know what? It was fabulous.  And of course olive oil is full of good heart healthy fats, so it all worked out!  From that point on I started looking more at flavored olive oils and olive oils labeled as “dipping oil”.  And you know what I found?

That stuff is flipping expensive!  Most were over $10 for a very small bottle of flavored oil.

Um, no. I’m not spending that much unless it’s also going to wash the dishes when I’m done eating.

At this point I realized that I could make my own.  I like having oils and vinegars multi-task at the HQ.  Because of that I don’t flavor a whole bottle of oil.  I do a quicker trick that is just as tasty and beautiful!

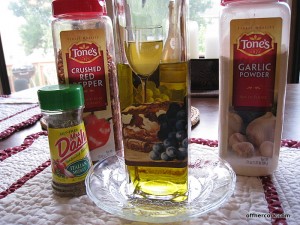
I pour a good quality olive oil onto a small plate.  An oil that I would also use in salads specifically for the flavor.  Then I sprinkle in some seasonings, whatever floats my boat that day.  Typically they are:

  • Garlic powder
  • Red pepper flakes
  • Italian Seasoning (salt free, Ms. Dash is the best in my opinion)
  • Chili powder or a pinch of cayenne for extra heat
  • Fresh ground black pepper

All of those to taste. I’m usually more heavy on the garlic and red pepper flakes.  Give it a quick stir and surround the oil with your favorite type of bread.  It’s unbelievably tasty and a very quick appetizer to put together.  Since oil can be stored at room temperature, you can make this ahead of time for guests and the flavors will just mingle and increase the longer it sits.

Try making your own olive oil dipping sauce for bread! It’s quicker, cheaper, and darn tastier!

Cocoa-Chili Rubbed Chicken Thighs

Cocoa-Chili Rub

Cocoa-Chili Rub

I have seen people use cocoa powder before in savory recipes and it always interested me.  However, I’ve never been inspired enough nor had that spark of creativity to come up with a use for it till now.  I was watching some Food TV one Sunday morning and at the same time thinking about what I can make for dinner that evening.  I like to create sort of traditional Sunday Suppers for us and when the warm weather arrives, both of us love when Sunday Supper includes grilling.

I started going through the inventory sheet in my mind of things I had on hand that I could use with cocoa powder.  One of my favorite combinations is dark chocolate and dried cranberries.  Normally I’m not much of a fruit + chocolate person but there is just something about the slight bitterness of dark chocolate paired with the sweet tartness of cranberry that makes me sigh with delight.

I decided to work with this combo and create a grilled chicken dish around those flavors.  I knew this would be perfect to try out on some chicken thighs and bringing out poultry means making a brine.  That’s where the cranberry comes in.  Ready to cook with chocolate?

Andrea’s Cocoa-Chili Rubbed Chicken Thighs

For the Brine:

  • 1.5C Unsweetened cranberry juice
  • 2C Water
  • 1/3C Kosher salt
  • 3TBSP Packed brown sugar
  • 1/4-1/2 Medium onion, chunked
  • 2 stalks celery, chunked
  • 2 garlic cloves
  • 2tsp Ground Black pepper
  • 1tsp Garlic powder
  • 2tsp Chili Powder
  • 1tsp Smoked paprika
  • Pinch Cayenne pepper
  • Pinch Red pepper flakes
  • 5-6 Bone-in chicken thighs

For the Rub:

  • 1tsp Dark Cocoa powder
  • 2tsp Chili powder
  • 1/2tsp Garlic powder
  • 1tsp Grill Seasoning (salt free)

The brine gets created first.  In a large deep bowl combine the cranberry juice, salt, sugar, and water.  Stir everything together until the salt and sugar are dissolved.  Then add in the onions, celery, and remaining seasonings, stir to combine.  Add in the chicken, and then add more water so that the chicken is completely covered and submerged in the brine.  Place bowl in the fridge and allow the chicken to brine for at least 6 hours.

About an hour before you are going to grill the chicken, remove the chicken from the brine.  Give a quick rinse and pat dry, placing chicken on a plate.  Combine all the ingredients for the rub in a small bowl.  Then rub down the chicken with the cocoa chili rub making sure that the entire thigh is covered.  Allow the chicken thighs to sit in the rub for at least 1/2 an hour.

Heat grill and cook the thighs until cooked through, about five minutes each side.  Remove from grill, allow thighs to rest for about 2 minutes and then serve.

This recipe turned out so much better than I expected.  Admittedly I was a little nervous working with cocoa powder in a savory dish because I had never done that before.  We’re always afraid of the unknown, right?  As it was grilling, the chicken smelled amazing.  Which made Scott and I both very excited to try this new dish!  We kept pacing around the deck watching the clock so we could eat already.

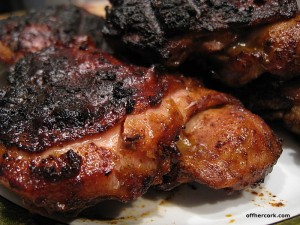
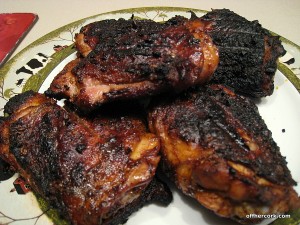
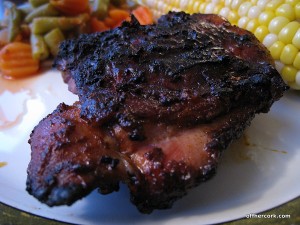
The thing that stood out the most was the visual presentation, the chicken having a nice dark color from the rub.  Chili powder is a deep color on it’s own, by adding the cocoa powder, not only does it add another depth to the flavor but it also brings more richness to the color of the chicken as it cooks.

Grilled Chicken Thighs

Grilled Chicken Thighs

The flavor of the chicken was beyond what I was expecting.  Chili powder has a spicy heat to it which is enhanced by the sweet yet slightly bitterness of the cocoa powder.  It provides a rich deep flavor that I wasn’t quite expecting and ended up loving.

I don’t eat meat all that much and when I make something like chicken, I prefer bone-in skin on pieces.  The chicken is more moist as it cooks because of the skin and usually bone-in pieces are larger providing you with more for your money because they are also cheaper cuts of meat.  I don’t eat the skin, I take it off.  It’s purpose is to provide flavor and keep the chicken from drying out.  However, this does not mean you have to do the same.  If you prefer boneless, skinless, by all means use that.

I used unsweetened cranberry juice because it was going into a brine and I wanted to control the sugar amount.  Plus unsweetened juice is much better for you and there’s no worry of fake or chemical additives.

Cocoa-Chili Rubbed Grilled Chicken Thighs

Cocoa-Chili Rubbed Grilled Chicken Thighs

I started with 1tsp of cocoa powder since this was my first attempt using it in a savory dish.  Next time I make this, I’m going to try adding a bit more cocoa and see what happens.  I’ll probably go up to 1.5tsp.  If you make this and want to pump up the cocoa amount, go for it!

This was a great intro recipe for using cocoa powder in savory dishes.  I can’t wait to start experimenting more and seeing what I can do!

Enjoy guys! And remember, always play with your food!

Chili Rubbed Beer Can Chicken

Substitute

Substitute

I have been intrigued by the beer can chicken technique ever since I first saw it done.  At first I thought it seemed a little silly and then I realized that perhaps those folks were on to something.  Just maybe this would be an awesome idea.  However, when I saw it done it typically involved a smoker or using a grill for hours on end.

Those things did not appeal to me.  I just sort of stored the concept in the back of my mind.  Time had passed and if this were a video blog I would insert some sort of musical montage at this point but since it’s not a video blog, you’ll have to imagine one.  Be sure to include jazz hands, headbands, and 80s music.

Trust me it’s fitting because the person who brought the beer can chicken concept back to the forefront of my mind was Guy Fieri.  Bling, bling!  I saw him make beer can chicken in his oven.  “Oh snap, I can totally do that too!”  Cue me busting around the house gathering ingredients.

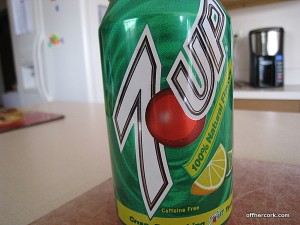
One problem was that I did not have a beer can.  Scott and I don’t drink beer out of cans.  Call us snobs, but whatever, I’m not doing it.  That’s just a road I am not willing to walk down and I also really like beer (as long time readers know) so I stick with bottles.  Not to worry, because I am a improvising whiz, I used a 7up can.  I also don’t drink pop; however, we have some on hand for company.  I dumped the pop and poured in some beer.  Beer can chicken was born.

Andrea’s Chili Rubbed Beer Can Chicken

  • 1 roasting chicken
  • 1 12oz can of beer
  • 6oz of beer
  • 1C chicken stock (have extra on hand)

For the rub:

  • 2tsp of garlic powder
  • 1/2 tsp of smoked paprika
  • 2 TBSP of good chili powder
  • Pinch red pepper flakes
  • Grill seasoning (to taste, I used about 1tsp)
  • Cayenne pepper (to taste, I used a few sprinkles)
  • Salt and pepper (to taste, check salt content of chili powder and grill seasoning before adding too much salt)

Combine all the rub ingredients in a small bowl.  Either the day before or early in the morning the day you are going to roast the chicken, rub the chicken with the dry rub you just made.  Be sure to get inside the chicken and under the skin.  Either place in a casserole dish or plate with high sides and cover wtih plastic wrap.  Allow the chicken to sit with the rub in the fridge overnight or for  6-8 hours.

1/2 hour before you plan to start roasting the chicken, pull it out of the fridge and allow to sit on the counter to help bring the temperature of the chicken down closer to room temp.  Preheat oven to 375.  Fill beer can 1/2 way with beer (6oz of beer).  You can also add in garlic cloves and fresh herbs at this point for extra flavor.  Place beer can in the roasting pan and fit the chicken on top.  You may need an extra pair of hands to hold the can steady for you.  In the roasting pan you can add some veggies and chicken stock.  About a cup or more of stock to use as a basting liquid.  Either drink the other 6oz of beer or you can use that combined with the chicken stock for a basting liquid as well.

Place roasting pan with chicken in the oven and cook until the chicken is done.  About an hour and a half.  Use a meat thermometer to montior the internal temperature of the chicken.  While the chicken is roasting, baste about every 15-20 minutes.  This helps keep the outside of the chicken moist and from drying out.  Because the chicken is raised on the beer can, the entire chicken is exposed and will roast nicely when monitored.

When the chicken is done, remove from oven and give one last basting.  Allow to sit for 10 minutes before removing from beer can and slicing.  The beer can will be hot and will also release steam, so take care when removing the can from the chicken.  It’s best to gently tip the bird over and remove the can while the chicken is laying flat.  You can coat the outside of the can with nonstick spray before cooking for easier removal.

Slice as you normally would and serve!
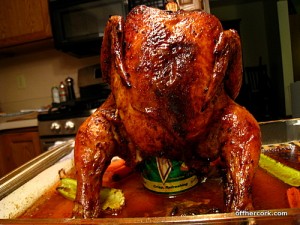
Chili Rubbed Beer Can Chicken

Chili Rubbed Beer Can Chicken

That’s one nice looking bird, isn’t it?  I have to say that I was nervous when making this for the first time.  I had visions of the chicken exploding or falling over and causing a huge mess.  That wasn’t the case at all.  It roasted nicely and smelled amazing as it cooked.

I used a red beer, Killian’s, when I made this.  You can use whatever beer you have on hand, but I do think a darker beer gives a little bit more flavor to the chicken as opposed to a lighter beer.  Feel free to play around with it though and see what what happens.

The reason to have extra stock on hand is because it will evaporate as the chicken roasts.  You may need to add more to the pan so your basting liquid doesn’t run out.

Normally I brine my chickens and chicken breasts before cooking them.  However, since this was the first time trying out this recipe, I wanted to see how it did without any outside influence.  I have to say that this produced one of the juiciest and tenderest non-brined roast chickens I’ve ever had.  I was pretty impressed with the taste.  Not only was it tender, but the rub, with the help of the beer steam, permeated through the entire chicken.  I would make this chicken again in a heartbeat and maybe tweak the rub a little bit as well.
Ready to serve

Ready to serve

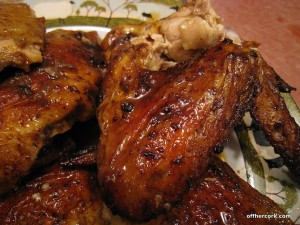
The thing I loved most about this chicken was the color.  The smoked paprika and chili powder present a nice deep color to the chicken, so as it roasts it takes on a nice deep golden color.  As I mentioned before, since the entire chicken is exposed due to sitting on the can, the whole chicken turns crispy golden which is very impressive to look at and would make a great presentation for serving guests.

Enjoy guys!  And remember, always play with your food!
Thoughts on dry rubs

Make your own

Make your own

Dry rubs are exactly as their name describes, they are a dry mix of seasonings/herbs that are rubbed onto meat or poultry.  You might have heard it referred to when people discuss prepping meats for a smoker or BBQ.  However, you can use dry rubs anytime, not just for grilling or smoking.  I started using dry rubs when my attempts to marinade meats and poultry just were not working out.  With a marinade I’m looking for a punch of flavor with each bite.  I want that wow factor.  Marinades were not wowing me.  This is when I started looking more into dry rubs and I’ve been a fan ever since.

In fact, I don’t even marinade beef at all anymore, I’m strictly a dry rub girl.  Everything in this house that is not seafood, will get some sort of seasoned rub on it.  And that includes things I’ve brined.  Just because they’ve brined doesn’t mean I’m done adding flavor.  Let me explain myself a little bit so maybe you can see where I’m coming from.  I’m huge on flavor, I want things to knock me over.  I’m not into subtle and I’m not into no flavor at all.  There are folks who grill steaks and add nothing but maybe a pinch of salt or butter.

To me that’s bland.  It’s apartment-grade “neutral”, it’s not my style.  I know what plain steak tastes like so let’s take this to another level and see what kind of result we get.  Sticking with plain and neutral all the time is snorefest boring.

This is where dry rubs come in because they can take meat and poultry to a whole other level.  They can bring you the wow factor.  They not only add flavor but will also provide a nice coloring to whatever is being cooked.

And the best thing about dry rubs is that you can make your own!  You do not need to buy a fancy jar of “grill rub” for $5.  No, no, no.  You can make your own in your kitchen because all you’re doing is making a mixture of spices and herbs.  This allows you to have control over your ingredients and gear it towards the flavors you are craving.  Perhaps you’re in a more spicy mood?  Maybe you want a load of garlic and rosemary?

Then you can make it!  I’m not providing measurements at this point because it changes on what I’m using the rub on.  But I typically start with the same base and go from there.  My standard base consists of:

  • Kosher salt
  • Fresh ground black pepper
  • Garlic powder
  • Smoked paprika

And then depending on what flavor I’m looking for, I build up.  Maybe adding in some red pepper flakes and cayenne for some kick.  Perhaps a smoky chili powder for a little deeper flavor and darker color.  Maybe poultry seasoning if I’m looking for comfort and something familiar.

Some upcoming recipes may have the addition of rubs so I thought now would be a good time to discuss them.  Here are a few things I’ve learned about using a dry rub:

  • When using a dry rub on red meat, allow the rub to sit for several hours before cooking.  Red meat responds very well to dry rubs and the longer it can sit the better.  Overnight is ideal, but starting it in the early morning for later in the evening is fine.
  • If using a dry rub on red meat that is going to be grilled or seared, be sure to add a little bit of brown sugar.  Not so much that it makes the rub sweet and detract from the other flavors, but just a small amount will help the outside caramelize and crisp up very nicely.  And good lord it’s tasty too, bonus!
  • If using a dry rub on chicken and other poultry, be sure to also get some under the skin as well as on top.  If prepping a whole bird, be sure to rub some on the inside as well.
  • Don’t forget to rub something that has been brined!  Meat and poultry should be allowed to come to room temperature before cooking as this results in a juicier product.  After the meat/poultry is pulled from the brine, rinsed and patted dry, rub with a bit of dry rub that will compliment the seasonings used in the brine.  The meat/poultry will be able to absorb some of that as it’s coming to room temperature.  It will also help provide a nice outside crust and deep golden color as it cooks.
  • At the risk of sounding dirty, you can’t be afraid to get intimate with the goods.  This is a rub after all, which means you need to get in there and rub it in.

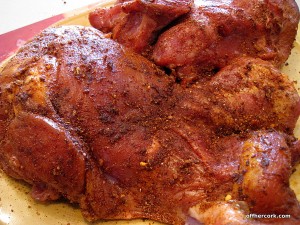
In the beginning, the meat/poultry will sort of not look like much.  Such as this:

Just rubbed

Just rubbed

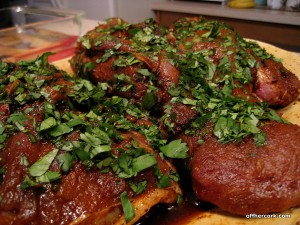
But after sitting for several hours it will look juicy and ready for some heat!

Ahhhh

Ahhhh

Obviously I added the herbs when I pulled the meat out of the fridge, the rub did not make them magically appear. ;)  These were turkey thighs, and you can see how much juice and goodness happened just after sitting the day away with the rub.

The next time you plan on cooking some poultry or meat, think about using a dry rub and take your dish to that next level!!