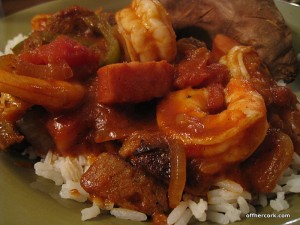
Spicy Shrimp and Sausage

Scott and I love seafood.  Like LOVE it, in what probably results in something verging on ridiculous.  I try to make sure that we have seafood at least twice a week since that is our preferred “animal” protein source.  Tuesdays we have fish so that leaves another day free for whatever.

And while I don’t eat a lot of meat, one thing I love is sausage.  My love for it would be just a few levels down from seafood.  Seafood I would eat everyday if you gave it to me, sausage I have to be in the mood for.  I swear I’m not trying to make a joke with that statement.

Sometimes those two wants just happen to collide with each other.

I will tell you that because I love food so much, I am constantly thinking about it.  I would guess this is the way most foodies behave.  Wondering about your next meal, when you can get in the kitchen and create.  Or maybe that’s just me?

One day Scott asked me what we were having for dinner and my response was, “I’m not sure yet but I do know that some shrimp and sausage needs to find their way into my bellah right quick!”

Once I had a base plan, knowing I was going to use shrimp and sausage, I started formulating a recipe around them.  I decided I wanted something with a little bit of a kick and something saucy.  Sort of a take on jambalaya a little bit.

Then I realized that I also wanted to incorporate beer into the mix and well crap I needed to get a move on before I started drooling all over myself.

Andrea’s Spicy Shrimp and Sausage

  • 1/2LB Kielbasa, cut into small bite size pieces
  • 2 Spicy chicken sausage links of your choice, also cut into bite size pieces
  • 1 Dozen medium sized shrimp, peeled (including removing the tail) and deveined
  • 1 Small onion, sliced thin
  • 1 Green pepper, sliced thin
  • 1 14.5oz Can of diced tomatoes (can use flavored if you prefer)
  • 1C Beer (dark, like a lager or red beer)
  • 1/2TBSP Chili Garlic Sauce (from the Asian Foods aisle)
  • 2TBSP Tomato Paste
  • Salt and pepper to taste
  • 1TBSP Worcestershire Sauce
  • 1tsp Chili Powder
  • 1 1/2 tsp Garlic Powder
  • 1/2 tsp Smoked Paprika
  • Olive oil for sauteeing

In a medium sized skillet (with high sides), drizzle a little bit of olive oil and heat over medium heat.  Add in sausage and cook till they are browned and a bit crisp.  Remove from pan and drain off excess oil if there is some.  Then add in just a touch of olive oil and the peppers and onions.  Season with seasonings and stir.  Sautee just until they start to get soft, then add in the chili garlic sauce and tomato paste.  Stir till everything is coated, and cook for about another minute.  Add in the Worcestershire sauce and beer.  Be careful when adding alcohol.  Keep an eye out that you don’t get a flare up.  Then add the sausage back in and combine.  Allow to simmer for about 5 minutes, giving time for all the ingredients to marry and enjoy each other’s company.  Add in the shrimp, stir, and cover with a lid.  Cook until shrimp is pink and done, about 3-5 minutes.

Give one final stir, pour mixture over rice, serve, and enjoy!
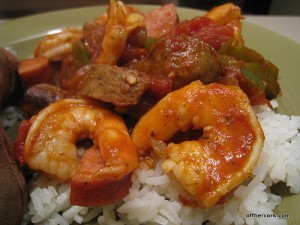
I don’t mind telling you that this dish was the flipping bomb-diggity.  I literally could not stop eating it nor exclaiming loudly to Scott that this, “Is freaking awesome!”  It was everything I hoped it would be, full of flavor, just a bit spicy, and totally saucy.

I put this on top of some Jasmine rice but you can use whatever rice you like.  Or maybe some noodles?

If you don’t dig on beer or don’t have any (which is a shame), stock/broth of your choice can be used.  I wouldn’t recommend water only because using a flavored liquid helps give the dish a little more umph and depth.

If you like super spicy, feel free to bump up the chili garlic sauce amount or even add in some red pepper flakes or jalapenos.  Totally up to you!

Have fun guys and remember, always play with your food! Enjoy!

Chipotle Glaze

Chipotle Glaze

Chipotle Glaze

This was another idea I came up with while working and thinking about what to make for dinner.  At least I’m a great multitasker!  Scott and I love fish and seafood.  Because it’s such a great protein source along with all the other goodies it contains, I try to make sure we get fish at least twice a week.  We were having salmon one night and I wanted a different way to serve it up.  I usually marinade the salmon in a teriyaki mixture because it takes to that flavor so well.  But this time I wanted something a little different.

Since I’ve been working on my heat tolerance level, I decided to try something new with the salmon by creating a sweet and spicy glaze.  Glazes aren’t something I really work with too much and I thought it was about time I changed that up.  I pulled out some chipotles and put together this really great tasting glaze.

Andrea’s Chipotle Glaze

  • 1 chipotle in adobo sauce
  • 1/2 TBSP of the adobo sauce
  • 1TBSP honey
  • 1 garlic clove
  • 1/2TBSP soy sauce
  • 2tsp grill seasoning (salt free!)
  • 1/2tsp smoked paparika
  • 1/2tsp garlic powder
  • 1tsp olive oil
  • 1tsp of lime juice
  • Pinch sea salt

Put all ingredients in a mini-food processor and pulse until a nice thick sauce is formed.

Simple right?  And this glaze could be used on anything from tofu to chicken. I used it on salmon steaks and here’s what I did:

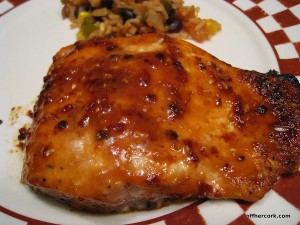
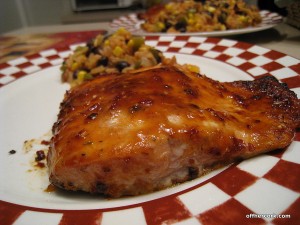
Chipotle Glazed Salmon

Chipotle Glazed Salmon

Andrea’s Chipotle Glazed Salmon

  • 2 salmon steaks
  • Chipotle glaze

Preheat oven to 400.  Line a cookie sheet with nonstick foil and place the salmon on top.  Brush the salmon with some of the glaze reserving about 1/3.  Allow the salmon to cook for a few minutes and then add the rest of the glaze.  Finish cooking the salmon, about 7-9 minutes total cook time. Allow to rest for a minute and serve!

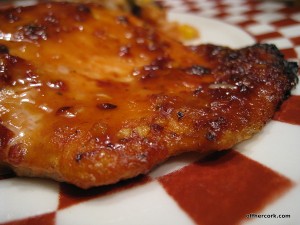
The glaze worked exactly how I was expecting it too and it was so tasty!  I was a bit worried if it would be too spicy for me and it was not at all.  It was spicy and sweet, the prefect balance.  Completely full of flavor and made one of the best salmon dishes we’ve had yet.  The smokiness of the adobo sauce provided a nice background while the honey helped the glaze stick and provide nice carmelization as the salmon baked.

I wasn’t done with it though.  I wanted to know how this was going to work with something grilled.  An even bigger test.  I still wanted to work with seafood and decided to try this out on some shrimp, but how? I finally decided to make some shrimp and pineapple skewers.

Because I wasn’t brushing this on but using it as a quick marinade and coating, I needed to bump up the glaze amount a bit.  Here’s what I did:

Andrea’s Chipotle Glaze for marinading

  • 2 cloves of garlic
  • 3 chipotle peppers
  • 1TBSP sauce (plus a pinch more)
  • 1.5TBSP soy sauce
  • 1TBSP honey
  • 1.5 tsp olive oil
  • 1tsp garlic powder
  • 1tsp smoked paprika
  • 2tsp grill seasoning
  • Pinch seasalt

Add all ingredients to a mini food processor and pulse until you get a sauce mixture.  By upping some of the ingredients, you get a little bit more of a sauce which makes it more appropriate for a marinade.  Seafood you only want to sit in the marinade for a few minutes. Things like pork, chicken, and steak can handle it for a bit longer.

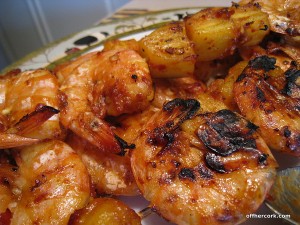
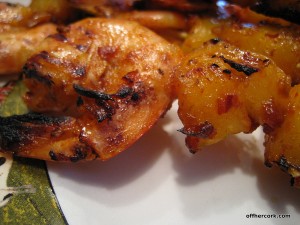
Shrimp and pineapple skewers

Shrimp and pineapple skewers

Now I made shrimp and pineapple skewers with this and grilled.  Here’s what I did:

Andrea’s Chipotle Glazed Grilled Shrimp and Pineapple Skewers

  • This makes 4 shrimp and pineapple skewers
  • 1C pineapple chunks
  • 1/2-1 lb of EZpeel shrimp
  • Chipotle marinade

If you’re using bamboo or wooden skewers, soak them for about 15 minutes in water first.  Then rub them with a little bit of olive oil. This helps prevent food from sticking to them and from burning on the grill.  In a medium sized bowl, combine all the ingredients.  Allow to sit for about 5 minutes.  Then assemble the skewers alternating pineapple and shrimp and plate.  Pour the remaining sauce over the skewers and squeeze a little lime juice over top. Place skewers on a hot grill.  Cook about 2 minutes on each side.  You’ll notice the shrimp turning pink and that means they are cooked and done on that side.  Shrimp do not take long to cook at all, be careful not to overcook them. When cooked, remove from grill and allow to rest for a minute, then serve!

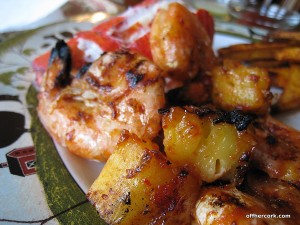
Sweet and spicy

Sweet and spicy

These were perfect!  Slightly spicy with a sweet finish from the honey and the pineapple.  Grilled pineapple is such a surprisingly tasty experience.  The smokiness from the grill and the sweetness from the fruit make for a great flavor combination.  The shrimp were juicy and flavorful.

In the glaze, I used seasalt but if you don’t have any, kosher will work fine.  Just a very small pinch because there is plenty of salt action from the soy sauce.

You’ll also notice that for the skewers, I added the lime juice last. When working with seafood, the citric acid will start to “cook” the seafood which can result in a mushy texture after you actually cook it with heat.  Save the lime for right before cooking.  If you’re working with something other than seafood, you can add the lime juice before cooking.

There you go guys!  Two great applications for my Chipotle Glaze!

Chipotle Glazed Salmon

Chipotle Glazed Salmon

Chipotle Glazed Grilled Shrimp and Pineapple skewers

Chipotle Glazed Grilled Shrimp and Pineapple skewers

Enjoy guys!  And remember, always play with your food!

Salmon Patties

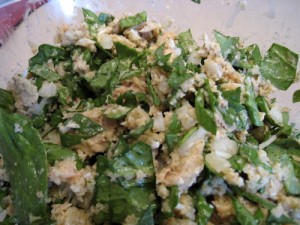
all mixed up

all mixed up

My mom used to make salmon patties all the time and admittedly I didn’t really care for them (sorry Mom!).  They were a little too on the fishy tasting side for me.  A little potent.  Once I left and was on my own for meals I forgot about them.

And then I picked them back up again.  I’m not sure how it happened.  If I was watching a cooking show maybe and saw someone make something simliar or what, but my interest was renewed.  I realized I didn’t have to make them the way my mom had, I could make them however I wanted and jazz them up a bit.

Sometimes it is really interesting to see the differences in the types of foods Scott and I each grew up with.  He did not have salmon patties as a staple growing up or even had them before I started making them.  This was something totally new for him.  He loves fish, so I was sure he was going to like it.  Over the years I have come up with a standard salmon patty recipe that isn’t overly fishy tasting and results in a light flavor not leaving you weighted down.

Andrea’s Salmon Patties

  • 1-6oz pouch skinless, boneless salmon
  • 1 egg
  • 1 TBSP of dijon mustard or a grainy mustard of your choice
  • 1/4 of a medium yellow onion, chopped
  • 1 TBSP of prepared horseradish
  • 2 C of fresh chopped spinach
  • 1/4 C of a combo of grated parm and asiago (shredded is also fine)
  • 1/4C of cornmeal
  • 1/4C of breadcrumbs
  • 2 TBSP of butter + 1/2 TBSP of olive oil

In a large mixing bowl, combine:

  • Salmon
  • Spinach
  • Egg
  • Mustard
  • Onion
  • Horseradish
  • Cheese

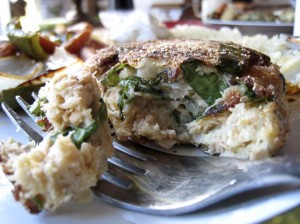
Mix until everything is in corporated.  Then add in the cornmeal and breadcrumbs and mix again (all by hand).  In a medium sized skillet (if you have cast iron, that would be preferable), heat the butter and 1/2 TBSP of olive oil over medium heat.  While that is heating, form the salmon mixture into four equal size patties.  These are going to be medium sized.  Place each patty in the skillet and cook for about 3-5 minutes on each side, till crispy.  Mostly wanting the outside to be crispy and the egg on the inside to firm up a bit.

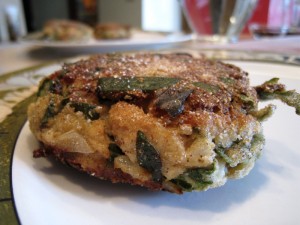
Salmon Patties

Salmon Patties

I’ve fallen back in love with salmon patties.  And in this current economic phase that the US is in, these make for a great cheap meal.  Salmon typically isn’t too expensive and you can always used canned instead, just remember to drain it first.  And frozen spinach (again, be sure to drain it well) can be used in place of fresh.

What I also like about these salmon patties is that they are really a blank slate waiting for anything to be added to them.  Shredded carrots maybe?  Some buffalo sauce instead of the mustard.  Some black beans or mashed chickpeas?  It’s all up to you what you want to do with them.  Just remember, if you add something to the mix that has more liquid, then you’ll need to probably add more breadcrumbs.

And feel free to reduce the butter amount if you want or omit it entirely and use olive oil.  It’s up to you!

Ready to eat

Ready to eat

Have fun guys!  And remember, always play with your food!  Enjoy!
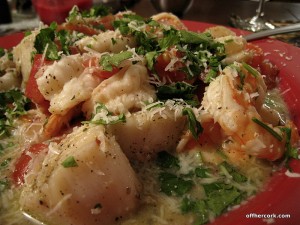
Shrimp and Scallops with garlic wine sauce

Must have

Must have

I grew up in a very small town in Southwestern PA.  Very. Small.  The kind of small town where the “fancy” restaurant is The Red Lobster (always pronounced as The Red Lobster because there can be only one.) that you had to travel 1/2 an hour to get to.  One of my very favorite things to get at The Red Lobster was the scampi.

I always felt a little decadent and grown up eating scampi.  I mean after all it did have wine in it right?  It said so right on the menu!  You have to be mature to handle a dish like that, or so I told myself.  And when the pathetic little dish of scampi arrived with the overcooked super tiny balls of shrimp, I was in heaven.  And you best believe I ate all that sauce too.  “Come ‘ere cheddar biscuits and help a sister out!”

Please, don’t even front and act like you don’t know what I’m talking about.  You have all been to The Red Lobster and you all can dig on what I’m saying.

As I became older and properly mature (Am too!), I decided it was time to branch out and start making my own scampi-type dish.  Thankfully I have a husband who loves seafood and so he has been my guinea pig for quite some time.  In this dish, I have combined things I love:

  • Garlic
  • Wine
  • Butter
  • Seafood
  • Chopped tomatoes and red onion

However, I like to think my dish is slightly healthier than a traditional scampi because traditional scampi has a load of butter in it (I’m talking sticks of butter here) where mine does not.  Oh there’s butter, because I fully believe that butter and seafood are meant to be together.  I just don’t use sticks of it.

Andrea’s Shrimp and Scallops with garlic wine sauce

  • 10oz of fresh scallops (about 8 medium sized)
  • 12oz of fresh shrimp (about 18 medium)
  • 4-5 cloves of garlic, grated (yes you read that right)
  • 1/4 medium red onion, chopped
  • 2 beefsteak tomatoes, seeded and chopped (or 3-4 romas)
  • 3 peperoncinis, chopped
  • 3/4 C -1C white wine
  • 1/2 TBSP of butter
  • 1 1/2 TBSP of olive oil
  • Sea salt, ground black pepper, pinch red pepper flakes
  • Italian seasoning blend
  • Chopped parsley and grated Parmesan for garnish

Make sure all the seafood is patted dry with papertowels.  Remove the shells, including the tail part, from the shrimp.  Either discard or save for stock purposes.  Remove the little conductor muscle on the scallops.  Sprinkle scallops with ground black pepper and sea salt on each side. Just a pinch.  In a large deep sided skillet, heat 1/2 TBSP of oil over medium heat.  Add the scallops and brown on each side, about 2 minutes per side.  Remove from skillet.  Add the remaining olive oil and the butter to the skillet.  Then add in the red onion, peperoncinis, and a pinch of red pepper flakes (how much depends on how much heat you want).  Season that with a little more salt, pepper, and the Italian seasoning blend.  Just a pinch of salt and pepper, and about 1/2 a tsp of Italian seasoning.  Cook until the red onions just begin to soften.  Add in the grated garlic and stir, then add in the wine. Don’t dilly dally after adding the garlic, as it will burn quickly.  Also, be careful here adding alcohol to heat.  You can remove the pan from the heat source for this and then return it immediately.  Stir the mixture and bring to a simmer.  Add in the shrimp, allowing the shrimp to cook in the sauce. After about a minute, add in the scallops and chopped tomatoes. Let dish simmer for about  3 minutes. Giving the shrimp time to cook and the scallops and tomatoes to heat through.  The shrimp is cooked when it turns pink, this does not take long.  The scallops will finish cooking as they are heating back up.

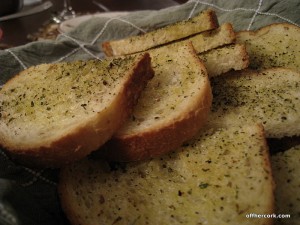
Remove and serve in a deep wide bowl or large pasta plate.  Garnish with chopped parsley and parm cheese.  Serve immediately and with plenty of crusty bread for dipping.

Shrimp and Scallops with garlic wine sauce

Shrimp and Scallops with garlic wine sauce

This is easily one of our favorite seafood dishes.  It’s quick to make and easy enough that you can chat while you busy away in the kitchen.  It makes for a great “date night” dish as well because you’re sharing a meal out of the same dish.  I do recommend having little plates on hand that you can scoop out portions on to as you’re eating.  Less risk of slopping on the table. Trust me on this! ;)

If you don’t have sea salt, naturally you can use kosher instead.  My preferred blend of Italian Seasoning is the Mrs. Dash variety.  It has no salt, allowing me to control the salt amounts, and it has a decent blend of herbs.  But use whatever you like and have on hand.

Since wine makes up the entire sauce base, pick a nice wine that you will drink.  No cooking wine!  That is loaded with salt and preservatives.  Use regular and a dry one, no sweet wines.  If wine is not your thing or you’re looking to not use as much, chicken stock or seafood stock can be used here as well.

We love garlic which is why I use 4-5 cloves of it but if you do not love it as much as us, feel free to reduce the amount.  Or just add the whole cloves and then scoop them out at the end.  The garlic flavor will be there, just not as intense.  You can easily chop the garlic instead of grating.  I personally feel that grating allows more of the flavor to come through.

Now you can be all mature and have a grownup seafood dish at home too!

Have fun guys!  And remember, always play with your food!

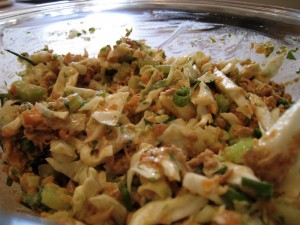
Asian Tuna Salad

Asian Tuna Salad

Asian Tuna Salad

Me: Hey? Do you want tuna sandwiches for lunch?

Scott: Sure.

*chop, chop, mix, assemble and serve*

Scott: What’s this?

Me: Huh? It’s a tuna sandwich.

Scott: Oh.

Me: Why? Doesn’t it look like a tuna sandwich?

Scott: No.

Me: No? What would your tuna sandwich look like?

Scott: Mayo on each slice of bread, scoop out the tuna from the can and stick on the bread. Put the two halves together and eat.

Me: Oh. How about I’ll do the cooking from now on?

And that’s pretty much how our conversation went the first time I made tuna salad sandwiches for Scott and I those many years ago when we moved into our first apartment right out of college. Tuna with some huge globs of mayo slapped on some bread? No thank you. And I’ve been playing with tuna salad ideas ever since.

This recipe came to me because I had a craving for some tuna salad and also knew I had some veggies that needed to get used up. I pondered it, and the result is this Asian inspired recipe.

Andrea’s Asian Tuna Salad

  • 1 pkg. of Sweet and Spicy tuna
  • 10 baby carrots shredded
  • 2 green onions chopped (both white and green parts)
  • 1 stalk of celery chopped
  • 2 TBSP of chopped cilantro
  • 2 Cups of shredded cabbage
  • 1 1/2 tsp of sesame seeds
  • 1/2 tsp of garlic powder
  • 1 1/2 tsp of soy sauce
  • 1/4 cup mayo
  • pinch of salt and black pepper to taste

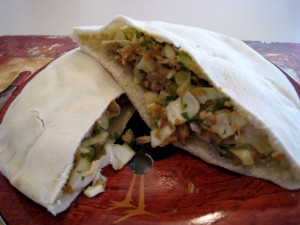
In a medium sized mixing bowl, combine all ingredients well. Serve as a sandwich or on a bed of greens as a salad.

I used Starkist Sweet and Spicy tuna but I’m sure you could use regular tuna as well. And if you want, you could use 2 cups of prepackaged coleslaw mix which would already have the carrots and cabbage combined. I used fresh because I feel it has a better crunch. But if the carrots and cabbage don’t look good that day, feel free to use some of the coleslaw mix.

I’m trying to get more veggies and fruits into my diet (and Scott’s!), so I try to put them in where I can. I thought this would be a great opportunity to add some greens to this dish by way of the cabbage. Cabbage is such a great veggie and so good for you that we eat it regularly here at OHC. It pumps up the volume of the salad and gives it a nice crunch and texture. Most times when you think of tuna salad you think of a gloppy mess of tuna and mayo. I tried to avoid that as much as possible in this salad. I only used 1/4 cup of mayo which binds everything together but doesn’t overpower the dish. Resulting in a nice light and crispy tuna salad.

Asian Tuna Salad in a pita

Asian Tuna Salad in a pita

Enjoy guys! And remember, always play with your food!