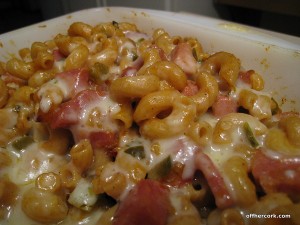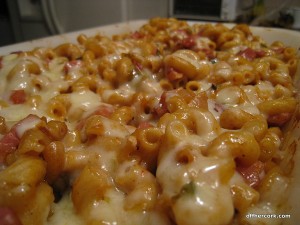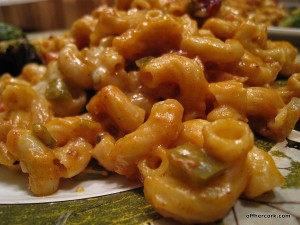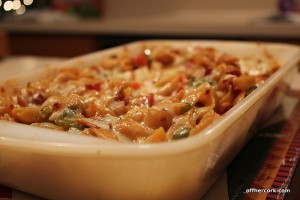
Beer and Bacon Mac ‘N Cheese

I play around with Mac ‘N Cheese a lot.  Scott loves it and really once you get the basic technique down it’s very simple to make.  I was talking with my lovely friend, Whitney, on Twitter not long ago and the idea of a beer mac ‘n cheese popped into my head.

And it wouldn’t leave.

Because really, how delicious does that sound?  Exactly.

I had to make it and once I told Scott about my idea then I couldn’t not make it because that would be teasing.

I’m no tease kids.

I made this and knocked it out of the park.

Andrea’s Beer and Bacon Mac ‘N Cheese

  • 12oz of Dark Beer
  • 1/2C Chicken Broth
  • 4TBSP (Heaping) of Unbleached All-Purpose Flour
  • 1C Shredded Cheddar (good cheddar please!), plus extra for garnish
  • 1C Shredded Pepperjack Cheese, plus extra for garnish
  • 3/4 of a Green pepper, chopped
  • 3/4 of a Red Pepper, chopped
  • 1/2-3/4 of a Large Onion, chopped
  • 1 Jalapeno, chopped
  • 2 Cloves of Garlic, minced or grated
  • 5-6 Slices of crispy bacon, chopped
  • 4C, Uncooked, Whole Wheat Small-Medium, Pasta Shells (not the stuffing kind)
  • Salt and Pepper to taste
  • 1tsp Smoked Paprika
  • 2tsp Garlic Powder
  • Red Pepper Flakes
  • Light Olive Oil for cooking, about 3 TBSP

Preheat oven to 400 and grease a large casserole dish with nonstick spray or olive oil.  Bring a large pot of water to boil and cook the shells, take them about half way.  Drain and set aside. In a medium sized saute pan, add in about 2TBSP of olive oil and heat over medium heat.  Add in the peppers and onions, sauteeing for about 5 minutes. Add in the salt, pepper, smoked paprika, red pepper flakes, and garlic powder.  Cook for about a minute then add in the garlic and bacon, and cook for about another minute or two.  Sprinkle in the flour and stir until everything is coated.  If the mixture looks really dry, add in some more olive oil until it looks a touch smoother.  Not too much oil, just enough to give everything a  little more moisture. Allow this flour mixture to cook for about 2-3 minutes.

Pour in the beer and stir, making sure to avoid clumping. It will foam up but that will dissipate in a minute.  Then add in the chicken stock and stir. Allow to come to a simmer so it thickens up a bit.  Slowly add in the cheeses and stir, turning down the heat at this point to a low-medium.  Once the cheeses are melted, you should have a lovely sauce.  Add in the pasta at this point and combine.  Pour mixture into a casserole dish and place in the oven.  Allow to heat until the mixture starts to bubble.  Sprinkle on the remaining cheese and place back in the oven just till the cheese is melted.

Serve up in bowls and enjoy!
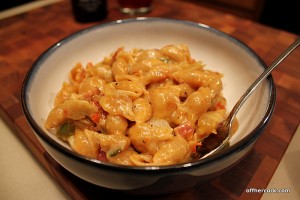
Ooooo this dish was so very good! The beer is what makes this dish so make sure you use a nice dark lager style beer.  Meaning, no Miller, Bud or whatever allowed here. You want the beer to shine so it has to be a great beer in order to give you a great Mac ‘N Cheese.

You can only make straight up Mac ‘n Cheese so healthy, you know? There’s no cream or milk used and the cheese isn’t a ton when you think about how much this actually makes, which is a lot of mac ‘n cheese.  Enough that we got four meals out of it. Plus whole wheat pasta instead of basic white pasta.

It’s a very intense and rich dish.
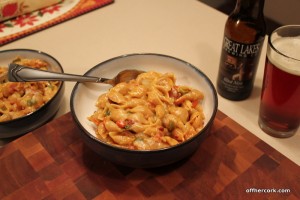
Beer of choice for this dish is my current love, Great Lakes Brewing Eliot Ness lager. Dark and spicy bringing a deep flavor to the mac ‘n cheese.

Have fun guys, and remember, always play with your food! Enjoy!

Tuna Noodle Casserole

Tuna Noodle Casserole is a new one for me.  I didn’t eat it growing up.  My mom might have made it once but eating warm tuna sort of threw me for a loop and I didn’t dig on it.  At all.  No one must of liked it because she never made it again. My previous tuna experience was tuna salad which of course is cold, that I can handle. Warm tuna, not so much.

I know it’s a staple and source of comfort food for many though and that includes Scott.  They apparently had it in their dinner rotation and somehow a box with a giant hand on it was part of the equation.

I never made it for him because I couldn’t get past the idea of warm tuna.

Then a few months ago I decided to give it a try.  Hey I’m eating lots of new stuff I never liked before, might as well hit up tuna noodle and see what it has to say for itself.

A meal made of some pantry goods is a great way to use up products while keeping costs low.

Andrea’s Tuna Noodle Casserole

  • 1 6.5oz Package of Tuna
  • 1 12oz Package of Whole Wheat Egg Noodles
  • 1/2 Large Onion, chopped
  • 2 Medium Carrots, chopped
  • 1 1/2C Peas (fresh or frozen)
  • 2C Chopped Green Beans, bite size pieces (fresh or frozen)
  • 2 Cloves Garlic, grated
  • 2 Tomatoes, seeded and chopped
  • 3TBSP All-Purpose Flour
  • 1 1/2C Chicken Stock
  • 1/2C So Delicious Unsweetened Coconut milk
  • 1/2C Shredded Cheddar, plus more for topping
  • 1tsp Soy Sauce
  • 2tsp Garlic Powder
  • 2TBSP Dijon Mustard
  • Big Pinch of Red Pepper Flakes
  • Salt and Pepper to taste
  • Olive Oil for sauteeing (About 2TBSP)

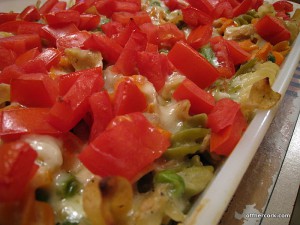
Preheat oven to 400 degrees and bring a large pot of water to boil.  Add in the noodles and cook about halfway through.  Drain and set aside.  In a large high sided skillet, heat the olive oil over medium heat.  Add in onions and carrot, plus seasonings.  Stir and allow to sautee for about 3-4 minutes.  Add in the green beans, peas and grated garlic, combine and cook for about a minute.  Sprinkle in the flour and stir until all the other ingredients are coated.  Cook for about 1-2 minutes.  Slowly add in the chicken stock while stirring the ingredients.  Add in the soy sauce and dijon once the chicken stock is added and combined.  Stir, then slowly add in the coconut milk and stir.  Allow to simmer for about 2 minutes.  The mixture should thicken by this point, add in the tuna and stir mixture.  Then add in the 1/2C cheddar and stir until the cheddar is melted.  Add in the noodles to the mixture, combining the ingredients well.  In a large, greased (with nonstick spray or olive oil) casserole dish, add in the tuna noodle mixture.  Place dish in oven and cook for about 10 minutes or until bubbling.  Sprinkle with more cheddar on top and add on the chopped tomatoes.  Place back in oven till the cheese is melted and the tomatoes are warmed through.

Remove and serve!

First of all you know I cannot make a casserole style dish without some veggies to go with it.  I think peas may be common in tuna noodle but I’m not positive.  I was flying without a net on this one!

I was really pleased with the way this turned out!  It was exactly what I expected tuna noodle casserole to be like! I was able to handle the warm tuna with no problem. The dish has protein, veggies, and whole grain pasta which makes it a great healthy alternative to traditional tuna noodle casserole.  Apparently that has like potato chips or something on top?  Oh my!

Next time I might do it minus the tomatoes.  Not that they were bad but I think I might like the dish without them a little more.

This dish makes great leftovers which are so much better the next day!  Easy to reheat in the microwave and great to eat while snug on the couch watching a movie.

Naturally, like all my recipes, this is wide open to interpretation. If you want to use milk instead of coconut milk, please do! More cheese? Do it! No veggies or more veggies, knock your socks off! Remember recipes are guidelines, not set in stone.

Did you eat tuna noodle casserole growing up?  Did you like it or hate it?  Have you made it since?

Have fun guys, and remember, always play with your food! Enjoy!
Pad Thai

Pad Thai is a relatively new to me dish.  I’m not a huge pasta eater and so the idea of the dish never really appealed to me.  Then one fateful evening I decided to order some and was blown away.  I loved it!  Sure it was a little lacking on veggies but the sauce, oh man, the sauce is what sealed the deal for me.

I am such a sucker for spicy sweet combo.  I like my BBQ sauce that way, I like salmon done that way, and I certainly enjoy Asian dishes that way.  Pad Thai totally fits that to a T.  I tried recreating it on my own many many many times.

Many. Times.

It was alright but it wasn’t exactly what I was looking for.  I saw several recipes using coconut milk and peanut butter.  Yes this created a nice sauce but it wasn’t even close to a Pad Thai sauce.  It was way too heavy and creamy, closer to something like a satay sauce.

This wasn’t what I was looking for.

Then Charise commented here not that long ago and pointed me in the direction of this recipe.  It is a breakdown of Pad Thai and how to create it.  It discusses the ideas behind the different ingredients used to create the sauce and explains exactly how to make the sauce.

Seriously one of the better recipes and tutorials I have seen.  I have it bookmarked and am never letting it go!

I was in need of some Pad Thai recently and was bound to create some that would be amazing.  I turned to the recipe linked and read it from beginning to end.  I didn’t have any of the ingredients on hand that Chez Pim used.  I wasn’t going out to the Asian grocery store any time soon and I really needed that Pad Thai quick before somebody got hurt.  I decided to take what I learned from the article and put it to use with ingredients I had on hand.

I learned from Chez Pim that great Pad Thai must follow the Four “S”s Rule.  Pad Thai needs:

  • Salty
  • Sweet
  • Spicy
  • Sour

Those four elements make up the classic taste of a Pad Thai sauce.  Okay, I can work with that.  I finally came up with a recipe that creates a sauce close to what I’ve experienced in restaurants.  While it isn’t perfect, it is so very close that I’m calling this a win.  It will be used as my base from now on for Pad Thai.

Andrea’s Veggie Pad Thai

Sauce:

  • 1 1/3C Chicken Broth
  • 1TBSP Soy Sauce (Salty)
  • 2TBSP Honey (Sweet)
  • 2TBSP Chili Garlic Sauce (Spicy)
  • 1TBSP Lime Juice (Sour)

In a small sauce pan, whisk together ingredients and bring to a simmer.  Allow to simmer for about 5-10 minutes so that the sauce reduces down a bit.  You want a thicker sauce to help glaze the noodles and veggies, but still liquidy enough that it will cover the entire dish.

Pasta Part:

  • 1/2 Package of Rice Noodles (sometimes called rice sticks, sometimes called Pad Thai Noodles)
  • 1 Small Head of Broccoli, chopped
  • 3 Medium Sized Carrots, peeled and chopped
  • 1 Medium Green Pepper, chopped
  • 4-5 Green onions, chopped
  • Sesame Seeds for garnish, about a TBSP
  • Olive Oil for sauteeing, about 1TBSP

In a medium sized high sided skillet, heat olive oil over medium heat.  Add in the veggies except the green onion.  Coat with the oil and sautee until they just start to get soft.  About 7-10 minutes.  Meanwhile, in a large pot of boiling water, dump in the pasta and allow to cook over a gentle simmer.  Takes about 5 minutes.

When the pasta is cooked, drain it and add to the veggie mixture.  Then pour the sauce on top and combine until everything is covered in the sauce.  Add in the chopped green onion and sesame seeds, and combine one last time.

Serve in large wide bowls and enjoy!

I was extremely pleased with this dish!  It was pretty spicy for me but I still loved it.  I finally created the right type of sauce!  It was not heavy, easy to put together, and utilized the Four “S”s Rule.

Of course if you want to make this vegetarian, you don’t have to use chicken broth as a base.  You can try water or veggie broth, or maybe even some No Chicken Broth.

I love green onions so I made sure this dish brought plenty of that to the table.  This is open to plenty of interpretation as well, maybe you like mushrooms or would love some scrambled egg added to your Pad Thai.  Whatever you want to put in there, put in there! Great way to use up leftover chicken or pork as well.

I’m currently out of rice noodles and that is the only thing keeping me from making this dish again!  Next time you’re in the mood for Pad Thai, try creating some yourself.  You might be surprised by the outcome!

Have fun guys, and remember, always play with your food! Enjoy!
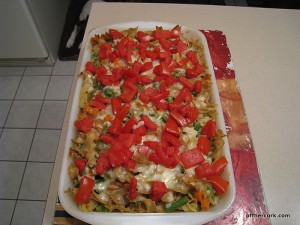
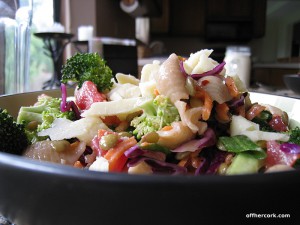
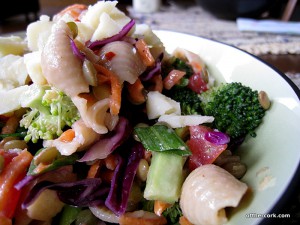
Pasta and Lentil Salad

This past summer was a hot one here in Columbus.  Extreme humidity and high temperatures.  The kind of heat where even sitting indoors with the luxury of air conditioning, you still don’t want to eat anything hot.  Or heat up the kitchen.  This left me seeking out meals that we could eat cold.  A lovely cold meal that I could make ahead and pull out of the fridge when supper time rolled around was exactly what I wanted.

I am a huge fan of pasta salad despite the fact that I’m not a huge pasta eater.  However, I’m extremely picky when it comes to pasta salad as well.  So much can be done with pasta salad that using a store bought mix or bottled dressing is unnecessary.  Pasta salad is not only easy to make using ingredients you have on hand but it’s quick and the longer it sits the better it gets.

That is my kind of meal!

I love when pasta salad is loaded up on veggies!  I view pasta salad as a way to get in as many veggies as I can, not as a source for eating as much pasta as I can.  My personal opinion is that pasta is a vehicle for veggies and what better way to enjoy veggies than in their simplest form in a pasta salad!

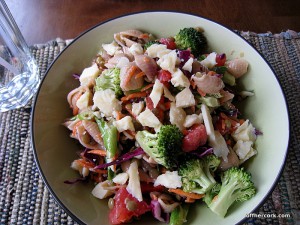
Andrea’s Pasta and Lentil Salad

For the Pasta Salad:

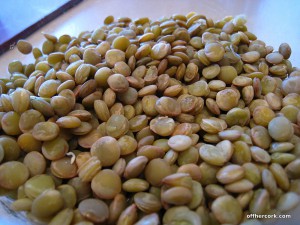
  • 1C Uncooked green lentils
  • 3C Uncooked Whole Wheat Medium Sized Shells
  • 1 1/2C Shredded Carrot
  • 1 1/2C Peas (I used frozen that I let thaw)
  • 6 Green Onions, chopped, both the white and green parts
  • 1 Large Tomato chopped (do not remove seeds)
  • 1C Shredded Red Cabbage
  • 1 Small to Medium Sized Head of Broccoli, chopped in small bite size pieces

Dressing:

  • 2 1/2 – 3 Heaping TBSP of Dijon mustard
  • 1/4C White Wine Vinegar
  • 1/4C Olive Oil
  • 1/2tsp Garlic Powder
  • 1/2tsp Soy Sauce
  • 1tsp Sesame Oil
  • Salt and pepper to taste
  • Pinch of red pepper flakes

Cook the lentils according to package directions and allow to cool.  Cook the pasta in boiling water till just shy of being “done”.  Drain and allow to cool.  You want the pasta to still have some good bite to it, otherwise it will get mushy in the salad.

In a large bowl, combine the pasta, lentils, and veggies.  In a small mixing bowl combine the ingredients for the dressing and whisk together (can also be blended in a blender).  Pour the dressing over the pasta, lentils, and veggies, and stir till everything is coated.  Allow to sit in the fridge for about an hour.  Gently stir before serving.

This is not a heavily dressed pasta salad.  The dressing is meant to give the pasta and veggies a touch of added flavor.  If you want more dressing on the salad, I suggest making the initial batch, and once the salad had a chance to sit in the fridge for a bit, you can drizzle on some more right before serving.

The reason I keep the dressing simple and light is because I want the fresh veggies to be the star and not to be overpowered by a heavy vinegar dressing.  The same goes for the pasta, I like my pasta lightly dressed or with just a touch of sauce.  Otherwise the sauce takes over and you can’t focus on the pasta!

This recipe makes a good bit of pasta salad.  Scott and I were able to have this for dinner two nights in a row.  It is definitely better the next day!  The dressing will soften the veggies and the pasta the longer it sits, this is why it is important to not cook the pasta too far.  Otherwise you will be met with a bowl of mush the next day.

I topped our pasta salad with chunks of good quality extra sharp cheddar which took the dish up to the next level and provided fun little bites of creamy cheese.

You can of course, use whatever your favorite veggies are or what you happen to have on hand.  I’ve made this with kale and some red and green peppers.  You can use red onion instead of green onion.  Whatever your little heart desires. It’s pasta salad, the possibilities are endless!

The recipe itself is vegan, adding the cheese clearly makes it not vegan.  I’m sure you realized that though!

Have fun guys, and remember, always play with your food!  Enjoy!
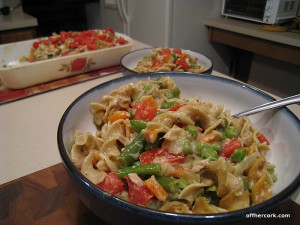
Late Night Pasta Toss

Scott: I think you should post about this.

Me: Post about what?

Scott: Dinner.

Me: What? Like what we’re eating right now?

Scott: Yes.

Me: But it’s nothing, just some veggies and pasta.

Scott: Right.

Me: ‘Splain yourself.

Scott: Well, what did you do?

Me: I made an easy and quick dinner because it’s crazy late and we need to eat.

Scott: Exactly.  Maybe people would be interested in this.  Maybe folks want to know how to just put something together quickly when they don’t have a lot of time. Or when it’s late and they are hungry but still want something healthy.  This is a good example of that.

Me: Well I’ll try.  I did just toss this together, no exact measurements or anything.

Scott: That’s the point!

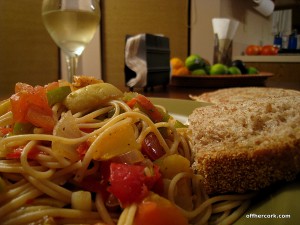
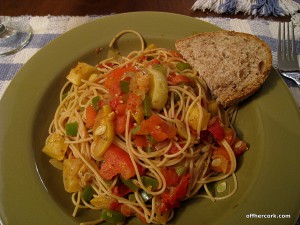
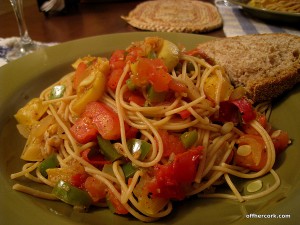
This was the conversation that Scott and I had last Wednesday when it was late, we were hungry, and I needed to put some food in our bellahs.  I attended that canning class and my original plan was that we would eat dinner before class.  That didn’t work out and I didn’t have a Plan B.  So when we got home and it was after 9pm, I needed to put something together quickly to feed us.

Andrea’s Late Night Pasta Toss

  • 2 Big handfuls of Whole Wheat Spaghetti
  • 1/4-1/2 Medium Onion, chopped
  • 1 Green pepper, chopped
  • 2 Large Tomatoes chopped
  • 1 Crookneck Squash Chopped
  • 1 Large Clove of garlic grated
  • 1/2C White Wine
  • 1TBSP Olive oil for sauteeing
  • Red pepper flakes
  • Salt and ground black pepper to taste
  • Italian Seasoning (I like Mrs. Dash)

In a huge pasta pot, fill with water and bring to a boil.  Dump in spaghetti and cook until your desired done-ness.  In a large skillet, heat olive oil over medium heat.  Add in onion, pepper, and squash, stir to coat with oil.  Then season and stir again.  Allow to sautee until softened.  Add in the chopped tomato and garlic, heat through.  Toss in the white wine and let simmer for a few minutes.  Add in the cooked pasta, toss, and serve with some crusty whole grain bread.  Glass of white wine to accompany it is optional.

This dish was really perfect for a late evening.  And when I say late, when we sat down to eat it was 10pm. Eeep!  It took me roughly 20-30 minutes to put this dish on the table.  What took the longest was actually waiting for the water to boil for the pasta!  Everything was something I had on hand and the squash was leftover from a previous dinner!

How much seasoning you want to use is totally up to you.  The veggies bring a lot of flavor so I keep the seasoning to a minimum.  The juice from the tomatoes along with the wine create a lovely light sauce.  Of course you can sub in stock of your choice or red wine if you don’t want to use white.  Add in some shrimp for a fun seafood pasta dish!

By the time I hit the hay that night it was 11:30 and way past my bedtime.  However our bellahs were full with a healthy meal that was created in no time.

Have fun guys, and remember, always play with your food!  Enjoy!
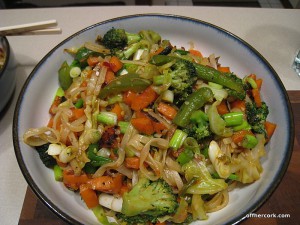
Asian Noodle Soup

I believe that some of the best recipes are ones you just have to create on the fly, not really knowing what you’re doing and hoping for the best.

Scott always talks about those big noodle bowls that you sometimes see at Asian restaurants and how delicious and yummy they look.

“I can make that for you.  What do they taste like?”

“I don’t know.”

“Well what’s in them?”

“I don’t know.”

“Haven’t you had one before?”

“No. I just think they look good.”

“I see.”

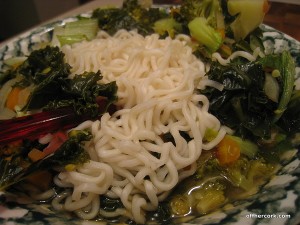
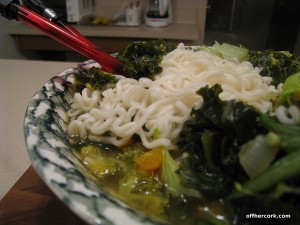
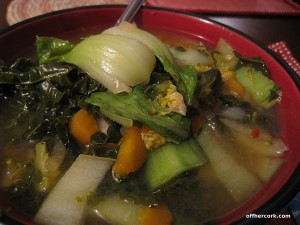
Not much info to work with but I decided to try and find out what I could do.  Scott was not feeling well one day and I decided to make him some “Asian soup”.  I put a bunch of stuff in a pot, added noodles and it was fantastic.  We’ve been having Asian Noodle Soup ever since when want some veggies or if Scott’s allergies are bad that day.

It’s evolved over time.  Me finding new ingredients or adding in different veggies but the core has stayed the same and we love it.

Andrea’s Asian Noodle Soup

  • 1 10oz Package of Ramen noodles
  • 1/2 Large onion, chopped
  • 4 Carrots chopped
  • 5 Kale leaves, stems removed and chopped
  • 3 Baby bok choy, chopped
  • 1 Small head of broccoli
  • 2 Quarts of Chicken stock
  • 2tsp Soy sauce
  • 1TBSP Chili Garlic Sauce
  • Salt and pepper, to taste
  • 2tsp Garlic Powder
  • 1tsp Smoked Paprika
  • Drizzle toasted sesame oil (or regular sesame oil)
  • Olive oil for sauteeing

In a large soup pot, drizzle some olive oil (about a TBSP) and heat over medium heat.  Add in the onions and carrots and stir, covering them with the oil.  Season with S&P, garlic powder, and smoked paprika.  Allow to sautee for about 5 minutes, then add in the garlic chili sauce and stir.  Add in the soy sauce and stir.  Slowly add in the chicken stock and stir.  Add in the kale and broccoli florets.  Drizzle in the sesame oil and stir.  Bring soup up to a simmer and let simmer for about 20-30 minutes. Add in the bok choy the last few minutes of cooking as it doesn’t take long to become tender.

About 10 minutes before serveing, cook the ramen noodles in a large pot of boiling water.  They only take a few minutes to cook.  Drain and place back in pot.

To serve, in a large soup bowl, spoon in some noodles then pour the soup on top.  Serve and enjoy!

Scott loves a ton of noodles with his soup.  He then adds in some Sriracha and slurps to his hearts content.

I have made this soup with shredded cabbage as well and that works really well.  I have made the soup without broccoli and without the garlic chili sauce.  It’s a pretty basic soup that is really versatile and will take on whatever you decide to toss in there. I’ve even added in shrimp for a little extra fun.

I like my soup just as soup and save all the noodles for Scott.  It works just as well that way and still hits the spot as a great soup.

Have fun guys and remember, always play with your food! Enjoy!
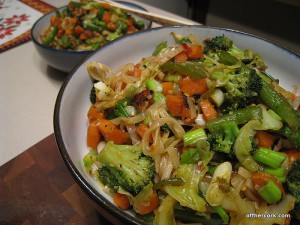
Spicy Mac ‘N Cheese

While I was hobnobbing it at the Foodbuzz Festival last year, I was one of the few who got to sample the spicy mac ‘n cheese that got passed around Friday evening.  It was creamy and spicy and I was thankful that it was a small portion because it tasted extremely decadent.

I made sure to tell Scott all about it and since then he has been saying, “Mmm spicy mac ‘n cheese” at random points.

Mac ‘n cheese isn’t something I make all that often but I have been making it since Scott and I first moved in together.  He grew up on that crazy boxed stuff and I personally think that stuff is disgusting (Gee do I want powder cheese? Or cheeze-whiz in a pouch for the “creamy” version. EW!).  We didn’t have it at my house.  We didn’t have mac ‘n cheese period, except when my neighbor would bring over some of the homemade kind which was amazing.

Because I had homemade I knew it could be done and whenever Scott would ask for mac ‘n cheese, I would make it for him.  I learned what a bechamel sauce was and how to make a great one.  Then I learned how to make short-cuts because I like being uber efficient in the kitchen.  Then I learned that I could do it my way and make it even better.

Scott stopped his random mutterings and straight up asked for some spicy mac ‘n cheese.  This was my first time making a spicy version and I’m pretty pleased with the results.

Andrea’s Spicy Mac ‘N Cheese

  • 2 1/2C Whole Wheat Elbow pasta
  • 1 jalapeno, seeded and chopped fine
  • 1/2 Medium onion, chopped
  • 1 1/2C Cubed Ham
  • 2/3C Salsa (chunky preferably)
  • 1C Chicken stock
  • 2/3C Soymilk
  • 2 1/2TBSP Unbleached all purpose flour (heaping)
  • 1 1/2C Shredded pepperjack cheese
  • 1/2C Shredded sharp cheddar
  • Reserve some cheese for sprinkling on top
  • Pinch red pepper flakes
  • Salt and pepper to taste
  • 1tsp Chili powder
  • 2tsp Garlic powder
  • 1/2tsp Smoked paprika
  • Olive oil for sautéing

Preheat oven to 400.  Cook pasta according to package directions.  Do not cook all the way but take until just shy of being done.  Set aside.  In a medium-sized skillet (one with high sides) add some olive oil (about 2 TBSP) and heat over medium heat.  Add the onions and jalapeno and sauté until they are soft (about 4 minutes).  Add in the red pepper flakes and the rest of the seasonings, combine.  Add in the flour and stir until everything is coated.  If this mixture looks dry, add in some additional olive oil, just a touch.  Allow to cook for about 2 minutes, then add in the salsa and stir.  Slowly add in the chicken stock and stir until the mixture is combined.  It should start to thicken up on you.  Let it start to simmer and thicken even more.  Add in the soymilk.  Turn the heat down and slowly add in the cheeses, stirring each time you add in some cheese.  Remember to hold some back for sprinkling on top.  The “sauce” should be thick and creamy by this point.  Turn the heat off and add in the pasta and ham cubes.  Combine.

Add mixture to a greased casserole dish.  Place in oven and cook for about 5 to 7 minutes, then stir.  Sprinkle with remaining cheese and place in oven to heat for about another 5-7 minutes.  You want the cheese melted and perhaps starting to brown on you.

Remove from oven and serve immediately!

You’ll notice right away a few things that make my mac ‘n cheese different from the norm:

  • Using stock
  • Using soymilk
  • No butter

Personally to have a great dish I don’t think you need to have a lot of “heavy” things.  Mac ‘n cheese can be creamy and glorious without heavy cream, butter, and tons of cheese.

The chicken stock helps keep things on the lighter end and you can just as easily use veggie broth or No-Chicken chicken broth instead.  Heck you can even use some white wine (which I’ve done before.  Surprised? I didn’t think so.) to give it some depth and umph.

I don’t even keep dairy milk in the house so soymilk is my go-to for most things.  It’s creamy and you cannot even tell that soymilk is used instead of regular milk.

Whole wheat pasta because that’s how we roll over here.

There is a good bit of cheese still in this dish but it’s not over-the-top considering this fills up a huge casserole dish and leaves plenty for leftovers.  My mac ‘n cheese isn’t a super creamy saucy dish just because that’s not our preference.  It has just the right amount of pasta-to-sauce-to-cheese ratio.

Since it’s a spicy version, I went with pepperjack as the main cheese but you can use whatever you like.  Using chunky salsa helps provide heat and also adds color and texture to the dish.  It really makes the dish in my opinion.

Scott loves ham with his mac ‘n cheese and I always make sure he gets it.  You can omit it though if it’s not something you dig on.  It won’t affect the ingredient portions at all.

We loved this dish and it made Scott start back up with the random, “Mmm spicy mac ‘n cheese” outbursts.  We’re outta ham though so he’s going to have to wait!

This dish also freezes well but be careful when reheating that you don’t overcook it and dry the cheese out.

Have fun guys, and remember, always play with your food!  Enjoy!
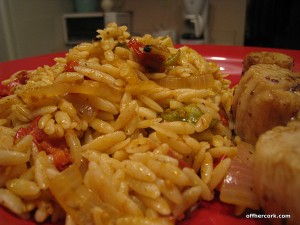
Orzo with roasted heirloom tomatoes and onions

The other day at the grocery store I came across some baby heirloom tomatoes and became quickly excited! I double checked to make sure that they were not from Mexico. They were not, score!  They were gorgeous and I decided to buy them since a container was only $2!  Not bad!

While I know that tomatoes are not in season right now, I also realize that some farmers run hydroponics in the winter to provide more produce.  This is a practice that I do not have an issue with.

Because these tomatoes were gorgeous, I wanted to use them in a dish that would show them off and not cover them up.  Tomatoes can easily get lost in a dish if there’s a lot going on or if the sauce is really heavy.  I wanted to avoid this as much as possible.

Tomatoes have a ton of juice in them that can easily be used as a “sauce”.  Extremely useful because you won’t lose any tomato flavor and it helps keep dishes light so that they don’t sit heavy in the tum.

I decided to go with a light pasta dish and roasting the tomatoes which makes this dish quick, easy, and only one pot needed!

Andrea’s Orzo with Roasted Heirloom Tomatoes and Onions

  • 1 1/2C Dry Orzo pasta
  • 1 small onion thinly sliced
  • 3C baby heirloom tomatos, halved
  • 1TBSP Olive Oil
  • 1tsp Italian Seasoning
  • 1tsp Garlic powder
  • Pinch Red pepper flakes
  • Pinch Sea salt
  • Grated Parm to taste

Preheat oven to 400F and set a large pot of water on the stove to boil.  Cook the orzo until done and according to package directions.  Orzo doesn’t take too long so keep an eye on it.

In a storage bag (or medium sized mixing bowl) add in the onion, tomatoes, olive oil, and seasonings.  Make sure everything is coated well and place on a lined baking sheet spray with nonstick spray.  Cook in the oven for about 10 to 15 minutes, until the tomatoes break down and the onions soften.  Doesn’t take too long.

Add the tomatoes and onions to the orzo and combine.  Make sure to use all the “sauce” from the baking sheet.  Add in some grated parm to taste.

Serve and enjoy!

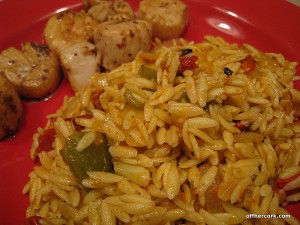
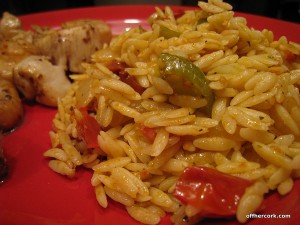
This dish was fantastic!  I’m not a huge pasta eater but I could not get enough of this side dish.  It was all I wanted to eat!  The tomatoes were sweet and provided great bursts of flavor mixed with the delicate and smooth pasta.  Roasted onions are one of the best things ever, in my opinion, and are a great addition to just about any dish.  They are sweet and get nice and crispy caramelized ends when they roast.  So good!

If you don’t have any or can’t find some baby heirlooms, grape or cherry tomatoes will work just as well.  Of course, leaving off the cheese will keep this dish vegan friendly.

My only change is that I would use more tomatoes next time!  The amount I used here was tasty but more would be even better.

This would be a great dish to take to a potluck.  It can be eaten hot, room temp, or even cold.  I’m pretty sure it would fit most palates and please just about everyone.

If you need a quick side dish or are looking for something to do with some tomatoes that you need to use up, give this dish a try.

Have fun guys and remember, always play with your food!  Enjoy!
Pumpkin Penne

Pumpkin

Pumpkin

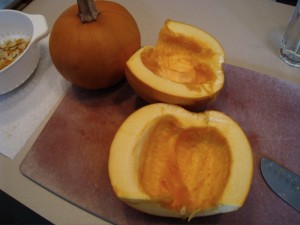
I love pumpkin and one thing I have resolved to do this year was to be more creative with foods. To experiment more and branch out more. I have been doing that a lot with pumpkin.

Pumpkin doesn’t have to be just regulated to pies and I’m sure all of you are aware of this fact already. I’m new to the party. Pumpkin can be savory? Pumpkin can be spicy? Well smack my bottom, let’s get this party started!

Some of you might be aware of the Blogger Secret Ingredient contest that has been going around. Well this week, Lindsay is hosting and she picked pumpkin. Since my new found love of experimenting with pumpkin, I wanted to create something that I could enter in this week’s contest.

The idea came to me earlier this week and I pondered it a bit before fully deciding what I was going to make and how exactly I was going to make it. Pumpkin Penne was the result!

Andrea’s Pumpkin Penne

  • 1 Italian sausage link
  • 1 C of pumpkin puree
  • 1/3 C of dry white wine
  • 1 C of chicken broth
  • 1/4 of a medium onion finely chopped
  • 1 clove of garlic
  • 1/2 TBSP of unsalted butter
  • 1/2 TBSP of olive oil
  • 2 1/2 C of mini whole wheat penne
  • 1/2 tsp of chili powder
  • Salt, pepper, garlic powder to taste
  • Pinch cayenne pepper, pinch crushed red pepper flakes
  • Flat leaf parsley for garnish
  • Grated parm for garnish

In a medium sized skillet with high sides, add the 1/2 TBSP of olive oil and heat over medium heat. Cut the casing on the sausage and crumble into the skillet browning and cooking through ( like cooking ground meat). Remove from skillet and set aside. Either drain the grease or keep (there shouldn’t be too much), add in the butter and chopped onions. Sprinkle with a pinch of salt and sauté until soft and transparent. Add the sausage back in and also grate the clove of garlic into the mixture. Stir everything together and then add the wine. Allow to simmer for about two minutes. While that is simmering bring a large pot of water up to boil for the pasta.

To the onions and sausage, add in the pumpkin and stir. Then add in the chicken stock and stir. Add in the seasonings and allow the mixture to simmer as the pasta cooks. The pasta should take about 7 minutes to cook, taste test to your preferred doneness. Once the pasta is cooked, drain and place back into the hot pot to help evaporate remaining water. Add the pasta into the pumpkin sauce and combine. Sprinkle in some chopped parsley for added color. Top with grated parm and serve!

Serves two with plenty of leftovers or can serve four for a dinner.

If the sauce starts to get too thick, add in more chicken stock by the tablespoon until it’s back to a smooth sauce.

Pumpkin Penne

Pumpkin Penne

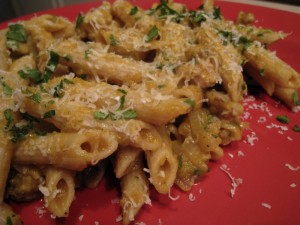
This dish came out perfectly. It was creamy with just a touch of heat from the seasonings. A great way to get more veggies in for the day. The sausage gives it just enough of texture and flavor to keep things interesting.

Certainly you can use spicy sausage here if you prefer; it’s all about your preferences. If you would like to keep it straight veggie, use veggie stock and perhaps some veggie crumbles or starters instead of sausage. I think adding in even more veggies would be a great addition, spinach or zucchini would work well with this dish.

I used a Chardonnay from a box from Target. It’s not too shabby and the box is handy for cooking because it’s easy to measure out what you need. However, opening a bottle for the evening is also a great way to go!

Enjoy guys, and remember, always play with your food!