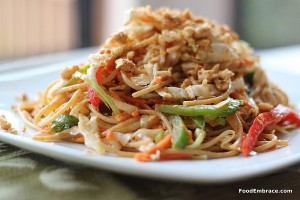
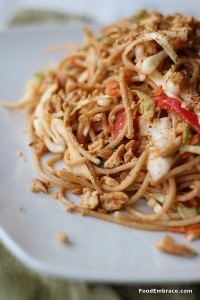
Noodles with Coconut Peanut Sauce

Warmer weather has me thinking of make ahead meals that can be eaten chilled or at room temperature.

When it’s hot and most especially when it’s humid, I don’t want to be stuck in a hot kitchen. Then eating a hot meal on top of that? Ick.

Pasta salads and roasted veggie salads almost become a summer staple here at the HQ.

I wanted to do something a little differently and decided to play around with some Asian inspired flavors.

I first made this dish last year to bring to a potluck (theme for the potluck was PB&J and this was my contribution) and made it again for us recently to have for dinner.  It’s a keeper.

Andrea’s Noodles with Coconut Peanut Sauce

For The Sauce:

  • 1/4C Water
  • 1/4C + 1TBSP Unsweetened Coconut Milk (Either canned or from the dairy aisle)
  • 1TBSP Chili Garlic Sauce (found in the Asian section at the grocery store)
  • 1tsp Soy Sauce
  • 1 Garlic Clove
  • 1/4C All Natural Peanut Butter (no added sugar, the kind you have to stir)
  • 1TBSP Honey
  • Juice from 1/2 a Lime

For the Pasta:

  • 1/2lb Whole Wheat Spaghetti
  • 1/2 Large Cabbage, cut in thin slices
  • 1/2 Red Pepper, thinly sliced
  • 1/2 Green Pepper, thinly slice
  • 2 Large Carrots, Shredded
  • 2 Green Onions, chopped
  • Roasted peanuts, crushed for garnish

In a blender, combine all ingredients for the sauce and blend until smooth.

Heat a skillet over medium heat, and add about 1/2tsp of olive oil.  Lightly saute the peppers until they just start to soften, about 2-3 minutes.  This is just to remove some of the excess liquid they have.

In a large stock or pasta pot, fill with water and bring to a boil. Cook pasta until just shy of being al dente.  You want it to have a little bite to it.

Drain pasta and add back into pot.  Add in all the veggies and toss.

Pour sauce mixture overtop and toss until everything is well combined.

You could serve immediately or place mixture in a bowl, cover and store in fridge until you’re ready to eat.

No need to heat this up, serve chilled.

Sprinkle with crushed peanuts if desired.

This dish completely hit the spot for us!  It was light, full of veggies, and with a slightly spicy heat in the background.

On a hot day when you don’t feel like cooking much, this is the perfect recipe!

The crushed peanuts give it a little bit more texture and some crunch to the dish.  You could get a little fancy and season the peanuts before roasting them with a little oil, chili powder, and garlic powder.  Roast at 350 for about 5 minutes.

I happened to have the whole wheat spaghetti on hand so that’s what I used but soba noodles would work well here as well.

Rice noodles, like the kind used for Pad Thai might also work though you may need a little bit more sauce if you use those.  You’ll have to play around with it and see what you come up with.

I’ve also used cilantro in this dish.  A handful added into the sauce and then some for garnish.  I left it out this time because I didn’t have any but feel free to toss that in if you like!

Have fun guys, and remember, always play with your food!  Enjoy!

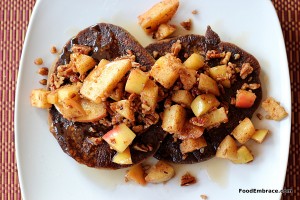
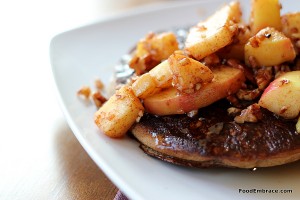
Sauteed Apples with Crushed Pecans

Sometimes I want a topping for Sunday Morning Pancakes that brings a little more umph than syrup. I want something in addition to syrup.

Since we always have a fruit with breakfast (and lunch!), I decided to make that part of the dish instead of just a side.

Sauteed bites of apple with the sweetness of crushed pecans is a great topping for pancakes.

Andrea’s Sauteed Apples with Crushed Pecans

  • 2 Small – Medium Red Apples, chopped
  • 1/2C Crushed Pecans
  • 2TBSP Butter
  • 1tsp Olive Oil
  • 1/2tsp Cinnamon

In a medium sized skillet, heat butter and oil over medium heat.  When the butter starts sizzling, add in the apples and cinnamon.  Sautee for about 3 minutes and then add in the crushed pecans.  Sautee for another 3 minutes, remove from heat and serve!

Makes enough topping for 3 servings.

Perfect for pancakes!  The apples are warm but stil crisp since they are not cooked for very long.  Plus you’re starting you day off with a serving of fruit!

This is also great for a topping over ice cream, with some yogurt, or even on top of some oats.  Mix with some granola for some extra crunch!

Have fun guys, and remember, always play with your food! Enjoy!
Banana Nut Pancakes

Me: What kind of pancakes do you want this week?

Him: Something with nuts!

Me: What kind of nuts, pecans or walnuts?

Him: What did we just have with the coffee cake?

Me: Pecans.

Him: Then we should have walnuts.

Me: Done

And this is how Banana Nut or what I lovingly call, my favorite pancakes ever, were born.

Andrea’s Banana Nut Pancakes 

  • 1C Unbleached All-Purpose Flour
  • 1C Buckwheat Flour
  • 1tsp Baking Soda
  • 1tsp Cinnamon
  • 2TBSP Sugar
  • 1C Walnuts, crushed
  • 1 Large banana
  • 1C Unsweetened Coconut Milk (the kind in the dairy section, not from a can)
  • 1C Water
  • 2tsp Vanilla Extract
  • 1/2tsp Apple Cider Vinegar

Preheat grilled over medium heat.  In a large mixing bowl combine the flours, baking soda, cinnamon, and walnuts and whisk together.  In a medium sized mixing bowl combine the water, coconut milk, vinegar, extract, and banana.  Mash the banana in the liquids as much as possible.

Add the liquid ingredients to the dry and stir until everything is combined.  Grease your griddle with a little oil and drop batter by spoonfuls.  The size is up to you!  Cook for about three minutes on the first side or until you start seeing several bubbles pop up in the center.  Flip and cook for another minute to two minutes.  Remove from heat and continue until all the batter has been used.

Serve warm and enjoy!

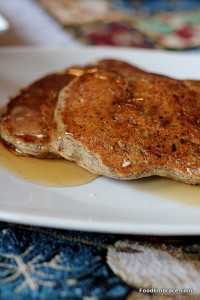
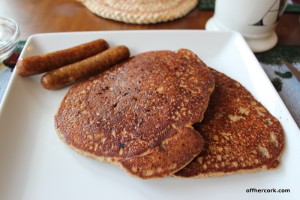
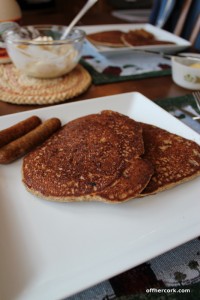
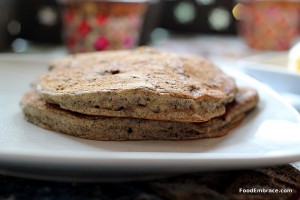
Most favorite pancakes to date.  These are slightly sweet, completely fluffy and full of flavor.  The banana keeps the pancake moist and the crushed walnuts add a little bit of crunch and texture.

Toppings are your choice, but clearly I used maple syrup for mine.

Leftovers can be frozen and reheated either in a toaster or toaster oven.

Two things are true, I’ve got leftovers and they will be eaten this weekend.

Have fun guys, and remember, always play with your food! Enjoy!
Italian Chocolate Meatball Cookies

For the Holiday Cookie Exchange, I was paired up with Jess! She sent along her recipe for Italian Chocolate Meatball Cookies.

I made a few changes to accomodate what I had on hand along with adjusting to suit our tastes.

Below is the original recipe from Jess:


Italian Chocolate Meatball Cookies
from Dianna Petrella’s recipe (a family friend)
Ingredients
  • 1 cup shortening (yes, you have to use shortening or something like Earth Balance – unfortunately butter just doesn’t work right)
  • 1.5 cup granulated sugar
  • 3 eggs
  • 1 cup warm milk
  • 2 tsp vanilla extract
  • 5 cups all-purpose flour
  • 5 tsp baking powder
  • 3/4 cup cocoa powder (Hershey’s, Ghirardelli, or Scharffen Berger are good)
  • 1 tsp cinnamon
  • 1 tsp nutmeg
  • 1 tsp cloves
  • 1 cup walnuts (finely chopped)
  • 1 cup raisins
  • 1 cup chocolate chips
Instructions
Mix all ingredients in a large bowl (ideally you would do this in a stand mixer if you have one; I wouldn’t recommend a hand mixer unless you’ve got an industrial strength one). Roll into balls. Bake at 350º for 10-15 minutes. Cool and dip tops into confectionary sugar frosting and sprinkle tops with confetti. Freeze for up to three months. Yields 4-5 dozen.
For frosting, mix 3 cups confectionary sugar, 2 Tbsp milk, and 1 tsp vanilla extract.
My adapations are as follows:
  • I didn’t have shortening, so I used 1/2C coconut oil as a sub.
  • I also don’t have milk, so I subbed in 1C of warm unsweetened coconut milk.
  • I used 2C Unbleached All Purpose Flour and 3C White Whole Wheat Flour
  • Used 1/2C Cane Sugar
  • And I didn’t have any raisins so I had to leave that ingredient out.
I did end up adding just a splash more liquid, since I used whole wheat flour that requires a touch more liquid to the recipe.  No more than 1/4C though I could have gone up to a 1/2C and been fine.
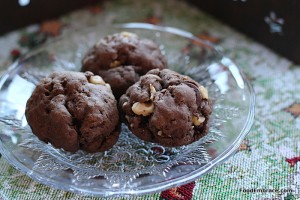
The dough for this recipe is a tight stiff dough and I thought these cookies were going to turn out very dense.  However they are light little cookies with a great chocolatey taste! We are not much fans of icing which is why I didn’t ice these cookies but if you do like icing then I highly suggest adding that as well!  Or sprinkling with a little powdered sugar on top.
Great little cookies to have on your holiday table!  Thanks for participating Jess!

Fig and Date Coffee Cake

It’s no secret that I like cooking with beer but I also like baking with beer. And experimenting with different ways to use beer in the kitchen.

One of my most recent experiments resulted in what is now my favorite coffee cake of all time. This coffee cake uses dried figs, dates, and nuts as part of the crumble topping.

This helps keep the cake moist while baking and gives a slight nod toward the fig newtons of my childhood.  I wasn’t a huge fan of fig newtons as a kid but when I got older I enjoyed them a great deal.

Having found dried figs at the store, I knew that I wanted to use them in something.  With seasonal beers out right now, the idea of making a coffee cake with one seemed like a natural fit.

I’ve made this cake several times since the first experiment and it always makes me squee with happiness when I get a chance to nibble on it.

Andrea’s Fig and Date Coffee Cake

For the Batter:

  • 1 1/4C Dark Winter Ale
  • 1C Oats
  • 2C White Whole Wheat Flour
  • 2tsp Vanilla Extract
  • 2tsp Ground Cinnamon
  • 1tsp Baking Soda
  • 1TBSP Maple Syrup

For the Topping:

  • 8 Dried and Pitted Dates
  • 1C Dried Figs, stems removed
  • 1C Pecans, Heaping
  • 2TBSP Brown Sugar, Packed
  • 2tsp Vanilla Extract
  • 1/2tsp Cinnamon

In a medium sized mixing bowl, add in dates and figs and cover with very hot water.  Allow to steep for at least half an hour.  Drain water from dates and figs.

Preheat oven to 375 degrees.  Spray a square baking dish with nonstick spray or olive oil.  About a 9×8 dish is what I used.

In a food processor, combine all ingredients for the topping.  Pulse until everything is broken up and a crumble forms.  It will be sticky and will stick together.

In a large mixing bowl, combine all dry ingredients for the batter and whisk.  In a medium sized mixing bowl combine wet ingredients, beer, maple syrup, and vanilla and whisk.  Slowly add the liquid mix to the dry mix.  Gently stir until everything is combined.  Pour mixture into baking dish.  Top batter with fig and date crumble.  You’ll have to use your hands to crumble it and spread it around.  The crumble mixture should cover the entire top of the batter.

Bake in oven for about 10 minutes.  A toothpick inserted will come out clean.  Don’t over bake as that will result in a dry coffee cake.

Remove from oven and allow to cool for a few minutes.  Slice and serve!

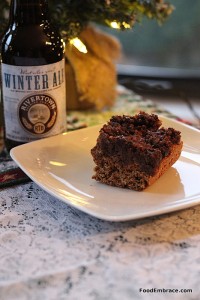
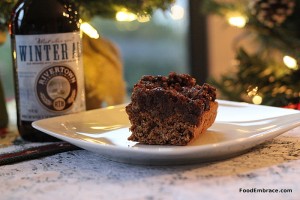
I used Rivertown’s Winter Ale for this coffee cake.  It’s brewed with molasses and cinnamon.  The cinnamon is very prominent in this beer and I knew that it would work well in the coffee cake.  It’s also a dark colored beer which provides a nice caramel color to the coffee cake.

We had this coffee cake over the Thanksgiving holiday and I’m already dreaming about when I can have it again! That’s how much I love it!

The fig and date topping help keep the cake moist while also making it a very filling cake.  This isn’t your grandma’s coffee cake.  This baby is hearty!

Have fun guys, and remember, always play with your food! Enjoy!
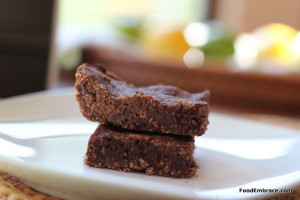
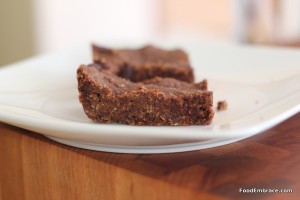
Buzzin Bars

Last week Scott left for a business trip that had him away from the house for about a week.  He was flying off to San Francisco to geek out about code and be in his element.

Because I knew that eating times might be odd and because I know Scott, this meant he would need to take some food along with him.

He was taking a carry on which meant that the food had to be small, easy to carry, and not prone to spoilage.  And since I knew that these could very well be a meal source, I knew that they had to be jam packed with good stuff.  Stuff that could get you through a couple of hours.

I like using soaked dates in bars and coffee cakes because it adds a nice sweetness without being over powering.  Plus they are a great source of fiber and potassium.

Plus I wanted to do something fun so I added an extra little kick to these bars.

Andrea’s Buzzin Bars

  • 10, dried and pitted dates
  • 1C Coffee + 2TBSP
  • 2C Oats
  • 1C White Whole Wheat Flour
  • 2TBSP Unsweetened Cocoa Powder
  • 1/2C All Natural Peanut Butter
  • 1/2C Dark Chocolate Chips
  • 1TBSP Maple Syrup
  • 1/2C Unsweetened Coconut Milk (Not the kind in a can, the kind in the refrigerated section)
  • 2tsp Vanilla Extract

In a small to medium sized bowl, add the dates and pour 1C of hot coffee over the dates.  Allow to soak for 1/2 hour to an hour.  You can use leftover coffee that has been reheated.

Preheat oven to 375 degrees and grease an 8×8 baking dish (either with oil or nonstick spray).

Drain dates and add to a food processor.  Pulse just until the dates start to break up.  Add in the oats, flour, cocoa powder, and chocolate chips.  Pulse again until the oats start to break down and the chips start to break down as well.  The chips might not break down as easy, don’t worry about this.

In a medium sized mixing bowl, add in the coconut milk, 2TBSP of coffee, the peanut butter, maple syrup, and the vanilla extract.  Whisk until the PB is well incorporated into the mix.  Add this mixture to the date mixture, and pulse until well combined.

This will be an extremely thick batter.  It will not be a pourable batter and you may have to remove it from the processor and mix with your hands a few times.  Put this mixture into the baking dish, you’ll have to press it into place.  Again, remember this is a really thick batter.

Place in oven and bake for about 10 -15 minutes.  Just till the top starts to get a little browned.  It doesn’t take long at all for these bars to set.

Remove from oven and allow to cool for about 15 minutes before cutting.  Cut into squares and serve immediately.  Or allow to cool longer once cut, place in a storage container and keep in fridge until you’re ready to eat one.  I suggest heating it up slightly before eating.

These also freeze very well.

These smell exactly like a no bake cookie.  The peanut butter comes out as a very strong smell and flavor in these bars.  The coffee is just enough to enhance the chocolate and not dominate the flavor in any way.

The bars are very dense because they are so jam packed with goodness.  Fiber from the oats and dates, protein from the peanut butter, and a little fun from the chocolate.

If you don’t have coffee or don’t want to use coffee, you can soak the dates in hot water.  Use 2 TBSP of coconut milk in place of the 2 TBSP of coffee in the bar batter.

Great as a breakfast or a snack.

Bonus, you don’t even have to cook these!  You can roll them into little ball shapes and serve them up as a twist on a truffle. Yes there is flour in here but there is no “uncooked flour” taste when you eat these bars raw.  All you get is a straight forward chocolate and peanut butter combo.

I did give all of these to Scott to take on his trip.  That much chocolate and PB needs to stay close to home as well.  I had some for breakfast and they are chocolatey delish!

Do you make bars at home?  They are perfect for snacks on the go!

Have fun guys, and remember, always play with your food!  Enjoy!
Pina Colda Pancakes

Earlier this week, I discussed how a recent kitchen flop then lead me to create one of the best pancake flavors to date. Happy day!

I had been toying around with making a summery-themed pancake one that tasted like the sun and reminds you of the beach and drinks with little umbrellas in them.

Or tasted like the sun and reminded you of being pool-side with drinks that had little umbrellas in them.

I’m flexible.

Once I trashed the failed pancakes, I got busy making some Pina Colada inspired pancakes.  While I don’t like an actual pina colada, the flavors that make one up are fantastic and can be used in other applications (like smoothies!).

I knew that I could use those flavors in a pancake as well!

Andrea’s Pina Colada Pancakes

  • 1C Spelt Flour
  • 1C Buckwheat Flour
  • Pinch Ground Cinnamon
  • 1/2C Unsweetened Shredded Coconut
  • 2TBSP Cane Sugar
  • 1/2tsp Baking Soda
  • 1C Pineapple Juice
  • 1/2C SO Delicious Unsweetened Coconut Milk
  • 1/2C Water
  • 1tsp Vanilla Extract

Preheat griddle over medium heat.  In a large mixing bowl, combine all dry ingredients and whisk.  In a medium sized mixing bowl, combine all liquid ingredients and stir.  The coconut milk will curdle in the pineapple juice, this is OK. Acid mixing with a cream will create this reaction. It’s not bad or sour, so don’t freak out.  Slowly add the liquid mixture to the dry ingredients, gently stir until everything is well combined.

Grease the griddle (I brush on olive oil) with your choice of oil or butter, and then spoon some of the batter onto the griddle.  The size of pancakes you want is up to you. Cook on one side until you start to see bubbles popping in the middle of the pancake, about 2-3 minutes. Flip and continue to cook until done, about 1-2 minutes.  Remove from griddle and repeat with remaining batter.  Serve warm!

Light and sweet pancakes that taste like summertime fun. The pineapple and coconut come out in full force in these pancakes but not so much as to be overwhelming. Both Scott and I enjoyed these a great deal and I’m happy to have found another way to use pineapple juice.

I like keeping the coconut milk to a small amount because I don’t want it to weight down the pancakes. By only using 1/2 a cup, the pineapple juice and water make up the rest of the liquid and help to keep the pancakes fluffy.

Have fun guys, and remember, always play with your food! Enjoy!
Homemade Granola

I love granola and am pretty sure that I have always loved it.  I was never much into the chewy granola bars, I loved the crunchy more sturdy ones.  I always felt oh so healthy when eating granola.  It’s oats and nuts and sometimes fruit!  How can that be bad?

I also always purchased granola because for some reason I had it in my head that it was hard to make.  Eventually I started realizing how much money I was spending on granola because granola is flipping expensive!  I also became aware of how much sugar was in the granola.  I’m not a big sugar person anyway and when I realized just how much sugar is in manufactured granola, I sort of silently freaked out. I personally don’t want or need that much sugar in my life.

It was at this point that I started making my own granola.  It was a rocky start that resulted in plenty of burnt batches.  Lesson learned, granola is a project of love. Slow, easy, and steady will get you the results you want.  Aggression and haste will just leave you frustrated and unsatisfied.  None of us want that!

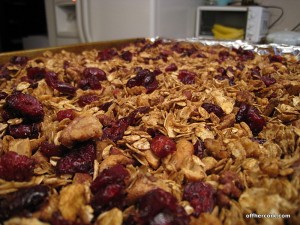
Andrea's Granola

Andrea’s Homemade Granola

  • 4C Old Fashioned Oats
  • 2TBSP Light Olive oil
  • 1/4C Maple Syrup
  • 3tsp of ground cinnamon
  • Fresh grated nutmeg, to taste (I do about 1/2 tsp)
  • 1C each crushed raw pecans and raw walnuts
  • 1/2C Unsweetened shredded coconut
  • 1C dried cranberries

Preheat oven to 300 degrees.  In a large mixing bowl combine, oats, nuts, cinnamon, nutmeg, oil and maple syrup.  It takes about 3 minutes of stirring for everything to combine.  Allow to sit for 10 minutes.

On a large cookie sheet, line with foil and spray with nonstick spray (or use a mister with oil of your choice).  Dump oat mixture onto the cookie sheet and spread out.  Place in the oven and stir the mixture about every 10 minutes.  Bake the oat mixture for about 25-30 minutes.  The last five minutes of baking, mix in the coconut.

When the granola is browned and crispy remove from oven and allow to cool.  About 15 minutes.  When the granola is cooled, mix in the cranberries.  Store the granola in an airtight container.  Mixture keeps for ages so no worries about it turning on you.

Once I started making my own granola, I have turned into a huge granola snob.  Either I don’t care for the taste of other granolas or the ingredient list isn’t something that appeals to me.  Recently I came across some granola that had powdered milk as an ingredient.  Wha the what?  Why in the world is there powdered milk in granola?

So yeah, I’m totally picky now.

This is a loose granola.  This granola will not provide you with big cluster pieces.  In order to get that kind of granola, a lot of oil and liquid sugars are needed and that’s not something I’m down with.  If that’s what you like, feel free to up the oil and maple syrup amounts and see what happens. :)

This granola is awesome with yogurt, sprinkled on top of oatmeal, or even salads.  In fact I’m currently out and need to make more!  I suppose I should get moving.  The smell of baking granola is amazing and instantly makes the house that much cozier.

Roasted Green Beans with Almonds

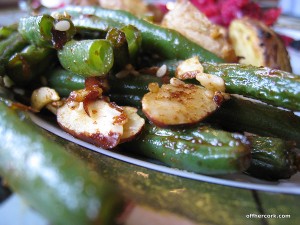
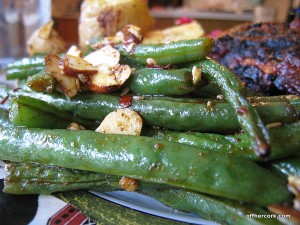
Roasted green beans with almondsWe love veggies here at the HQ and because of that, I’m constantly exploring new ways to cook up some of our favorites.  Both of us really love green beans.  For me, it’s one of those comfort veggies that I have great memories of and that makes me feel all warm and fuzzy when I eat it.

Summer is when certain veggies shine and come into their own and green beans are one of those veggies.  They are plentiful in the grocery stores and I tend to stock up when I shop.

The most recent time we had green beans, I wanted to try something a little different with them.  I’ve roasted green beans before but this time I added a few other things and the results were exactly what I was looking for.  Both of us enjoyed this dish and it made a great side for our grilled feast we had that night.

Andrea’s Roasted Green Beans with Almonds

  • 1lb Fresh green beans
  • 1/2 tsp sesame seeds
  • 1tsp soy sauce
  • 1/2 tsp light olive oil
  • 1/2 tsp garlic powder
  • 1/2 tsp chili powder
  • Pinch red pepper flakes
  • Sliced almonds

Wash and trim up the green beans.  Preheat oven to 400 degrees.  Fill a medium sized pot or pasta pot with water and bring to a boil.  Add the green beans to the boiling water and blanch, for about 2-3 minutes.  Remove green beans from the water and rinse with cold water.  Once the green beans have cooled, add them to a storage bag (or you can use a medium sized mixing bowl) and add to the green beans the seasonings, soy sauce, and olive oil.  Mix well.  On a baking sheet lined with foil and sprayed with nonstick spray, spread the seasoned green beans.  Place in oven and roast the beans for about 5-7 minutes.  When the green beans are cooked through, turn off the heat and add the almonds and sesame seeds and toss.  Serve and enjoy!

Roasted green beans with almonds

I didn’t give a measurement for the almonds because how much you want to use is up to you.  You can buy prepackaged sliced almonds which are usually found in the produce section.  Sometimes they can be found in the chip and snacks aisle.  If you can’t find sliced almonds, use regular almonds.  A small handful in a baggie then use a meat tenderizer or rolling pin to crush. Sprinkle in with the green beans and it’s good to go.  If you’re grilling or bringing this to a picnic, try using some crushed smoked almonds.  That would be fabbo!

I chose to blanch the green beans first because I actually like soft green beans with a very slight crunch.  If you prefer your green beans more crunchy, you can skip this step and move straight to roasting.

Toasting the almonds and sesame seeds first before adding them in will give an additional background flavor and depth to the dish.  Fiddle around and see which combination you like best!

Enjoy guys and remember, always play with your food!

Pear and Brie Crostini

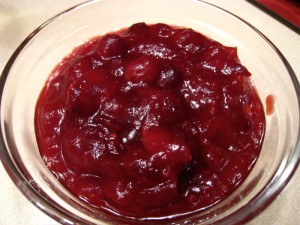
Cranberry Sauce

Cranberry Sauce

I am a lover of cheese, but I’m not a lover of all cheese. Blue cheese or anything that has a mold as an ingredient is not something I really want to eat. Stinky cheeses and sheep’s milk cheese are also not cheeses I care for much.

This may surprise you, but brie is also not a cheese I care for too much. I know people love it but for me, brie basically tastes like what an old musty basement would taste like if you could spread it on a cracker and serve it during cocktail hour.

However I can appreciate the creamy perfection of this cheese and how when melted, it envelops everything it touches. I have discovered that I like and enjoy brie when something sweet is accompanying it.

Because brie is a cheese that almost everyone else on the planet loves and it shows up often during the holidays, I wanted to create a recipe that could be served as an appetizer. Something other than brie en croute because let’s face it, that is an old worn out technique. I also wanted something where the color would stand out and incorporated classic fall/winter flavors. Pear and Brie Crostini is the answer.

Andrea’s Pear and Brie Crostini

  • French Baguette
  • Red Pear
  • Brie slices
  • Cranberry sauce
  • Chopped or crushed walnuts
  • Olive oil

This is a recipe where you determine how much you want to make, that’s why I didn’t provide specific amounts. You can make this for a crowd or for a couple of friends, or just for you!

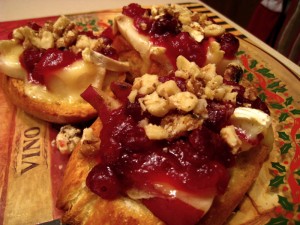
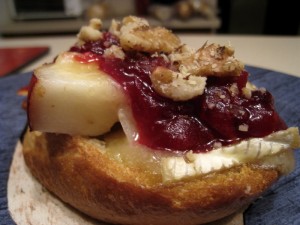
Preheat your oven to 400 degrees. Slice the baguette into 1/2 inch or slightly thicker slices. You want it thick enough to hold the ingredients but not so thick it becomes difficult to take a bite. Place slices on a cookie sheet that is lined or sprayed with nonstick spray. With a pastry brush, brush a bit of olive oil on the slices and place in the oven till golden brown, about 3-5 minutes. Remove from oven. Slice the red pear into thin slices. Use a pear that is ripe but not too soft. Place slices of pear on the baguette slices, about 2-3 per piece. Top that with brie slices and place back in the oven until the brie is melted, about 2-3 minutes. Remove from oven, drizzle with cranberry sauce and top with walnuts. Serve warm and enjoy!

About to be served

About to be served

This recipe exceeded all of my expectations and that makes me drunk with happiness. I love when an idea I have swirling around comes together more perfectly than I could have imagined. This little appetizer is amazing and as my husband put it, “This is really smooth. Everything flows together.”

The pear gives the dish a little more umph and the brie provides a nice creamy warm cheesy goodness. The cranberry sauce creates a nice sweet-tart contrast to the smooth pear and cheese while the walnuts bring crunch and added texture. The brie slices make it feel very indulgent while the nuts and pear provide the protein and fruit boost.

Pear and Brie Crostini

Pear and Brie Crostini

I used red pears because they are my favorite and I wanted to stick with the red and white colors. However a green pear would be fine as well. You could probably even use apple slices here if you prefer. Serve this up on a pretty serving dish, maybe garnish with some whole cranberries and you’ve got a very fancy appetizer that only took a few minutes to make!

Enjoy guys! And remember, always play with your food!

Happy Holidays from OHC!