Quinoa Pancakes

For those of you that read Mama Pea’s blog, you got a sneak peak of these babies last month.

I had a bit of leftover quinoa that I needed to use up and wasn’t quite sure what I wanted to do with it.  Seeing as how it was Sunday and Sunday Breakfast time, I decided, what the heck, and tried making pancakes out of it.

I was really pleased with the way these turned out!  Healthy pancakes with added protein punch?  I’ll take it!

Andrea’s Quinoa Pancakes:

  • 1 1/2C Cooked Quinoa
  • 1C Whole Wheat Pastry Flour
  • ½ tsp Baking powder
  • 1tsp Ground cinnamon
  • 1TBSP Maple Syrup
  • 1 1/4C Soymilk
  • 2TBSP Wheat Bran
  • 2TBSP Ground Flax
  • 2tsp Vanilla Extract

In a small mixing bowl combine the soymilk, vanilla extract, and maple syrup. In a large mixing bowl, combine all other ingredients. Gently add the liquid mixture to the quinoa mixture. Stir just until everything is combined.

Heat a griddle over medium heat. Brush with light olive oil and drop pancake mixture by the spoonful onto the griddle. Amount is up to you and what size pancakes you want to make. Cook for about 4 minutes on one side or until the middle starts to pop with air bubbles. Gently flip and allow to finish cooking on the other side. About another 3 minutes or so.

Makes roughly 8 medium sized pancakes.

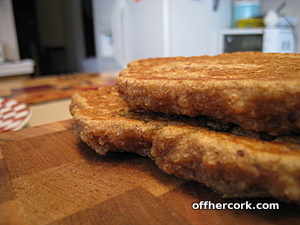
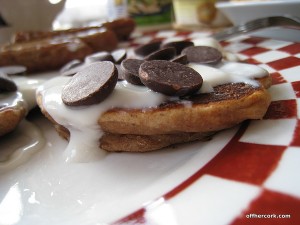
I dipped these babies in some yogurt and was really excited about the way they turned out!

Cooked quinoa can be heavy and weigh things down causing the cooking time to go up.  Eating the end result does not taste heavy or leave you feeling like you have a brick in your belly.  It just increases the cooking time, so keep that in mind if you make these pancakes.

The texture of the quinoa melts into the pancake.  There’s a bit more of a chew to them but otherwise it’s just like a regular ole’ pancake.

They freeze and reheat well, just pop them in a toaster or toaster oven for a few minutes to warm and get crisp (all my pancakes freeze well! FYI!).

Got leftover quinoa, give some pancakes a try!

Have fun guys and remember, always play with your food!  Enjoy!

Spelt Pizza Dough

Pizza!!  I don’t know why it took me so long to finally post my dough recipe but here we are, woo!

Scott and I started Pizza Thursday I think in early 2009.  We love pizza and we decided that if we have it every week then we would be more open to playing with toppings and sauces.

Also because we have had trouble finding pizza we like in Columbus.  I know everybody has places they like but some of them are a little too far for us to travel for pickup for a Thursday night.

In order to satisfy our love for pizza we had to make our own.  I originally started out buying pizza dough from Whole Foods which was fine but it wasn’t awesome.  Plus it was pricey.  Yes it was still cheaper than buying a pizza out but if I made my own crust, I could save us loads of cash.

I searched around for dough recipes and started playing around with what I found.

It took me a few months to fully develop this dough and find out what worked for me and what flavors we really liked.  Once I got this down, I haven’t even looked at any other dough.

Andrea’s Spelt Pizza Dough

  • 2C Spelt Flour
  • 1C Unbleached All-purpose flour
  • 1C Warm water + extra
  • 1TBSP Active Yeast
  • 1TBSP Cane Sugar
  • 1TBSP Olive Oil + extra

You need a stand-mixer for this, it makes life a lot easier.  If you don’t have one, you can probably mix this by hand but I haven’t tried that so I cannot make any promises!

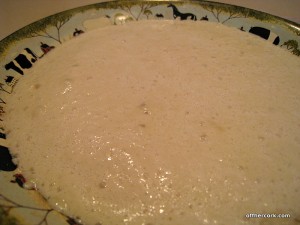
In a small non-reactive bowl (like glass) pour in the cup of warm water.  Slightly warmer than room temperature but not “hot”.  You should be able to stick your finger in the water and keep it there without feeling like the water is too hot.  To the warm warm add in the yeast and sugar, gently stir.  Allow yeast mixture to sit for about five minutes so it can bloom.  The picture above is that of bloomed yeast.

Fit your stand mixer with the dough hook and add in the yeast mixture to the mixing bowl.  Add in the unbleached AP flour and gently mix for about 2 minutes.  Stop mixer and add in the spelt flour and 1TBSP of olive oil.  Continue to mix on a low speed.  At this point you will notice that more water needs to be added to help the flour bind and stick together.  Again with warm water, slowly add some to the mixture as it mixes.  About 1TBSP at a time.  Some days you might not need much and other days you might need a few.  Keep an eye on it as it mixes.  You’ll see the dough start to pull together and form a ball. You should be able to touch the dough and it shouldn’t stick to your fingers.

In a large mixing bowl, drizzle it with some olive oil and smear it around the bowl.  Once the dough has reached the ball stage, put it in the mixing bowl and turn it so that it’s coated in oil.  Drape the bowl with a warm damp towel and let it do it’s thing rising and going.

Let it rise for at least an hour and a half then do as you please with it.  Roll it out and start topping it for pizza!
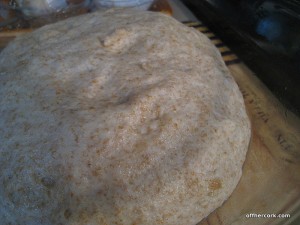
You don’t have to use spelt, you can use whole wheat, whole wheat pastry, or all AP flour if you want.  We just prefer the taste and texture of spelt.

You can also flavor the dough.  I’ve added herbs, hot sauce, and loads of different seasonings.  You will want to add those when you add in the spelt flour.  Not too much, you just need a bit to season the dough.

This makes a good bit of dough, enough for me to roll out to a rather large pizza.  It provides enough that I can have three pieces, Scott has four, and then there are four to five slices leftover for Scott to have later.  You can split it and make smaller pizzas.

Sometimes I let it rise for an hour, turn it over punching it down and let it rise again.  Sometimes I let it rise for hours before pulling it out to start the pizza.  It’s really forgiving and very easy to play around with.

Once you get used to making dough it literally takes at most 10 minutes and you’re done.  Easy peasy!

Just a tip, for those that are vegan, you don’t necessarily have to look for vegan specific dough recipes.  Most straight pizza dough recipes are already vegan because there’s no dairy or animal products in the dough.

Now there’s no excuse for you to not try making pizza at home!

Have fun guys and remember, always play with your food!  Enjoy!
Spicy Shrimp and Sausage

Scott and I love seafood.  Like LOVE it, in what probably results in something verging on ridiculous.  I try to make sure that we have seafood at least twice a week since that is our preferred “animal” protein source.  Tuesdays we have fish so that leaves another day free for whatever.

And while I don’t eat a lot of meat, one thing I love is sausage.  My love for it would be just a few levels down from seafood.  Seafood I would eat everyday if you gave it to me, sausage I have to be in the mood for.  I swear I’m not trying to make a joke with that statement.

Sometimes those two wants just happen to collide with each other.

I will tell you that because I love food so much, I am constantly thinking about it.  I would guess this is the way most foodies behave.  Wondering about your next meal, when you can get in the kitchen and create.  Or maybe that’s just me?

One day Scott asked me what we were having for dinner and my response was, “I’m not sure yet but I do know that some shrimp and sausage needs to find their way into my bellah right quick!”

Once I had a base plan, knowing I was going to use shrimp and sausage, I started formulating a recipe around them.  I decided I wanted something with a little bit of a kick and something saucy.  Sort of a take on jambalaya a little bit.

Then I realized that I also wanted to incorporate beer into the mix and well crap I needed to get a move on before I started drooling all over myself.

Andrea’s Spicy Shrimp and Sausage

  • 1/2LB Kielbasa, cut into small bite size pieces
  • 2 Spicy chicken sausage links of your choice, also cut into bite size pieces
  • 1 Dozen medium sized shrimp, peeled (including removing the tail) and deveined
  • 1 Small onion, sliced thin
  • 1 Green pepper, sliced thin
  • 1 14.5oz Can of diced tomatoes (can use flavored if you prefer)
  • 1C Beer (dark, like a lager or red beer)
  • 1/2TBSP Chili Garlic Sauce (from the Asian Foods aisle)
  • 2TBSP Tomato Paste
  • Salt and pepper to taste
  • 1TBSP Worcestershire Sauce
  • 1tsp Chili Powder
  • 1 1/2 tsp Garlic Powder
  • 1/2 tsp Smoked Paprika
  • Olive oil for sauteeing

In a medium sized skillet (with high sides), drizzle a little bit of olive oil and heat over medium heat.  Add in sausage and cook till they are browned and a bit crisp.  Remove from pan and drain off excess oil if there is some.  Then add in just a touch of olive oil and the peppers and onions.  Season with seasonings and stir.  Sautee just until they start to get soft, then add in the chili garlic sauce and tomato paste.  Stir till everything is coated, and cook for about another minute.  Add in the Worcestershire sauce and beer.  Be careful when adding alcohol.  Keep an eye out that you don’t get a flare up.  Then add the sausage back in and combine.  Allow to simmer for about 5 minutes, giving time for all the ingredients to marry and enjoy each other’s company.  Add in the shrimp, stir, and cover with a lid.  Cook until shrimp is pink and done, about 3-5 minutes.

Give one final stir, pour mixture over rice, serve, and enjoy!

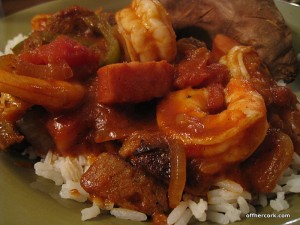
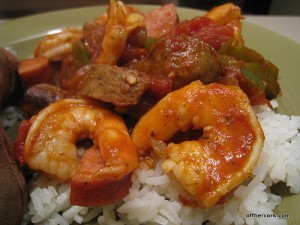
I don’t mind telling you that this dish was the flipping bomb-diggity.  I literally could not stop eating it nor exclaiming loudly to Scott that this, “Is freaking awesome!”  It was everything I hoped it would be, full of flavor, just a bit spicy, and totally saucy.

I put this on top of some Jasmine rice but you can use whatever rice you like.  Or maybe some noodles?

If you don’t dig on beer or don’t have any (which is a shame), stock/broth of your choice can be used.  I wouldn’t recommend water only because using a flavored liquid helps give the dish a little more umph and depth.

If you like super spicy, feel free to bump up the chili garlic sauce amount or even add in some red pepper flakes or jalapenos.  Totally up to you!

Have fun guys and remember, always play with your food! Enjoy!

Peanut Butter and Banana Pancakes

Naturally since I got a brand spanking new fantastic waffle maker for Christmas, I have been in the mood for nothing but pancakes.

Figures.

Pancakes are in big rotation here at the HQ as a Sunday Breakfast staple.  I love coming up with new creations and flavor combos.  This newest pancake has the awesome combo of bananas and peanut butter!

Andrea’s Peanut Butter and Banana Pancakes

  • 1C Spelt Flour
  • 1C Unbleached All Purpose Flour
  • 1tsp Baking Powder
  • 1TBSP Ground Flax
  • 2tsp Cinnamon
  • 2 Bananas
  • 1 3/4C Soymilk
  • 1/4C All Natural Peanut Butter
  • 2tsp Vanilla Extract
  • Olive oil for cooking

In a large mixing bowl combine the flours, baking powder, flax, and cinnamon.  Stir with a whisk to combine and aerate the flours.  In a medium sized mixing bowl combine soymilk and banana.  Mash the banana with a masher until totally demolished.  Add in the peanut butter and vanilla, whisk till combined.  Gently pour the liquid mixture in with the flour mixture, stir with mixing spoon to combine.  Will need to add the liquid mixture a bit at a time.

On a griddle heated over medium heat, brush with some olive oil.  Drop pancakes by the spoonful onto griddle.  Cook on the first side about 4 minutes, until the middle starts to pop bubbles.  Flip and cook on the other side for about two minutes.  Remove from heat and serve!

Spelt flour is easily my favorite flour to work with, oat flour coming in to a close second.  I like using a mixture of spelt and all purpose because I think the all purpose flour helps to keep things light and fluffy.

You’ll notice that there is no added sugar to these pancakes.  The bananas help to sweeten them and if you use a vanilla soymilk (or flavored non-dairy milk of your choice) you will get some sweetness from that.  I used a vanilla soymilk here but plain works or whatever you want to use works!  I listed it as just soymilk in the ingredients but use what knocks your socks off.

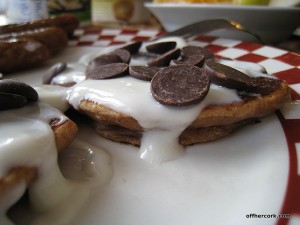
The pancakes were light with just a touch of peanut butter taste in the background.  Yogurt and chocolate chip topping optional!

Enjoy guys! And remember, always play with your food!

Homemade Granola

I love granola and am pretty sure that I have always loved it.  I was never much into the chewy granola bars, I loved the crunchy more sturdy ones.  I always felt oh so healthy when eating granola.  It’s oats and nuts and sometimes fruit!  How can that be bad?

I also always purchased granola because for some reason I had it in my head that it was hard to make.  Eventually I started realizing how much money I was spending on granola because granola is flipping expensive!  I also became aware of how much sugar was in the granola.  I’m not a big sugar person anyway and when I realized just how much sugar is in manufactured granola, I sort of silently freaked out. I personally don’t want or need that much sugar in my life.

It was at this point that I started making my own granola.  It was a rocky start that resulted in plenty of burnt batches.  Lesson learned, granola is a project of love. Slow, easy, and steady will get you the results you want.  Aggression and haste will just leave you frustrated and unsatisfied.  None of us want that!

Andrea's Granola

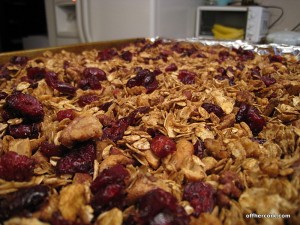
Andrea’s Homemade Granola

  • 4C Old Fashioned Oats
  • 2TBSP Light Olive oil
  • 1/4C Maple Syrup
  • 3tsp of ground cinnamon
  • Fresh grated nutmeg, to taste (I do about 1/2 tsp)
  • 1C each crushed raw pecans and raw walnuts
  • 1/2C Unsweetened shredded coconut
  • 1C dried cranberries

Preheat oven to 300 degrees.  In a large mixing bowl combine, oats, nuts, cinnamon, nutmeg, oil and maple syrup.  It takes about 3 minutes of stirring for everything to combine.  Allow to sit for 10 minutes.

On a large cookie sheet, line with foil and spray with nonstick spray (or use a mister with oil of your choice).  Dump oat mixture onto the cookie sheet and spread out.  Place in the oven and stir the mixture about every 10 minutes.  Bake the oat mixture for about 25-30 minutes.  The last five minutes of baking, mix in the coconut.

When the granola is browned and crispy remove from oven and allow to cool.  About 15 minutes.  When the granola is cooled, mix in the cranberries.  Store the granola in an airtight container.  Mixture keeps for ages so no worries about it turning on you.

Once I started making my own granola, I have turned into a huge granola snob.  Either I don’t care for the taste of other granolas or the ingredient list isn’t something that appeals to me.  Recently I came across some granola that had powdered milk as an ingredient.  Wha the what?  Why in the world is there powdered milk in granola?

So yeah, I’m totally picky now.

This is a loose granola.  This granola will not provide you with big cluster pieces.  In order to get that kind of granola, a lot of oil and liquid sugars are needed and that’s not something I’m down with.  If that’s what you like, feel free to up the oil and maple syrup amounts and see what happens. :)

This granola is awesome with yogurt, sprinkled on top of oatmeal, or even salads.  In fact I’m currently out and need to make more!  I suppose I should get moving.  The smell of baking granola is amazing and instantly makes the house that much cozier.

Tuesday Tip: Using oat bran instead of breadcrumbs

Oatbran I’m constantly on the lookout for healthy substitutions for things in cooking and in baking.  Although admittedly,  I haven’t baked anything in a very long time and I’m hoping to change that soon!

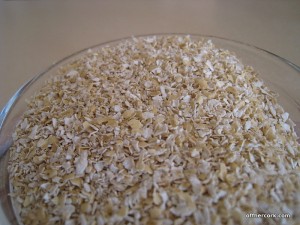
One thing I love is a breadcrumb topping.  Either on baked mac ‘n cheese, or perhaps as a coating to something, I love the crispy crunchy texture it gives food.  Crispy and flavorful is about all it brings to the table and these days I’m looking for multitasking.  I turned to one of my good friends, oat bran.  Oat bran is finely ground and in my opinion, resembles that of course bread crumbs.  Why couldn’t I use this instead of breadcrumbs?  I pondered.

I decided to find out.

I mixed it with a bit of seasonings, coconut and coated some tilapia with it.

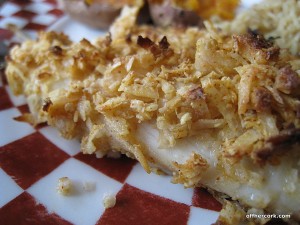
Coconut baked tilapia

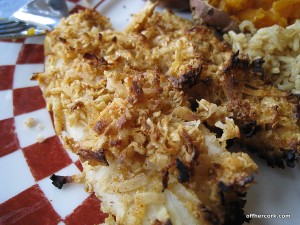
The result was crispy baked tilapia.  Not only did the oat bran work replacing empty calorie breadcrumbs but it’s also bringing protein and fiber to the table.  Multi-tasking indeed!

Andrea’s Coconut Baked Tilapia

  • 4 tilapia filets
  • 1C oat bran
  • 1/2C shredded coconut
  • Sprinkle sea salt
  • Ground black pepper to taste
  • Small pinch of cinnamon

Preheat oven to 400 degrees.  Line a cookie sheet with foil and place a metal cooling rack onto the lined cookie sheet. Spray the cooling rack with nonstick spray.  In a large shallow dish, combine all the ingredients except the tilapia.  Once the ingredients are combined, dreg the fish through the coconut mixture and place on the cooling rack.  Once all the fish are coated, place in oven and bake until cooked through, about 10 minutes.  Fish will start to flake with a fork when cooked.  If your oven runs hot, knock the heat down to 375 and extend cooking time by a couple of minutes.  The coconut can burn easily, so keep an eye on it. Allow to cool for 2minutes and then serve.

Crispy coconut baked tilapiaThe oat bran worked amazingly well!  I used sweetened coconut for some extra sweetness (and because I have yet to find unsweetened) but feel free to use whatever you like.  If you are looking for a super coconut taste, add in more shredded coconut and a little less oat bran.  Also you can add in whatever seasonings and herbs you like, the coconut and oat bran are just the base.  Feel free to experiment!

My oat bran substitution for breadcrumbs was a success!  I am definitely going to play around with this more and see what other things I can create!  Give it a try the next time you need a crunchy breadcrumb topping! Or perhaps use oat bran instead of breadcrumbs for meatballs, veggie patties, and things like that. :D

Cranberry and Pecan Stuffed Acorn Squash

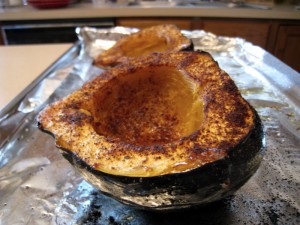
Roasted Acorn Squash

Roasted Acorn Squash

I’ve been experimenting with winter squashes lately. These are a new item at OHC HQ and one that we are thoroughly enjoying. I didn’t grow up eating winter squash aside from pumpkin, and that was only in pie. Perhaps a cookie, but that’s as far as it went. All the other varieties of squash never crossed the threshold and I’m pretty sure it was the same way over at young Scott’s house as well.

During my experimentations, both of us have decided that we love the winter squashes and currently we have not met a squash we didn’t like. A familiar squash this time of year is the little acorn squash. Perfect as a meal on its own or playing costar as a side dish. And one thing that seems pretty typical is a stuffed acorn squash. Meat of some sort seems to be a common ingredient, sausage taking a top spot.

When I created this dish, it was a veggie day for us so there’s no meat contained in this stuffing. I was looking for something a little sweet and a little savory. Filling, yet light, so as not to weigh you down after eating.

Andrea’s Cranberry and Pecan Stuffed Acorn Squash

  • 1 medium-sized acorn squash
  • 1-2 C of cooked brown rice
  • 1/2 C of dried cranberries
  • 1/2 C of crushed pecans
  • 1 TBSP of maple syrup
  • 1 TBSP of olive oil
  • Salt, pepper to taste
  • 1 tsp of chili powder
  • 1/2 tsp of cinnamon

Preheat the oven to 400 degrees. Cut the acorn squash in half and remove the seeds. On a foil lined cookie sheet place the acorn squash cut side up. Rub each half with 1/2 TBSP of olive oil. Sprinkle with salt and pepper (to taste). Also sprinkle each half with 1/2 tsp of chili powder, 1/4 tsp of cinnamon. Roast for about 1 hour or until fork tender.

While that is roasting, cook the rice according to package directions. I always use chicken stock for cooking rice. In a medium sized mixing bowl, combine rice, cranberries, pecans, and maple syrup. Mix to combine.

When the squash is fully roasted, remove from oven. Place each half on a plate and fill with the rice mixture. Serve immediately.

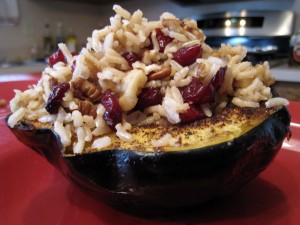
Cranberry and Pecan Stuffed Acorn Squash

Cranberry and Pecan Stuffed Acorn Squash

Both of us were really pleased with the way the dish came out. The acorn squash is sweet but it isn’t quite as sweet as a butternut, allowing the maple syrup and cranberries to shine through. The pecans give it some crunch and a little protein boost. The brown rice keeps things filling yet light.

I used a brown jasmine rice but you can use whatever rice you love or happen to have on hand. Another common way of roasting squash, is in a shallow roasting pan with a little water, about an inch or so. Roast at the same temp for the same time or until fork tender. The steam from the water will help keep the squash moist.

If you’re looking for something a little different this holiday season, or perhaps an easy side dish to bring to a party, this is definitely a winner.

Have fun guys, and remember, always play with your food!