Bacon Wrapped Jalapenos

Crunchy jalapenos

Crunchy jalapenos

Jalapeno poppers.  Jalapeno bites, whatever you call them they have been making the rounds at parties and gatherings for a while now.  They interested me but I also shied away from them since I tend to have a low tolerance for spicy dishes.  I’ve been slowly working to become more immune because when one has a husband who loves spicy stuff it starts getting harder to avoid it.

I finally decided to tackle bacon wrapped jalapenos.  Now, all recipes I have come across just call for some cream cheese in the jalapenos.  If you know me, then you’ll know that I consider that too plain.  Anyone can do that.  I wanted to put a twist in it.  Let’s bump this up and play around with it for a little bit and see what happens.  I went back and forth thinking about what I could do.  I wanted to keep it as simple as possible but still kick up the flavor.  Finally it hit me, jalapenos are already spicy (well to me anyway) so let’s stick with that theme and keep the spicy going!

Andrea’s Bacon Wrapped Jalapenos

  • 4 medium to large jalapenos
  • 4 slices of bacon cut in 1/2
  • 2 TBSP Cream Cheese
  • 1/2-1 TBSP Chunky Salsa
  • 1 TBSP Shredded Cheddar

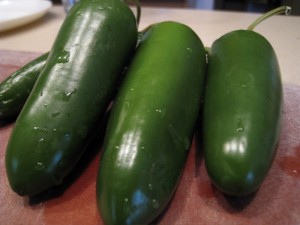
Cut the jalapenos in 1/2 lengthwise and remove all seeds and veins.  Make sure not to touch your eyes or face afterwards because you will light yourself on fire and curse yourself.  I know because I did it.  In a small mixing bowl mix together the cream cheese, salsa, and cheddar.  Once that’s mixed start to fill the jalapenos a little bit at a time.  You don’t want to overload them or the stuffing will come out as they cook.  Once the jalapenos are filled, wrap them with a piece of the bacon.  I used a toothpick to secure the bacon in place.

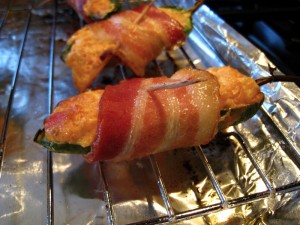
Since the salsa sort of loosens up the cream cheese, it’s helpful at this point to put the jalapenos back in the fridge for a few hours to get the cheeses to set back up.  Right before you are going to cook them, heat your oven up to 400.  Line a cookie sheet with foil and then place a wire cooling rack on top of the cookie sheet.  Spray the rack with nonstick spray.  Place the jalapenos on the rack and place in the oven to bake for about 10 minutes or until the bacon becomes nice and crispy.  Remove and allow to cool for about a minute then serve!

Just out of the oven

Just out of the oven

These turned out to be perfect pockets of spiciness!  My husband loved them and made little manly “nom nom” noises as he ate them. Chunky salsa works better than a very smooth salsa because the smooth waters down the cream cheese too much.  If the chunky seems to have a lot of juice to it, go ahead and strain some off a bit before adding it to the cream cheese.  You can also grill these on your outdoor grill if you’re having an outdoor party.

Admittedly these are addicting so if you are having a party I suggest making more than 8 because otherwise you run the risk of a fight breaking out amongst your guests.  When we become adults the cops showing up at a party does not provide the thrill it used to.

Also feel free to remind your guests about the toothpicks if your guests are such who eat before looking or if perhaps they are a little too in the “happy zone” to notice such things.  Mouth impalement is not a fun party time activity.

Bacon Wrapped Jalapeno

Bacon Wrapped Jalapeno

If you find yourself with leftover stuffing mixture, it makes a great dip for chips or veggies.  And just to give you something else to ponder, perhaps your guests would like something a little more hardy and while stuffed jalapenos are great they want something bigger.  Meatier.  And with some beans would be nice too, thank you.

Okay, I will help you out!

Use the cream cheese salsa mixture and build off of that.  I’m not giving amounts because it depends on how large your crowd is for how much you’re going to need.  Here’s the concept.

Andrea’s Layered Chili Dip

Ground meat (whichever floats your boat) cooked and seasoned with chili powder, garlic powder, S&P.  To taste, as spicy as you like.  Drained and cooled.  Layer that in the bottom of a casserole dish.  Pinto beans, rinsed and drained, on top of the meat.  The cream cheese and salsa mixture (start with a whole container of cream cheese, and 1/2 jar of salsa and if you need more keep going), spread that on top of the meat and beans.  Heat in a 400 degree oven until it’s warm and heated through.  Remove, top with shredded lettuce, cheddar, and dollops of sour cream if you want to go crazy.  Serve with tortillas and veggies.

You can of course lose the meat if you don’t want it and even the beans too.  In that case, you don’t even need to heat up the cream cheese and salsa.  Just mix it and put it in a small casserole dish topped with the lettuce and cheddar.  Ta-da, more variations!  Clearly this is a pretty easy dish that can be altered however you like.

Now most all your guests should be happy and content.  And if not, time for new friends.  I’m just saying this is some good grub and party food. ;)

Have fun guys!  And remember, always play with your food!

Sour Cream and Chive Deviled Eggs

Simple

Simple

One of my favorite type of egg dishes are deviled eggs. Growing up in western Pennsylvania, deviled eggs were a common dish that made appearances at every barbecue, football party, or general gathering of friends and family. It was a constant. And I’m not talking about the fancy-putting-on-airs deviled eggs where a piping bag was used to create a frilly filling. These were simple honest deviled eggs where an everyday spoon was used to fill them.

To me that’s how deviled eggs should remain and I guess the appropriate term that’s used nowadays is Rustic. To me, deviled eggs are not meant to look fancy but look rustic and homemade. So that it stirs up thoughts of watermelon and bbq chicken and a bucket full of drinks submerged in ice.

For some reason, living in the Midwest, deviled eggs do not seem popular here. I have yet to see them at any gathering we have been to and when I have made them, they sit untouched (except for the ones Scott and I eat). Perhaps deviled eggs are a regional thing?

I developed this recipe not long ago when Scott and I grilled some steaks. I set out to make my usual recipe when I realized a key ingredient was missing. I had already boiled the eggs and needed to use them up so making a new recipe seemed my only option. I honestly didn’t think they would turn out like much but the taste was perfect. Smooth with just a hint of tartness in the background.

Andrea’s Sour Cream and Chive Deviled Eggs

  • 4 hardboiled eggs
  • 2 tsp of Dijon mustard
  • 4 tsp of sour cream
  • 1 tsp of mayo
  • 1/2 tsp of white wine vinegar
  • 5 chives, 3 of them chopped
  • Pinch of salt and pepper to taste
  • Paprika to sprinkle

Place the eggs in a pot and cover them with water, add a pinch of salt. Bring pot to a boil and let boil for two minutes. Turn off heat, leave pot on burner and cover with a lid. Let sit for 10-15 minutes. The eggs should be perfectly cooked this way. Remove the eggs from the water and allow to cool.

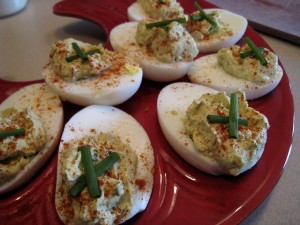
Once cool, remove shells and cut eggs in half, dumping the yolks into a small mixing bowl. Place egg halves on a serving plate or deviled egg holder. Add all the other ingredients to the yolks and mix gently until everything is combined. With a spoon, start spooning the filling into the egg halves. The two remaining chives, slice into 1/4 inch pieces. Place two, crisscrossing over each egg. Sprinkle eggs with paprika. Cover and refrigerate for a few hours before serving. Makes 8 deviled eggs.

Sour Cream and Chive Deviled Eggs

Sour Cream and Chive Deviled Eggs

The chives give some depth to the deviled egg without overpowering it. These deviled eggs are light and fluffy which doesn’t overshadow the main course. The vinegar provides a tartness on the back of the tongue, just enough to make it interesting.

Enjoy guys! And remember, always play with your food!
Ham and Cheddar Potato Puffs

Jazz up leftovers

Jazz up leftovers

It never fails, whenever I make mashed potatoes I always make way too much. Then I have leftovers and I wonder what I’m going to do with them. Sometimes they get eaten with the next night’s dinner but sometimes they don’t. I hate throwing out food and have since vowed to always try and do something with my leftovers.

Thankfully mashed potatoes are a dish that can be easily and quickly turned into something else. They can go the savory route or, believe it or not, the sweet route. I typically stick with the savory road myself. I love mashed potatoes. A comfort food for me that I often turn to when I need a big comfy sweatshirt and a hug.

This is a recipe I created so that I could use up the small amount of leftover mashed that was sitting in my fridge. The rest of the meal that accompanied the potatoes had been eaten and they were all that remained. I pulled out some other things from the fridge to add to the potatoes and my little potato puffs were born.

Andrea’s Ham and Cheddar Potato Puffs

  • 1 1/4 C of mashed potatoes
  • 1 egg
  • 3 TBSP of sour cream
  • 1/4 C shredded cheddar
  • 3 slices of deli ham chopped
  • 6 chives chopped

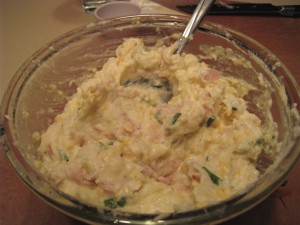
Preheat oven to 375 and with some nonstick spray, grease a mini-muffin pan. In a medium sized mixing bowl combine all of the above ingredients until everything is well mixed. Spoon into the mini-muffin pan, filling the each area to the top. Bake for about 15-20 minutes until the potatoes are puffed, browned, and set. Makes about 15 mini potato puffs.

From the oven

From the oven

These make perfect little appetizers or a nice side to a meal. You can mix in whatever strikes your fancy. Perhaps doll them up a bit more with some parm and prosciutto. Maybe add some swiss and bacon. The possibilities are endless with these.

You can freeze them and reheat them whenever the mood strikes or as a make ahead dish to a party. Just put the oven on at 350 and heat until they are warmed back through. Enjoy guys! And remember, always play with your food!
Ham and Cheddar Potato Puff

Ham and Cheddar Potato Puff