Spring Clean Eats: Day 10, Piggie Piggie

Breakfast soupUgh, I totally slept like crap the night before.  I woke up in the middle of the night and was up for four hours before falling back to sleep again.

GAH!

By the time I rolled out of bed I was feeling like I got run over.  Running was not happening as I had zero energy.

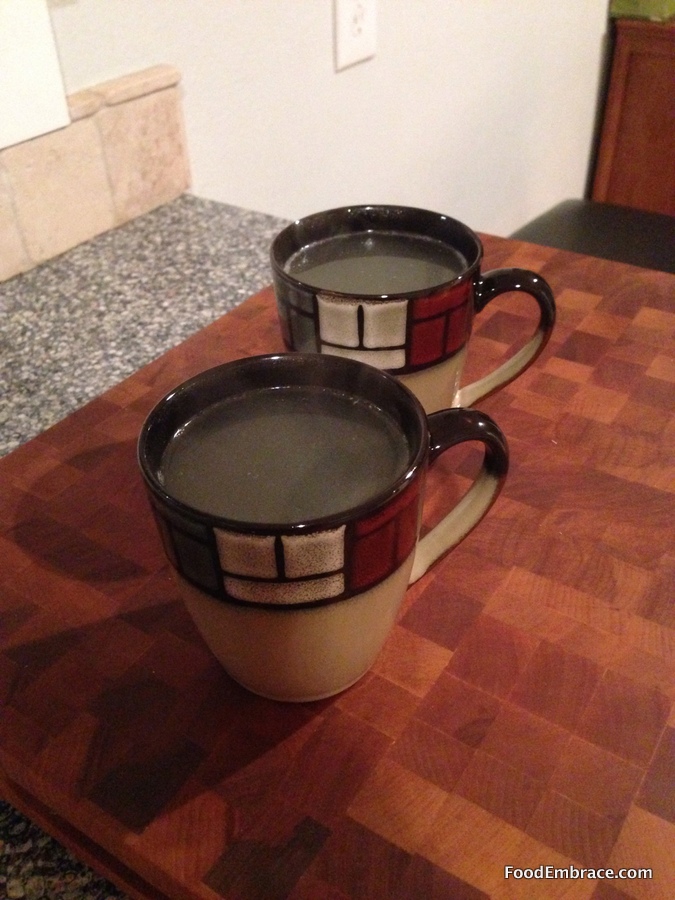
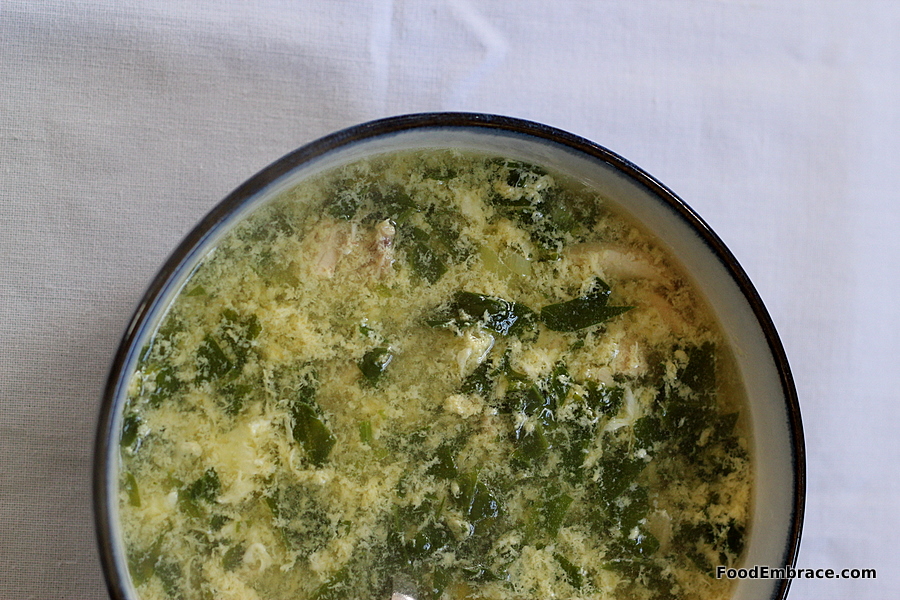
Thank goodness for breakfast soup!  A big bowl of broth hit the spot.  This had spinach and a little bit of shredded chicken in it as well.  Not the best picture I’ve taken of soup but it will have to do.

I started feeling better and 100% a couple hours later.  It took a while but I got there, the broth helped tremendously.  Back home from a meeting, I made a quick lunch for us.

taco salad

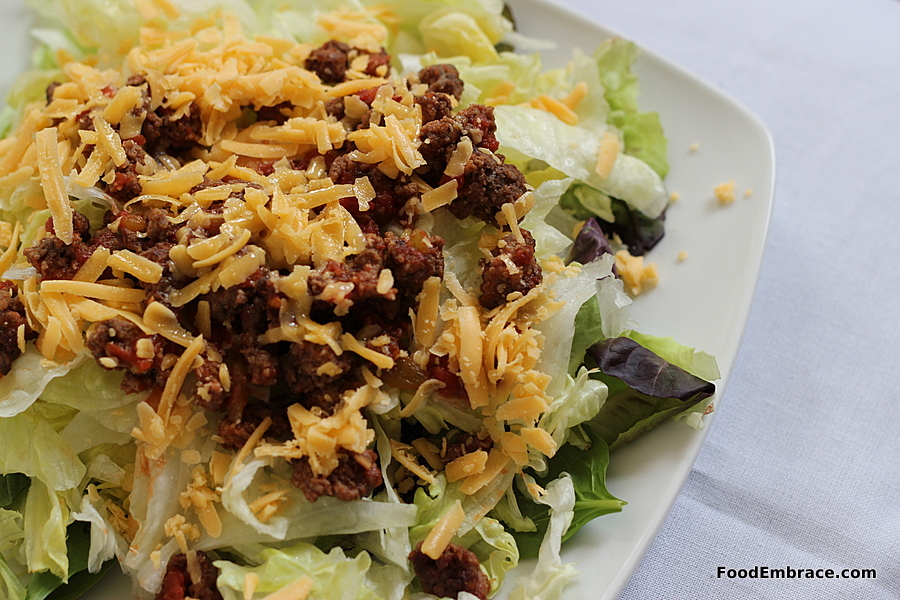
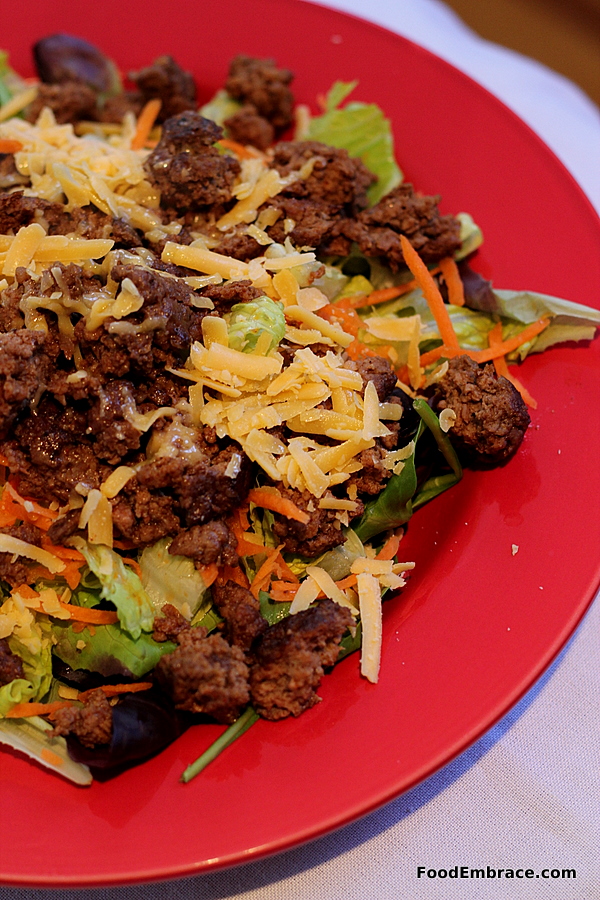
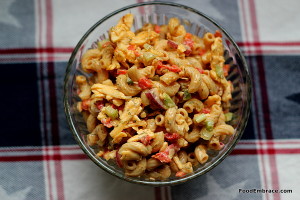
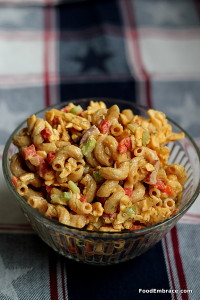
More taco salad!  This totally hit the spot.  After a late lunch, Scott went out to do errands and I plopped down on the couch with the pups.  I was feeling lazy and not motivated to do anything.  Since Scott was already out, he brought home dinner.

This became interesting and a challenge of its own.  With Spring Clean Eats, the goal is to eat high quality foods and little to no grains/empty carbs.  That eliminates a lot of places for takeout!

Scott came home with BBQ from a place just up the road.

BBQ Ribs

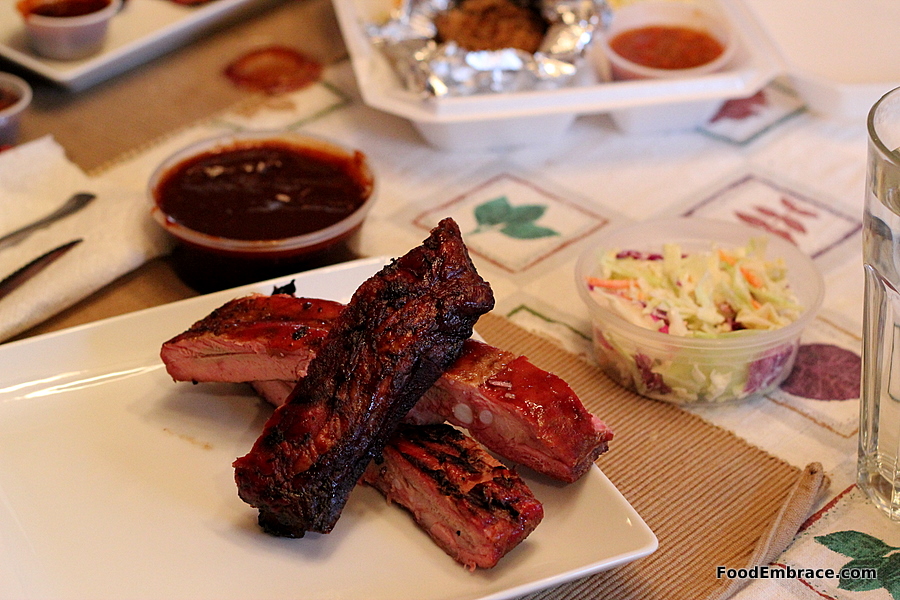
We had ribs, pulled pork, coleslaw, beans, and potato salad.

I was totally bummed out because the food was disappointing.  I’ve had really good BBQ before and this was just a’right.  I only had two of the ribs because they were gigantic so two was plenty. Only a few bites of coleslaw because it wasn’t very good.  The potato salad and beans were not my style.

So I was left feeling guilty that we just spent money on subpar food and I should have just made something quick myself.  Plus there’s the fact that I doubt this was a nice pastured pork, so ugh what did I just eat?

That is what I call, The Quality Food Dilemma.  Do you sacrifice quality for authenticity?  This will definitely be another topic that I bring up after the challenge so we can have a full on discussion about it.  It’s one of my on-going “food” debates  and I haven’t figured out an answer just yet.

Spring Clean Eats, Day 9: On The Run

Fried eggs, avocado, mandarin orangeOne of the struggles with this challenge so far has been breakfast.  I’m trying to keep it different because I do get tired of the same thing all the time. But with semi-sorta-kinda-Paleo that has been the biggest hurdle for me.

If you have any fun breakfasts that are protein or veggie based, please share!

Yesterday’s breakfast was two eggs fried in ghee, topped with half a sliced avocado and hot sauce (Choloula, no sugar).  Also with a side of mandarin oranges.

We are still having milk with our coffee in the mornings.  I forgot to decrease the amount for this week’s delivery so we are trying to get through it.

I’m in the process of deciding to give it up or stick with it.  Still not sure!  The biggest draw is that we get it delivered fresh from a local dairy which is very convenient.

Exercise:

Running!  Ahhhh and it was glorious!  I probably could have pushed through the whole run but my legs started getting tired.  Mostly my quads so I had one walk break.  I wasn’t too surprised, they have been getting fatigued during kickboxing as well.

Lunch meetings and afternoon dog walks meant it was another Linner day.  This one was fantastic and totally hit the spot!

Taco salad

Taco salad!

Baby greens and chopped romaine topped with ground beef, shredded carrots, and a little cheddar.  I also made pico de gallo (tomatoes, jalapeno, onion, cilantro and lime juice) and some guacamole on the side.  I topped my salad with the pico for “dressing”.

The couch and I had a date yesterday which is why this post is late.  I really needed a couch and Law and Order moment to zen out.  I have a feeling that I’m going to need more today.  That definitely wasn’t enough of a recharge!

Spring Clean Eats: Day 4, Management

Mugs of chicken brothIn yesterday’s post we left off with my need for a snack. I looked around my kitchen but nothing was Spring Clean Eats friendly. It was also later evening and my desire to cook something or even heat something up was non-existent.

Then I remembered that I just made a fresh batch of chicken broth! So Scott and I sipped big mugs of hot broth while we watched Helix. That show is batshit crazy but I have a very strong need to find out how it ends.

After a bit I headed off to bed to read for a little while.  Give me a moment while I shout that, I slept great last night!  I’ve been sleeping like crapola for a couple of years at this point (thanks shit diet and too much beer!) that a great night sleep is totally worth celebrating!  I would have run first thing but we had an early morning appointment so I needed to get to breakfast quickly and get some work done first.

Plus I was hungry!

Scrambled eggs, fresh from a friend’s backyard.  Hooray, backyard chickens!Scrambled Eggs, Mandarin Oranges

With a side of the norm, mandarin oranges.

We were running low on veggies, most especially greens, so after our appointment today, I headed to the store to get supplies our fridge.  I found some paleo “snacks” that I’m pretty excited to try.  They should be making an appearance this weekend!

I was starving and it was way past lunch time, so I picked up some sushi for us to have when I got back home.  Scott had spicy tuna and I just had a veggie roll.

Sushi

It had carrots, avocado, and cucumber with white rice.  I also had two chicken wings (from home) on the side for the protein portion.  Unpictured, is a half apple that I also decided to eat after I realized I was still hungry.

I picked up two portions of sushi but only ate one.  I wasn’t feeling the sushi really.  I also noticed that, for me personally,  it didn’t make for a very great lunch.  It didn’t fill me up or leave me satisfied at all.  I also had the mid-afternoon crash afterwards.  I haven’t experienced that in some time so that surprised me.  Was it the rice? Do I need a much better veg to protein ratio?  Not sure but I’ll keep experimenting and see what works.

I think that I would prefer salads with protein added (like chicken, eggs, or fish) than the combo I had today.

I didn’t get very much water in before lunch either so I feel like that could have played a large part as well.

Mental note, get more water in before lunch! And make sure you eat a proper lunch!

All I kept thinking about after lunch was dinner!

Burger and fries

Burgers and fries, oh yeah!

The burgers were seasoned with salt, pepper, onion powder, and garlic powder.  I cooked them in my cast iron skillet in some ghee.  I prefer to cook burgers and steaks in lard, but I currently need to make some more.  Ghee works just as well!

Topped with tomato, onion, and wrapped up in lettuce.  Oh I also put mayo on mine!

The fries were seasoned with:

  • Olive Oil
  • Salt
  • Garlic Powder
  • Chili Powder

And roasted in the oven at 425 for about 20-25 minutes.

I made some Fry Sauce for dipping.  I found some Paleo ketchup at the store today, made by The Paleo Chef. I used this instead of traditional ketchup (which has sugar) to make the fry sauce.

I ended up not getting a chance to work out today.  I was going to go to kickboxing but time ran away from me today and I didn’t make it.

Lessons learned from today:

I need to work on meal and time management.  I should have had lunch planned out a little better and I need to make sure that I manage my errands better so I can hit the gym.

Well tomorrow is another day! This whole challenge is supposed to also be a learning experience and I am definitely learning the new needs and wants of my body.


Curry Butternut Squash Mac And Cheese

Butternut Squash Mac and CheeseIt’s cold out and winter is officially here, at least in our neck of the woods.  Which means all I want is the most comfortable of comfort foods.

Mac and cheese totally hits the spot but I wanted a little something different.  A little way to toss in some veggies and make it taste slightly more indulgent.

I thought if I pureed up some butternut squash and some coconut milk this might work to form a really creamy sauce.  It worked beautifully and we had a creamy cheesy dish to to eat while we snuggled on the couch in our jammies watching TV.

Andrea’s Curry Butternut Squash Mac and Cheese

To Roast:

  • 1 2 1/2 pound Butternut squash, peeled, seeded, and cut into chunks.
  • 1 Small onion, cut into chunks.
  • 1/2TBSP Olive Oil
  • 1tsp Curry Powder
  • 1tsp Garlic Powder
  • Sprinkle of salt and pepper
  • 3C Elbow Pasta

Preheat oven to 400 degrees.  Put the onion and squash in a bowl and toss with the olive oil and seasonings.  Place on a greased baking sheet and roast in the oven for about 25 minutes.

You can also cook the pasta at this time as well, 3C of elbow pasta.  Bring a large pasta pot to boil and cook pasta for 3 minutes. Don’t cook the pasta all the way, only take it to where the pasta is just beginning to soften just a bit.  It will finish cooking in the oven when the dish is fully together.  Drain pasta, put back in pasta pot, and set aside.

For the Sauce:

  • 1 Can Coconut Milk, full fat (you can use reduced fat if you like)
  • 1 1/2C Water
  • 1/2 tsp Curry Powder
  • 1/2tsp Garlic Powder
  • Pinch Red Pepper Flakes
  • Roasted squash and onion
  • 1 1/2C Shredded Jack Cheese
  • 2C Shredded Sharp Cheddar

Place the first five ingredients in a blender and blend till mixed.  Then add in the squash and onion and blend until everything is creamy and smooth.  You might need to stop along the way and use a spoon to help break things up.

In a large sauce pot, add the sauce and heat over low-medium heat.  Slowly add in the cheese until all the cheese is used and melted into the sauce.

Grease a 12×8 casserole dish. Add the sauce to the pasta in the pasta pot and stir until everything is mixed.  Then add that mixture to the casserole dish.

Place in the 400 degree oven and let bake for about 15 minutes.  Stir and bake for another 15 minutes.  Sprinkle the topping (see below) all over the top of the dish, give it another 5 minutes and remove from oven.

Topping:

  • 1C Breadcrumbs
  • 1/2C Grated Parmesan
  • 4 Slices of crispy cooked bacon, crumbled
  • 4TBSP Olive Oil

Mix all ingredients in a small bowl.

Allow the mac and cheese to cool for two minutes then serve and enjoy!

Butternut Squash Mac and Cheese

It’s going to seem like a lot of sauce but it will cook down once it’s in the oven.  That’s the reason for not cooking the pasta all the way.  The pasta will finish in the oven and absorb some of that sauce.

Creamy and slightly different with the curry powder.  Yeah, ok I used a lot of cheese and if you’d like to reduce that amount you can.  I used the jack for melty goodness and the cheddar to give it some bite.

The coconut milk provides the perfect base for the sauce because you don’t need to use any thickeners like flour.  You don’t even need to take the time to make a roux!  It also isn’t noticeable in the taste, no one is going to suspect you used coconut milk in this dish.

I had bacon on hand so why not?  You can omit that too if you’d like to keep it veggie friendly.

This makes a good bit of mac and cheese and is perfect for leftovers the next day.  It won’t last longer than that though so make sure to eat it up!

I was pleased how this dish turned out though I think I might tweak with it a little more and see what else I can do with it.  That’s the best part of cooking, just playing around with recipes and methods!

Have fun kids, and remember, always play with your food! Enjoy!


Cheese Ball Requests

mmmm

Every year for the holidays my mom would make a cheese ball and a salmon ball that we were able to enjoy throughout the day.

I loved that cheese ball and it was only later after I asked for the recipe that I realized it was full of things I hated like Velveeta (ew!) and blue cheese (double ew!).  But it tasted amazing on crackers.

I always associate cheese balls and cheese spreads with the holidays.  I don’t know why they kind of went out of fashion.  Maybe people wanted to put out cubes of fancier sounding cheeses.  Maybe people got lazy and it was easier to cut up cheese and set out chunks without worrying about making it look pretty.

I think now that many associate the cheese ball or cheese spread as something cheesy (pun intended) from the 60s.  But I think a cheese ball can be fancy, creative, and a fun thing to have out for entertaining.

I want to help bring the cheese ball back and I can’t do it alone!  You are going to have to help me with this effort!

I am taking submissions with your best or your favorite cheese ball recipe.  Include a picture of the finished product if you can!  If you have a favorite or funny memory about the holidays and a cheese ball, I will be sharing those as well!

If you have your own blog and write a post with a recipe or funny memory, please send me the link and I will include it in a post.

I am taking submissions from now until December 15th by 5pm Mountain Time.  I will begin posting and sharing on Monday, December 16th. 

Let’s work to help bring the cheese ball back as a holiday must have!

Pimento Cheese Macaroni Salad

Pimento Cheese Macroni SaladWe have been in the middle of a heat wave here in The Fort.  School was even cancelled today due to intense heat.

When you live in a house with no air conditioning, all you want to eat is cold stuff.

Very. Cold. Stuff.

We had some mayo on hand and I asked Scott if he wanted old school potato salad or old school macaroni salad.

He picked pasta.

Once I opened the pantry and saw some pimentos sitting there, I asked Scott if he would mind if I experimented with the macaroni salad.  He’s such a good sport and always indulges my creativity,  so I got to work right away on a new macaroni salad.

Now this isn’t macaroni salad with some pimentos added.  And it’s not pimento cheese with some pasta tossed in.

This is indeed a combo of the two and it’s delicious.

Andrea’s Pimento Cheese Macaroni Salad

  • 8oz Diced Pimentos (drained)
  • 2 1/2C Elbow Macaroni, uncooked
  • 1/4 Of A Small Red Onion, diced
  • 1 Small Green Pepper, diced
  • 2 Ribs of Celery, diced
  • 2C Shredded Sharp Cheddar (I like Tillamook)

For The Dressing:

  • 1/2C Mayo
  • 2TBSP Yellow Mustard
  • 1/4tsp Celery Salt
  • 1tsp Garlic Powder
  • 1/2tsp Onion Powder
  • 2TBSP Dill
  • 1/2tsp Sweet Smoked Paprika

In a small mixing bowl, add everything for the dressing and combine.  Set aside.  In a large glass or non-reactive mixing bowl, add in the pimentos, onion, green pepper, and celery.

Bring a large pot of water to a boil and add the macaroni.  Cook until pasta is al dente.  The goal is to cook the pasta till it’s just short of being fully cooked.  The pasta should still have a little bite and chew to it.

Once pasta is cooked, remove from heat and drain.  Then run cold water over the pasta to stop the cooking process.  Drain well and add pasta to the veggie and pimento mixture.

Toss veggies and pasta.  Add in the dressing and gently combine.  Then add in the cheese and also gently combine until everything is mixed well.  Cover and refrigerate for at least 2 hours before serving.

Pimento Cheese Macaroni SaladPlease note that for two people this makes a lot of macaroni salad and that’s exactly what I was going for.  I wanted a side dish that would last for a couple of days in the fridge.  This is the kind of dish that just gets better the longer it sits and the flavors have time to develop.

Both of us loved this version of macaroni salad and I’m not sure if I could go back to regular after this.  You’ll notice that this version isn’t drowning in mayo dressing.  If you like your macaroni salads to have more dressing, you can certainly up the mayo and seasoning amounts to suit your tastes.

The pimentos and cheese add a nice twist to the dish, providing some sweetness and some tang.  If you’re looking for something different to take to a potluck or BBQ, this is the dish for you!

Have fun guys, and remember, always play with your food!  Enjoy!

Mashed Cauliflower Experiment

Cheesy Mashed CauliflowerThank you all so much for your kind words about our new house!  We are totally stoked to be able to get moved in soon and start a new chapter in our lives!

But enough about that, let’s talk about mashed cauliflower.

With certain diets that are trending right now, cauliflower has sprung up as a staple veggie and one that can be used in a lot of ways.

A common way that I have been seeing it used is as a replacement for mashed potatoes.

Say wha?

Mashed cauliflower or cauliflower puree, if you’re trying to be fancy, is pretty simple to make and it’s been popping up everywhere.

I decided to see what all the fuss was about and make my own.

I made it the way I make mashed potatoes.  The only difference being the cauliflower gets put in a food processor verses a stand mixer.

I washed, and cut up a whole head of cauliflower and added it to some salted boiling water.  I let it boil for about 5 minutes or until it was fork tender.

I drained it and then put the cauliflower back in the hot pot to help get rid of excess moisture.

In the food processor it went with milk, butter, and some cheddar for extra flavor.  A little salt, pepper, and garlic powder added for seasoning.

I pureed it until it got creamy and dished it up on plates.

Cheesy mashed cauliflowerBoth Scott and I really enjoyed this as a side dish.  It had the consistency of really creamy mashed potatoes but don’t fooled, it doesn’t taste like mashed potatoes.

It tastes like what it is, cauliflower.

I would definitely make this again for an easy side dish and a great way to have another veggie on the plate.  Would I use it as a sub for mashed potatoes?

Not on your life.  My Polish grandma would roll over in her grave and that is not the kind of juju I need.

What about you, have you tried mashed cauliflower before?

Have fun kids, and remember, always play with your food!  Enjoy!

Kale and Walnut Pesto

Kale and Walnut PestoA couple weekends ago Scott and I traveled to Boulder for a beer release.  On our way home we stopped by a Whole Foods there (huge and crazy packed!) to pick up a couple of things.

We also grabbed dinner which was pizza.  My pizza had kale pesto on it that I thought was unique and really tasty.

Because I love the concept of pesto and I love kale, this was a match made in heaven.  So of course I had to make my own version a couple of days later!

Andrea’s Kale and Walnut Pesto

  • Two Bunches of Kale**, stemmed and roughly chopped
  • 1C Walnut Halves (Raw or roasted, your choice)
  • 2 Cloves of Garlic
  • 1C Olive Oil
  • 1 Pinch of Kosher or Sea Salt
  • 2tsp Italian Seasoning
  • 1/2tsp Smoked Paprika
  • 1 Big Pinch of Red Pepper Flakes
  • 2tsp Garlic Powder
  • 1C Grated Parmesan Cheese

Place half the kale, walnuts, and oil in a food processor along with all of the seasonings and cheese.  Process until it starts to break down and get creamy.  Add the rest of the kale, walnuts, and oil and continue to process until you have a smooth creamy paste.

Pour out into a glass container with an airtight lid.  Makes about 2-3 cups of pesto and will keep in fridge for at least four days.

Kale PestoThis pesto tastes like summer. It’s grassy, slightly bitter, and feels full of sunshine.

**I didn’t cook the kale and you are free to keep it raw or to blanch it a little first.  If you do blanch it, you’ll have to make sure that you dry the leaves as much as possible.  Otherwise you’ll have a watery and runny pesto.

Since the kale is raw there is a slight grassy bitter taste up front but it soon mellows out with the garlic, walnuts, and cheese.  It’s great as a dip, to use on pasta, or even as a spread on pizza.

I think it would also benefit from a little lemon zest and a little squeeze of lemon juice.  I didn’t have any on hand when I made this but next time I’m going to give it a try.

Pizza sliceI ended up having this pesto three ways, well four, if you count eating that little slice of bread up there with the pesto on it.

Next week, you’ll get to see the other delicious way to have this pesto.


Roast Beef Dip Sandwich

Roast Beef Sandwich with JusDeli style roast beef wasn’t something we had a lot of growing up. Our family was “on a budget” and roast beef was pricey so it was only purchased for special occasions.

I did love it though.  Back in the day, when I ate fast food, Arby’s was my favorite.  Yuck now! But at the time it was heaven.

If I ever ordered a hoagie, I usually got a hot roast beef sandwich.

Despite all of that, I never had a roast beef dip sandwich.  Ever.  I don’t know why either because it’s totally up my alley.

I recently was able to enjoy a prime rib dip sandwich from Common Link (my fave food truck in Fort Collins) and fell in love.  I’ve been dreaming of having another one very soon! Since I’ve been without, I had to make do and create one on my own.  Complete with homemade jus!

I didn’t use prime rib but did use some roast beef deli meat and while it wasn’t Common Link’s sandwich, it definitely hit the spot.

It’s super easy to put together too!

I don’t have measurements for the sandwiches because you can adjust the amount to fit your needs.  I do have measurements for the jus (dipping sauce) though!

Andrea’s Roastbeef Dip Sandwich

  • Deli Roastbeef, sliced thin
  • Swiss Cheese
  • Caramelized Onions (technique is explained here)
  • Long Rolls (I used brat rolls)
  • 1TBSP Butter or Olive Oil

For the Jus (dipping sauce), Makes Enough For Two Servings

Preheat oven to 425 and grease or line a medium sized baking sheet.  Split the rolls and place them on the baking sheet.

In a medium sized sauce pan, add in all the ingredients for the jus.  Bring to a simmer and allow to simmer for about 10 minutes.

In a medium sized skillet, heat the butter or oil over medium heat and add in some roast beef.  Lightly sauté and add in the caramelized onions.  Add in about a tablespoon of the jus and combine.

Put the beef and onion mixture on one half of the roll.  Top with swiss cheese and place baking sheet in oven.  Heat for about 10 minutes or just until the cheese is nice and melted.

Remove from heat, top with the other half of the bun.  Cut sandwich in half and plate.  Pour the jus into little bowls and place on the plate.  Serve and enjoy!

Roastbeef Dip SandwichPretty simple, right? And it’s so very tasty! Perfect if it’s a busy day and you need to quickly get dinner together.  The onions can be sautéd to soften them up instead of taking them all the way to caramelization, if you’re short on time.

I used homemade stock but you can used store bought if you don’t have homemade on hand.  Still add the extra seasonings though because that makes a big difference!

If you have leftover beef from a roast, this would be a great way to utilize the leftovers!

I’ll definitely being making this again if I can’t swing over to Common Link!


Caramelized Onion Burgers

Caramelized Onion BurgersScott and I made a vow that we were going to spend more time outside this year and that we were going to spend more time grilling.

I’m pleased to say that when Fort Collins gets a streak of warm weather, we have been grilling like crazy!

I had a craving for a lovely grilled burger but I wanted to dress it up a little bit.  Nothing too fancy but I did want the burger to have a little bit more flavor to it.

I used two kinds of meats and added in some caramelized onions.  The burgers smelled amazing as they cooked and had the exact depth of flavor that I was looking for.

Andrea’s Caramelized Onion Burgers

  • 1lb Ground Beef (fat ratio of your choice)
  • 1lb Ground Pork
  • 1 Medium Onion, sliced thin
  • 1TBSP Dijon Mustard
  • 1/2TBSP Worcestershire Sauce
  • 1tsp Garlic Powder
  • 1/2tsp Ground Sage
  • 1TBSP Olive Oil for sauteeing
  • Pinch of salt and pepper

In a large mixing bowl, place the beef and the pork.  In a medium sized skillet, heat the olive oil over medium-low heat.  Add in the onions and sprinkle with a little bit of salt and pepper.  Stir and continue to stir occasionally as the onions cook down and start to caramelize.

This will take some time! Around 45 minutes for the onions to caramelize.

Once the onions have caramelized, remove from heat and add in the mustard, worcestershire sauce, garlic powder, and sage.  Stir and allow mixture to cool, about 5 minutes.

Add onion mixture to the beef and pork mixture and combine well.

Form into hamburger patties.  The size and thickness is up to you.  I made medium sized burgers and ended up with 5 medium size and one on the small side.

Store patties in fridge for at least an hour to allow the flavors to combine.  Remove from fridge at least 1/2 hour prior to cooking.

Heat a grill or skillet over medium heat.  If using a skillet, add in some oil or lard, about 1TBSP.  Place patties on grill/skillet and cook for about 5 minutes on each side.

Because this uses ground pork, you have to cook the burger all the way through.

Remove from heat and top with your favorite toppings, and enjoy!

Caramelized Onion Burgers

The burgers turned out great!  The pork along with the caramelized onion mixture kept the patties nice and juicy.  The flavor was subtle, the onions in no way over power the burger.

I topped with some swiss cheese along with some Quick and Dirty Beer Ketchup but feel free to top with your favorite sauces!

Will you be grilling more this summer?