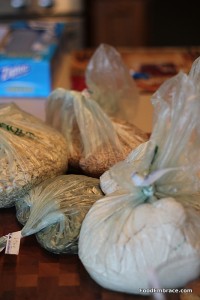
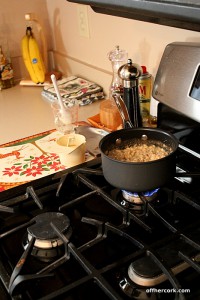
Status

Brine, Glorious Brine

Bourbon Brined Turkey

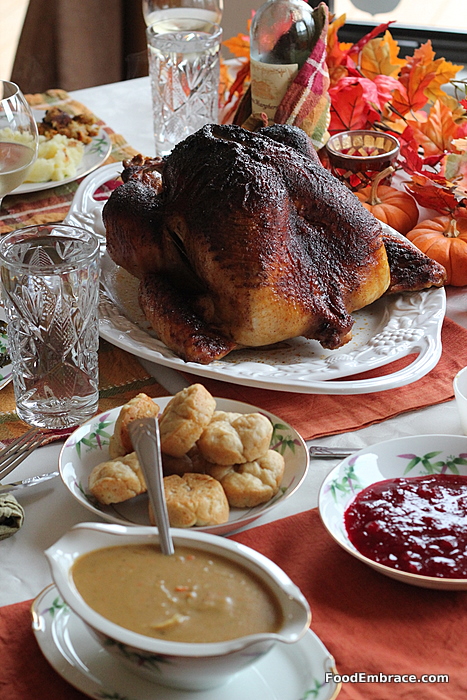
A brined turkey is a glorious thing!  It seems daunting but it’s actually very simple to do.  Yeah you’ll need some special equipment and figure out spacing in the fridge but it’s totally worth it!

For a basic brine you will need:

  • Kosher Salt
  • Brown Sugar
  • Water
  • A large bucket

You can purchase a 5 gallon bucket at any home improvement store and they are not in any way expensive. I promise they are budget friendly!  Clean it with dish soap and hot water and then label it as a “food bucket” that way you won’t be tempted to use it for something else and contaminate it.

You’ll need to be able to fit the bucket in your fridge for 24 hours.  If you live in an area where it’s super cold outside (under 20 degrees F) you can keep it outside.  Just remember to keep it safe so no animals are tempted to eat your Thanksgiving bird!

If you don’t have room in your fridge to fit a 5 gallon bucket (I currently do not) and your heart isn’t set on roasting a whole turkey, you can break the turkey down and brine the breast and legs in separate containers.  That leaves the back and wings leftover and they are perfect for making stock!  Most likely that is what I’ll be doing this year.

I love brining so much that I have already written several articles sharing tips that I’ve learned over the years.  Here’s a couple to get you started!

Brining A Whole Turkey (a how to)

Tips on Brining (Including seasonings and liquids you can use in a brine)

Bourbon Brined Turkey because holidays should always include booze.

So don’t be scared, give that turkey a good brine bath this year!

Using A Blender To Make Gravy

Gravy.  There’s really not a whole bunch more that can be said about its awesomeness.  We love gravy, everything from sausage gravy to gravy for roasted meats.

And you can’t even have Thanksgiving without gravy.

No really, it’s true.  Thanksgiving without gravy isn’t Thanksgiving, it’s just Thursday.

You can look that up.

As much as I love homemade gravy sometimes I get a little impatient while making it.  First you have to make the roux (fat + flour = roux) and wait for that to get a nice caramel color to it.  Then you can start adding in the liquid slowly stirring constantly so no lumps form.  Then you let that simmer to thicken up a bit and then finally, finally, you can serve it up.

Sometimes I don’t want to want that long and I just want to go straight to faceplanting into some gravy.

We’ve all been there.

While I haven’t fully got the gravy making part down to mere seconds, I have decreased the time required by a significant amount.

I introduced my blender to making gravy and now I don’t think I’ll make gravy without it.  Unless forced at will to do so, which I hope I’m not in that type of position.

The concept is pretty simple, I basically just dump everything in the blender and let it blend away till everything is smooth.  Then it gets poured into a sauce pan and cooked on the stove till it thickens.

I always use onions and carrots in with a roast, no matter if it’s beef or poultry, so those get added to the blender as well.

Blender Gravy:
What you’ll need:

  • Extra stock for the gravy
  • Juice from the roasting pan (you can remove some of the fat if you like)
  • Some roasted onions
  • Some roasted carrots (not too many or the gravy will become sweet)
  • Roasted garlic if there is some
  • Flour (either All-Purpose or White Whole Wheat)
  • Extra seasonings (salt, pepper, garlic powder, poultry seasoning etc)

Add in a few pieces of the roasted onions and carrots, along with the garlic.  You don’t need a lot, about 3-4 onion pieces and 1-2 carrot pieces.  We like garlic so I add 2 cloves.

Add in the juice from the roasting pan (or from the slow cooker if you used that method).

Add in the flour, usually about 2-3 Tablespoons and then blend until everything is smooth.

Pour into a sauce pan on the stove and heat over medium heat till it starts to simmer.  Add in any additional stock as needed to help keep it from getting too thick.

Allow to simmer for about 5-7 minutes.  This allows the gravy to thicken up and cooks out the flour.

Add in any additional seasonings as needed.  I usually add in extra salt, pepper, and garlic powder.  If it’s a chicken or turkey gravy, I’ll add in more poultry seasoning.  Sometimes if I want some spice to it, I’ll add in chili powder.

Once it’s thickened up and you are satisfied with it’s taste, it’s ready to serve up!

Pretty simple right?  I’ve done spicy gravy as well with some roasted chili peppers tossed into the blender along with everything else.

Gravy is a great thing to play around with because it can change up an entire dish just by how you season it.

Aside from the fact that the gravy making time is decreased, a side bonus with using the blender is that you don’t have to worry about lumpy gravy!

There will be a small amount of texture from the veggies but if you don’t even want that, you can strain the gravy to make it ultra smooth.

Have fun guys, and remember, always play with your food!  Enjoy!

Tip: Soaking Potatoes

I’m not sure if you’re aware of this but I am a gigantic fan of Triple D. You know, the Food Network show with Guy Fieri, Diners, Drive-Ins, and Dives.

Every week I’ll watch the mini-marathons on Monday and Friday evenings.  And so help you if you try to stand in my way and prevent me from watching the show because I will take you out.

I even have an app on my phone (TV Diner, awesome, you should totally get it) to help me find spots featured on the show.

It’s a great way to introduce local and independent restaurants to folks plus I learn a lot of great tips.  On one episode I saw, a diner soaks their fries in water for 24 hours before frying them.  It helps them achieve a really crispy fry.

You don’t say?

I’ve tried it and it does help make for a crispy fry, and I make my fries in the oven.

This Thanksgiving, I wondered if I could apply that concept to making mashed potatoes.

It occured to me that if I soak the cubed potoates in a lightly salted bowl of water, that might help remove some of the starch and result in a fluffier mashed potato.  Because potatoes have so much starch to them, sometimes they turn into a very thick and glue-like mess of mashed potatoes. Mashed potatoes are easy to make but they can be tricky to get the right consistency and texture.

In theory, removing some of the starch should help make for lighter and fluffier mashed potatoes, right?

Since I’m all about experimenting, I gave it a go.  The day before Thanksgiving, I peeled and cubed my potatoes and placed them in a large bowl.  I sprinkled in some salt and filled the bowl with cold water.  Stirring everything together and I set that in the fridge letting it hang out till I was ready to use it.

On Thanksgiving day, I drained the potatoes, dumped them in a pot and filled the pot with cold water.  Brought it up to a boil and went about the normal routine of making mashed potatoes.

The experiment totally worked!  We had the creamiest and fluffiest mashed potatoes!

Soaking the potatoes removed a good bit of the starch which meant they weren’t a heavy mess.

This technique also decreased the cooking time to bring the potatoes to fork tender, probably by about 10 minutes.

I also had less lumps and a much smoother texture.  I used Yukon Golds which are creamy potatoes on their own but this was a whole other level of creaminess.

I definitely will be doing this from now on when I make mashed potatoes.  I would imagine a full 24 hour soak isn’t necessary, just a few hours should do the trick.

Fall In Love With Leftovers

This week has been a busy one for me. I was prepping for a webinar that I presented on Wednesday evening.  And we all know that when preparing for a presentation, you are constantly practicing and tweaking what it is that you’re going to say.  Even how you’re going to say it!

Basically I was focused on that event and nothing else leading up to the evening of the event.

This meant that when it came to meal planning I need quick and easy.

One thing I always stress with the majority of my recipes is: Go Big, or Go Home.

This is my way of saying, make a lot because you’ll want to have leftovers.

Leftovers are like a Food Insurance Policy.

By having leftovers ready to go either the next day or tucked away in your freezer, you are making sure that on those nights when you’re working late, or the kids basketball game ran over, or you are super tired, you’ve got something to turn to that isn’t fast food or take out.

You’ve got a homemade meal ready to go and all you have to do is heat it up.

Sometimes we can just heat up something as is, and sometimes we can tweak those leftovers to jazz them up.

By taking the time to plan a head just a bit, we can make sure that we feed ourselves wholesome foods even when we’re at our most busy or at our most tired.

This week, I turned to leftovers and simple dishes a lot.

  • Sunday I pulled out some chili from the freezer.
  • Monday I made a HUGE pot of haluski (recipe soon!) that would feed us through Tuesday as well.
  • Wednesday, it was breakfast for dinner with scrambled eggs and black beans.

Having leftovers accesible made sure that even on this super busy start to the week, we had homemade hot meals ready to go at dinner time.

Now it’s on to planning my next webinar series and making lots of meals to stock my freezer back up with leftovers!

Leftover Ideas:

Potato and Green Bean Hash

Fish Po’ Boys

Veggie Stuffing Bowls

Tell me about your relationship with leftovers! Love or hate them?

Cleaning Leeks

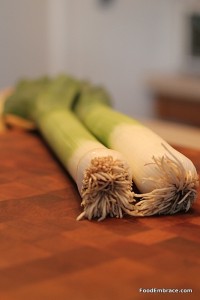
Several years ago I made the jump and tried leeks for the first time. I would see recipes for soup or recipes for pastas that had leeks as an ingredient. I never tried them though, always nervous about making that leap.

When I learned that they are basically just like a huge green onion then my mind was made up.  I love green onions so I knew that I would love leeks.

I have been getting leeks ever since, typically in the fall and winter months though.  I’m not sure what their season is but for me, my taste for them usually pops up around late September.

Which is now!  Hooray fall!

While leeks have a similiar, though more potent, taste as green onions, they take a little more effort to clean.  They grow up through sandy soil and have a ton of layers.  All these layers usually will contain some of the soil which needs to be removed.

You don’t want to eat that!

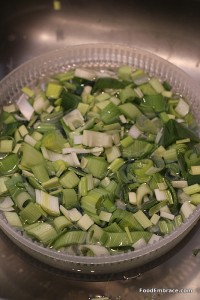
All suggestions for cleaning them say to fill a sink with water, add the chopped leeks and give them a good swishing around to get the sand out.

That’s lovely but when you want to remove the leeks, you’re chasing chopped bits all around the sink.

Not my idea of a good time so I’ve come up with a better more efficent way to clean leeks.

Cleaning Leeks

  1. Cut off the ends of the leek, the root tip and most of the top green part.
  2. Cut leek in half length-wise.
  3. Chop each halves into pieces, size up to you.
  4. Fill your sink with cold water.
  5. Place a large strainer in the water.
  6. Add chopped leeks into strainer.
  7. Swish around, break up the layers, and help remove sand from the leeks.
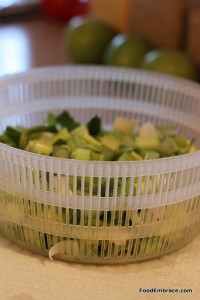
  8. Pull strainer out of water and drain.
  9. Set strainer on a towel or paper towel and set aside.
  10. Use when needed!

Easy and effective!  The stainer keeps the leeks together and contained.  It makes it easier to clean and then you just lift the strainer up out of the water.

Ta-da!

Your chopped leeks stay together, they drain easily, and now they are ready to use.

You’re not chasing leek bits all around your sink as you try to remove them.

Leeks, simple and easy to clean!

Have you cooked with leeks before?  Do you like the flavor of them?

Freezing and Storing Bulk Bin Items

Ever since I discovered the “bulk bin” section at grocery stores, I’ve been in love and visiting them frequently.  Most grocery stores have them and the variety of items varies per store but typically you can find some high quality products.

I try to purchase most things from the bulk bin. Things that I always get are:

  • Variety of raw nuts
  • Raw pumpkin seeds
  • Oats
  • Spelt Flour
  • Buckwheat Flour
  • Wheatberries
  • Speltberries
  • Dried beans

And then whatever random items I want to try out.  My local Whole Foods has an amazing bulk bin section featuring lots of things like unsweetened coconut, goji berries, raw cocao nibs and other awesome things.

Bulk Bins can be extremely beneficial whether you’re buying a lot of something or just a small amount to try out.  I’ve learned a few things along the way regarding bulk bin items.

Always Write Down The Product Number:

In the bulk bin section, you’ll find a box of twisty-ties that are made from paper and are wide enough to write on.  Each item is assigned a product number, usually four numbers in length.  Think of it like an ISBN number or that little number on produce that you buy.  Those four numbers are like its ID card. The cashier needs to know what those are in order to be able to charge you properly for the item.  Save time at the checkout and make sure you have those numbers written down.

Speaking with a few cashiers, they’ve told me that most people don’t write down the product number and then checkout doesn’t run as smoothly as it should.  Take that extra moment to make sure you write that down.

Label The Containers For Your Bulk Items:

You want to remember what you just purchased and if it’s something not easily recognizable (a lot of flours and grains can look alike), we can easily forget what it is.  Put the items in a container or bag that can be labeled with what the item is and the date you purchased it. This makes storing and organizing really easy.

Freeze Your Bulk Items:

YES! Once you have the items in a storage container and properly labeled, put them in the freezer and don’t use them for at least 48 hours.

The reason being is that bulk items can be hard to manage. Plus as a consumer we can’t be positive on what the turnover rate is for that particular item.  Or perhaps someone left the container open for a period of time.  We just don’t know and therefore can run the risk of some not so desirable items being in the food.

By freezing the product for at least 48 hours you’re going to kill anything undesirable and/or stop any processes from forming or completing its phase.

I’m not saying bulk items are unclean or unsafe.  What I’m saying is since these items are not sealed up in packages, we need to take that extra step to make sure we get a clean and pure product.  It’s up to us to be responsible with the items we purchase and choose to use.

Does your grocery store have a bulk bin section? What are some of your favorite things to get from the bulk bin?

Homemade Bread Crumbs

Most of us are accustomed to seeing that canister of “Italian Style” breadcrumbs in the grocery store.  Most of us have probably even purchased it a time or two.

Or several times.

I’m as guilty as the next person, I used to have them on hand all the time.  Then a light bulb went off and I realized I could make my own at home with the bread that I liked.

Making breadcrumbs couldn’t be easier, you only need two things:

  • Bread
  • Food Processor

That’s it!  I like to use the end pieces of bread to make bread crumbs but you can use whatever you like.  After I slice up bread that I brought home, I usually put the end pieces in their own bag.  Unless I eat one right away!  I take the bag of end pieces and tuck them in the freezer until I’m ready or until I gather enough to make bread crumbs.

When the time comes, I pull the bread out and let them sit out in the kitchen for about a day so they get nice and stale.  Then I plop them in the food processor and pulse until I get the desired consistency for my bread crumbs.  I like them small and fine, so I pulse quite a few times.

You have the option of seasoning the breadcrumbs at that point or waiting until you use them and season them to accent the dish you are using them for.  Dried herbs like oregano and basil with some garlic powder will get you the “Italian Style” breadcrumbs that you see at the market.

When you make breadcrumbs at home you are in the driver’s seat and have control of the situation.  You know what bread was used and what it was made of. If you bought local, you know where it was made as well! Plus you know when exactly those breadcrumbs were made and you know exactly what’s in them.

This can provide great peace of mind when you are trying hard to provide healthy meals to your family and friends.

Then you can use your breadcrumbs to make fabulous dishes like “unfried green tomatoes”.  Recipe for those tomorrow!

Kitchen Essentials: High Sided Skillet

I was getting caught up on my recipes making sure I had them typed out and ready to post when I realized that I talk a lot about using a high sided skillet.  Then it occurred to me that maybe people don’t quite know what that is?  Maybe it’s called something else in your house or maybe you’ve never seen one.

Because of that, I thought I should talk about it and it would be a great way to kick off the Kitchen Essentials Series.  There are several kitchen items I consider “must haves”.  Basic things that you need to help make things easier in the kitchen for you and things that help you create the best meals that you can.

Kitchen Essentials don’t have to be super expensive items but they shouldn’t be cheap either.  Remember, these are things that are helping you create awesome meals that you are serving yourself, family, and friends. You want them sturdy, durable, and able to withstand lots of use.

So let’s get started with the first Kitchen Essential!

High Sided Skillet or Saute Pan

I looked it up online and this item is referred to as a “Saute Pan” so that’s what I’m going to call it from now on as well.  That seems more universal though I may also put “high sided” in parentheses just to be super clear on what I’m referring to.

I cannot live without the Saute Pan. It’s perfect for making just about everything you can think of, from sauces, to stir-fry, to sauteeing up things from veggies to chicken.  Next to my chef’s knife this is the most used item in my kitchen.  No joke.

I use it so much that I want another one and I would like a larger one.  Most Saute Pans are about 3.5 to 5 quarts which is a very decent size to get you started.

Things to look for when buying a saute pan:

Make sure that it can also go in the oven. Trust me on this, it is very handy to be able to toss your pots and pans in the oven to allow items to finish cooking.  I place mine in the oven typically when I am wanting a meat to finish cooking.  Things from stuffed chicken breasts, to pork chops can finish off in the oven.  Even pasta dishes, maybe you have a pan full of pasta and sauce that needs some cheese melted on top.  Sprinkle on the cheese and give it a minute in the oven.  All you have to do is turn off the stove heat and put the saute pan right on the oven rack.  Just remember to use a pot holder when checking on it or removing it!

Skip the old school non-stick.  If you are looking for a non-stick style, go with hard-anodized.  This is not like the slip-n-slide teflon old school non-stick that can flake off and then you ingest.  Lovely, no?  Hard Anodized is hardened and is extremely durable.  It is made for high heat and food doesn’t stick to the bottom. For a more scientific description, you can check here. If you are curious and want more information, a Google search will provide you with a bunch.

Otherwise check out stainless steel pots and pans.  You’ll need to make sure that you use enough oil for cooking so that the food doesn’t stick but you will be able to use metal utensils with them.

Hard-Anodized is supposed to be able to resist scratches but I take caution and use either wooden or silicon utensils with my pots and pans.

Make sure it comes with a lid so that if you’re simmering sauces, you don’t have to worry about splatters all over your stove top.

My saute pan is my go-to pan for just about everything under the sun. I adore it so much and would be lost without it!

Do you have a saute pan? Do you use it very often? If you don’t have one, will you be purchasing one soon?

Makin’ Bacon

Our household loves bacon. A lot.  Thankfully we have access to local bacon that we purchase regularly. I buy it in one pound increments and typically freeze it right away until I’m ready to use it.

The trouble is that when I thaw it, obviously I now have a whole pound of bacon at the ready.

We might love bacon but we won’t eat a pound of it in one sitting.

No worries though because I just cook it all and then freeze whatever doesn’t get used.

That’s right, you can precook your bacon and then freeze it so that it’s ready when you need some smoky goodness in your life.

I cook my bacon in the oven on top of a cooling rack.  This saves me from having to stand guard over a hot skillet with flying grease. Cooking it in the oven is so much easier! Plus you have the benefit of even cooking and taking that bacon as far as you want it to go.  I like my bacon extra super crispy pretty please.

How OHC Handles Makin’ The Bacon

What you need:

  • 1lb Fresh Bacon
  • 1 Large Baking Sheet
  • Foil
  • Metal Cooling Rack
  • Oven

Preheat your oven to 400 degrees.  Line the baking sheet with foil and place the metal rack on top.  Place bacon slices in a single layer, on top of the metal rack. The entire amount of bacon might not fit and you make have to do this twice. I always have to do two batches.

Place baking sheet in oven and cook until the bacon is as crisp as you like it.  Be careful it doesn’t burn or that the grease doesn’t smoke too much.

Once it’s at your desired crispness, remove from oven VERY CAREFULLY so that you don’t spill hot bacon grease.

Place cooked bacon on paper towel.

Repeat with the next batch.  If you have a lot of bacon grease, drain into a heat proof glass container and then proceed with making the next batch.

Use as much bacon as you need for whatever you’re using it for and just freeze the leftovers in a freezer bag.  The bacon takes no time to thaw and you can pull out as many slices as you need for your next meal or recipe.  The bacon will thaw as you prep ingredients.  If you want it warm, just heat in the microwave for about 10 seconds.

Ta-da! Easy! Not only do you now have a grease free stove-top, you have successfully made some bacon including leftovers for future uses.

Like for sandwiches or salads.

Or just eating. Whichever comes first.

Washing Pot Holders

Pot holders here at the HQ get grungy.  Like seriously burnt looking from constant use.  They sit on my counter because as of right now I have no idea where to put them especially since they get used so much.  I’m continually grabbing for them to check on things in the oven, handle pots on the stove, or crockpot.

Always in use!  I have some nice long ones too that don’t cause me to fight for space as I’m pulling out a baking sheet from a 425 oven.

One thing I never knew regarding pot holders is that they can be washed!  In the washing machine! Just tossed in with your other wash and into the dryer like everything else.

Okay, maybe you knew this and do this all the time but it never occurred to me.  For some reason I just assumed they were filled with some magical heat resistant material that wasn’t supposed to get wet.  Therefore I never washed them.

Then I saw a blogger friend who was talking about laundry and how she washed her pot holders. This was a huge new piece of information for me and you know I immediately tossed mine in the next wash cycle.

Of course mine are stained and did not come out pristine but they did look a lot better than when they went in.  Now I make sure to toss them in the wash every so often to keep them fresh and not so grungy looking.

Did you know that you could wash pot holders? What kind of pot holders do you like? I admit that I don’t really care for the mitt style ones.  I like my hand to be free!