Status

Maple Bacon Wrapped Goat Cheese Stuffed Dates

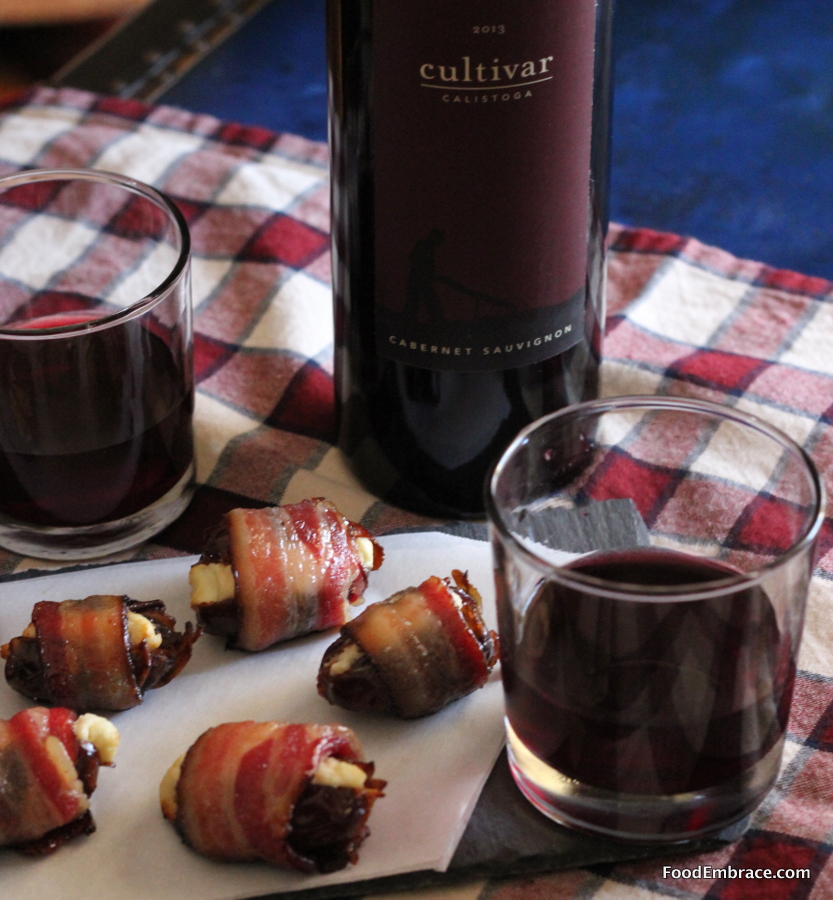
I wanted to make a snack that would be the perfect little bite. Something that could go before a meal or be a nice treat after. I had some dates and decided to stuff those with creamy earthy goat cheese then wrap them in savory smokey bacon.  These turned out better than I could have hoped and paired so well with the 2013 Calistoga Cabernet Sauvignon that Cultivar Wine recently sent me.

Cultivar Wine with Stuffed Dates


My husband is a HUGE fan of these little dates.  He basically wants them available at all times so he can enjoy a date or two in the evenings. This is very high praise, he doesn’t usually request things to have on hand.

They are super simple to make but give the illusion of being very fancy. Their decadent taste certainly helps support the hype. Perfect for get-togethers and special occasions.  Or just because it’s Tuesday, your choice. No judging from me.

Andrea’s Maple Bacon Wrapped Goat Cheese Stuffed Dates

  • 12 Dates, split and pitted (**See Note)
  • 6 Slices of Bacon, cut in half
  • 4 oz Goat Cheese
  • 1 TBSP Maple Syrup
  • 2 tsp Light Olive Oil

Preheat oven to 375 and line a small baking sheet with foil, brush the olive oil all over the foil. Make sure the dates are not cut in half but just split down the middle lengthwise.  Fill each date with some goat cheese (about 1/2 tsp each) and then wrap in bacon. Make sure the seam side is down when you place the dates on the baking sheet.  Continue until all dates are stuffed and wrapped.

Place baking sheet in oven and bake for about 15 minutes. Watch to be sure the bacon doesn’t burn. Right before removing the dates from the oven, brush each date with maple syrup.  Continue to bake for another two minutes. Remove from oven and allow to cool.  Serve immediately or can be stored in the fridge in an air tight container.

**I used regular dates but you can use medjool dates if preferred. Those are larger so you may need more goat cheese for the filling.

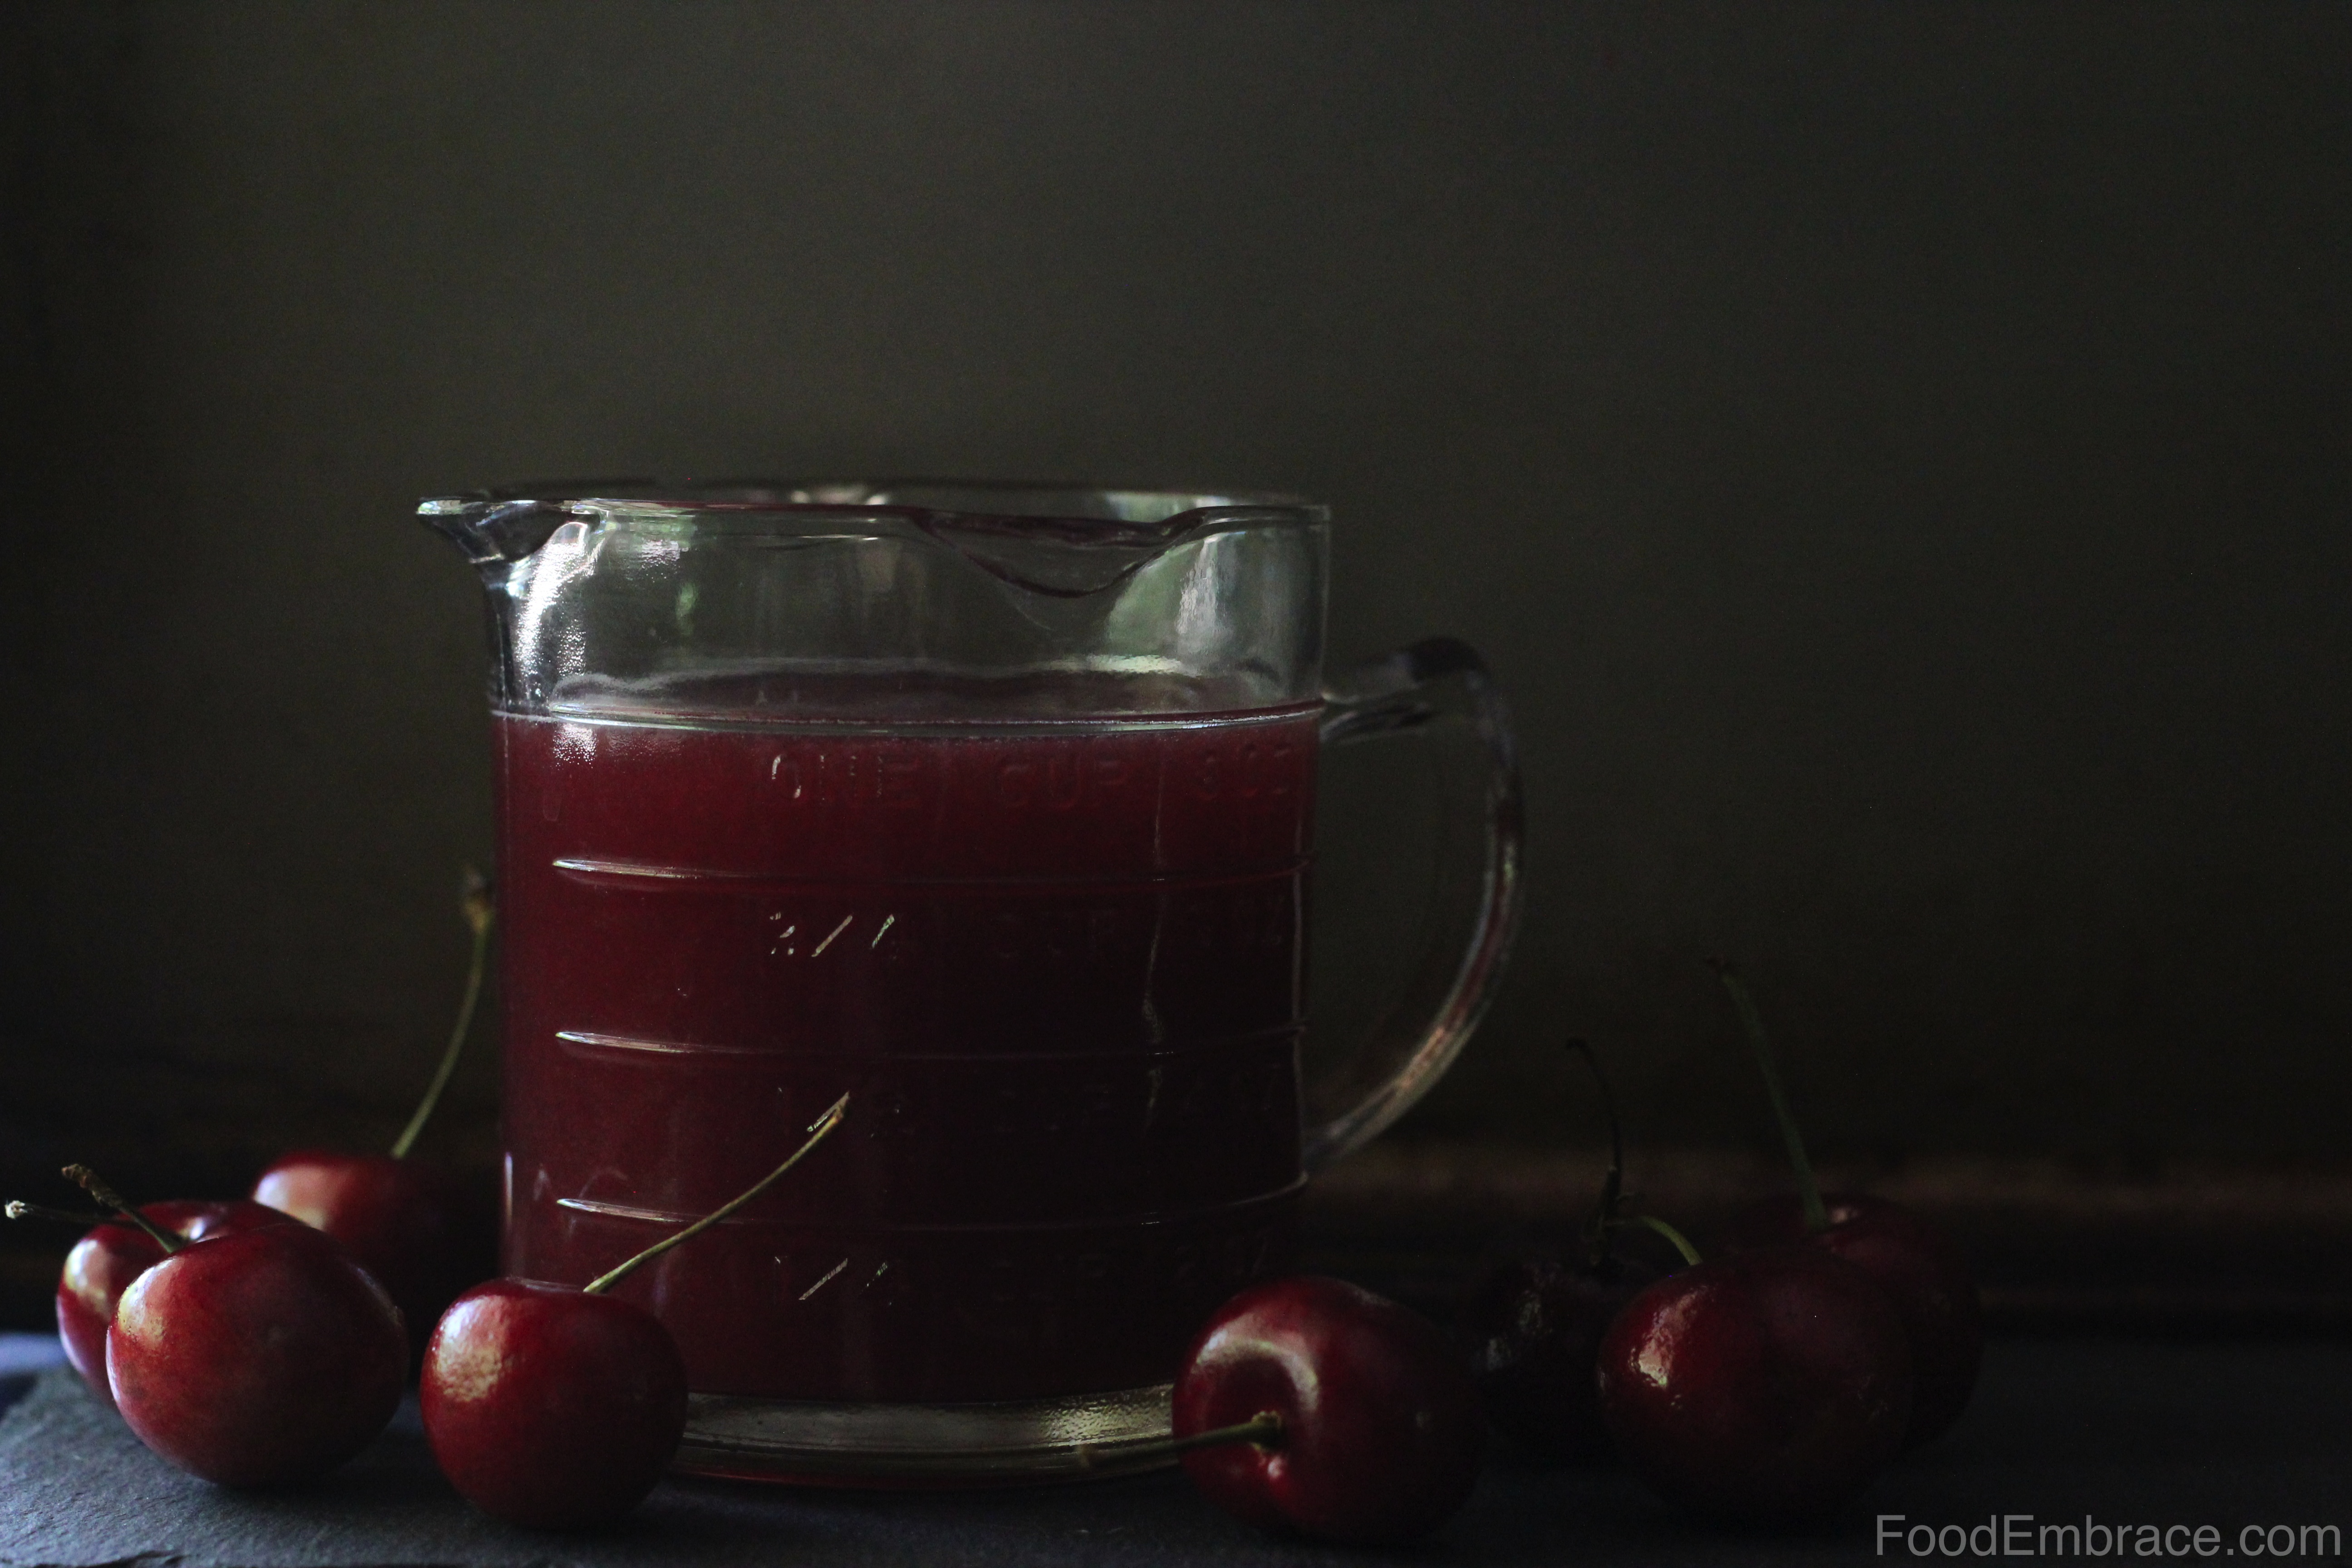
You can get even fancier and used bourbon barrel aged maple syrup if you like.

I highly recommend making a big batch of these if you will be having them at a gathering because they will go quickly! One batch is perfect for date night but you’ll need more for a bigger crowd.

Since these guys are on the sweeter side I decided to pair them with Cultivar Wine’s 2013 Calistoga Cabernet Sauvignon which worked beautifully.  The black pepper and tobacco notes brought out the smokiness of the bacon and maple syrup while the dryer finish helped balance out the sweetness.  The wine also accentuated the creaminess of the goat cheese and complimented its earthy flavor.

You can also make these dates ahead of time and then gently reheat them at 350 for about 5 minutes before serving.

If you’d like to try Cultivar Wine , they are offering a special promotion to my readers. Use the code CultivarWineFoodEmbrace when you order and you’ll receive 10 percent off your purchase.

Disclosure: I’m required to disclose a sponsored partnership between our site, Food Embrace, and Cultivar Wine. I have been compensated in exchange for this post in the form of product. All opinions presented are my own. I receive wine from Cultivar Wine as a member of the Cultivar Wine Bloggers group. 


Status

Cherry Simple Syrup

Cherry Simple Syrup

My friend, Lori, over at Fake Food Free posted a picture on her instagram recently of bourbon and cherries.  I loved the idea so much that I started playing around with bourbon and cherries myself.

I had some cherries that were a little bruised and a little soft that needed used up.  I decided to try and make a simple syrup with them that can be used to flavor drinks.

The result is a glorious red colored simple syrup that can be used in everything from mixed drinks to flavoring seltzer water.

Andrea’s Cherry Simple Syrup

  • 1/2C Water
  • 1/2C Natural Cane Sugar (Can use palm sugar or honey here)
  • 1/2 pound Cherries, pits and stems removed

In a medium sized sauce pot add the sugar and water.  Over medium heat bring up to a simmer and stir until the sugar is dissolved into the water.  Then add the cherries, simmer for 5 minutes.  Turn off heat but leave pot on the burner.

Allow the mixture to cool for about 5-7 minutes.  Pour entire mixture into a blender and blend until smooth.

Using a fine mesh strainer, strain the syrup into a glass jar or bottle.

Shake before using.  Will keep in the fridge for up to two weeks.  Makes 1 Cup of syrup.

I love the color of this syrup!  Feel free to switch up the fruits, you can do this with blueberries, blackberries, or raspberries as well!

We’ve been using this in mixed drinks with bourbon and also making some cherry lime margaritas.  It’s really easy to make and will be a hit in your household!

You can also keep it kid friendly by adding it to plain or lime seltzer for a little fun treat.

Have fun guys, and remember, always play with your food!  Enjoy!

Status

Buttermilk Spice Cake

Buttermilk Spice Cake

Buttermilk has been on sale at the store recently and I’ve been on a cooking spree using it in different dishes.  I had just a little bit left and wondered if I could make a cake with it.  I mean, if it can be used in pancakes and waffles, why not cake, right?

I wanted something a little more spicy since it’s the holidays and went with flavors similiar to gingerbread cake.  This cake turned out just how I was hoping and it’s even better drizzled with some Caramel Sauce.

Andrea’s Buttermilk Spice Cake

Wet Ingredients:

  • 1C Buttermilk
  • 1/4C Blackstrap Molasses
  • 3 Eggs
  • 3tsp Vanilla

Dry Ingredients:

  • 1C White Whole Wheat Flour
  • 1 1/2 C Unbleached All Purpose Flour
  • 1/2C Cane Sugar
  • 2tsp Baking Soda
  • 1tsp Cinnamon
  • 1/2tsp Allspice
  • 1/2tsp Ground Ginger
  • 1/4tsp Ground Clove

1/2 TBSP Butter to grease the pan

Preheat oven to 400 degrees and lightly grease a pan with the butter.  In a stand mixer, combine the wet ingredients and mix until everything is incorporated.  In a large mixing bowl, add the dry ingredients and whisk.   Turn the stand mixer on slow and slowly add the dry ingredients to the wet.  Do this until all the dry has been added.  Increase the speed on the mixer just a bit and mix for about 2 minutes.

Add this mixture to the bundt pan, make sure the the batter is even in the pan.  Place in oven and bake for about 20 minutes or until a toothpick inserted comes out clean.  Remove from oven and allow to cool completely before removing from pan.

Slice and serve!

NOTES:

If you live at sea level or below, reduce the heat on the oven to 375.  This may affect the time it takes for the cake to bake so make sure to keep an eye on it.

This cake also freezes and reheats very well!  Allow to thaw at room temperature and then gently heat in a low temp oven or toaster oven.

This is also goes great with coffee or tea in the morning, you know, if you’re one to have cake for breakfast.  No judging from me, it’s the holidays!

Have fun guys, and remember, always play with your food!  Enjoy!

Status

Bourbon Coconut Caramel Sauce

Bourbon Coconut Caramel Sauce

I have a love affair with caramel.  Rolos and Twix bars were a favorite when I was a kid.  I loved the Cadbury caramel eggs and when I got sundaes, I preferred caramel sauce over chocolate sauce.

Caramel is rich and buttery and like the liquid version of toffee, which I also love.  I have never tried making my own caramel sauce though because I figured it was too difficult.

Phsaw.

Spoiler alert: It isn’t.

It does take time and yes you do have to baby this but it’s worth it because in the end you have a delicious caramel sauce that can be added to just about anything you can think of.  Cake? YES! Coffee? YES!  Pancakes and waffles! Drizzle it into some brownie mix to make caramel brownies.  Drizzle it over some coffee cake.  Add it to ice cream? The list is endless!

You can see that I put this on top of some cake.  Some Buttermilk Spice Cake!

Since I’m cutting down on my dairy intake, I made this with full fat coconut milk instead of cream.  You won’t notice the difference because it tastes amazing.

Also, since it’s #BoozeyHoliday, I added bourbon at the end.  You’re welcome.

Andrea’s Bourbon Coconut Caramel Sauce

  • 1 Can Full Fat Coconut Milk
  • 1/2C Maple Syrup
  • 1TBSP Butter
  • 2tsp Vanilla
  • 2TBSP Bourbon

In a medium sized heavy sauce pan add in the coconut milk, maple syrup, and butter.  Heat over medium heat and whisk until the butter is melted and everything is incorporated.  Bring the mixture up to a boil and boil for two minutes. Then reduce the heat to low and continue to cook for 60 minutes.  Whisking every few minutes. The mixture should just be slightly bubbling.

Yes 60 minutes is a long time, but this needs to reduce down and thicken up.  You’ll know it’s ready when the sauce coats a spoon and has a slow drizzle to it.  It should be thick.  At this point, turn off the heat, add in the vanilla and bourbon and whisk.

Put the sauce into a heat proof container (I used a mason jar) and allow to cool.  Either use right away or store in the fridge.  If it’s cold, gently heat the sauce by adding some of the caramel to a sauce pan and heating over low heat.  Just until the sauce can be drizzled.

Yeah it takes some time but it lasts for two weeks in the fridge!  Honestly, I doubt it will last you that long because you’ll be eating it by the spoonful.


Sauteed Apples with Crushed Pecans

Sometimes I want a topping for Sunday Morning Pancakes that brings a little more umph than syrup. I want something in addition to syrup.

Since we always have a fruit with breakfast (and lunch!), I decided to make that part of the dish instead of just a side.

Sauteed bites of apple with the sweetness of crushed pecans is a great topping for pancakes.

Andrea’s Sauteed Apples with Crushed Pecans

  • 2 Small – Medium Red Apples, chopped
  • 1/2C Crushed Pecans
  • 2TBSP Butter
  • 1tsp Olive Oil
  • 1/2tsp Cinnamon

In a medium sized skillet, heat butter and oil over medium heat.  When the butter starts sizzling, add in the apples and cinnamon.  Sautee for about 3 minutes and then add in the crushed pecans.  Sautee for another 3 minutes, remove from heat and serve!

Makes enough topping for 3 servings.

Perfect for pancakes!  The apples are warm but stil crisp since they are not cooked for very long.  Plus you’re starting you day off with a serving of fruit!

This is also great for a topping over ice cream, with some yogurt, or even on top of some oats.  Mix with some granola for some extra crunch!

Have fun guys, and remember, always play with your food! Enjoy!

Vanilla Maple Coconut Butter

Nut and seed butters are all the rage now.  Even coconut is getting more play as an ingredient and many (including myself!) have turned to using the milk for cooking and baking purposes.

Recently on another blog (I forgot who though! Sorry!), I saw that she had made some coconut butter and it’s just as easy as making your own nut butter!

Who knew?! I sure didn’t and as soon as I realized I could make my own coconut butter, you best believe I hightailed it to the kitchen to make some up. So easy, takes about 10 minutes and uses simple ingredients.

Andrea’s Vanilla Maple Coconut Butter

  • 2C Shredded Unsweetened Coconut
  • 1tsp Vanilla Extract
  • 1-1 1/2 TBSP Coconut Oil
  • 1/2TBSP Maple Syrup

In a food processor, add in the coconut and start to process.  Give it about 5 minutes, when you start to see the coconut begin to break down and form a paste.  Scrap sides of processor if necessary and then add in the remaining ingredients. Make sure the coconut oil is in liquid form when you add it.  Continue to process until a smooth paste or butter forms.

Spoon out into a glass container and store in fridge.  You will have to heat it up a tad in the microwave when you want to spread it on something.

I mean honestly, could this be more simple? Now you have your own flavored coconut butter! I’ll probably add a touch more maple syrup next time and if I had a vanilla bean I would have used that instead.  This is not an overly sweet butter but it is jam packed with coconut flavor.

It will harden up in the fridge.  I think you may have to add more oil and syrup in order to keep it at a spreadable consistence.  I didn’t really need that as I don’t have a problem giving it a quick 10 second zap.

It goes great on some oats or you know, spread on top of a Sunrise Cookie if you prefer.

Have fun guys, and remember, always play with your food! Enjoy!

Vegan Chocolate Pudding

The first time I had vegan chocolate pudding was when I picked up a small container of it from Whole Foods.  I read the ingredient list which was not scary nor was it long, so I dumped into the cart.  It did use silken tofu as a base and while I don’t really dig on tofu, I decided to be open-minded and give it a try.

From that point we were hooked and would purchase it on occasion when making a Whole Foods trip.  However, like most things at Whole Foods, their pudding was overpriced and on the small side (sorry WF but you know it’s true).  I decided to look into making my own.  I checked a few recipes online just to get a basic idea of what is needed, reviewed the ingredient list of the Whole Foods version and started experimenting.

What I am currently doing takes no more than like five minutes prep time and uses only four ingredients.  It’s still a work in progress but so far it’s damn tasty and when your husband begs you to make him some Vegan Chocolate Pudding, it’s safe to assume you are on the right track.

Andrea’s Vegan Chocolate Pudding

  • 1 pkg. (1lb) of organic silken tofu
  • 4TBSP (heaping) Unsweetened Cocoa Powder
  • 4TBSP Maple Syrup
  • Pinch (1/2tsp) of Organic Unrefined Cane Sugar

Drain as much of the liquid off of the tofu that you can and dump into a blender.  Add in the other ingredients and blend until everything is well combined.  Pour into a bowl, cover and refrigerate for about 2 hours.  Allowing the tofu to set back up.  Spoon into dishes and enjoy!

P.S. Or just eat straight from the bowl like we do!

I’m trying to experiment with different tofu textures because while this is a great pudding, it isn’t quite as thick as I would like it to be.  The one from Whole Foods was extremely thick and decadent but they also used silken tofu so I’m not sure how they achieved that.  I tried straining the tofu to get as much liquid out as I could but that didn’t really help matters.  I think maybe I need to not use the silken and try a slightly firmer tofu.

The pinch of cane sugar gives it just the right amount of sweetness that you won’t get from only using maple syrup.  I tried using only cane sugar and the texture ends up being a little bit grainy.  This combo works out really well, if you like sweeter though, then by all means use more sugar to suit your tastes.

You can use a food processor to mix if you don’t have a blender.

I like the concept because it presented me with a different way to view tofu.  Like I mentioned, I’m not a huge tofu fan.  The texture is weird and even marinaded, it tastes bland to me.  Creating this pudding gave me a chance to work with tofu in a new way and I realized that tofu doesn’t just have to be baked or stir-fried.  It has loads of possibilities!

This is a great tasting treat!  A lovely dessert that you can feel good about eating.  Pair it with some red wine and you have a great dessert on your hands.

Enjoy! And remember, always play your food!

Reindeer Crunch

Reindeer Crunch by Off Her Cork I have come across a snack mix that is typically referred to as Puppy Chow.  It is a snack mix that is covered with tons of powdered sugar and is typically seen during the holiday season.  Has it made an appearance near you?

I have never eaten this snack mix before.  First of all it’s covered in powdered sugar which means it’s gonna be major sweet.  And secondly, it’s called Puppy Chow for frack’s sake.  I’m not eating that.  At the risk of sounding totally snotty, I don’t even feed my dog kibble, you think I’m gonna touch something that is named after some crappy dog food?

Fat chance.

I don’t know what prompted me to look into this snack mix a bit further but I did and realized that it’s pretty easy to make.

I decided to come up with my own recipe because most of the other recipes I saw used lots of butter or shortening.  Even the vegan versions used vegan shortening.

Totally unnecessary!  I knew I could come up with something better AND it’s not named after a really crappy dog food, it has a festive cute name instead.  If you don’t dig on Reindeer Crunch, feel free to call it “Stuff” or “Addicting” instead, I won’t be mad at ya.

Andrea’s Reindeer Crunch

  • 4C of Kashi Honey Heart to Heart Cereal
  • 2C Mini pretzels
  • 1C Unsweetened Banana Chips
  • 1.5C Dark chcolate chips
  • 1/2C All natural Peanut Butter
  • 1/2TBSP Coconut oil
  • 2.5C Powdered sugar

In a very large bowl mix the cereal, pretzels, and banana chips together.  In a double boiler, melt the chocolate, peanut butter, and coconut oil together until smooth and creamy.  Remove from heat and pour over top of the mixture in the bowl.  Stir to make sure everything is coated with the chocolate mixture.  Start adding in the powdered sugar until everything is white and covered in sugar.

Immediately start stuffing your face with your new snack mix.

I used coconut oil in place of the butter and shortening I saw in other recipes.  I also decreased the amount a great deal.  Using several tablespoons of butter or shortening is totally unnecessary and a bit excessive.  In fact I don’t even think the coconut oil is even required.  I bet this would work just as well without it.

I like Kashi cereals but if you want to use Honey Nut Cheerios instead, knock yourself out.  That would work just fine.

You probably could melt the chocolate, peanut butter, and coconut oil in the microwave but a double boiler is super easy to make and I think results in a creamier better tasting chocolate.  If you want to try the microwave, give it a shot, I’m not making any promises though!

I do have two sticking points.

1. Don’t use crap chocolate, get good chocolate.  This means bypass the Hershey’s or store brand chips and get yourself some nice chocolate.  I used Ghirardelli 60% dark chocolate chips.

2. When I say all natural peanut butter, I mean it.  No Jif, or Skippy, or anything like that.  I am talking peanut butter where the ingredients consist of two items: peanuts and salt.  That’s it.  The kind of peanut butter you have to stir first and then store in the fridge.  Trust me, your body and your friends will thank you for this choice.

This is a recipe that is easy and can be done in like 5 minutes.  It’s also a recipe that can make a ton if you need it for parties or perhaps for some gift giving. :)

Happy Holidays!

Chocolate Zucchini Bread

Chocolate Zucchini LoafNot that long ago I had a hankering for some chocolate zucchini bread.  Or at least I assumed this was the case, as I had never actually had chocolate zucchini bread.

Zucchini bread, yes.  But it was always the same way, spicy and more along the lines of like a carrot cake, spice cake kind of taste.  Lots of cinnamon, clove, and allspice in the mix.

That wasn’t exactly what I envisioned.  I wanted a dense chocolate quick bread with some zucchini in it.  I started looking around for recipes to see what I could find.  There were loads out there!

But they all had tons of sugar, white flour, and a load of eggs in them.

This is where my knack to never follow a recipe comes in handy.  I looked at the recipes to get an idea of the basic ingredients and then I created my own chocolate zucchini bread recipe.

Andrea’s Chocolate Zucchini Bread

Wet Ingredients:

  • 2C shredded zucchini
  • 1/3C light olive oil
  • 1 egg white (or 3 TBSP of egg whites from a carton)
  • 1C soymilk (plus a few extra splashes at the end)

Dry Ingredients:

  • 2C Whole Wheat Pastry flour (or regular WW flour is fine)
  • 1C Unbleached all purpose flour
  • 1/2tsp Baking soda
  • 2tsp Baking powder
  • 1/4C Cane sugar
  • 4TBSP Unsweetened Dark Chocolate Powder
  • 2TBSP Ground flax
  • 2tsp Ground cinnamon
  • Freshly grated nutmeg (about 1/2tsp)
  • Pinch cayenne pepper (just a small, very wee pinch)
  • Pinch kosher salt (very small amount)
  • 1.5C Dark chocolate chips (can use milk if prefer)

Preheat oven to 350 degrees.  In a medium sized mixing bowl, combine the wet ingredients.  In a large mixing bowl combine the dry ingredients, making sure everything is incorporated.  Then slowly add the wet ingredients to the dry ingredients, stirring gently to combine everything.  You want to fold everything together, easily as possible.  This is a very thick and dense mixture.  You may need to add a few splashes of soymilk in to help the ingredients combine and move along.  However do not add more than an extra 1/3C.  Add in the extra amount a tablespoon at a time.  This will help keep the mixture thick and dense.

Once everything is combined, place mixture in a loaf pan (I used a 9x5x3 loaf glass pan) that was sprayed with nonstick spray.  Bake at 350 for about 30-40 minutes.  Or until a toothpick inserted in the center (highest peak) comes out clean.

Allow to cool for about 10 minutes or so, then slice and enjoy!

Chocolate Zucchini Bread slice Let me state right up front that this is not a very sweet bread.  You can see from the ingredients, I’m only adding in 1/4C of cane sugar.  I don’t care for sweets much and most recipes called for something like 2C or so of sugar.  Holy crap that’s a lot of sugar!  Not for this sister!  A quarter cup of sugar is plenty.  This is a decedent and rich chocolate zucchini bread and beyond amazing.  I was so pleased with the way this came out and both Scott and I adore it.

Now let’s talk about the ingredients a bit.  To me, this is a very healthy snack.  I like to snack every so often and I like to indulge my wild side but at the same time, I like keeping things healthy.  It’s how I prefer to be, and this bread makes for a nice healthy treat.

Do you have to use whole wheat flour?  No, if you want to use all purpose for the whole thing, knock your socks off!  If you want to add more sugar, go for it. If you don’t have ground flax, don’t sweat it!  You can also use regular milk too if you like.

I like organic cane sugar because it’s healthier but if you have white sugar on hand, you can use that.

I also use olive oil because if I have to add oil to a recipe, it’s going to be a good oil.  If you have vegetable or canola, feel free to use that.  I like olive because of it’s added health benefits.

This is my vision of what a perfect chocolate zucchini bread is like.  The beauty of recipes is that we can play around with ingredients!  So you can do whatever your little heart desires.

I encourage you to not forget the cayenne though because it adds such a nice warmth to the flavor.  Cinnamon is very spicy and provides a nice heat.  The addition of cayenne takes that heat a little bit further and gives it some depth as well.  Trust me on this, go for the cayenne!

I have used vanilla and plain soymilk in this recipe and both work very well.  I also have used milk and dark chocolate chips, and again, both work really well.  My preferred chocolate powder is Ghirardelli but use whatever you have on hand.

chocolate zucchini muffin I’ve also made this into muffins instead of a loaf, and they also came out great!  Makes just shy of 24 muffins.  Cook time is reduced to about 15 minutes or until a toothpick inserted in the middle comes out clean.

This also makes for a great prerun snack the night before a morning run. :D  
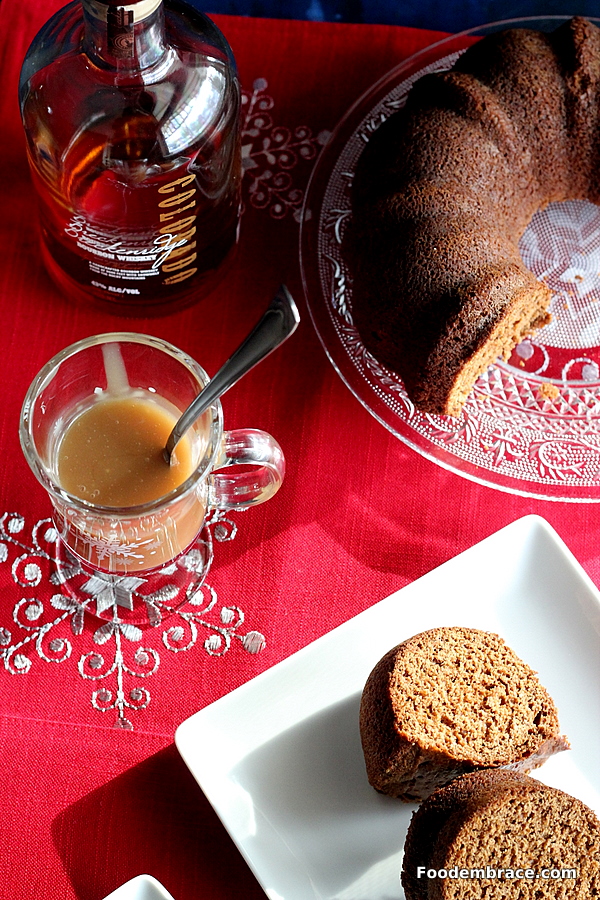
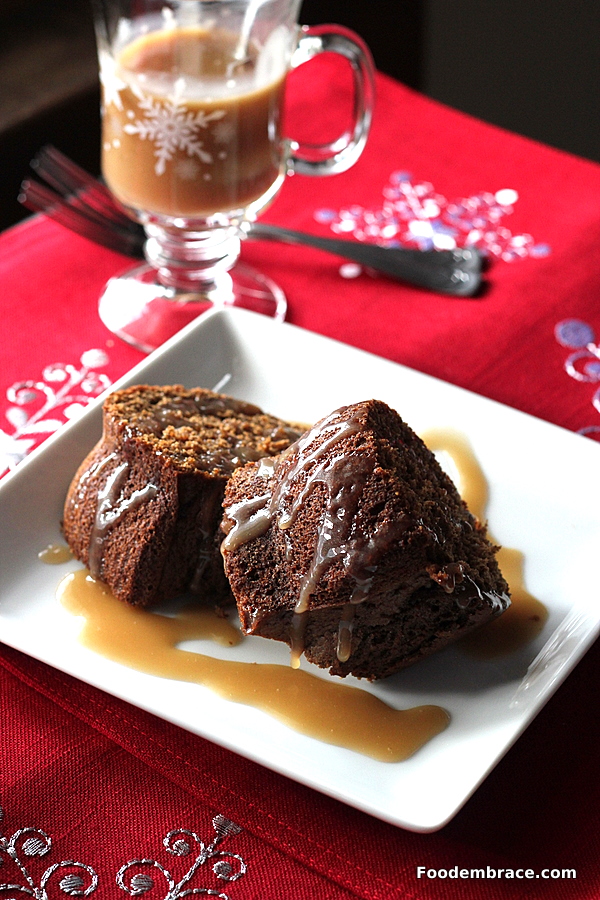
It’s carblicious and dense so it sticks with you.  I can also tell you that the chocolate zucchini bread goes great with red wine, white wine, and beer.  Pumpkin beer is a fabbo accompaniment!

If you’re craving some chocolate, give this bread a try and tell me what you think!

ETA: I also wanted to mention that this bread freezes very well.  Stick in a freezer bag and forget about it till you need a little chocolaty snack. :)

Remember guys, have fun and always play with your food!  Enjoy!