Flourless Peanut Butter Cookies

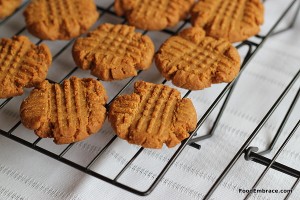
Flourless Peanut Butter Cookies are my newest obsession.  They are so easy to make and bake up in no time.

They also taste mighty damn fine.

These cookies have been popping up lately all over the food blogs and I finally decided to give them a shot.  Mine are just a little different because I use more peanut butter.

I’ve never been a fan of these so-called peanut butter cookies that only use like 3/4C of peanut butter in them.

That’s not a peanut butter cookie, it’s a cookie with some peanut butter in it.

Big difference!

These cookies are also perfect to use with all natural peanut butter, you know, the kind you have to stir.

Andrea’s Flourless Peanut Butter Cookies

  • 1 16oz Jar of All Natural Peanut Butter (no sugar added)
  • 1/2C Brown Sugar
  • 2 Eggs
  • 2 1/2tsp Vanilla Extract
  • 1tsp Baking Soda
  • Pinch of cinnamon if you feel spunky

Preheat oven to 350.

Dump all ingredients in your stand mixer bowl and use the paddle attachment.  Mix until everything is well incorporated.

Roll into small balls, about the size of a bite-size meatball.  Place on cookie sheet and then flatten with a fork to make criss-cross pattern.

Place in oven and bake for about 10 minutes or until the edges start to seem crispy.  They will harden further once they start to cool down so pay attention that you don’t burn them or overcook them.

Remove from oven and allow to cool for about 5 minutes before eating.  Enjoy!

Can this be any easier?

Scott and I give these two thumbs up!  They are perfectly crumbly like a peanut butter cookie should be and full of peanut butter flavor!

I am not much on sweets so my cookies generally do not have a ton of sugar in them (and really it’s not needed).  So be advised that these are not super sweet cookies.  They have just a hint of sweetness to them.

I highly suggest you make these this weekend and then make another batch just for good measure.

Have fun guys, and remember, always play with your food!  Enjoy!


Rum Gingerbread

I know that it might not be the holidays any longer but it technically is still winter and that means winter foods are still acceptable.

One of my favorite flavors of all time is that of gingerbread.  The combination of clove and molassess is a match made in heaven.

Gingerbread is so spicy and not overly sweet which makes it the perfect dessert for me.

I experimented a lot this winter with cooking and baking with bourbon and rum.  This is one of those experiments and it turned out to be a favorite.

Andrea’s Rum Gingerbread
Dry:

  • 1C Whole Wheat Pastry Flour
  • 1C Unbleached All-Purpose Flour
  • 1tsp Baking Soda
  • 1 1/2tsp Baking Powder
  • 1 1/2tsp Ground Cinnamon
  • 1/4tsp Ground Allspice
  • 1/2tsp Ground Clove
  • 1/2tsp Ground Ginger
  • 1tsp Grated Fresh Ginger
  • 2TBSP Brown Sugar

Wet:

  • 1/2C Unsweetened Coconut Milk (the kind found in the dairy aisle)
  • 1/4C Rum
  • 1/2C Molasses
  • 2TBSP Light Olive Oil

Preheat oven to 375 and spray a square baking dish (9×9) with oil or nonstick spray.

In a large mixing bowl combine all dry ingredients and whisk together.  In a medium sized mixing bowl combine wet ingredients and whisk.

Gently pour the wet mixture into the dry mixture and stir.  The batter will be slightly thick and sticky.

Pour gingerbread batter into the greased baking dish and place in oven.  Bake for about 15-20 minutes or until a toothpick inserted in the center comes out clean.

Remove from oven and allow to cool for about five minutes before cutting.  Serve and enjoy!


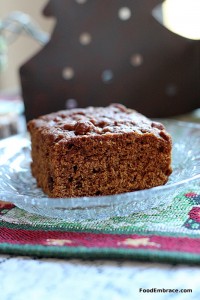
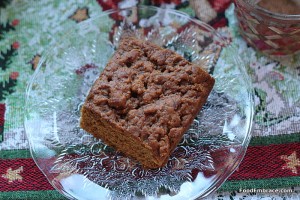
This gingerbread is spicy and a bit denser in texture providing a hearty dessert.  Or breakfast in case you roll that way.  I definitely do sometimes.

I tend to lean more towards the clove and molasses flavor so if you would like more ginger punch, feel free to add in some more.

You can use your favorite nondairy milk of choice or regular milk if you have it.

Perfect for a party or just a lazy Sunday at home.

Have fun guys, and remember, always play with your food! Enjoy!

Crab Stuffed Twice Baked Potatoes

There’s been a lot of experimenting going on with crab here at the HQ. Both Scott and I adore crab and while crab cakes are tasty, sometimes you need a little more out of life.

I’ve been hesitant in the past to mess around with crab because it is a pricey protein option and the idea of messing something up didn’t sit well with me.

However I reached a point where I realized that if we don’t experiment in the kitchen we won’t grow as cooks.  And that doesn’t do anyone any good.  So in the name of Embracing Cooking, I decided to start experimenting more with crab.

And that lead to twice baked potatoes!

Andrea’s Crab Stuffed Twice Baked Potatoes

  • 2 Large Russet Baking Potatoes, scrubbed
  • 8oz Crab Claw Meat, drained, rinsed, and checked for shell
  • 1/2 Red Pepper, finely chopped
  • 1/2 Green Pepper, finely chopped
  • 1/4 Red Onion, finely chopped
  • 4 Slices of crispy bacon, chopped
  • 1TBSP Grainy Mustard
  • 2tsp Worcestershire Sauce
  • 2TBSP Prepared Horseradish
  • 1/2C Shredded Cheddar
  • Big Pinch Red Pepper Flakes
  • 1/2-1tsp of Garlic Powder
  • 1tsp Old Bay Seasoning
  • Olive Oil for sauteeing, about 1/2 TBSP

Preheat oven to 400 degrees, poke holes in the potatoes with a knife, and wrap in foil.  Bake for about an hour until potatoes are soft and cooked through.

Remove potatoes from oven and allow to cool enough to handle.

Cut the top off of the potato and scoop out insides into a large mixing bowl.  You want the potato to look like a boat but don’t scoop so much out the potato loses structure.

In a medium sized skillet, heat oil over medium heat.  Add in the peppers and onion and sautee just till they start to soften.  About 2-3 minutes.  Remove from heat and add to the mixing bowl.

Add in the crab, bacon, mustard, horseradish, worcestershire, and seasonings along with 1/4C of the cheddar.  Start to stuff the potatoes.  This makes a lot of filling and the potatoes will be stuffed to the tippy-top.

Before serving, heat oven to 400 degrees and line a baking sheet with foil.  Spray or brush olive oil on the baking sheet and place the potatoes on top.  Bake for about 20 minutes or until the insides are hot.  Sprinkle on remaining cheddar and allow to melt.

Remove from oven and serve!

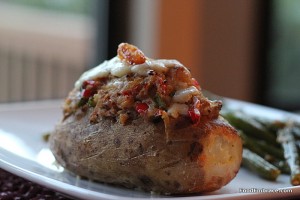
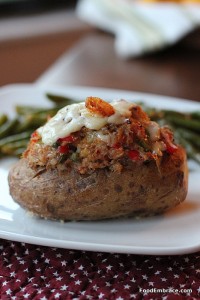
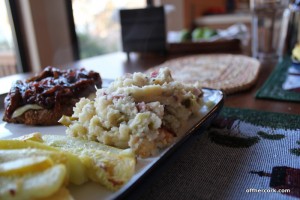
These potatoes hit the spot! And because they are large, they can be used as a main dish.  Just add some veggies or a salad on the side to round things out.

I kept the flavors similar to that of a crab cake with the use of the peppers and onion.  I knew that combination already worked so I ran with it and incorporated it into the twice baked.

The potato is very filling! So much so, that I could only eat half and saved the other half for the next day.

One reason I loved twice baked potatoes is because they can be made up to a day ahead of time, then you just have to heat them right before serving.  Add a few extra minutes to the time if they are going from fridge to oven.

They also are perfect for freezing!

Remember guys, have fun and always play with your food! Enjoy!

Skillet Chocolate Chip Cookie

The other day I was surfing around looking at different recipes for stuff when I stumbled up on a chocolate chip cookie cooked in a cast iron skillet.

Whoa! Back that train up!

They completely had my attention because that sounds darn good!  I looked at the recipe and immediately started figuring out how I could make my own.

Everyone’s heard of those BIG chocolate chip cookies sometimes people use in place of birthday cakes.  But this?  This is a completely different concept.

It really is just a basic chocolate chip cookie cooked in a cast iron skillet which results in a thicker cookie with a gooey middle.

I wasted no time in making my own version.

Andrea’s Skillet Chocolate Chip Cookie

  • 1C Unbleached All-Purpose Flour
  • 1C White Whole Wheat Flour
  • 1/3C Unsweetened Coconut Milk (Found in the dairy aisle, not the canned kind)
  • 2 1/2TBSP Unsalted Butter, room temp + 1/2TBSP
  • 1 Egg, room temp
  • 1/2C Brown Sugar
  • 1/2C Unsweetened Applesauce
  • 2tsp Vanilla Extract
  • 1tsp Baking Powder
  • 1/2tsp Sea Salt
  • 1C Dark Chocolate Chips
  • 1C Walnuts, crushed

Preheat oven to 375 degrees. Use 1/2TBSP butter to grease your cast iron skillet.  In a large mixing bowl combine, flours, sea salt, and baking powder.  Whisk together then add in the nuts and chocolate chips.  Stir until everything is combined.  In a medium sized mixing bowl, combine 2 1/2TBSP butter, egg, vanilla, brown sugar, coconut milk, and applesauce.  Slowly add the liquid mixture to the dry and stir until everything is well combined.  This will be a slightly thick dough.

Pour mixture into greased skillet and spread around till it’s even in the skillet.  Place in oven and bake for about 30 minutes or until a toothpick inserted in the center comes out clean.

Remove from oven, allow to cool for about 5 minutes, slice and serve.  Best served warm.

Both Scott and I were very happy with the way this cookie turned out!  Because of the white whole wheat flour it’s a more dense and chewy cookie.  A lot more filling as well!  It’s not a crumbly crispy cookie, instead it’s soft with gooey melty chocolate.  I added the walnuts just for a little extra kick.

This cookie is best served warm and the slices can be easily heated up in the microwave before serving.  It also freezes well!

If you have a cast iron skillet you should probably make this for a holiday dessert.

Or for Christmas morning breakfast, whichever you feel is more appropriate.

Have fun guys, and remember, always play with your food! Enjoy!

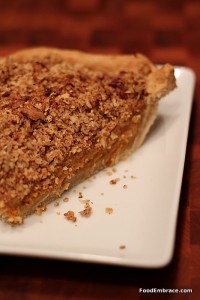
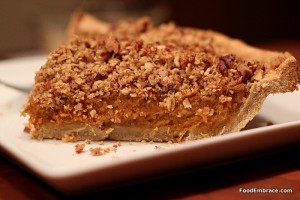
Sweet Potato Pie

Pumpkin pie is one of those items that I stopped making for our Thanksgiving dinner a few years back.  Don’t get me wrong, I love pumpkin!

But we have it all the time and I use it in a lot of different applications.  Sweet potatoes were something that was completely traditional for Scott to have at Thanksgiving so we couldn’t skip them.

What to do? They had to be part of the menu yet as a side dish would put us way over the edge.

I decided to remove them as a side dish and return them as dessert.

This has worked out very well!  We’re still getting sweet potatoes for the big day but not as a sticky gross mess (sorry but that whole marshmallow thing needs to go!).  Instead it’s served up in pie form!

And if you’ve got folks who claim they hate pumpkin (GASP!) you can serve them this instead!

This year I experimented a little and added a crumb topping and some good rum into the mix.

Andrea’s Rum and Sweet Potato Pie

For The Crust:

  • 2C Whole Wheat Pastry Flour
  • 1/4C Coconut Oil
  • 1TBSP Light Olive Oil
  • 1/2TBSP Sugar
  • Cold Water

Combine flour, oils, and sugar into a food processor.  Pulse and slowly add in the cold water, 1/4C at a time.  Pulse until the mixture comes together and starts to form a ball.  The mixture should be easy to handle and come out of the food processor without sticking.  Wrap dough in plastic wrap and place in the fridge for at least two hours.  Can be made up to two days ahead of time.

For the Filling:

  • 1, Very Large Sweet Potato
  • 2TBSP Butter, room temperature
  • 1/4C Whole Wheat Pastry Flour
  • 1/4C Dark Rum
  • 1tsp Ground Cinnamon
  • 1/4tsp Ground Clove
  • 1TBSP Molasses
  • 2TBSP Brown Sugar, Packed
  • 2tsp Vanilla Extract
  • 1/2tsp Baking Powder

Preheat oven to 400 degrees.  Poke holes in the sweet potato and place on a greased baking sheet.  Bake until a knife can be inserted easily.  Remove from oven and allow to cool completely.  Remove the outer skin and place sweet potato into a bowl for your stand mixer.  Add all the remaining ingredients for the filling and mix until everything is well blended.

For The Topping:

  • 1C Pecan Halves
  • 1C Oats
  • 1/4C Rum
  • 1TBSP Brown Sugar
  • 1TBSP Butter

Combine all ingredients in a food processor and pulse until it resembles a crumble mixture.

Assembling and Baking:

Preheat oven to 350 degrees.  Pull out a 9inch pie pan and grease using nonstick spray or olive oil.  Roll out pie dough until it’s about 1/4inch thick.  Place and fit into pie pan.  Crimp the edges and use a fork to poke holes in the bottom to allow steam to escape.  Add filling and smooth the top.  Sprinkle crumble topping on top using all of the mixture.

Bake for about 25-30 minutes.  A toothpick inserted will come out clean.  Remove and allow to cool completely before slicing and serving.

Serve and enjoy!

This pie went over very well this year!  The crust was flavorful but since I used whole wheat pastry flour, it had some great chew to it.  I like pie crusts to have some heft and not be too much like a pastry.

The rum was extremely prominent in this pie!  Next time I would probably leave out the rum in the crumble topping but feel free to play around with it and see what you like! I would probably add a little bit more olive oil or butter to the topping as well so it has a little bit more moisture to it.

Leftovers can be frozen and pulled out when you feel like a little slice of the holidays is necessary.

Have fun guys, and remember, always play with your food!  Enjoy!

Fig and Date Coffee Cake

It’s no secret that I like cooking with beer but I also like baking with beer. And experimenting with different ways to use beer in the kitchen.

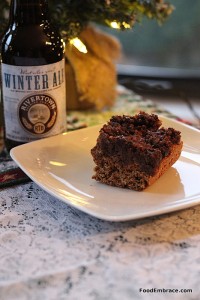
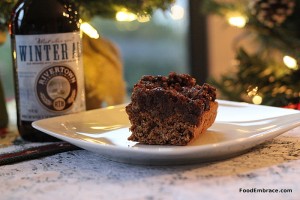
One of my most recent experiments resulted in what is now my favorite coffee cake of all time. This coffee cake uses dried figs, dates, and nuts as part of the crumble topping.

This helps keep the cake moist while baking and gives a slight nod toward the fig newtons of my childhood.  I wasn’t a huge fan of fig newtons as a kid but when I got older I enjoyed them a great deal.

Having found dried figs at the store, I knew that I wanted to use them in something.  With seasonal beers out right now, the idea of making a coffee cake with one seemed like a natural fit.

I’ve made this cake several times since the first experiment and it always makes me squee with happiness when I get a chance to nibble on it.

Andrea’s Fig and Date Coffee Cake

For the Batter:

  • 1 1/4C Dark Winter Ale
  • 1C Oats
  • 2C White Whole Wheat Flour
  • 2tsp Vanilla Extract
  • 2tsp Ground Cinnamon
  • 1tsp Baking Soda
  • 1TBSP Maple Syrup

For the Topping:

  • 8 Dried and Pitted Dates
  • 1C Dried Figs, stems removed
  • 1C Pecans, Heaping
  • 2TBSP Brown Sugar, Packed
  • 2tsp Vanilla Extract
  • 1/2tsp Cinnamon

In a medium sized mixing bowl, add in dates and figs and cover with very hot water.  Allow to steep for at least half an hour.  Drain water from dates and figs.

Preheat oven to 375 degrees.  Spray a square baking dish with nonstick spray or olive oil.  About a 9×8 dish is what I used.

In a food processor, combine all ingredients for the topping.  Pulse until everything is broken up and a crumble forms.  It will be sticky and will stick together.

In a large mixing bowl, combine all dry ingredients for the batter and whisk.  In a medium sized mixing bowl combine wet ingredients, beer, maple syrup, and vanilla and whisk.  Slowly add the liquid mix to the dry mix.  Gently stir until everything is combined.  Pour mixture into baking dish.  Top batter with fig and date crumble.  You’ll have to use your hands to crumble it and spread it around.  The crumble mixture should cover the entire top of the batter.

Bake in oven for about 10 minutes.  A toothpick inserted will come out clean.  Don’t over bake as that will result in a dry coffee cake.

Remove from oven and allow to cool for a few minutes.  Slice and serve!

I used Rivertown’s Winter Ale for this coffee cake.  It’s brewed with molasses and cinnamon.  The cinnamon is very prominent in this beer and I knew that it would work well in the coffee cake.  It’s also a dark colored beer which provides a nice caramel color to the coffee cake.

We had this coffee cake over the Thanksgiving holiday and I’m already dreaming about when I can have it again! That’s how much I love it!

The fig and date topping help keep the cake moist while also making it a very filling cake.  This isn’t your grandma’s coffee cake.  This baby is hearty!

Have fun guys, and remember, always play with your food! Enjoy!

Double Stuff Squash

Not long ago at the grocery store, I saw some new-to-me squashes and decided to pick some up.  The one I ended up using first was a Sweet Dumpling squash.

I went back and forth about stuffing it because I wasn’t quite sure what I wanted to stuff it with, rice or…?

If I had had goat cheese on hand, I would have made a rice concoction.  Since I didn’t, I decided to go with stuffing to stuff the squash.

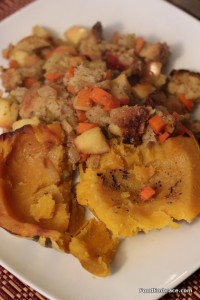
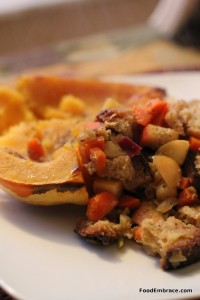
I used my apple stuffing recipe to keep things very fall-ish feeling.

I cut the squash in half and removed the seeds.  I saved those though because I can roast them!

I preheated the oven to 400.  I filled a baking dish with a little bit of water to create a steam.  I put butter on the exposed squash and sprinkled it with a little all purpose seasoning (similiar to poultry seasoning).

I roasted the squash for about 20 minutes and then flipped it over for another 15 or so.

While that roasted I made the stuffing.  When everything was done, I put the stuffing on top of the squash and called it dinner.

They are not kidding when they call this squash sweet.  Goodness!  It is crazy sweet, like I felt my teeth curl up, kind of sweet.

Scott loved it, I could only handle so much of the sweet before I tapped out.

The texture is amazingly buttery though and oh so creamy.  This would make an excellent casserole or pie.

Next time, I’m definitely going to try and make a rice mixture to go in it.  One that’s really savory and maybe a little spicy to combat all that sweetness.

Have you ever had a sweet dumpling squash before?  Do you eat much squash in the winter?

Whole Wheat Drop Biscuits (Vegan)

I love biscuits. They’re warm and they make me want to eat jam. I’m not a jam person at all but when I have a biscuit, there’s only two things that go with it, gravy or jam. Okay sometimes butter but I would rather have gravy than butter on my biscuit.

Growing up, we didn’t have traditional biscuits.  My mom made drop biscuits.  Drop biscuits are made without having to knead the dough and adding in butter.

They’re really easy to make and are a nice addition to a meal.

My mom always made them with Bisquick and in the beginning I did as well.

As I started paying more attention to ingredients and eliminating processed food, Bisquick had to go.

Since drop biscuits are so simple to make, there’s no need to use a boxed mix.

Andrea’s Whole Wheat Drop Biscuits

  • 1 1/2C White Whole Wheat Flour
  • 1/2tsp Baking Soda
  • 1/2tsp Baking Powder

A Pinch Of:

  • Salt
  • Ground Black Pepper
  • Ground Sage

Liquid:

  • 1C Unsweetened Coconut Milk

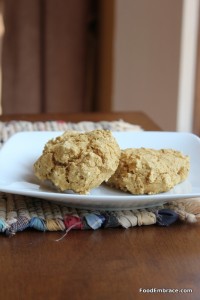
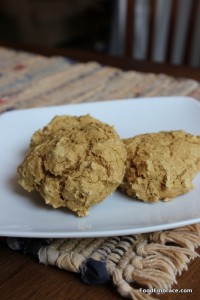
Preheat oven to 375 degrees.  Line a baking sheet with parchment or a silicone liner.  In a medium sized mixing bowl, add all dry ingredients and whisk.  Slowly add in the coconut milk and stir.  This will be a thick batter, keep mixing until all the dry mixture is incorporated in with the coconut milk.

Drop mixture by the spoonful onto the lined baking sheet.  Size is up to you, smaller biscuits will have a faster cooking time.  Larger biscuits take about 5-7 minutes.

Remove when biscuits are browned on top and a toothpick inserted comes out clean.

These don’t take long at all to cook, so keep an eye on them.

Remove from oven, allow to cool for about a minute and serve.

This is a basic biscuit, once you get the concept and technique down, feel free to play with the flavor!  I was pairing these biscuits with something that had a sage flavor to it, hence the sage in the mix.  However you are free to use what you like!

If you feel the dough is a bit dry, you can add in more coconut milk but not much, start with a tablespoon.

Naturally you can use milk (though they will not be vegan any longer) or your nondairy beverage of choice, I tend to have coconut milk on hand.

These are begging for some jam or gravy!

Do you make biscuits?

Buzzin Bars

Last week Scott left for a business trip that had him away from the house for about a week.  He was flying off to San Francisco to geek out about code and be in his element.

Because I knew that eating times might be odd and because I know Scott, this meant he would need to take some food along with him.

He was taking a carry on which meant that the food had to be small, easy to carry, and not prone to spoilage.  And since I knew that these could very well be a meal source, I knew that they had to be jam packed with good stuff.  Stuff that could get you through a couple of hours.

I like using soaked dates in bars and coffee cakes because it adds a nice sweetness without being over powering.  Plus they are a great source of fiber and potassium.

Plus I wanted to do something fun so I added an extra little kick to these bars.

Andrea’s Buzzin Bars

  • 10, dried and pitted dates
  • 1C Coffee + 2TBSP
  • 2C Oats
  • 1C White Whole Wheat Flour
  • 2TBSP Unsweetened Cocoa Powder
  • 1/2C All Natural Peanut Butter
  • 1/2C Dark Chocolate Chips
  • 1TBSP Maple Syrup
  • 1/2C Unsweetened Coconut Milk (Not the kind in a can, the kind in the refrigerated section)
  • 2tsp Vanilla Extract

In a small to medium sized bowl, add the dates and pour 1C of hot coffee over the dates.  Allow to soak for 1/2 hour to an hour.  You can use leftover coffee that has been reheated.

Preheat oven to 375 degrees and grease an 8×8 baking dish (either with oil or nonstick spray).

Drain dates and add to a food processor.  Pulse just until the dates start to break up.  Add in the oats, flour, cocoa powder, and chocolate chips.  Pulse again until the oats start to break down and the chips start to break down as well.  The chips might not break down as easy, don’t worry about this.

In a medium sized mixing bowl, add in the coconut milk, 2TBSP of coffee, the peanut butter, maple syrup, and the vanilla extract.  Whisk until the PB is well incorporated into the mix.  Add this mixture to the date mixture, and pulse until well combined.

This will be an extremely thick batter.  It will not be a pourable batter and you may have to remove it from the processor and mix with your hands a few times.  Put this mixture into the baking dish, you’ll have to press it into place.  Again, remember this is a really thick batter.

Place in oven and bake for about 10 -15 minutes.  Just till the top starts to get a little browned.  It doesn’t take long at all for these bars to set.

Remove from oven and allow to cool for about 15 minutes before cutting.  Cut into squares and serve immediately.  Or allow to cool longer once cut, place in a storage container and keep in fridge until you’re ready to eat one.  I suggest heating it up slightly before eating.

These also freeze very well.
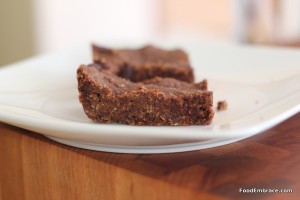
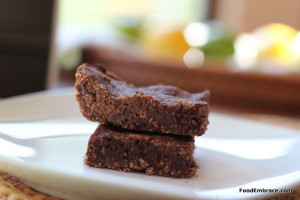
These smell exactly like a no bake cookie.  The peanut butter comes out as a very strong smell and flavor in these bars.  The coffee is just enough to enhance the chocolate and not dominate the flavor in any way.

The bars are very dense because they are so jam packed with goodness.  Fiber from the oats and dates, protein from the peanut butter, and a little fun from the chocolate.

If you don’t have coffee or don’t want to use coffee, you can soak the dates in hot water.  Use 2 TBSP of coconut milk in place of the 2 TBSP of coffee in the bar batter.

Great as a breakfast or a snack.

Bonus, you don’t even have to cook these!  You can roll them into little ball shapes and serve them up as a twist on a truffle. Yes there is flour in here but there is no “uncooked flour” taste when you eat these bars raw.  All you get is a straight forward chocolate and peanut butter combo.

I did give all of these to Scott to take on his trip.  That much chocolate and PB needs to stay close to home as well.  I had some for breakfast and they are chocolatey delish!

Do you make bars at home?  They are perfect for snacks on the go!

Have fun guys, and remember, always play with your food!  Enjoy!
Leftover Idea: Baked Mashed Potatoes

I’m not sure if we’ve ever discussed how much I love potatoes but I do. I love them more than Paula Deen loves butter and just by that statement alone, you know I mean business.

Potatoes are good for you. Potatoes are a veggie that can be utilized in so many different ways. Pasta? Forget about it. I prefer my carbs and starch from root veggies, thank you.

Leftover mashed potatoes can be just lovely on their own the next day but sometimes they need a little extra love and attention.

Sometimes you just want something a little different with your leftovers.

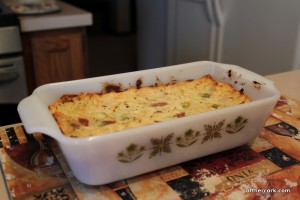
I took some leftover mash that we had, added a few extra ingredients, baked it for about 20 minutes and got an entirely new dish out of some basic leftovers.

Andrea’s Baked Mashed Potatoes

  • Leftover Mashed Potatoes
  • 5 Green Onions, chopped
  • 1/2C Greek Yogurt

Preheat oven to 400. Grease a small baking dish. Combine all above ingredients and place in baking dish. Bake for about 20 minutes or until the the edges and top get a crispy brown.  Serve hot and enjoy!

Pretty simple right? You could add some cheese in there too and maybe some bacon.  Or leftover ham? Heck you could even add some greens in there like spinach for some extra veggie action.  Leftovers are what you make of them, and they can be a completely different dish if you allow your imagination to wander a bit.

The measurements aren’t exact, it depends on how much you have left over and how much other things you want to add it.  It’s also a great way to stretch the use of some potatoes and save some pennies.

Have fun guys, and remember, always play with your food! Enjoy!