Status

Bourbon Barrel Maple Vanilla Scones

Bourbon Barrel Maple Vanilla Scones

I was recently contacted by Kite Hill to review their almond milk based yogurts. They are the only company that I’ve come across that makes almond milk based products and I have been wanting to try them out for quite some time.  This gave me the perfect reason to finally dive in!

I know a lot of people who are dairy free for a number of reasons and these products seemed like a nice alternative to dairy based cheeses and yogurts.

I admit that I did go in with some hesitation.  I’ve tried non-dairy yogurts in the past and it hasn’t gone well.  The texture was off and the flavor was a little astringent with a fake sweetness to it.  I put my previous experience aside and went in with optimism.

Kite Hill sent me all of their flavors:

  • Plain
  • Vanilla
  • Blueberry
  • Strawberry
  • Peach

The strawberry I gave to Scott since I’m allergic but all of the other flavors I was able to test out.  I tried it as I normally eat yogurt, by making a yogurt bowl for breakfast.

I have to say this yogurt is pretty spectacular for a dairy free yogurt.  It is a little on the thinner side texture-wise but not by much. It’s creamy and rich with tons of fruit flavor.  It is lightly sweetened and if I had to give a critique, it would be to lessen the sweetness just a tad.

Kite Hill’s yogurts are hands-down the best non-dairy yogurts that I have tried.  These are perfect for those that are avoiding dairy or are looking for an alternative.  Plus there’s no soy in these products either which is a lovely added bonus!

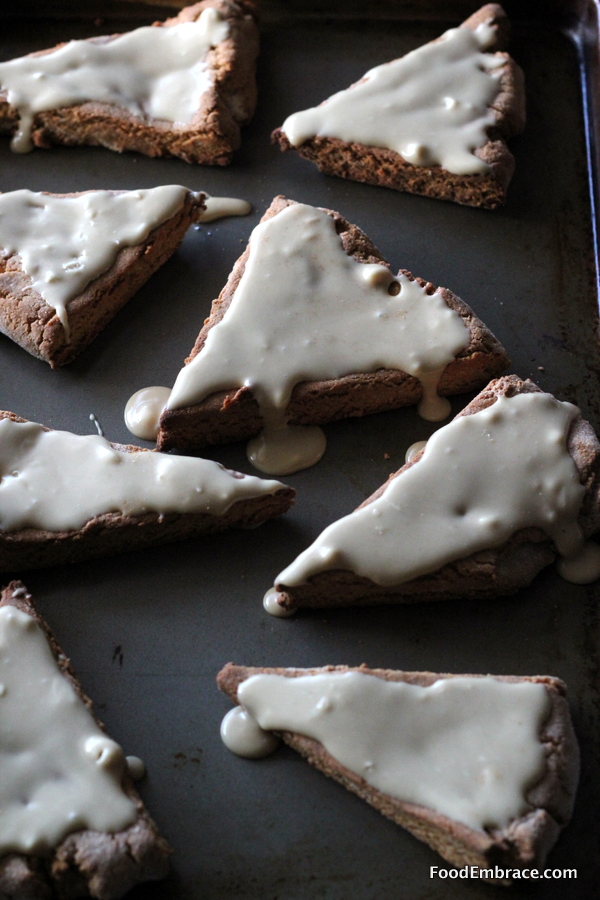
I wanted to see how well these yogurts would work with baking so I decided to make some sweet scones with the vanilla yogurt. These scones are dairy-free, egg-free, grain-free, and vegan.

I win blogger bingo for that!

I also used bourbon barrel aged maple syrup in the recipe.  (drops mic)

Andrea’s Bourbon Barrel Maple Vanilla Scones

  • 2.5 C Almond Flour
  • 1/2 C Tapicoa Flour
  • 1/4 C Coconut Flour
  • 2 tsp Vanilla Extract
  • 2 TBSP Bourbon Barrel Aged Maple Syrup* (see note at bottom)
  • 5 oz Kite Hill  Vanilla Yogurt
  • 2 tsp Baking Soda
  • 1/2 tsp Ground Cinnamon

For the glaze:

  • 1/2 C Powdered Sugar
  • 4 TBSP Bourbon Barrel Aged Maple Syrup

Preheat oven to 400 degrees (If you live at sea level, reduce heat to 375) and line a baking sheet with either parchment or silicone.

In a food processor, combine all ingredients for the scones and pulse until the dough comes together in a ball. Sprinkle the counter with a little extra coconut flour and place the dough on top.  Shape dough into a square about 1/2 an inch in thickness.  Cut dough into 8 triangles and place those on the baking sheet.

Place in oven and bake for about 10 minutes.  Remove and allow to cool before adding the glaze.  For the glaze, mix the sugar with the syrup and spread over scones.  This is a thicker glaze, if you want a thinner glaze add more syrup or a splash of almond milk to the mix.

*I purchased the bourbon barrel aged maple syrup at Trader Joe’s.  If you can’t find any or don’t want to use that, regular maple syrup will work just fine.

These scones are great as a breakfast treat or a little nighttime snack.  If you want to freeze them, then do not glaze them until you are ready to serve.

The yogurt did great in these scones providing a nice little sweetness along with enough acid to kickstart the baking soda.  It also provided enough moisture that I didn’t need to add any eggs to the mix.

Kite Hill yogurts are great straight up or you can use them in recipes in place of dairy yogurt.  I believe that currently these are only available at Whole Foods so you’ll have to swing by your local store to check them out.  Definitely try their products to see what you think!

Disclaimer: Kite Hill sent me these products for review.  All opinions are my own and I was not further compensated for this post.

Status

Almond Flour Tortillas


Almond Flour Tortillas

I have made some grain free tortillas before but due to the amount of coconut flour in them they lean more towards the sweeter side.  Making them perfect for sweet crepes or toasted up and used for ice cream sandwiches.

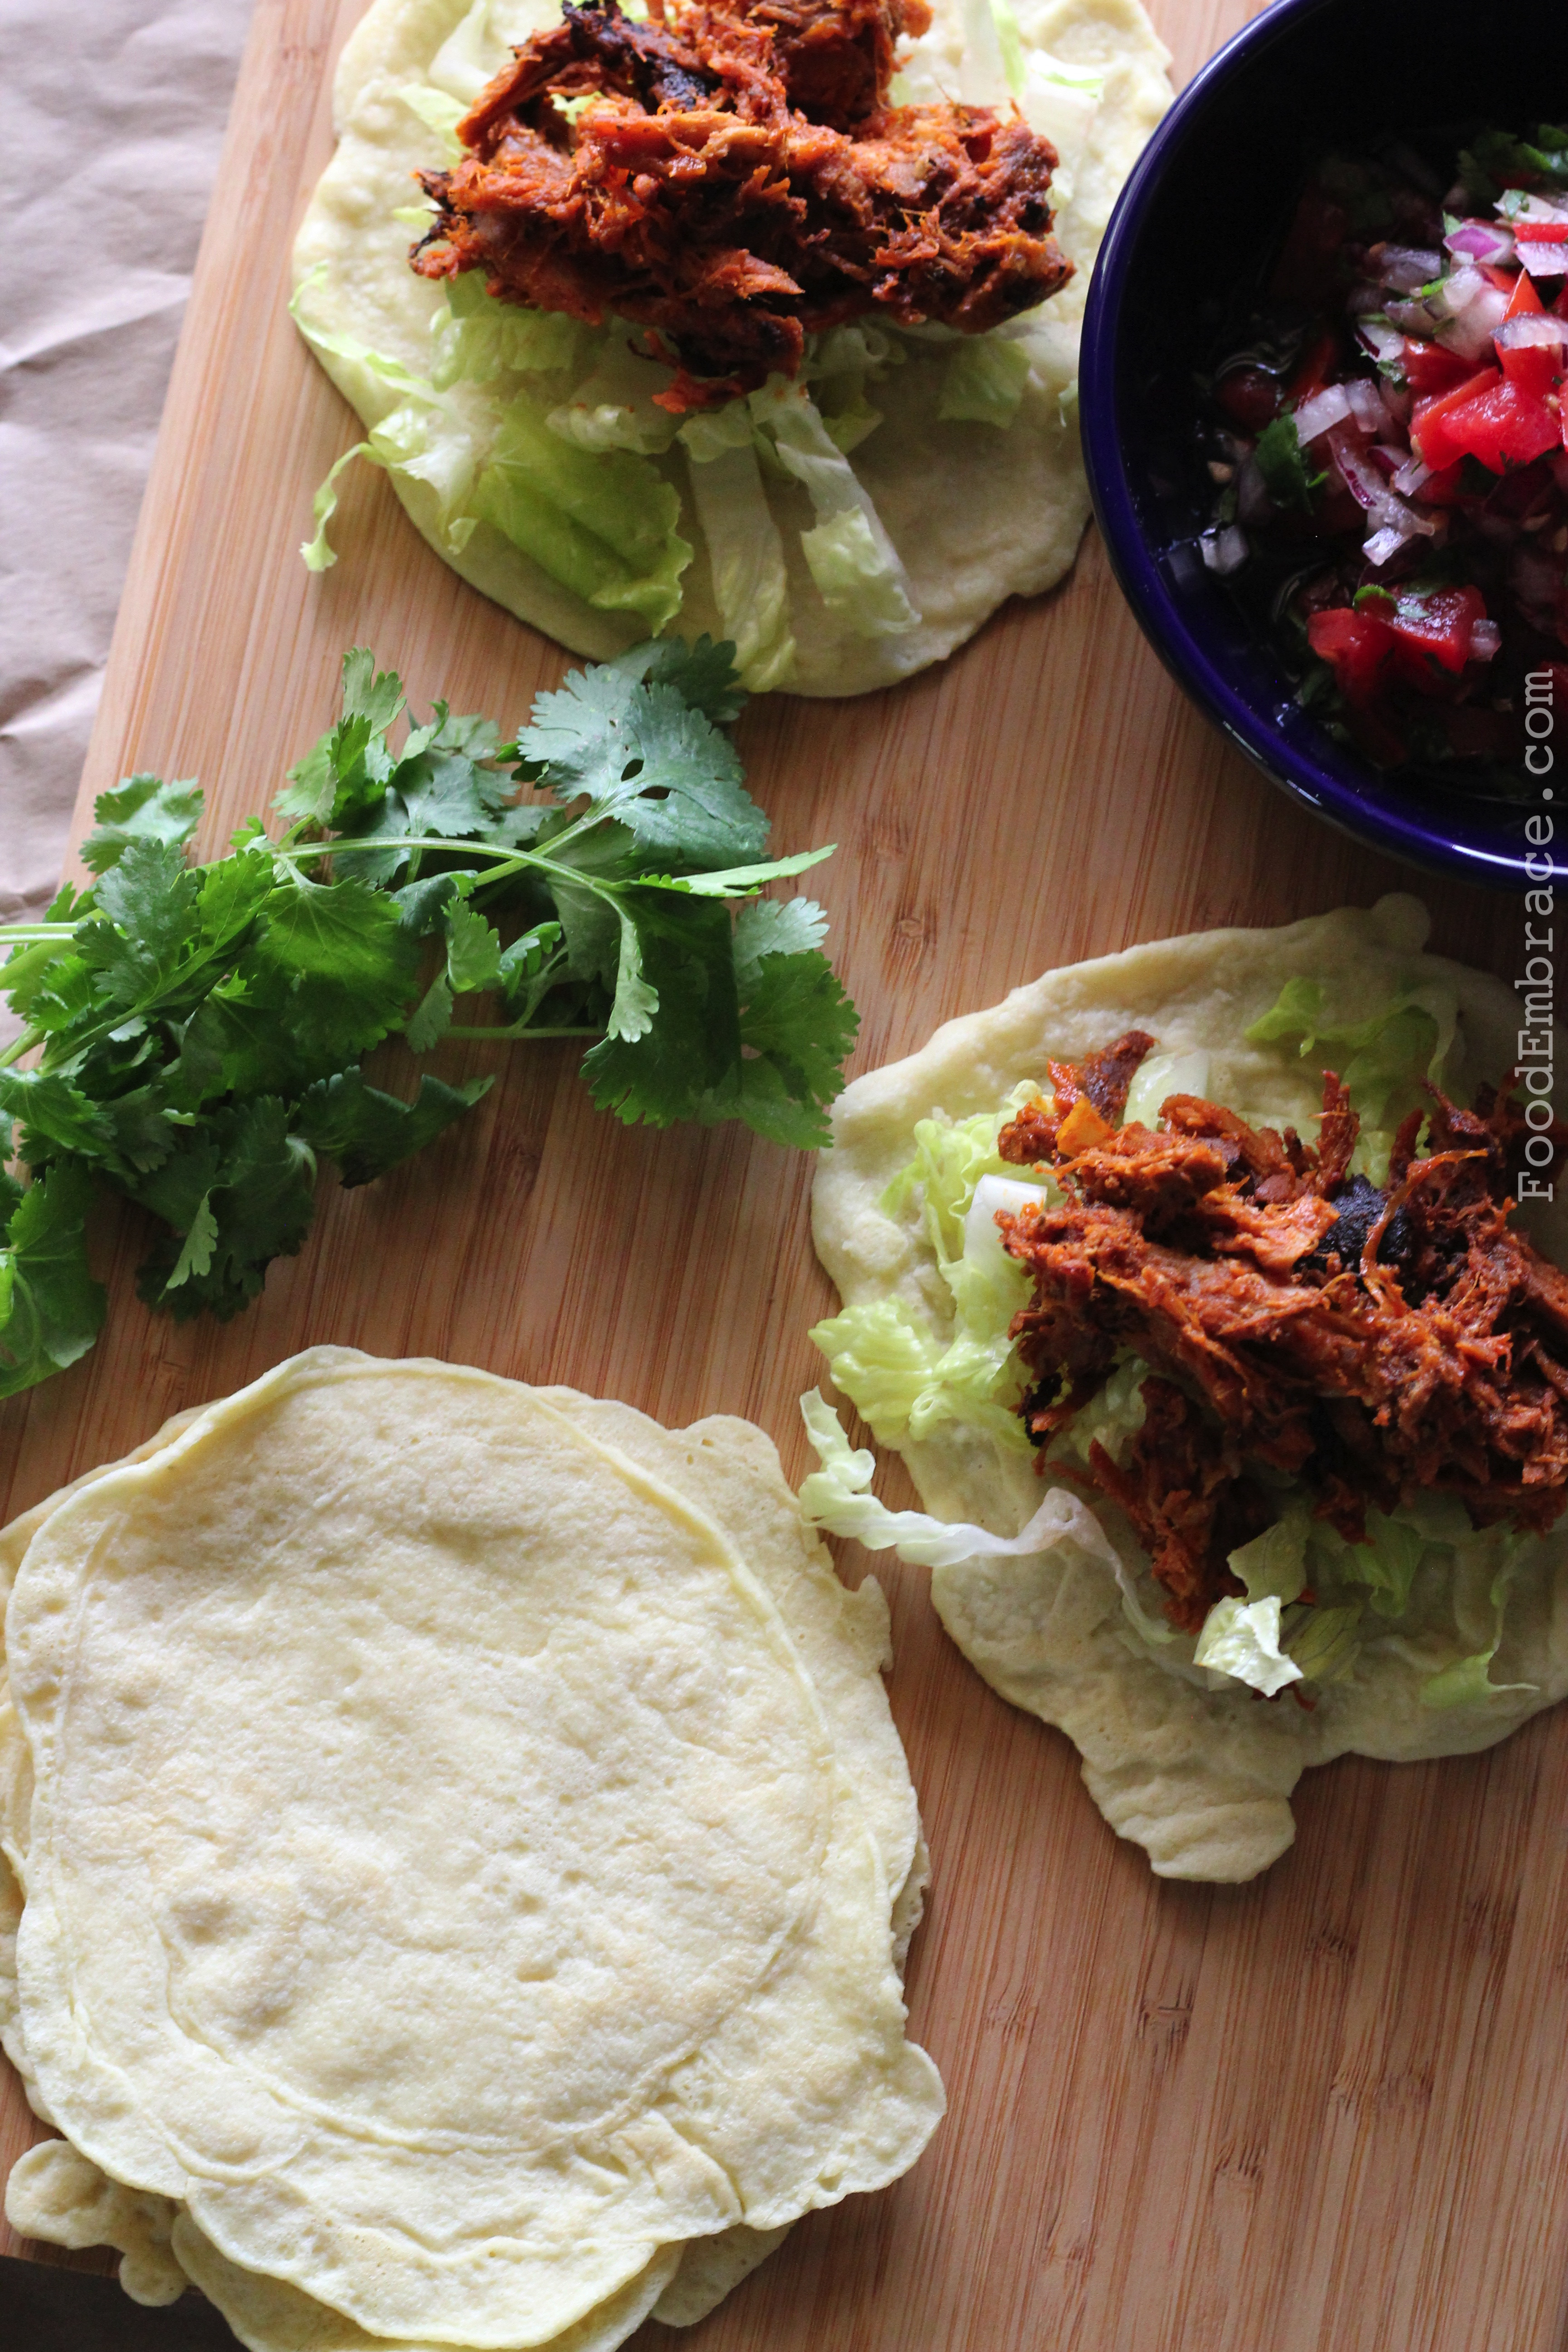
I wanted something a little more neutral in flavor to use for tacos and sandwich wraps so I fiddled around with my recipe and created a winner!

Andrea’s Almond Flour Tortillas

  • 1 1/2C Almond Flour
  • 1/2C Tapioca Flour
  • 1 TBSP Coconut Flour
  • 1 1/4C Water
  • 4 Eggs
  • Pinch of salt (sea salt or Himalayan preferred but not necessary)
  • Ghee or fat of choice for cooking


In a large mixing bowl, add in the flours and whisk together to remove any lumps and to fluff up the flours.  In a medium sized bowl add in the eggs, water, and salt, and whisk until the mixture is blended and frothy.

Add the liquid mixture to the dry mixture and mix well.  This will be a thin runny mixture, similiar to a crepe batter.

In a large skillet, over medium heat, add in a very small amount of ghee and spread that around the skillet.

Use a 1/4C scoop for street taco size tortillas or a 1/3C scoop for wrap and enchilada size tortillas.

Pour batter into center of skillet and using a spatula spread the batter around making a very thin circle.  This takes time!

Allow to cook for 2-3 minutes on each side.

Remove from skillet and repeat process until you’ve used all the batter.

The amount of tortillas you get depends on the size you make.  For wrap size tortillas, this should make about 10.

Store in the refrigerator or you can also freeze them as well.  Gently reheat right before serving.

The are great for wraps and tacos.  Can also be toasted up to use as tostadas or quesadillas.  They have a neutral flavor but you can add some lime zest and lime juice if you want to make them more flavorful for tacos.

They do take some time to make so have patience because it’s worth all the effort!  You’ll have great tasting grain-free wraps with out fillers or junk.  I usually make a big batch at once and store them in the freezer.

Have fun guys, and remember, always play with your food!  Enjoy!

Status

Buttermilk Spice Cake

Buttermilk Spice Cake

Buttermilk has been on sale at the store recently and I’ve been on a cooking spree using it in different dishes.  I had just a little bit left and wondered if I could make a cake with it.  I mean, if it can be used in pancakes and waffles, why not cake, right?

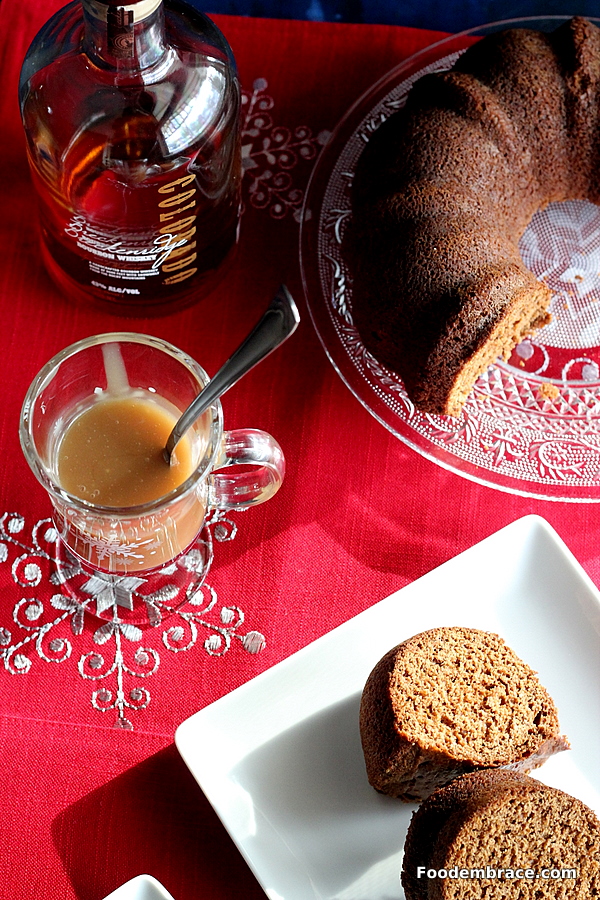
I wanted something a little more spicy since it’s the holidays and went with flavors similiar to gingerbread cake.  This cake turned out just how I was hoping and it’s even better drizzled with some Caramel Sauce.

Andrea’s Buttermilk Spice Cake

Wet Ingredients:

  • 1C Buttermilk
  • 1/4C Blackstrap Molasses
  • 3 Eggs
  • 3tsp Vanilla

Dry Ingredients:

  • 1C White Whole Wheat Flour
  • 1 1/2 C Unbleached All Purpose Flour
  • 1/2C Cane Sugar
  • 2tsp Baking Soda
  • 1tsp Cinnamon
  • 1/2tsp Allspice
  • 1/2tsp Ground Ginger
  • 1/4tsp Ground Clove

1/2 TBSP Butter to grease the pan

Preheat oven to 400 degrees and lightly grease a pan with the butter.  In a stand mixer, combine the wet ingredients and mix until everything is incorporated.  In a large mixing bowl, add the dry ingredients and whisk.   Turn the stand mixer on slow and slowly add the dry ingredients to the wet.  Do this until all the dry has been added.  Increase the speed on the mixer just a bit and mix for about 2 minutes.

Add this mixture to the bundt pan, make sure the the batter is even in the pan.  Place in oven and bake for about 20 minutes or until a toothpick inserted comes out clean.  Remove from oven and allow to cool completely before removing from pan.

Slice and serve!

NOTES:

If you live at sea level or below, reduce the heat on the oven to 375.  This may affect the time it takes for the cake to bake so make sure to keep an eye on it.

This cake also freezes and reheats very well!  Allow to thaw at room temperature and then gently heat in a low temp oven or toaster oven.

This is also goes great with coffee or tea in the morning, you know, if you’re one to have cake for breakfast.  No judging from me, it’s the holidays!

Have fun guys, and remember, always play with your food!  Enjoy!

Eggnog Oatmeal Cookies With Rum Raisins

Eggnog Oatmeal Cookies with Rum RaisinsSince eggnog is a staple in our house around the holidays I’m constantly trying to come up with new ways to use it.

Besides sipping some by the Christmas tree.

Rum is a pretty standard addition to eggnog and I wondered if I could some how incorporate that into some cookies.

Rum raisin popped into my head and I was off experimenting in the kitchen.

Chewy with a little warm holiday spice, these oatmeal cookies turned out just as I had hoped.

Andrea’s Eggnog Oatmeal Cookies with Rum Raisins

For the raisins:

  • 1C Raisins
  • 1/2C Rum
  • 1/4C Water

Place the raisins in a medium sized glass bowl.  Put the rum and water into a small sauce pan and gently heat until the mixture is warm.  Do not bring to a boil or a simmer, just heated through.  Pour over raisins and let steep for one hour.

Drain the raisins and set aside.

Keep the rum mixture! You can use that in waffles or even add it back into some eggnog later.  It’s now infused with the sweetness from the raisins so don’t toss it, use it up!

For The Cookies:

  • 1 1/2C White Whole Wheat Flour
  • 2C Old Fashioned Oats
  • 1/2C Cane Sugar
  • 1tsp Baking Soda
  • 1/2tsp Ground Cinnamon
  • 1/4tsp Ground Clove
  • 2 Large Eggs
  • 1/4C Molasses
  • 3/4C Eggnog
  • 5 TBSP Butter, room temperature
  • 2tsp Vanilla
  • 1C Rum Soaked Raisins

Preheat oven to 400 degrees**.  Line a baking sheet with parchment or grease with some butter.

In a large glass mixing bowl, combine the oats, flour, sugar, baking soda, cinnamon, and clove.  Whisk until everything is combined.

In a stand mixer using the paddle attachment, add in the eggs, butter, and sugar.  Mix until the butter and eggs are combined.  Add in the molasses, vanilla, eggnog, and combine.

With the stand mixer on low, slowly add in the flour and oat mixture.  Increase speed slowly until everything is mixed together.  Next add in the raisins and mix until the are just incorporated into the cookie batter.

Drop by the tablespoonful on the lined or greased baking sheet.  Create space between the cookies as they will spread while baking.

The size of the cookies will determine their bake time.  I made very large cookies and they took 20 minutes to bake through.  If you make smaller cookies, the bake time will decrease.  You will need to keep an eye on them as they bake.  Insert a toothpick in the center, if it comes out clean, the cookies are done.

Remove from heat and allow to cool.  Serve and enjoy!

**Above sea level, use 400 degrees as the baking temp.  At sea level, drop down to 375 for baking.

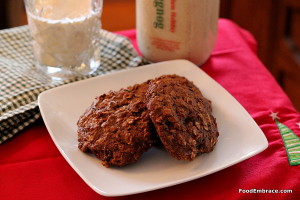
Eggnog Oatmeal Cookies with Rum RaisinsThe cookies are darker in color because I used molasses in the batter.  This gives a nice richness to the cookie and a little bit of a gingerbread feel.  The raisins add a little pop of sweetness and only a slight hint of rum.  You won’t be overpowered by alcohol flavor and it’s totally safe for kids to eat as well.

These also go great with coffee in the mornings. If you decide to roll that way.  And of course they are perfect with some eggnog!

Have fun guys, and remember, always play with your food!  Enjoy!

Peach Whiskey Crumble

Peach Whiskey CrumbleIf you recall, I recently fell in love with some local Peach Whiskey.  We have already made a light and fun iced tea with it.

Now we need something a little bit more substantial and dessert sounds just about right.

Or breakfast.  This may or may not make for a great breakfast treat if you roll that way.  We don’t judge over here.

When I made this dessert, I used a mixed of peaches and nectarines because that’s what I had on hand.  However you can most definitely use all peaches or all nectarines in this recipe.

Colorado peaches are currently in season and what better way to highlight them than with some whiskey baked up in a very easy dessert.

Andrea’s Peach Whiskey Crumble

For the filling:

  • 2 Large Peaches, peeled and chopped
  • 4 Nectarines, peeled and chopped
  • 1/4C Cane Sugar
  • 2tsp Vanilla Extract
  • 1/2tsp Ground Cinnamon
  • 2TBSP Unbleached White Whole Wheat Flour
  • 1/2C Peach Whiskey

For the Crumble Topping:

  • 2C Old Fashioned Oats
  • 1C Pecan Halves
  • 1/4C Unbleached White Whole Wheat Flour
  • 6TBSP Butter, cubed
  • 1/2tsp Ground Cinnamon
  • 2tsp Vanilla Extract
  • 1/2C Whole Milk (or Half and Half, or non-dairy milk of your choice)

Preheat oven to 400 degrees and grease an 8×8 baking dish.  In a medium sized glass mixing bowl, add the peaches, nectarines, sugar, cinnamon, and vanilla.  Allow to sit for half and hour mixing every so often.

Then add in the whiskey and flour, gently mixing until everything combined.  Add this mixture to the baking dish.

For the topping, add the oats, flour, and pecans to a food processor.  Pulse about 4-7 times to start to break down the oats and pecans.  Add in the remaining ingredients and pulse until the mixture is crumbly but also starts to hold together.

Crumble this mixture over the top of the peach mixture.  There is a lot of topping so the whole dish should be covered.

Place in the oven and bake for about 30-40 minutes until the topping is browned and the peach mixture is bubbling.

Remove from oven and allow to cool for about 5 minutes before serving.

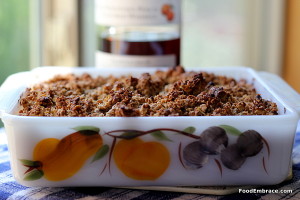
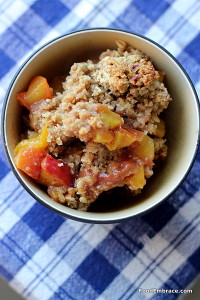
Peach Whiskey CrumbleIf you don’t have white whole wheat flour on hand, regular AP flour is fine.  I also didn’t use that much sugar in this recipe.  The peaches are already sweet and so is the whiskey, so only a small amount of additional sugar is needed.

Scott and I loved how this dessert came out!  Sweet, the topping gets a little chewy, and the whiskey adds just enough of a kick.

Now don’t you want to go get some peaches and whiskey?

Have fun guys, and remember, always play with your food!  Enjoy!


Chocolate Milk Stout Brownies

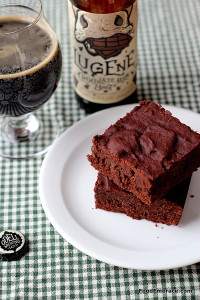
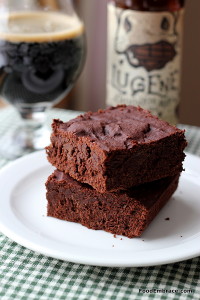
Lugene Brownies I’m not much of a dessert fan but ever since I had some of Odell’s Lugene, all I could think about was how awesome it would be in some sort of dessert.

Lugene is Odell’s chocolate milk stout.  It’s creamy, sweet, and chocolatey.  Perfect for making some brownies.

The next time I was out, I picked up a four pack of Lugene and got busy in the kitchen making some brownies.  They turned out exactly how I hoped they would!

It’s a bit of a process but don’t let that keep you from trying them.

Lugen BrowniesAndrea’s Chocolate Milk Stout Brownies

Liquid:

  • 2/3C Chocolate Milk Stout
  • 1/3C Whole Milk
  • 2 Eggs
  • 2 1/2 TBSP Cooled Coffee
  • 2tsp Vanilla Extract

Melted Chocolate:

  • 2C Chocolate Chips, melted
  • 2TBSP Whole Milk
  • 4TBSP Butter, cut into cubes

Dry: 

  • 1 1/4C Flour
  • 1/3C Brown Sugar, packed
  • 1/2tsp Ground Cinnamon
  • Pinch Cayenne pepper (very small)
  • 2TBSP Heaping, Unsweetened Cocoa Powder

Preheat oven to 375 degrees and grease up an 8×8 baking pan.  In a large mixing bowl, add all the liquid ingredients and combine well.

Melt chocolate using a double boiler method.  Once the chocolate is melted, add in the butter, a little at a time.  Stir and allow the butter to melt in the chocolate.  Once all the butter is in, remove chocolate from the double boiler.

Add in the 2TBSP of milk and stir.  Set aside and allow the chocolate mixture to cool. About five minutes.

In a medium sized mixing bowl, add in the dry ingredients and whisk together.

Once the melted chocolate has cooled a bit, add a small amount of the liquid mixture to the melted chocolate and stir.  This is to temper the chocolate. Now add that chocolate mixture into the liquid mixture and combine.

Slowly add in the dry ingredients to the chocolate and combine.  Once everything is incorporated, add that to the greased baking pan.

Place in oven and bake for about 20 minutes or until a toothpick inserted in the center comes out slightly clean.

Remove from oven and allow to cool, about 15 minutes.  Cut and serve!

Lugene Brownies


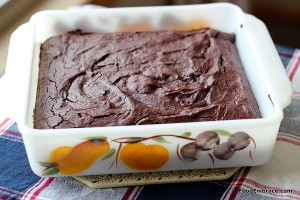
These are not your mama’s brownies.  These are dense and hefty brownies with a huge dose of chocolate goodness. They almost have the texture of a flourless cake, that’s how dense they are.

Also you don’t want the toothpick to come out completely clean, because you want the brownies to be a little soft and gooey.

I didn’t use a lot of sugar so these are also not very sweet.  If you like more sweeter desserts, you’ll want to add more sugar.  You could probably add up to a cup of sugar without effecting the batter too much.

No worries if you don’t have Lugene, you can use any chocolate milk stout that you like!

Now who wants some brownies?


Pepperoni Stromboli Roll

pepperoni stromboli rollSince I’m still not done eating things from my childhood, I busted out an oldie but goodie a couple weekends ago.

Pepperoni rolls were common and super popular where I grew up.  I don’t really see them out anywhere else and that kind of bums me out because they are so delicious.

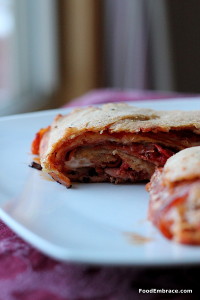
Basically it’s pizza dough with pepperoni slices and then rolled up and baked.  My mom used to make a huge one layered with lots of sandwich pepperoni and shredded cheese.

It was awesome and it was even better cold the next day.  When I moved in with Scott, it was something I would make for us on occasion.  Except I kicked mine up a little bit more and added sauce and some toppings.  This makes it extra gooey and delicious.

We haven’t had one in ages and when we were stuck inside one snowy Saturday, it seemed like a great time to bust it out.

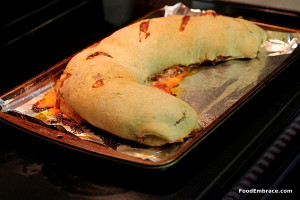
I call it a stromboli roll because it has sauce and instead of just folded over dough, I roll it up like a log.

There’s no measurements because you use as much as you want in terms of toppings and cheese.  This is what I used when I made it:

Andrea’s Pepperoni Stromboli Roll

  • Pizza Crust
  • Pizza Sauce, just a little bit
  • Shredded Mozzarella
  • Sandwich pepperoni
  • Chipped (shaved) Ham
  • Olive Oil

Preheat oven to 400 degrees.  Grease or line a baking sheet.  Roll out the dough until you get a rectangle-ish shape about 1/4 inch in thickness.

First layer is sauce, then sprinkle on some cheese.  Add in the pepperoni and ham.  Sprinkle on some more cheese and then start to roll up the dough.  Shape into a log and gently place on the baking sheet.  Brush the top with olive oil and cut a few slits in the top to allow steam to escape.

Bake for about 20 minutes.  If you used a lot of toppings, then go a little bit longer possibly 30 minutes.

Remove from oven and let sit for about 5 minutes.  Slice and serve!

pepperoni stromboli roll


It’s gooey and delicious. You have to eat it with a fork and knife. In other words, it’s awesome.

I’ve done onions, peppers, sausage, and mushrooms before as well.  If you do any veggies, I suggest giving them a quick sauté first to help remove some of their water content.  Otherwise you’ll end up with a really soggy roll and nobody wants that.

Thankfully we have leftovers stored away for another weekend dinner!

Have fun guys, and remember, always play with your food! Enjoy!


Pecan and Walnut Rolls with Bourbon Icing

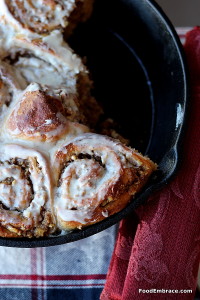
Pecan and Walnut Breakfast Rolls I am not by any stretch what one would call a baker. I make the occasional cookies, biscuits, and pie crust. That’s about it.

But sometimes I want to experiment and make something different.  Recently I couldn’t get the idea of cinnamon rolls for breakfast out of my head.

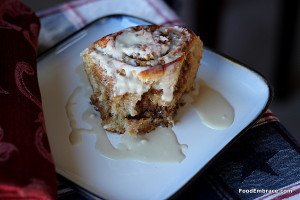
Gooey rolls filled with nuts and perhaps a boozy icing would be a great way to kick off a weekend morning.

While Scott and Avery were sleeping in all snug in bed, I was in the kitchen putting together some sweet dough for rolls.

And crossing my fingers that it would work because I’m still learning how to bake at elevation.

I’m pleased to say this experiment turned out and I’ll probably be making some more very soon!

Andrea’s Pecan and Walnut Rolls with Bourbon Icing

To Bloom The Yeast:

  • 1C Milk (I used whole milk but you can sub soy if you want)
  • 1TBSP Active Yeast (Not for bread machines)
  • 1TBSP Cane Sugar

Heat the milk until it’s just warm, you do not want it to boil or scorch.  In a glass bowl add the milk, yeast, and sugar.  Let sit for about 5 to 7 minutes to allow it to bloom.

For The Dough:

  • 1 1/2C White Whole Wheat Flour
  • 1C Unbleached All Purpose Flour
  • 2TBSP Cane Sugar
  • 1tsp Ground Cinnamon
  • 2tsp Vanilla Extract
  • 1/2C Milk

For The Filling:

  • 1C Pecan Halves*
  • 1C Walnuts*
  • 1tsp Ground Cinnamon
  • 2tsp Vanilla Extract
  • 3TBSP Brown Sugar
  • 4TBSP Unsalted Butter, cut into cubes
  • 1TBSP Milk

*Make sure to use unsalted pecans and walnuts.

Bourbon Icing:

  • 1/2C Powdered Sugar
  • 1TBSP Bourbon

Mix together so that it forms an icing that can be drizzled.  Add more bourbon if necessary.

Making The Dough: 

In a stand mixer, add all the dry ingredients for the dough and whisk together mixing it well.  Attach the dough hook, add in the yeast mixture and slowly mix the dough.  Add in the additional milk and vanilla letting everything mix together.

The dough will be very sticky and soft.

Set aside and let the dough rise for one hour.


Making The Filling:

In the meantime, in a food processor add all the ingredients for the filling and pulse until a paste forms.

Assembly:

Preheat oven to 400 degrees.

When it’s time to roll out the dough, sprinkle a surface with flour and flour a rolling pin.  Roll out dough to about 1/4 of an inch thin and in the shape of a rectangle.  About 20 inches long and 20 inches wide.

Spread the filling onto the dough and roll up lengthwise.  Slice the roll in about 2 inch pieces. You should get about 12 rolls.

In a buttered or greased cast iron skillet (I used a 9 inch skillet) arrange the rolls.  Allow to rise for 1/2 hour.

Place in oven and bake for about a half hour or until the dough fully sets.

Remove and let cool for 10 minutes.

Drizzle with bourbon icing and serve!

Yields about 12 rolls.

Pecan and Walnut Rolls with Bourbon IcingIt seems like a lot when you are first looking at the recipe but I promise it’s not hard at all.  It does take time but oh man fresh nut rolls with boozy icing on a weekend morning are totally worth the effort.

Scott was happy and I was so pleased that this experiment worked!  As much as I loved the icing it ended up being a little sweet for me.  However if you love bourbon then make extra icing, trust me.

I did put an eggwash on the rolls before baking them but that is completely optional and not required.

Now that I have the baking bug, I’ll have to see what else I can bake up this week.

Have fun guys, and remember, always play with your food! Enjoy!


Peach and Goat Cheese Ice Cream Sandwiches

I’m not quite sure how I got the notion but the idea to create goat cheese cookies popped into my head and I could not leave it be.

I started dreaming of a lovely cookie that was sort of like a shortbread and sort of like a sugar cookie.

But with goat cheese.

Once the idea was there it was not to be ignored and I soon found myself in the kitchen making some cookies.

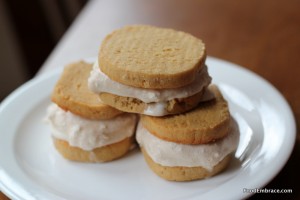
My idea worked and I was rewarded with golden cookies that are perfect with tea and as a late night little munch.

Considering I’m not a huge baker, I’m considering this a triumph!

Earlier this summer, I was contacted by Yagoot Frozen Yogurt Company asking if I would be willing to create a recipe using their yogurt.  Yagoot is based out of Cincinnati and also has a store in the Easton Shopping Center near Columbus, OH.

I knew right away that I wanted to make ice cream sandwich cookies using my new goat cheese cookie recipe.  I headed over to Yagoot in Easton to pick up some pints of frozen yogurt.  I spied the Summer Peach flavor and immediately knew I would be using that.

Andrea’s Goat Cheese Cookies

  • 4oz of Goat Cheese, room temperature
  • 4TBSP Butter, at room temperature
  • 1 Egg
  • 3tsp Vanilla Extract
  • 1C White Whole Wheat Flour
  • 1/2C Unbleached All-Purpose Flour
  • 1/3C Organic Cane Sugar
  • 1tsp Baking Powder

In your stand mixer bowl, add in the goat cheese, butter, egg, sugar, and vanilla.  Beat on low until everything is smooth and creamy.

In a medium size mixing bowl, add in the flours and baking powder.  Whisk until everything is blended and airy.

Put the stand mixer on low and slowly add in the flour mixture until everything is combined.  The dough should be a little stiff.

On a lightly floured surface, place dough and start to roll out into a log shape.  Roll it till it’s about a foot long and 1/2 inch in diameter.

Wrap in plastic wrap and place in the fridge for about 2 hours.

Preheat oven to 350 and line two baking sheets with parchement or silpat.  Slice the log into slices about a 1/4 of an inch thick.  Place on cookie sheet and bake for about 10 minutes or until the cookies start to crisp up and brown on the edges.

If you can only fit one cookie sheet in your oven, place the remaining cookies back in the fridge until you are ready to slice and bake.

Allow about 4 minutes to cool and then serve.


Ice Cream Mixture:

  • 1/2 pint of Yagoot’s Peach Flavored Frozen Yogurt
  • 2oz of Plain Goat Cheese at room temperature
  • 1/2 tsp Ground Cinnamon
  • 1/2 tsp Vanilla Extract
  • 1/2 TBSP Organic Cane Sugar

With a hand mixer or stand mixer, place all ingredients in a bowl and mix until the goat cheese is combined.

Sometimes goat cheese has a tendency to break down into little balls of goat cheese when it combines with something cool.  This is okay!


Assembling the Ice Cream Sandwiches:

  • Cookie Sheet
  • Parchment Paper to line the cookie sheet

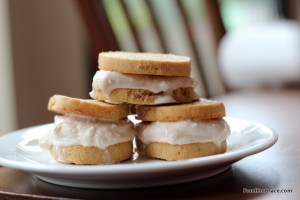
Scoop a little bit of the frozen yogurt onto a cookie and top with another cookie.  Gently press down and place the ice cream sandwich on the cookie sheet.

Repeat until all the frozen yogurt is used.  This will make between 8-10 sandwiches depending on how much frozen yogurt you use for each sandwich.

Work quickly because the frozen yogurt melts fast!

Once you’re finished, place the cookie sheet with the sandwiches in a freezer and freeze for at least two hours giving the frozen yogurt a chance to set back up.

Serve as a cool treat or a sweet ending to a summer meal!


The goat cheese freezes a bit when the cookies go back in the freezer and so you get little crunchy tangy bites of goat cheese while eating the ice cream sandwiches.

A great little summer treat with a twist!

Yagoot is graciously giving away a $20 gift card to readers of Food Embrace!  Keep in mind Yagoot is only available in Columbus and Cincinnati right now.  If you’d like to enter to win the gift card all you have to do is:

Comment, telling me what flavor if yogurt you’d like to try!

Contest ends on Friday, August 24th, at 5pm EST.  I’ll contact the winner by email so make sure you leave a valid email address in the comment!

WINNER: Random Number Generator picked Comment Number 3! The winner is Joe!  Thanks for commenting Joe!

Have fun guys, and remember, always play with your food!  Enjoy!


Disclaimer: Yagoot Yogurt contacted me and asked me to create a recipe using their product. They supplied me with a gift cards in order to purchase the product and for supplies needed to create the recipe.

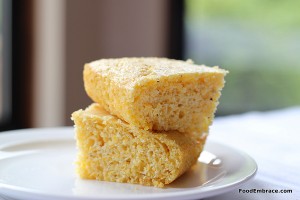
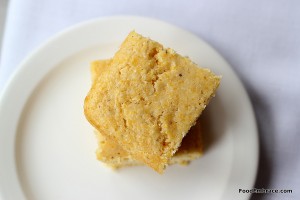
Buttermilk Cornbread

It didn’t even occur to me to make cornbread until Brandi mentioned it as I was deciding on how to use up the buttermilk.

I’m so glad she did because I probably won’t make cornbread with out it now!

My version of cornbread could not be any simpler to make. All you have to remember is 1 because all the ingredients except for the sugar are 1 in size.  The sugar is a quarter.

Andrea’s Buttermilk Cornbread

  • 1C Cornmeal
  • 1C White Whole Wheat Flour
  • 1 Egg
  • 1C Homemade Buttermilk
  • 1TBSP Butter, Melted and cooled
  • 1tsp Baking Powder
  • 1/4C Organic Cane Sugar

Preheat oven to 375 and grease an 8×8 baking dish.  In a large mixing bowl combine the cornmeal, flour, sugar, and baking powder.  Whisk until everything has combined.  In a medium sized mixing bowl, combine the buttermilk, butter and egg.  Whisk until that is combined.

Slowly add the liquid to the flour mixture and gently mix until everything is incorporated.

Pour mixture into baking dish and bake until a toothpick inserted in the center comes out clean.  About 10-15 minutes.

Allow to cool for five minutes before slicing and serving.

I told you, easy peasy!

You can make this in cast iron skillet if you have one handy.  Next time I’m going to do that, I totally forgot until after I baked this up!

I like my cornbread sweet and buttery. If you like yours savory, feel free to reduce the sugar amount or omit it entirely.

Because this is so simple, the recipe can be fiddled with to suit your tastes.

This cornbread also freezes really well!

Have fun guys, and remember, always play with your food!  Enjoy!