Making Stock Better

Stock simmeringOne of my goals that I had last year was to make more stock at home.  I use a ridiculous amount of stock each week for cooking.  Everything from soups to rice.  Because of that I wanted to rely less on store bought stock and more on homemade stock.

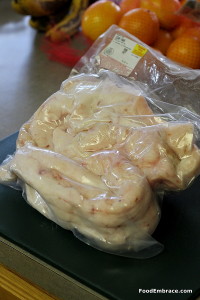
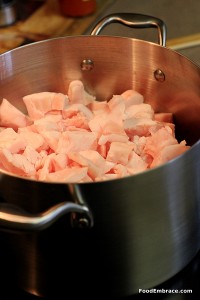
Since our move here I’m happy to say that I have been using homemade stock exclusively! Since local meats are super abundant and because I bought a meat share this year, bones have been plentiful for stock making.

I’ve also found two things to take my stock from average to perfection.  Before my homemade stocks, while tasty, were missing something.  I had no idea what but they didn’t seem to have the depth and rich flavor that I expected from homemade stock.

Trick 1:

Reading different homesteading blogs and food blogs I noticed that most people add some sort of acid, usually in the form of cider vinegar to their pot of stock.

I found this really interesting and did a quick search to see why folks were adding vinegar. Westin A. Price says that adding vinegar to the stock helps to extract calcium from the bones. Several other sites merely said that adding vinegar helps pull out more minerals and nutrients from the bones and meat.

Curious, I decided to try it out.

My preference is Bragg’s Unfiltered Apple Cider Vinegar so that’s what I’ve been using. I add anywhere from 1/4 to 1/3C of it to the stock pot.

Trick 2:

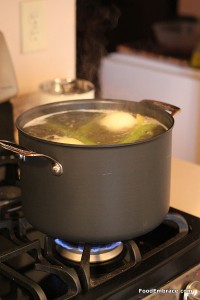
Salt and lots of it. Previously I did not season the stock as it simmered.  It would eventually get seasoned when I cooked with it so in my mind, seasoning it as it simmered seemed unnecessary.

Oh how wrong I was.  Salt is a must!

By “lots of it”, I’m referring to a good 2 to 3 big pinches of kosher salt adding to the stock water.

These two tricks have elevated my homemade stock from alright to dazzling.  Perhaps this is all common knowledge? If so I missed that memo.

homemade stock

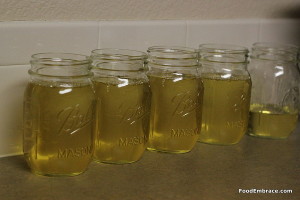
Adding the vinegar provides depth and richness in flavor that I was looking for but wasn’t getting before.  It also helps the stock become a lovely golden brown in color for poultry and pork stocks.  For beef stocks it ensures a glistening dark brown stock.

The salt basically just makes things more tasty. It’s a lot easier to pick up the meat and veggie flavors of the stock when the stock is salted.  It makes the stock standout instead of just being a background ingredient.

I definitely won’t be making stock without these two ingredients again!

Do you make stock at home? Any tips or tricks to share?

Embracing Lard

Pig Fat Last fall I purchased a half hog meat share.

This has easily been one of the best decisions I have made!  One, albeit large, payment and my freezer is stocked with pork cuts.  Enough to keep us in pork until summer.

It’s been a learning experience and one of the new things that came along with with purchasing a half hog is learning how to render lard.

I got the fat from the pig as well as the meat cuts and to be truthful, this was what I was looking forward to the most.

Lard from pasture raised (meaning properly raised pigs) is a great source of fat and good for the body.  Lard from the grocery stores is hydrogenated making it full of transfat and very bad for the body.

Fresh lard = great for you

Grocery store lard = stay away from

While lard is fat from the pig, you have to do some work to get it.  Lard doesn’t just happen, it takes a little bit of time.  The process requires rendering down the fat to separate it from anything else that might be in the fat.  The little resulting bits leftover from rendering are referred to as cracklings.  You can fry them up and eat them!

I looked up resources and found a great tutorial over on A Little Bit of Spain in Iowa.

I always get nervous when trying new kitchen techniques   I was completely nervous about rendering lard.  Would it take forever?  Would it smell?  What if I messed up?

As with most new experiences in the kitchen, you just have to suck it up and try.  So I did.

I had five pounds of pork fat that I cut up into small pieces.  In a large heavy pot (8QT stainless steel stock pot), I added in a half cup of water and then the lard pieces on top.

Rendering LardWith the burner temp on the stove set to 1, I let it get busy rendering.  I stirred it every few minutes to make sure the lard didn’t stick to the bottom.  It took a while for it to get going but soon the fat started melting.

Yes there was a smell but it smells like pork and isn’t overpowering at all.

I let the lard render for a couple of hours, stirring occasionally.

It finally got to a point where I thought it had rendered enough, removing it from the stove, I started ladling the liquid through a cheesecloth lined strainer.

Lard CoolingFive pounds of pig fat resulted in just a little over 4 pints of lard.  I let the lard cool on the counter over night, sealing them up with lids in the morning.

lardGorgeous white pig gold!

Unfortunately I did let the fat render a little too long which resulted in a lard that had a slight pork chop smell to it.  It’s a very slight smell and despite that I have still used the lard in baking.  Thankfully it does not result in pork chop tasting baked goods!

There is a slight savoriness to the biscuits and crusts that I’ve made but it’s delicious and not off putting.

Lard freezes really well which means there’s no worry about how to get through 4 pints of the stuff quickly.

If you have the opportunity to get your hands on some fresh pork fat, I highly recommend making your own lard.  It’s easy, you probably already have all the tools in your kitchen, and you’ll be swimming in pig gold which makes everything taste better.


Preserving by Freezing

One of the things that I wanted to be able to do this summer was can. I was hoping to purchase a pressure cooker and go to town canning stocks, veggies, and sauces.

However the rental we’re in comes equipped with a flat top range.

Ugh.

So pressure canning is out.  I’m sure it can be done on a flat top but I’m not patient enough to try and figure it out.  Or risk something happening.  If this were my house that would be a different story but since we’re renting I’m not doing anything risky.

While I put canning on hold for this year, I’m turning to my freezer instead for preserving.

I want to make sauces from tomatoes, possibly stock (we’ll see, I’m not a huge fan of frozen stock), and veggies.

I do have a standup freezer that provides me with some extra space.  If you don’t have one, I highly recommend getting one!  They are very convenient to have on hand.

I made my first batch of tomato sauce ready for the freezer!  I’m also exploring and learning how to freeze with mason jars.  Sounds easy but you do have to make sure the jars don’t break during the process (from liquids expanding) so there is a little learning curve to it.

My first batch of tomato sauce has frozen successfully with no broken jars!  I’ll be pulling some out to use with pizza this week.

Do you preserve the summer harvest by freezing?  Any tips or tricks to share?

Making Butter and Homemade Buttermilk

Making butter at home is super easy though it can be a little messy, but don’t let that dissuade you!

When you make your own butter you get to control the ingredients which means you can get a better product.

Try to find cream from grassfed cows.  The cream tastes better which means the butter will taste better.  It will also be a pretty yellow color without the need for additives to get it that way.

If you cannot find grassfed cream, look for the best possible source of cream you can find. See if there are any local dairies in your area.  You can check Local Harvest and Eat Wild to discover local producers.

I purchased whipping cream by the half gallon, so my post today will be based off of that.

You’ll want to get whipping cream to make your butter.  You need the fat in this to create your butter.

What you’ll need:

  • Stand mixer (you can use a hand mixer but it takes a long time to get butter, just a heads up)
  • Wire strainers
  • Large bowl
  • Paper towels or dish clothes that you use for food prep
  • Containers for buttermilk
  • Plastic wrap or containers for butter

I work with 4 Cups of cream at a time.

I place the cream into the stand mixer bowl, attach the whisk attachment. I start at speed 2 for a bit and once it starts to get fluffy and thicken up I increase the speed to 4.  I do not go past 4.

Let this work and work and work.  It takes about 10 minutes, possibly a little less.  The whipped cream will keep getting thicker and thicker.  Eventually it will break down, this is the stage you want to get to.

When the cream breaks, it will look like this.

That right there is your butter sitting in some buttermilk.  This is where the strainers come in handy.

Place one strainer over a large bowl and pour out the buttermilk and let the butter sit in the strainer.

Push down and squeeze the butter through your hands to get out most of the buttermilk.

Then (and this is the messy part), place the butter in another strainer and take to your sink.  Run cold water over the butter and squeeze and knead the butter with your hands.  This works out any leftover milk solids in the butter.  You want to do this until the water you’re squeezing out starts to run clear.  When the liquid coming out of the butter is clear this means the butter is free of milk.  Milk left in the butter won’t affect the taste but it can cause the butter to have a shorter shelf life.

Then with paper towels or dish cloths, dry out the butter.  The goal is to get the butter as dry as possible.

Do the exact same thing for the next four cups of cream that you have waiting.

I portion out the butter into small amounts and put the buttermilk in an air tight container.

I wrap the butter in plastic wrap and store in the freezer until I need it.  Then since it’s already portioned out, I am able to pull out how much I need.

The buttermilk will last you about a week.

I don’t salt my butter but I know some folks do.  I like it fresh and unsalted.  If you are doing any baking, the butter is already at room temp so you would be able to get started right away.

From start to finish this takes me about 45 minutes and that includes the cleanup.  I usually get close to 1 Quart of fresh buttermilk and about 2 Pounds of butter.  Not to shabby!

I totally encourage you to give making butter a try!  Like with everything else, with practice it becomes easier and more streamlined the more you do it.  Give it a shot and let me know how it goes!

Using Up Buttermilk

When I made butter not long ago, I was left with a quart of buttermilk and I was looking around for ways to use it up.

The buttermilk you get from making butter is a lot different from the buttermilk you purchase at the store.  Store bought buttermilk is usually cultured so it has that tangy sort of smell to it and has a much thicker texture to it.

The buttermilk that is leftover from making butter is a lot smoother, creamier, and has a soft sweet butter tast to it.  It’s not tangy at all and is in fact, very pleasant.

I was excited to cook with it! Take a look at all that I made!


Buttermilk French Toast

Buttermilk Grits

Buttermilk Scones

Buttermilk Potato and Parsnip Mash

Buttermilk Cornbread

You can do a lot with a quart of buttermilk!  Recipes coming soon!

Update: Exploring Homemade

If you recall from this post, I mentioned that I wanted to start making more things at home. I wanted to start saving on costs but I also wanted to be more in control of our food.

The three B’s that I was going to start making at home were:

  • Broth/Stock
  • Butter
  • Beans

I have kept to my promise and have made all of these things at home.

Broth/Stock

I have made stock several times now, both chicken and a beef stock.  However I’m finding that because it’s summer, I’m not using nearly as much broth as I used to.  I still use it for making rice but with warmer temperatures soups, stews, and braised meats aren’t so abundant.

Stock will keep for several weeks in the fridge (I’ve double checked this and also have done it without issues) but I also felt the pressure to use it up.  For right now I’m only going to make stock on occasion and rely on boxed stock to see me through summer.

Once the cooler weather comes back I’m going to revisit making my own stock and not purchase boxed stock.  I’m also going to look into pressure canning so I can seal and store my stock in the pantry.

For now boxed will work and I’ve reduced how much I purchase at the store.

Butter

I’ve made my own butter and this has shown to be a lot more cost effective than purchasing butter.

The butter I would buy was unsalted Kerry Gold butter, which is grass-fed Irish butter (again if you are buying, make sure to get the good stuff).  The cheapest I could find that was at my Whole Foods for $2.79 for 1/2 a pound of butter.

I can purchase a half gallon of  local grass-fed cream for $9.99 (Whole Foods to the rescue again with the cheapest price).

From that half gallon of cream I can get just over two pounds of butter along with a quart of buttermilk.  All for $9.99.

At $2.79 for 1/2 pound of butter, it would cost me $11.16 (2.79 x 4) to get 2 pounds of butter which doesn’t even include the additional bonus of buttermilk.

Win win! So I’ll stick with making my own butter when I can.

Beans

I still have a few cans of beans to get through to clear out my pantry but I have made black beans in the meantime.  I purchased a pound of organic black beans and cooked them up which yielded me about 6 cups of black beans total.  I used two cups for a recipe and froze the remaining beans in 2 cup portions.

This I also like a great deal and will continue to make beans at home and freeze portions of them.


I’m happy with the progress that I’ve made with this little adventure!  I like making things at home and taking a day just to be in the kitchen and filling the house with great smells and yummy foods.

What are things that you stopped purchasing and started making at home?

Exploring Homemade

In January, I mentioned that my word for the year was going to be “Explore”. I’ve been doing a lot of that lately over the past four months. However it’s been more internal than external.

Meaning that I’ve been exploring feelings, thoughts, and emotions more than anything else.

I’m working on changing that starting this week.

I want to focus on exploring things on the homefront as well, because I want to become a little more resourceful.

I want to make more things at home for several reasons but two of the biggest are:

Cost: By making more things at home, I will be saving us money in the long run.  We are over-hauling our budget and changing things up in regards to food purchases. I don’t have a strict or dedicated food budget but that doesn’t mean I don’t want to save us money or readjust priorities.

Control: By making things at home, I will have more control over the ingredients and what goes into the product.

There are three things that I would like to focus on for making at home.

Stock: I talked a little bit about starting to make stock at home.  In that post I mentioned that we don’t eat enough meat to keep us supplied in stock.  Then I realized that I can purchase the perfect stock goods in bulk for an inexpensive price.  I want to try doing that and see how it works out for our stock supplies.

Butter: I currently purchase grass-fed butter which isn’t cheap but isn’t crazy expensive either.  However after learning that butter can be frozen, I want to try making my own butter and freezing portions of it.  It’s cheaper to buy a quart of Snowville Cream than it is to purchase grass-fed butter every two weeks.

Beans: These are another thing that can be stored in the freezer.  I can make a huge batch of beans and freeze portions of them.  This will reduce the amount of canned beans we purchase (because we eat a lot of beans!) reducing cost and waste.  I currently buy canned beans at Whole Foods because they have unsalted and the cheapest price on beans (surprising, I know.).  I really want to be able to cut out that expense and waste.

There are so many other things I want to start making at home as well but I have to start somewhere and I want to start with reasonable tangible goals.  These three are it!

I know that a lot of you make things at home instead of buying them.  What are some of your top things you make at home?

Grinding Meat At Home

We’ve been dabbling with the idea of grinding our own meat for burgers and homemade sausages.

I knew nothing about grinding meat and but luckily my friend Rachel had put on a class all about making sausage at home.

Scott and I went to the class and bought a grinder attachement for the stand mixer right away.

I’m still learning and this year I would like to explore this a little more.

The first thing we did was make burgers!

I forget what cut of meat I bought but I know it was a roast cut from Blues Creek.  I didn’t really know what cut to look for but threw caution to the wind.  I mean, no matter what I used I knew everything would work out.

I chilled the mixing bowl, and all of the parts to the grinder until they were super cold.

I cut up the roast and tossed it with a few spices and placed that in the freezer until it was cold and firm.

Then it was time for the grinder!

We got one good run through the grinder. We tried to put it through again for a finer grind but the meat kept getting caught up and stuck.

Probably related to the cut I picked, perhaps it had too much connective tissue in it?

Regardless the first grinding worked and we had ground beef ready for some patties!

I made some burgers, let them chill in the fridge until it was dinner time, and we enjoyed a nice night of grilling.

The burger was tasty and one of the better ones that we’ve made at home.

It’s still a big learning process for me but hopefully this year I’ll be able to gain more experience with it.


Honey Face Wash Update

I’ve had a couple people ask me about the Honey Face Wash Challenge and asking me to talk about why I stopped using it. I didn’t mention that I had stopped using it so it kind of surprised me that everyone thought that I had.

To catch up, you can read about the challenge here and my results here.

The truth is, I have stopped using honey to wash my face, so those that suspected are right!

I used the scrub method, honey + baking soda + wash cloth to wash my face when I was wearing makeup.  This was too rough on my face and so I eliminated the baking soda and only used honey + wash cloth on those occasions.

That was still very rough on my face.  Then I started using a scrub from Lush for the times I wore makeup and that was also too rough.  I don’t wear makeup often but it was enough that this routine caused me to breakout and for my skin to become really rough and irritated.

I switched to using only honey with no wash cloth and apple cider vinegar (ACV) mixed with water for a toner.  I thought this would help sooth the irritation and help clear up my face.

We were also dealing with a bunch of changes to our routine and lives at this time and I was stressed right out.  My face tends to explode when I’m stressed. Most annoying.

After weeks of using honey and ACV my skin wasn’t getting any better.  The irritation wasn’t clearing up nor were my breakouts.

I gave up and went back to my old routine in order to get my face to clear up.

It took a long time, months, before my face looked normal again.

I do not think honey was the problem in this case.  I now have learned that my face can’t tolerate scrubbing nor high amounts of ACV.  I need to dilute the ACV even more and also only use honey, no scrubs needed.  At least not that frequently.  With the little amount of makeup that I wear when I do put some on, the regular honey washing method works just fine to remove it.  And a toner will remove the rest.

I still use the Lush scrub, once a week and that helps.  It’s gentle enough to use once a week but I cannot use it more than that. The scrub I use is Angles on Bare Skin.  It’s amazing for a once-a-week treatment and a little goes a long way so one purchase lasts for months!

Will I go back to the honey? Yes, at some point I’m going to give it another shot.  I’m still researching natural cleansers (I need a liquid or soap style) so if you have any recommendations please pass them along!


Honey Face Wash Challenge – The Results

ETA: Update At The Bottom

Hello my honeys! We are at the end of the two week honey face wash challenge and it’s time to talk about our results!

For those that are just see things for the first time, you can catch up by reading these posts.

Crunchy Betty’s Challenge

Crunch Betty’s Honey Face Wash Makeup Remove & Check-In

Food Embrace Takes The Challenge

Food Embrace’s Week One Check-In

Let’s talk about honey!  I have been dutifully using honey on my face twice a day and I only missed one wash with honey during this whole two week challenge. When Crunchy Betty mentioned using Apple Cider Vinegar (ACV) as toner, I have done that a few times as well.

With the makeup remover version, I found that the baking soda was actually a little bit too harsh of a scrub on my face.  I also found that using a straight face cloth to wipe away the honey and to help remove the makeup was also a little rough on my face.  Though that method is much preferred over the baking soda.  It worked well enough but I may need an alternative method for makeup removal.  This will take a bit more research on my part.

In regards to acne, I am pleased to say that no new pimples have popped up since using honey to wash my face.  I was curious to see the results of this and I’m super stoked about the outcome.  I put it to the test too!

I started this challenge just after having some waxing done on my face and I always breakout around my lip and on my chin afterwards.  No matter what, I get small little pimples all over.

With using honey, I got two super super small ones that popped up the day after waxing but with using honey, they were gone the following day.  Poof gone!

Also, I had about the worst case of PMS these past few weeks along with a major amount of stress that I was also battling.  Normally my chin would have erupted and I would have been even more cranky.  But using the honey face wash twice a day, nothing.  Not one little blimp showed up.

This makes me extremely happy.  Pardon the red splotches on my face, this is actually due to the fact that Scott was cracking me up right before taking the picture.  When I truly laugh, my face turns red. Now you know my secret.

My skin is clear and it also has taken on a very lovely kind of “brightness”.  It doesn’t look oily, it just looks shiny like it’s brand spanking new.

When I use honey, I take the time to really massage and rub it into my skin.  Especially in the “trouble” spots which for me is my nose, chin, and around the lip area.  I let it sit on my face for a few minutes and then rinse away.  For now, if I have makeup on, I use a washcloth in small circular motions to remove the makeup and honey.

I am still toning and moisturizing my face like normal.  I’m researching other face creams and pondering creating my own.  For now I’m using a regular face lotion in the AM and then a Lush lotion in the evening.  I might start using that in the AM as well.  We’ll see how things go.

I really enjoy the ACV as a toner.  It’s very refreshing and makes my face feel invigorated so I am going to stick with that.  I briefly dampen a cottonball with cool water and then put a bit of ACV on that.  This helps dillute the ACV so I’m not putting straight vinegar on my face.  Currently I’m using Bragg’s Raw Unfiltered ACV.

Yes it smells like vinegar but it only lasts for a second and once you moisturize that will take over.

Will I continue using honey as my face wash?  Yes.  I like it, it’s simple to do, and for me it works.

I’m very happy I came across this challenge and now I’m ready to start making other natural body care products.  This is something I’m very interested in and can’t wait to have a whole variety of homemade personal care products!

Now let’s talk about you!

Have you been using the honey on your face and if so, how do you feel?

Did you try the makeup remover version, by adding a touch of baking soda and using apple cider vinegar as a toner afterwards?

What are your thoughts on the process?

ETA: Click Here for an update on the honey face wash and why I’ve stopped using it.