Sweet Potato Pie

Pumpkin pie is one of those items that I stopped making for our Thanksgiving dinner a few years back.  Don’t get me wrong, I love pumpkin!

But we have it all the time and I use it in a lot of different applications.  Sweet potatoes were something that was completely traditional for Scott to have at Thanksgiving so we couldn’t skip them.

What to do? They had to be part of the menu yet as a side dish would put us way over the edge.

I decided to remove them as a side dish and return them as dessert.

This has worked out very well!  We’re still getting sweet potatoes for the big day but not as a sticky gross mess (sorry but that whole marshmallow thing needs to go!).  Instead it’s served up in pie form!

And if you’ve got folks who claim they hate pumpkin (GASP!) you can serve them this instead!

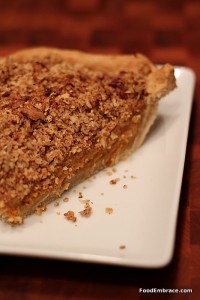
This year I experimented a little and added a crumb topping and some good rum into the mix.

Andrea’s Rum and Sweet Potato Pie

For The Crust:

  • 2C Whole Wheat Pastry Flour
  • 1/4C Coconut Oil
  • 1TBSP Light Olive Oil
  • 1/2TBSP Sugar
  • Cold Water

Combine flour, oils, and sugar into a food processor.  Pulse and slowly add in the cold water, 1/4C at a time.  Pulse until the mixture comes together and starts to form a ball.  The mixture should be easy to handle and come out of the food processor without sticking.  Wrap dough in plastic wrap and place in the fridge for at least two hours.  Can be made up to two days ahead of time.

For the Filling:

  • 1, Very Large Sweet Potato
  • 2TBSP Butter, room temperature
  • 1/4C Whole Wheat Pastry Flour
  • 1/4C Dark Rum
  • 1tsp Ground Cinnamon
  • 1/4tsp Ground Clove
  • 1TBSP Molasses
  • 2TBSP Brown Sugar, Packed
  • 2tsp Vanilla Extract
  • 1/2tsp Baking Powder

Preheat oven to 400 degrees.  Poke holes in the sweet potato and place on a greased baking sheet.  Bake until a knife can be inserted easily.  Remove from oven and allow to cool completely.  Remove the outer skin and place sweet potato into a bowl for your stand mixer.  Add all the remaining ingredients for the filling and mix until everything is well blended.

For The Topping:

  • 1C Pecan Halves
  • 1C Oats
  • 1/4C Rum
  • 1TBSP Brown Sugar
  • 1TBSP Butter

Combine all ingredients in a food processor and pulse until it resembles a crumble mixture.

Assembling and Baking:

Preheat oven to 350 degrees.  Pull out a 9inch pie pan and grease using nonstick spray or olive oil.  Roll out pie dough until it’s about 1/4inch thick.  Place and fit into pie pan.  Crimp the edges and use a fork to poke holes in the bottom to allow steam to escape.  Add filling and smooth the top.  Sprinkle crumble topping on top using all of the mixture.

Bake for about 25-30 minutes.  A toothpick inserted will come out clean.  Remove and allow to cool completely before slicing and serving.

Serve and enjoy!
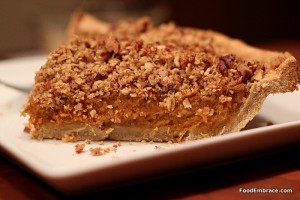
This pie went over very well this year!  The crust was flavorful but since I used whole wheat pastry flour, it had some great chew to it.  I like pie crusts to have some heft and not be too much like a pastry.

The rum was extremely prominent in this pie!  Next time I would probably leave out the rum in the crumble topping but feel free to play around with it and see what you like! I would probably add a little bit more olive oil or butter to the topping as well so it has a little bit more moisture to it.

Leftovers can be frozen and pulled out when you feel like a little slice of the holidays is necessary.

Have fun guys, and remember, always play with your food!  Enjoy!

Fig and Date Coffee Cake

It’s no secret that I like cooking with beer but I also like baking with beer. And experimenting with different ways to use beer in the kitchen.

One of my most recent experiments resulted in what is now my favorite coffee cake of all time. This coffee cake uses dried figs, dates, and nuts as part of the crumble topping.

This helps keep the cake moist while baking and gives a slight nod toward the fig newtons of my childhood.  I wasn’t a huge fan of fig newtons as a kid but when I got older I enjoyed them a great deal.

Having found dried figs at the store, I knew that I wanted to use them in something.  With seasonal beers out right now, the idea of making a coffee cake with one seemed like a natural fit.

I’ve made this cake several times since the first experiment and it always makes me squee with happiness when I get a chance to nibble on it.

Andrea’s Fig and Date Coffee Cake

For the Batter:

  • 1 1/4C Dark Winter Ale
  • 1C Oats
  • 2C White Whole Wheat Flour
  • 2tsp Vanilla Extract
  • 2tsp Ground Cinnamon
  • 1tsp Baking Soda
  • 1TBSP Maple Syrup

For the Topping:

  • 8 Dried and Pitted Dates
  • 1C Dried Figs, stems removed
  • 1C Pecans, Heaping
  • 2TBSP Brown Sugar, Packed
  • 2tsp Vanilla Extract
  • 1/2tsp Cinnamon

In a medium sized mixing bowl, add in dates and figs and cover with very hot water.  Allow to steep for at least half an hour.  Drain water from dates and figs.

Preheat oven to 375 degrees.  Spray a square baking dish with nonstick spray or olive oil.  About a 9×8 dish is what I used.

In a food processor, combine all ingredients for the topping.  Pulse until everything is broken up and a crumble forms.  It will be sticky and will stick together.

In a large mixing bowl, combine all dry ingredients for the batter and whisk.  In a medium sized mixing bowl combine wet ingredients, beer, maple syrup, and vanilla and whisk.  Slowly add the liquid mix to the dry mix.  Gently stir until everything is combined.  Pour mixture into baking dish.  Top batter with fig and date crumble.  You’ll have to use your hands to crumble it and spread it around.  The crumble mixture should cover the entire top of the batter.

Bake in oven for about 10 minutes.  A toothpick inserted will come out clean.  Don’t over bake as that will result in a dry coffee cake.

Remove from oven and allow to cool for a few minutes.  Slice and serve!

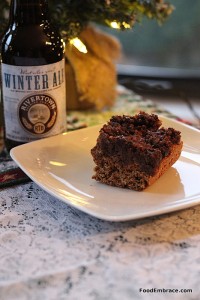
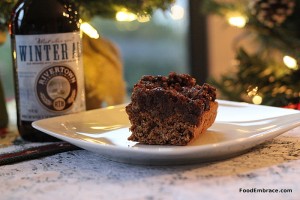
I used Rivertown’s Winter Ale for this coffee cake.  It’s brewed with molasses and cinnamon.  The cinnamon is very prominent in this beer and I knew that it would work well in the coffee cake.  It’s also a dark colored beer which provides a nice caramel color to the coffee cake.

We had this coffee cake over the Thanksgiving holiday and I’m already dreaming about when I can have it again! That’s how much I love it!

The fig and date topping help keep the cake moist while also making it a very filling cake.  This isn’t your grandma’s coffee cake.  This baby is hearty!

Have fun guys, and remember, always play with your food! Enjoy!
Oatmeal Mask

I’m still washing my face with honey everyday.  I am not about to give that up, no way.  I have found my new routine, hooray!

While the honey is great, I do like to give my face a little bit of a scrubbing one or twice a week. I wanted to keep things simple and still homemade so I pondered what I could use as a natural scrub.

I found a lot of recipes for an oatmeal scrub and decided to quick put together one for a little pampering.

In my scrub I used:

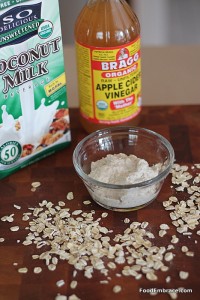
  • Old Fashioned Oats
  • Raw Apple Cider Vinegar
  • Unsweetened Coconut Milk

I put all of these ingredients into my mini food processor and processed until the oats broke down and the mixture got thick.  I tried to keep the portions small but still ended up with a ton of scrub!

The oatmeal for scrubbing purposes, and coconut milk along with the oats for skin softening purposes.  The apple cider vinegar is used as a mild astringent and to help tighten and unclog pores.

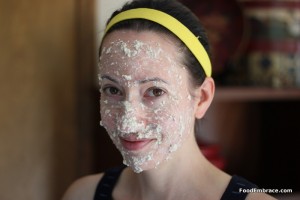
I took my concoction upstairs and applied it to my face.

I put the mixture on my face in small circles to start the scrubbing process.  Then I applied more and created a mask.  I let this mask sit and tighten on my face for about half an hour.

I rinsed it off in the shower.

The mask worked really well!  My skin was soft, glowing, and felt amazingly clean!

Since then I’ve changed tactics a bit.  I’m using ACV as a toner/astringent after all my face washings now so I skip that ingredient when creating a scrub.

I combine oats and a small amount of coconut milk in the food processor and process as much as I can to break up the oats.  Then I add in a few scoops of coffee grounds.

That’s right.

It’s already ground up and it’s just going to be tossed out anyway, so I might as well use it, right?

It’s a perfect scrub and caffeine helps to tighten up pores and skin.

If you have sensitive skin or gentle skin on your face, use the grounds sparingly and be extra gentle as you scrub your face.

If you have really sensitive skin, stick with just the oats.

Tone and moisturize as usual after using the scrub.

Things to keep in mind:

  • Use unsweetened coconut milk or make your own because you don’t want additives on your beautiful face.
  • Use plain coffee and not a coffee that has been flavored (like Irish Cream coffee for example), because again, you don’t know exactly what is in that, so it’s best to avoid all together.
  • If you make the scrub ahead of time and keep in the fridge, it will gel and thicken up just a bit more.
  • Make sure you apply over a sink because the mixture will fall off and you don’t want that to go splattering all over your floor.

Have you been sticking with a more natural approach to your beauty routine? Have you made your own scrub before?

Buzzin Bars

Last week Scott left for a business trip that had him away from the house for about a week.  He was flying off to San Francisco to geek out about code and be in his element.

Because I knew that eating times might be odd and because I know Scott, this meant he would need to take some food along with him.

He was taking a carry on which meant that the food had to be small, easy to carry, and not prone to spoilage.  And since I knew that these could very well be a meal source, I knew that they had to be jam packed with good stuff.  Stuff that could get you through a couple of hours.

I like using soaked dates in bars and coffee cakes because it adds a nice sweetness without being over powering.  Plus they are a great source of fiber and potassium.

Plus I wanted to do something fun so I added an extra little kick to these bars.

Andrea’s Buzzin Bars

  • 10, dried and pitted dates
  • 1C Coffee + 2TBSP
  • 2C Oats
  • 1C White Whole Wheat Flour
  • 2TBSP Unsweetened Cocoa Powder
  • 1/2C All Natural Peanut Butter
  • 1/2C Dark Chocolate Chips
  • 1TBSP Maple Syrup
  • 1/2C Unsweetened Coconut Milk (Not the kind in a can, the kind in the refrigerated section)
  • 2tsp Vanilla Extract

In a small to medium sized bowl, add the dates and pour 1C of hot coffee over the dates.  Allow to soak for 1/2 hour to an hour.  You can use leftover coffee that has been reheated.

Preheat oven to 375 degrees and grease an 8×8 baking dish (either with oil or nonstick spray).

Drain dates and add to a food processor.  Pulse just until the dates start to break up.  Add in the oats, flour, cocoa powder, and chocolate chips.  Pulse again until the oats start to break down and the chips start to break down as well.  The chips might not break down as easy, don’t worry about this.

In a medium sized mixing bowl, add in the coconut milk, 2TBSP of coffee, the peanut butter, maple syrup, and the vanilla extract.  Whisk until the PB is well incorporated into the mix.  Add this mixture to the date mixture, and pulse until well combined.

This will be an extremely thick batter.  It will not be a pourable batter and you may have to remove it from the processor and mix with your hands a few times.  Put this mixture into the baking dish, you’ll have to press it into place.  Again, remember this is a really thick batter.

Place in oven and bake for about 10 -15 minutes.  Just till the top starts to get a little browned.  It doesn’t take long at all for these bars to set.

Remove from oven and allow to cool for about 15 minutes before cutting.  Cut into squares and serve immediately.  Or allow to cool longer once cut, place in a storage container and keep in fridge until you’re ready to eat one.  I suggest heating it up slightly before eating.

These also freeze very well.

These smell exactly like a no bake cookie.  The peanut butter comes out as a very strong smell and flavor in these bars.  The coffee is just enough to enhance the chocolate and not dominate the flavor in any way.

The bars are very dense because they are so jam packed with goodness.  Fiber from the oats and dates, protein from the peanut butter, and a little fun from the chocolate.

If you don’t have coffee or don’t want to use coffee, you can soak the dates in hot water.  Use 2 TBSP of coconut milk in place of the 2 TBSP of coffee in the bar batter.

Great as a breakfast or a snack.

Bonus, you don’t even have to cook these!  You can roll them into little ball shapes and serve them up as a twist on a truffle. Yes there is flour in here but there is no “uncooked flour” taste when you eat these bars raw.  All you get is a straight forward chocolate and peanut butter combo.

I did give all of these to Scott to take on his trip.  That much chocolate and PB needs to stay close to home as well.  I had some for breakfast and they are chocolatey delish!

Do you make bars at home?  They are perfect for snacks on the go!

Have fun guys, and remember, always play with your food!  Enjoy!
Chocolate Coconut Oats

Most times I’m just a regular old fashioned oats girl with no frills. I used to make all kinds of combos but then I moved away from that and became more old school.  Or plain. However you want to label it. I found comfort in regular oats.

But some days we just need something fun. Some days we need a little pick-me-up.

Some days we just need some dang chocolate.

And on those days, I get a little sassy with my oats and make something super yummy.  Nothing too terribly fancy and I’m sure others have been doing this for a while but this is my take on a classic flavor combo.

Chocolate and coconut!

Andrea’s Chocolate Coconut Oats

  • 1C Old Fashioned Oats
  • 1.5C Plain Soymilk (or liquid of your choice)
  • 1 Ripe banana
  • 1TBSP Wheat Germ
  • 1TBSP Ground Flax
  • 1TBSP Coconut Butter
  • 1TBSP Unsweetened Cocoa powder
  • 2TBSP Dried Unsweetened Coconut
  • Extra coconut and dark chocolate chips for garnish

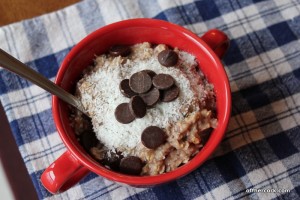
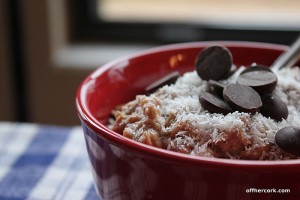
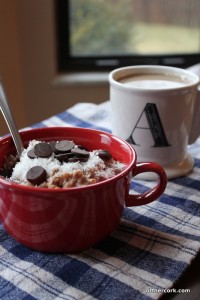
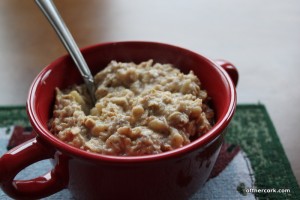
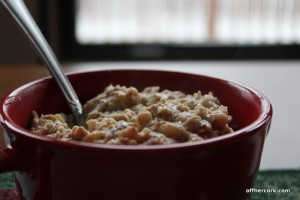
In a small pot, add in the soymilk and the banana. Mash the banana around and then add in the cocoa and coconut butter.  Heat over medium-high heat until the soymilk just begins to bubble. Add in the oats and reduce heat to medium-low.  Also add in the ground flax, wheat germ, and dried coconut. Stir and allow to cook for about 5-7 minutes until the oats soften and the mixture starts to thicken up.  Remove from heat, spoon into bowls, and top with chocolate chips and coconut for garnish. Makes enough for two bowls of oats.

Everything before you hit the coconut butter, is how I make my typical morning oats just adding in a sprinkle of cinnamon for some flavor and warmth. Whenever I try and make a fancier bowl of oats, I start with the basic and build up from there. It makes things easier plus I know if the oats don’t turn out, it’s because of the new ingredients since nothing else is different.

This is a lovely bowl of oats when you want something a little different. It’s not too sweet and the chocolate isn’t overpowering. The flavor is subtle and you can appreciate taking a little trip down chocolate lane as you eat it.

Just because it’s chocolate doesn’t mean you can’t have it for breakfast!

Have fun guys, and remember, always play with your food! Enjoy!
Andrea’s Basic Oats

I love oats in a pretty serious way.  I eat oats almost every single morning in some shape, either a bowl of oats or in the form of granola.

When I first started eating oats, I made all kinds of crazy combinations but now I’m an oatmeal purist. I just like straight up oats please.  Occasionally I’ll play around with oats and do something fancy, which we can talk about later.  But for the most part, my oats are pretty straight forward.

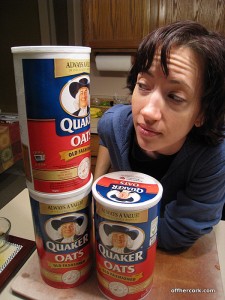
I have two kinds of oats on hand, Quaker because that’s the easiest for me to get as most grocery stores have that brand, and also some bulk oats I get from Kroger.  Quaker for breakfast and baking, the bulk oats for granola.  Quaker oats don’t really make the best granola but the bulk oats making amazing granola.  The opposite is also true, Quaker makes a great bowl of breakfast oats, while the bulk granola does not.

It pays to shop around and try different brands!

My pantry is packed full of oats at all times.  I use Quaker old fashioned oats because quick oats and instant are a little ridiculous.  Much like “minute rice” it’s unnecessary and not good for you (stop buying that stuff!).

I tend to get a little cranky if I go without oats for a while.  My body loves the fiber and protein that they provide.

I get asked a lot about my oats and how I make them which caused me to realize that I never posted the recipe!  At least I don’t think that I have so today I’m fixing that and bringing you my basic oats mix.

Andrea’s Basic Oats

  • 1C Old Fashioned Oats
  • 1.5C Plain Soymilk
  • 1 Large banana
  • 1TBSP Ground Flax
  • 1TBSP Wheat Germ
  • Cinnamon, to taste

In a sauce pan add in the soymilk and banana.  Mash and whip the banana until it is incorporated into the soymilk.  I use a potato masher to do this.  Place pan on stove and heat over medium-high heat until the soymilk starts to come to a boil.  Don’t let it boil though!  Add in the oats, cinnamon, flax, and wheat germ.  Stir and reduce heat to medium bringing the oats down to a simmer.  Cook for about 5-7 minutes until the oats are soft and the consistency is light and fluffy.

Makes enough for two servings.

Pretty easy, right? Of course you are free to use whatever liquid strikes your fancy.  If you like milk, go for it.  If you want to use almond milk, do it! I’ve tried SO Delicious Coconut milk but that didn’t work too well.  I don’t know why but it didn’t give me the same texture or effect I was looking for.  The taste was also a tad bitter.  Soymilk works well for us and doesn’t scorch or taste odd.

The banana sweetens the oats so that there is no need for additional sugar or sweeteners.  The cinnamon gives it just enough of a background taste to keep the oats from being plain.

Flax and wheat germ for the omega fatty acids and minerals they provide.  Along with additional fiber!  I told you, my body loooovveessss fiber!

In the comments, Brandi asked a great question that I should have addressed! This recipe makes enough oats for two people.  Either it can be split right down the middle or divided up however you like, but this recipe does in fact make a bunch of oats.

What about you? Do you eat oatmeal? What’s your favorite way to prepare it?

Have fun guys, and remember, always play with your food! Enjoy!
Sunrise Cookies

When I tell you about these cookies, I’m pretty sure that you are going to think that I have crossed over into crazy land.  Let me assure you that I have not.

I have been dreaming of a cookie that I could eat for breakfast for a long time now.  Something that I could make ahead and keep in the freezer where I could pull out one or two, heat up quick in the microwave and eat.  With my hands and not a fork or spoon.

I wanted a cookie that would make a great on-the-go snack that was low in sugar but loaded with flavor and good stuff.

I wanted something that could be legitimately called a cookie because they were made and eaten just like a regular cookie.

I wanted it to have whole grains and veggies in it.

Stay with me, remember I promised you I wasn’t crazy.

I’m calling these Sunrise Cookies because you can have them first thing in the morning and feel good about starting you day off with a cookie.

Andrea’s Sunrise Cookies

  • 1C Carrot Juice
  • 1Small Handful of Spinach or 1C Packed Spinach
  • 1 Large ripe banana
  • 1 1/2C Oats
  • 1 1/2C White Whole Wheat Flour + 4TBSP
  • 2TBSP Ground Flax Seed
  • 2TBSP Wheat Germ
  • 2TBSP Packed Brown Sugar
  • 1/2tsp Baking Powder
  • 1/2tsp Baking Soda
  • 1tsp Cinnamon

Preheat oven to 350. In a blender, combine the carrot juice, spinach, and banana. Blend until smooth.  In a large mixing bowl, combine all other ingredients EXCEPT for the 4TBSP of flour. Whisk ingredients together. Slowly add the liquid mixture to the dry and gently combine with a mixing spoon.  Sprinkle in the remaining 4TBSP of flour and stir again.

On a lined baking sheet (either parchment or silpat) drop the mixture by large spoonfuls.  Place in oven and bake for about 10-12 minutes.  They are large cookies and the dough is thick so they will take some time to cook.  They are down when a toothpick inserted comes out clean.  Remove from oven and allow to cool.

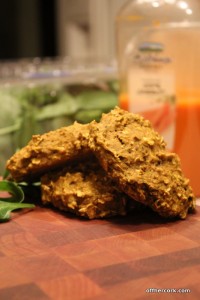
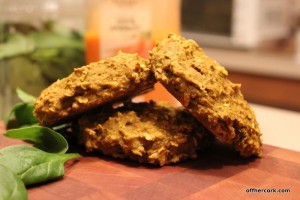
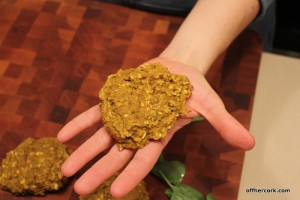
Now when you’re making these, I realize you might have some doubts especially when you smell the spinach and carrot juice mixture. But remember my promise! If you click and make this picture bigger, you’ll be able to see some flecks of spinach in the cookies.

I love that! Green flecks in a cookie are fantastic!

I admit I had my doubts too but then I nibbled on one and all doubts went out the window. These cookies totally delivered! Even Scott loves them so they passed the guy test as well!  I did in fact have them for breakfast not that long ago and was so happy. A great little cookie packed with tons of yummy things and very low on sugar.

Next time I’ll probably add in some vanilla extract, 1tsp, I got so excited as I was making these that I forgot.


UPDATE, January 2014:

I recently made this again with a few adjustments.

Added:

  • 1tsp Vanilla Extract
  • 1/2tsp Cinnamon
  • 2TBSP Coconut Sugar

Left Out:

  • Baking Powder
  • Flax Seed
  • Wheat Germ
  • Brown Sugar
  • 4TBSP White Whole Wheat Flour

I didn’t have the flax or wheat germ on hand and since that got reduced I left out the remaining flour. I also don’t use brown sugar much anymore and subbed coconut sugar instead.  Adding the cinnamon and vanilla gave it a little extra sweetness and depth.

Since I now live at a higher altitude, I baked these at 400 degrees also for about 10-15 minutes.

They came out beautifully!  I will be making a large batch of these to keep in the freezer for quick breakfasts or snacks.


I buy large bottles of carrot juice at the store, or you certainly can juice your own carrots. Add some of the pulp back into the cookies!  You could also add an egg for extra protein or some raisins for some extra sweetness.  Play around and see what combo you like!

I wanted these for breakfast so I made them huge, the size of my palm but you can make them whatever size you like.  Maybe you want small ones for a snack (which I’m also going to do!), if so, just make a bunch of little babies. They also won’t take nearly as long to cook.

I cannot wait to make more of these, that’s how much I love them. In fact I would eat them as a dessert as well, that’s how tasty I think they are.  See what happens you when experiment, fun things!

Have fun guys, and remember, always play with your food! Enjoy!
Apple Cinnamon Baked Oatmeal

I grew up in Pennsylvania. Western PA as a matter of fact. Home of the Steelers, The Penguins (and the Pirates if we must) and the City of Bridges. I didn’t grow up in the city but in a rural coal mining and farming town which was only an hour south of the city. I now live in Columbus, which is only 3 hours away from my hometown.

Doesn’t sound like a huge difference but in terms of weather it totally is! Ohio gets some of the most crazy weather and by crazy I am referring to how extreme it is.  It goes from one end of the spectrum to the other, sometimes in the same day.

This week we have the pleasure of dealing with an ice storm and then more snow.  Good times.

Thankfully Scott and I work from home which means we can stay bundled up.

On the first cold and iced-in day, I decided to kick my normal bowl of morning oats up a notch and make it something special.  I’ve seen others talk about baked oatmeal before and the concept always intrigued me.  Baked oatmeal sounds really decadent and like a lovely winter treat, doesn’t it?

I decided that on a very cold and icy Tuesday morning, this was exactly what we needed.

Andrea’s Apple Cinnamon Baked Oatmeal

  • 2C Plain Soymilk
  • 1 Large Banana
  • 1/3C Greek Yogurt
  • 1tsp Cinnamon
  • 1 Apple, chopped (I used golden delicious)
  • 2C Old Fashioned Oats
  • 1TBSP Ground Flax
  • 1TBSP Wheat Germ (raw)
  • Pecans and Maple Syrup for fun

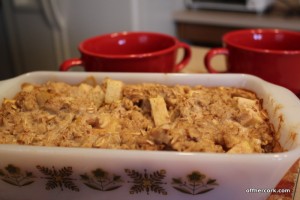
Preheat oven to 375 and in a small casserole or baking dish, spray with olive oil or nonstick spray.  In a large bowl, add in the soymilk and banana.  Mash the banana into the soymilk until it’s fully broken down.  Add in the oats, apple, yogurt, cinnamon, flax, and wheat germ, then mix.  Pour mixture into the baking dish and place in oven.  Bake for about 30 minutes. Stir once halfway through.

Remove, spoon into bowls and enjoy!

I was so excited about this breakfast! Partly because it was new to me and partly because I wanted to EAT! I was hungry when this was done!

Minus the yogurt and the apple, this is my basic oatmeal that I eat almost everyday.  I decided that the Greek yogurt would give it a nice rich background and make things just a tad more fancy for a weekday breakfast. Apples because why not?

The great thing is that this doesn’t cook long enough that the apples breakdown and get mushy.  They just get warmed through.

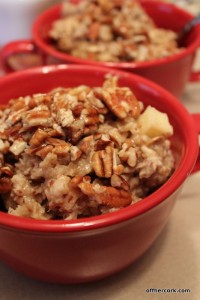
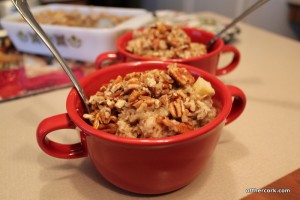
Topped with some crushed pecans and a drizzle of maple syrup takes this baked oatmeal to the top level.  It is a thick oatmeal and reminds me of a lovely custard.  Warm and creamy, with a sweet crunchy topping perfect for when you’re stuck indoors and need some fuel to get you through the day.

This would be a great thing to make for a brunch because it’s easy and quick to put together. Plus since it bakes in the oven, it doesn’t need a lot of fussing or focus while you deal with other things.  If I were to make this for a brunch, I would probably create a crumble type of topping to go with it, just to make things more fun.  Or maybe a “topping bar” so people can make their own style!

Ever have baked oatmeal before?

For another twist on baked oatmeal, checkout Fake Food Free’s Peach Baked Oatmeal.

Have fun guys and remember, always play with your food!  Enjoy!
The Joy of Overnight Oats

If you’ve been reading here for any length of time  then you know that I love my oats.

Probably a little too much.  Oats bring me joy! And comfort and a full belly.  I eat oats everyday in some shape or form.  Typically a bowl of oats that I just made but I also have been known to inhale oatbran and a yogurt mess with granola often as well.

Recently with the very hot temperatures we’ve been having and the ridiculous amount of humidity that has made itself known, the idea of a hot steaming bowl of oats is less than appealing.  All I want is COLD stuff.  I don’t mind hot coffee but everything else must be as cold as it can get!

Even making and eating dinner is not so much fun because I don’t want to deal with the hot and my appetite has gone down a bit as a result.  Anyway, I needed to solve this problem somehow because I have to eat breakfast.  If I don’t eat breakfast, I can become cranky really quickly.  And after an 8 mile run, food is very important.  I thought about cereal and even bought some but have yet to open the box.  Cereal just does not have enough staying power for me.  I wanted the completeness of oats without all the hot.

The solution seemed to be trying my hand at overnight oats.  Tuesday I made up a mix and placed it in the fridge overnight.  Wednesday morning I was licking the bowl clean and congratulating myself on finding the best solution ever!

I know a lot of people have been making overnight oats for some time now.  This is not a new concept in the world of food but here at the HQ it’s brand new and I’m pretty stoked about my new affair.

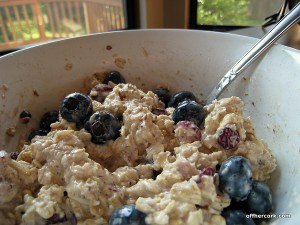
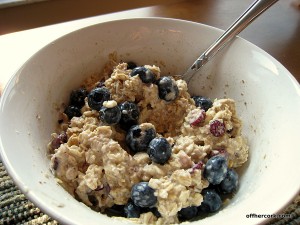
It’s super easy to make!  Sort of the same concept as muesli really.  In a bowl combine oats and liquid of your choice.  I use plain soymilk then I add in some dried cranberries and a pinch of cinnamon.  The measurements do not have to be rocket science.  Pour some oats in a bowl (I use about 1.5C) and then cover with the liquid.  You want the oats to be covered and mixed well but not drowning in the liquid.  Cover and let sit in the fridge overnight.  In the morning give it a stir and see if you need to add more liquid or if it has the right consistency for you.  Top with fresh fruit or toppings of your choice and enjoy!

It is the most refreshing thing!  It is cold and delicious and the best thing to eat after steamy hot run and shower.

Of course if you prefer hot oats, you can still use this method and then just nuke in the microwave for a minute to warm through.  The best thing about this is that there are no dishes to clean up!  Everything is done in the bowl you are going to eat out of and it is ready to go when you are.  No waiting around for it to cook and no dirtying up a pot.  Not that making oats is a huge process but sometimes you just want to eat already!

Overnight oats are filling, satisfying, and refreshing! If you haven’t tried it before and you enjoy oats, give it a shot! You just might find a new favorite breakfast!