Status

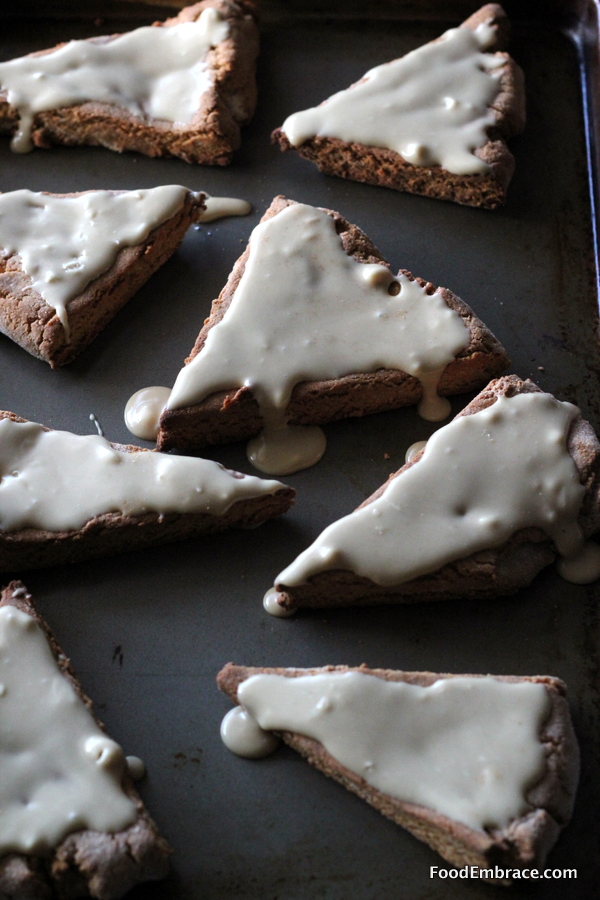
Bourbon Barrel Maple Vanilla Scones

Bourbon Barrel Maple Vanilla Scones

I was recently contacted by Kite Hill to review their almond milk based yogurts. They are the only company that I’ve come across that makes almond milk based products and I have been wanting to try them out for quite some time.  This gave me the perfect reason to finally dive in!

I know a lot of people who are dairy free for a number of reasons and these products seemed like a nice alternative to dairy based cheeses and yogurts.

I admit that I did go in with some hesitation.  I’ve tried non-dairy yogurts in the past and it hasn’t gone well.  The texture was off and the flavor was a little astringent with a fake sweetness to it.  I put my previous experience aside and went in with optimism.

Kite Hill sent me all of their flavors:

  • Plain
  • Vanilla
  • Blueberry
  • Strawberry
  • Peach

The strawberry I gave to Scott since I’m allergic but all of the other flavors I was able to test out.  I tried it as I normally eat yogurt, by making a yogurt bowl for breakfast.

I have to say this yogurt is pretty spectacular for a dairy free yogurt.  It is a little on the thinner side texture-wise but not by much. It’s creamy and rich with tons of fruit flavor.  It is lightly sweetened and if I had to give a critique, it would be to lessen the sweetness just a tad.

Kite Hill’s yogurts are hands-down the best non-dairy yogurts that I have tried.  These are perfect for those that are avoiding dairy or are looking for an alternative.  Plus there’s no soy in these products either which is a lovely added bonus!

I wanted to see how well these yogurts would work with baking so I decided to make some sweet scones with the vanilla yogurt. These scones are dairy-free, egg-free, grain-free, and vegan.

I win blogger bingo for that!

I also used bourbon barrel aged maple syrup in the recipe.  (drops mic)

Andrea’s Bourbon Barrel Maple Vanilla Scones

  • 2.5 C Almond Flour
  • 1/2 C Tapicoa Flour
  • 1/4 C Coconut Flour
  • 2 tsp Vanilla Extract
  • 2 TBSP Bourbon Barrel Aged Maple Syrup* (see note at bottom)
  • 5 oz Kite Hill  Vanilla Yogurt
  • 2 tsp Baking Soda
  • 1/2 tsp Ground Cinnamon

For the glaze:

  • 1/2 C Powdered Sugar
  • 4 TBSP Bourbon Barrel Aged Maple Syrup

Preheat oven to 400 degrees (If you live at sea level, reduce heat to 375) and line a baking sheet with either parchment or silicone.

In a food processor, combine all ingredients for the scones and pulse until the dough comes together in a ball. Sprinkle the counter with a little extra coconut flour and place the dough on top.  Shape dough into a square about 1/2 an inch in thickness.  Cut dough into 8 triangles and place those on the baking sheet.

Place in oven and bake for about 10 minutes.  Remove and allow to cool before adding the glaze.  For the glaze, mix the sugar with the syrup and spread over scones.  This is a thicker glaze, if you want a thinner glaze add more syrup or a splash of almond milk to the mix.

*I purchased the bourbon barrel aged maple syrup at Trader Joe’s.  If you can’t find any or don’t want to use that, regular maple syrup will work just fine.

These scones are great as a breakfast treat or a little nighttime snack.  If you want to freeze them, then do not glaze them until you are ready to serve.

The yogurt did great in these scones providing a nice little sweetness along with enough acid to kickstart the baking soda.  It also provided enough moisture that I didn’t need to add any eggs to the mix.

Kite Hill yogurts are great straight up or you can use them in recipes in place of dairy yogurt.  I believe that currently these are only available at Whole Foods so you’ll have to swing by your local store to check them out.  Definitely try their products to see what you think!

Disclaimer: Kite Hill sent me these products for review.  All opinions are my own and I was not further compensated for this post.

Status

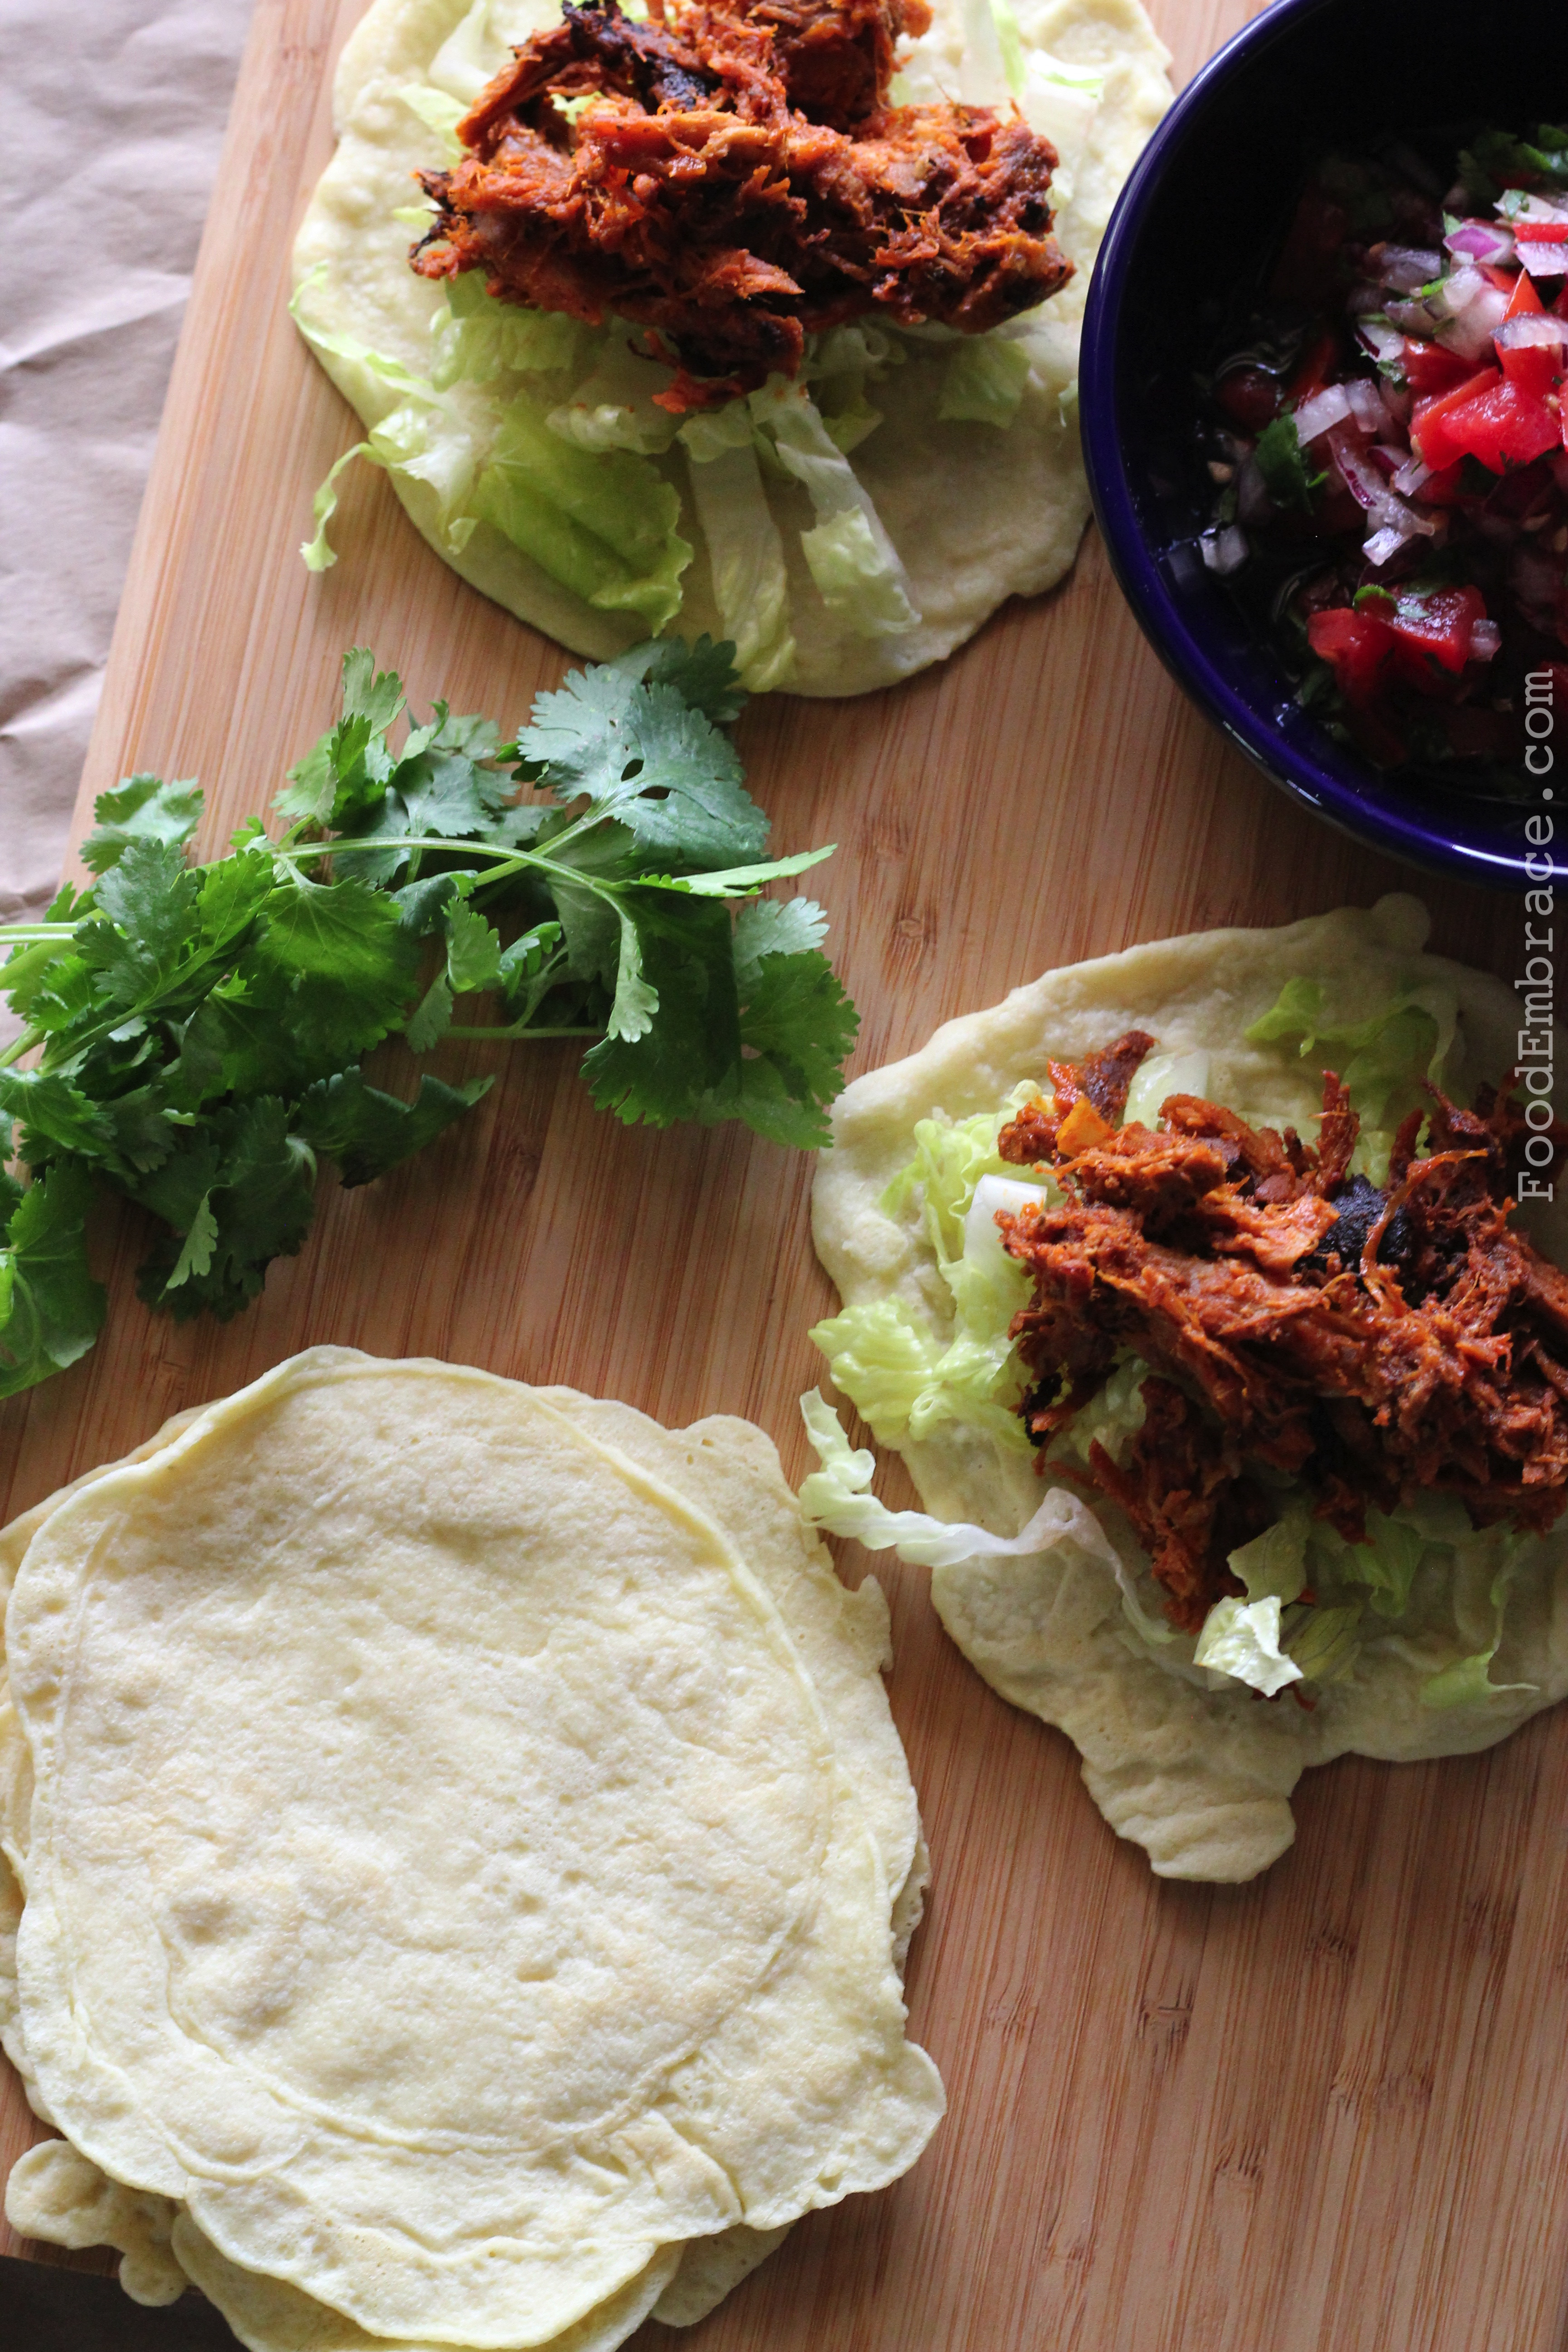
Almond Flour Tortillas


Almond Flour Tortillas

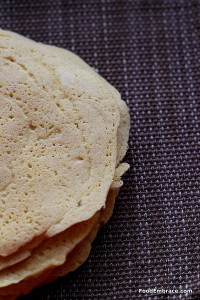
I have made some grain free tortillas before but due to the amount of coconut flour in them they lean more towards the sweeter side.  Making them perfect for sweet crepes or toasted up and used for ice cream sandwiches.

I wanted something a little more neutral in flavor to use for tacos and sandwich wraps so I fiddled around with my recipe and created a winner!

Andrea’s Almond Flour Tortillas

  • 1 1/2C Almond Flour
  • 1/2C Tapioca Flour
  • 1 TBSP Coconut Flour
  • 1 1/4C Water
  • 4 Eggs
  • Pinch of salt (sea salt or Himalayan preferred but not necessary)
  • Ghee or fat of choice for cooking


In a large mixing bowl, add in the flours and whisk together to remove any lumps and to fluff up the flours.  In a medium sized bowl add in the eggs, water, and salt, and whisk until the mixture is blended and frothy.

Add the liquid mixture to the dry mixture and mix well.  This will be a thin runny mixture, similiar to a crepe batter.

In a large skillet, over medium heat, add in a very small amount of ghee and spread that around the skillet.

Use a 1/4C scoop for street taco size tortillas or a 1/3C scoop for wrap and enchilada size tortillas.

Pour batter into center of skillet and using a spatula spread the batter around making a very thin circle.  This takes time!

Allow to cook for 2-3 minutes on each side.

Remove from skillet and repeat process until you’ve used all the batter.

The amount of tortillas you get depends on the size you make.  For wrap size tortillas, this should make about 10.

Store in the refrigerator or you can also freeze them as well.  Gently reheat right before serving.

The are great for wraps and tacos.  Can also be toasted up to use as tostadas or quesadillas.  They have a neutral flavor but you can add some lime zest and lime juice if you want to make them more flavorful for tacos.

They do take some time to make so have patience because it’s worth all the effort!  You’ll have great tasting grain-free wraps with out fillers or junk.  I usually make a big batch at once and store them in the freezer.

Have fun guys, and remember, always play with your food!  Enjoy!

Monday Meals: Seafood Season

This week I felt like I was running a little behind since I didn’t have even the slightest outline for a meal plan.  We still ate really well (whew!) but I definitely felt like I was flying by the seat of my pants.

Because I do better with calendars and lists that are actual pieces of paper (I like to make notes and I’m still old school about some things), I have decided to print off a meal plan for each week.  I got the template from Real Food Liz, and you can get one too.  Click HERE.

Just a side note, tangent, I bought a huge Paleo bundle of ebooks a little while back and it included a lifetime membership to Good Food For Bad Cooks.  It has recipes, you can make shopping lists, there are food guides.  It’s a pretty neat little site with lots of info so if you are looking for something to help you meal plan and for more recipes, definitely check it out. (That is not an affiliate link and it’s not a plug. I just like the site.)

Ok on to meals!

BREAKFAST:

Chicken and spinach

Chicken with spinach that I added a little homemade tomato sauce too and sprinkled with parm.  It was delicious!  I always forget how much I like chicken for breakfast.
Fruit, coconut cream, almonds

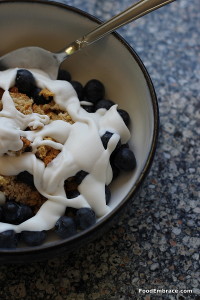
Blueberries and nectarines with coconut cream, crushed almonds, and coconut flakes.

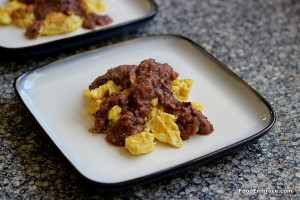
Scrambled eggs with blackbean sauce

Scrambled eggs with a black bean sauce.  The sauce was really simple.  In a blender, I added:

  • Black Beans (about 1.5 cups)
  • Salsa
  • Chicken Stock
  • Salt
  • Chili Powder

Blended till it was smooth, and heated it in a medium sized pot over medium heat.  Brought it to a simmer and let it reduce just a bit so the sauce thickened up.

Easy and quick sauce.  I froze the rest to save for enchiladas at some point.

Blueberries, coconut cream

Blueberries, grain-free scone, and drizzled with coconut cream.  Please note that if you refer to blueberries as “bluebs”, we can no longer be friends.  Sorry, but that’s life sometimes.

Veggie fritatta

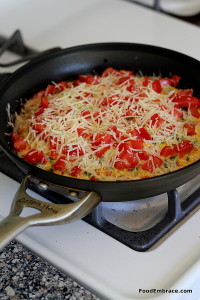
Veggie fritatta!  I sauteed up some baby kale, red pepper, and half an onion in some ghee and let that mixture cool.  In a bowl I whisked 5 eggs, a splash of whole milk, and some dijon mustard.  Added in the veggies and then added that mixture to a greased skillet (I used ghee) that was heating up on the stove.  Heated it for about two minutes then put the pan in a 425 degree oven for about 40 minutes.  Topped with diced tomato and a sprinkle of parm.

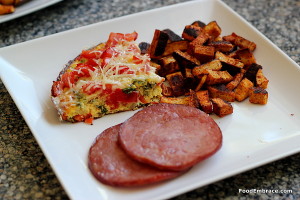
fritatta, ham, potatoes

We had that with some ham slices and some roasted sweet potatoes.

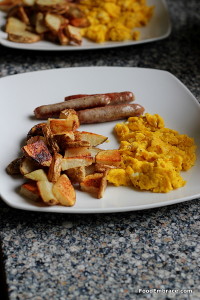
Eggs, potatoes, sausage

Another big breakfast of scrambled eggs (look how yellow they are! The yolks in these farm fresh eggs were gorgeous.), roasted potatoes, and sausage.

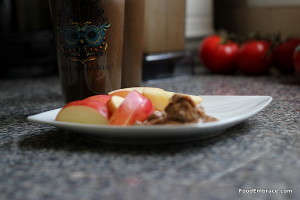
smoothie, apple, almond butter

Random picture of a smoothie, sliced apple with almond butter.  Sometimes if  I have a large breakfast then I have smallish snack as lunch.  I don’t normally show these pictures because they aren’t exciting and I’m not sure if you are interested in seeing them.  If you are, just let me know and I’ll share what goes in the smoothies.  Spoiler alert, it’s usually always the same.

DINNER:

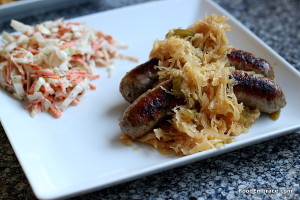
Sausage and kraut

Leftovers, sausage, kraut, and coleslaw.  I had spinach and feta sausage from Whole Foods and Scott finished the other sausages.  I have to say that I’m not super impressed with our local Whole Foods sausages.  I probably won’t get them again unless something really catches my eye.

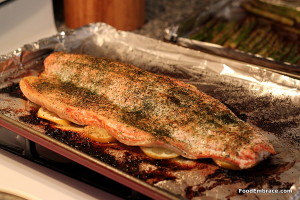
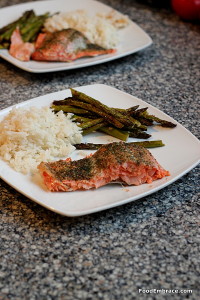
Copper River Salmon

Glorious salmon!  Copper River salmon was in season so I stocked up and purchased a couple of sides.  Please note that if you are local, our Whole Foods does not remove the bones from the fish so either you have to do it or you can ask for it to be done.  If you ask, the workers tend to get really pissed off, at least they did for me.  And they still didn’t remove many bones, Scott and I were picking them out as we were eating.  Good times.

I brushed the salmon with some coconut oil and sprinkled with:

  • Lemon Pepper Mix (by Simply Organic)
  • Garlic Powder
  • Dill

I also laid it on some lemon slice while it roasted in a 400 degree oven for about 20 minutes.

Salmon, asparagus, rice

We had the salmon with roasted asparagus and rice.  Fish + rice is one of my favorite combinations.  We used to eat this all the time on “Fish Tuesdays” and I think I need to bring that back.

This provided us with leftovers and I was so hungry and excited when we had leftovers that I forgot to take a picture!  It was salmon with a side salad.  Nothing fancy but delicious!

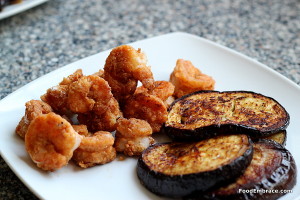
Crispy shrimp and eggplant


And lastly, crispy shrimp with roasted eggplant.  I whisked together 2 eggs, a splash of milk, and some hot sauce.  The coating was a mix of coconut flour and tapioca starch seasoned with chili powder, garlic powder, and onion powder.  The shrimp went in the egg bath first then to the coating. I cooked the shrimp in a cast iron skillet in some lard.

This was the first time I used coconut flour and tapioca as a coating and I really liked the way it turned out.  The tapioca provides a nice thin coating on the shrimp that really crisped up and turned a lovely golden brown color.

The eggplant was sliced, seasoned with soy sauce, salt, garlic powder and roasted in a 400 degree oven for about 10 minutes.

For The Locals:

All chicken and eggs from Jodar Farms.

Sausage, ham, and seafood from Whole Foods.

Milk from Morning Fresh Dairy.

This Week:

I have  my meal plan all printed out and I’m ready to get started on this week!  I already have some chicken and pork chops thawing in the fridge so we will be having that this week.  The chicken will last at least two days, so that is three days covered already.  Now to figure out the rest of the week.

How did you do last week and what are your plans this week?

Review: Coconut Organics CocoBacon

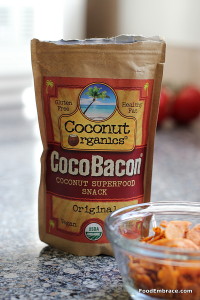
Coconut Organics Coconut BaconI was contacted by Coconut Organics asking if I would be interested in reviewing their newest product being marketed as coconut bacon.

Seriously, I could not pass up coconut bacon so I accepted.  This sounded so interesting and unique that I was curious what the product would be like.

Here is a little bit from their website describing the coconut bacon:

CocoBacon ® is made in our organically certified kitchen. First we start with thick, sweet organic coconut chips from mature coconuts and lightly toast them. These crunchy decadent coconut chips get a generous dose of raw, organic coconut oil to achieve the fatty satisfaction of bacon. Then, we apply a little bit of low-glycemic, high-vitamin organic coconut sugar for the slight sweetness of bacon. Next, we add some high-mineral Celtic Sea Salt ® for the salty side of bacon. The final savory and smoky flavors come from organic mesquite smoke flavor and our special organic spice blend. The result is a perfectly balanced salty, savory, smoky and sweet flavor combination on a crunchy coconut chip.


The coconut bacon is in a 2.2 oz bag and the bag is completely resealable.  It is labeled as vegan and gluten free.  The ingredients are also very clean (to my standards) so I felt good about reviewing this product.  Going by the ingredients, the product is also technically Paleo.

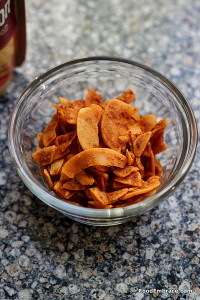
I’m not really quite sure what I was expecting when thinking coconut bacon but this definitely surprised me!  I was assuming this was going to be big pieces of coconut product put together to form a “slice”.  Because when I think about bacon, I think about a slice of something.

That isn’t what this product looks like at all.

Coconut Organics Coconut Bacon

It’s big pieces of flaked coconut that have been toasted and then a savory smokey seasoning is added.

I had the coconut bacon straight up to see what it was like right out of the bag.  There is a big crunch factor to the pieces of coconut.  The taste is definitely interesting and unique.  It’s very sweet because it is a large piece of actual coconut but then the savory smokey part comes in at the end.  The two flavors are separate and distinct.  First it’s sweet, then it’s savory.

It’s a little weird but strangely addicting and kind of fun.

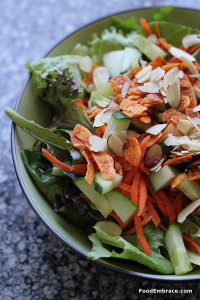
Coconut Bacon on a salad

I then had it on a salad to see what mixing it with something else would be like.  The coconut bacon’s sweetness went way down and it added a savory little crunch and texture to the salad.  As a salad topping or a topping to say a baked potato would be the way I would eat this product. Straight up is fine but I prefer it mixed with something.

Because of it’s convenient packaging, I can see how this would be great for traveling since the packaging makes it very portable.  Perfect for keeping some at the office, in your purse/laptop bag for when you need a little something during the day.  Since it does have that sweet/savory mix going on combined with all the healthy fat from the coconut meat, it is very satisfying as a snack.

Currently this product is available online in two packs or six packs.  And the company has free shipping going on right now!

Coconut Bacon is unique, interesting and definitely worth checking out.  Try a little snack and see what you think!


Disclaimer: I was sent this product for review.  All opinions are my own and I was not compensated for this review.

Sweet Tater Smoothie from Paleo Smoothies

Paleo Smoothies by Mariel Lewis We are in love with smoothies here at the HQ. We try to have a smoothie everyday with our lunch or if we’re not too hungry, it will be lunch.

Having a smoothie jam packed with fruits and veggies makes me feel amazing.  It also helps us to get in more portions of fruits and veggies throughout the day.

We have our favorites though and are guilty of falling into a rut.  Having the same smoothie over and over again, it happens.  Some days I am not feeling inspired to experiment.

This is why I was thrilled to be able to review the new Paleo Smoothies recipe book by Mariel Lewis.  It’s packed full of recipes that are unique and utilizing ingredients that I never thought of adding to a smoothie (hard boiled egg anyone?).

The book is broken down into 10 categories, such as Cleansing Smoothies and Recovery Smoothies.  Mariel gives a brief run down of the Paleo Diet and goes over what foods are included in the diet.  She also discusses how smoothies are beneficial to over all health and even gives you a guide to kitchen tools that you should have on hand.

I couldn’t wait to start making smoothies!  Since I have never had a sweet potato in a smoothie before, I made the Sweet Tater Smoothie.

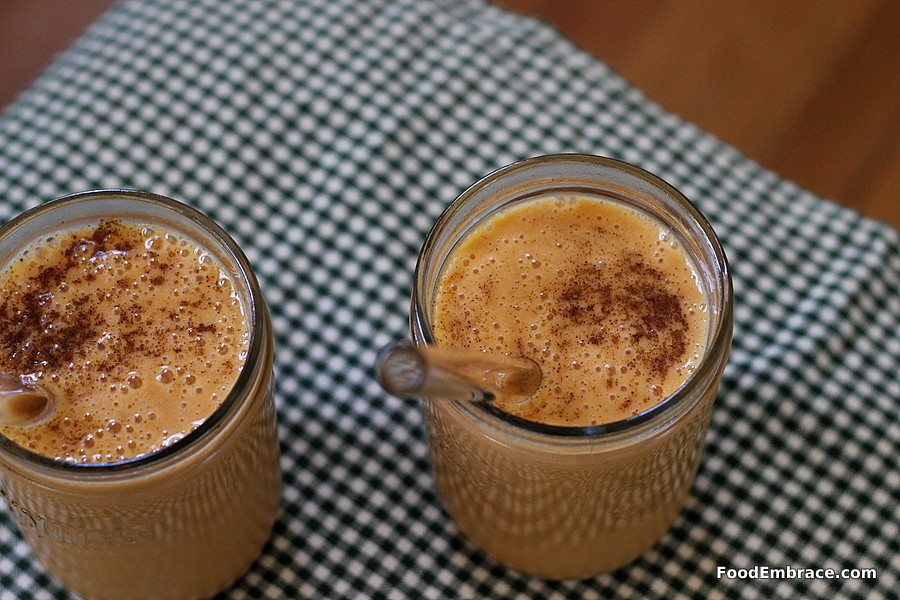
Sweet Tater Smoothie from Paleo Smoothies

Sweet Tater Smoothie from Paleo Smoothies by Mariel Lewis

Republished with permission from Adams Media, © 2014 Mariel Lewis

  • 1 Frozen Banana
  • 1 Baked Medium Sweet Potato, skin removed
  • 1 1/4 Cups Unsweetened Vanilla Almond Milk
  • 1TBSP Maple Syrup
  • 1/4 tsp Cinnamon
  • 1/4 tsp Nutmeg
  • 1/8 tsp Ground Cloves (to garnish)

1. Place all ingredients in a blender, except for the ground cloves, and blend on high until smooth.

2. Pour smoothie in a glass and garnish with half of the ground cloves.  Enjoy!

This smoothie was rich and delicious!  It tasted like a pumpkin pie.  The sweet potato produced that gorgeous orange color and made the smoothie extra thick, like a well made milkshake.

I might start keeping sweet potatoes on hand just for smoothies!  Each recipe in the book also has nutritional information so that you know exactly how many calories, carbs, and so on you are consuming.

Whether you are on a Paleo Diet or not, this recipe book has some amazing smoothies that will please all tastes!

Disclaimer: I was sent this cookbook for review.  All opinions are my own. I was not required to write about it and was not compensated for this review.

Grain Free Tortilla Wraps

Grain Free Tortillas This tortilla recipe was born out of frustration and desire.

During the Spring Clean Eats challenge limiting carbs was one of the goals.  I also used this as a way to challenge myself in the kitchen and develop new skills (grain free cooking isn’t such a mystery anymore!).  Because I was reducing carbs, I had to come up with alternatives.

I wanted a tortilla or wrap that fit the guidelines of the challenge so off to the interwebs I went.  All the recipes I found didn’t really appeal to me for two reasons.

Either they used a ridiculous amount of eggs (I’m talking like 18 eggs for one batch) and/or the recipe only resulted in like 6 tortillas.

If you think I’m using close to 2 dozen eggs to make 6 wraps, you have lost your damn mind.

I decided to take matter into my own hands and create my own tortillas.  One that would use an acceptable amount of eggs and also made more than 1/2 dozen wraps.

Andrea’s Grain Free Tortillas

  • 1C Almond Meal
  • 1/2C Coconut Flour
  • 1/2C Tapicoa Starch
  • 4 Eggs
  • 1 1/2C Almond Milk
  • Pinch of salt
  • Ghee or lard for frying

In a large mixing bowl, combine the flours and the salt.  Whisk so that all the flours combine.  In a medium sized mixing bowl, combine the almond milk and the eggs.  Whisk until the eggs and almond milk combine.

Slowly add the egg mixture to the flours and stir until everything is mixed and a batter has formed.

Heat a medium sized nonstick skillet** over medium (to medium low) heat.  Add in just a small amount of lard or ghee (no more than half a teaspoon), let the fat melt and brush it around the pan.  Pour in 1/3C of batter and spread around with a spatula.  Making the tortilla as thin as possible.  Cook for 2-3 minutes and then flip cooking for another 2-3 minutes.

Remove tortilla from heat and set aside.

Repeat until you have used all the batter.

Makes about 13 tortillas.

**Please see notes at bottom.

Grain Free TortillasNOTES:

Some things to keep in mind as you make these tortillas.  They are a work of love, they will take you some time to make.  But you’ll be left with a big batch of tortillas that work great as wraps, or for things like enchiladas, or even crepes.  They also freeze and reheat well.

A nonstick skillet is key, I would not recommend cooking these with stainless steel.  If you have a very well seasoned cast iron, you could probably use that.

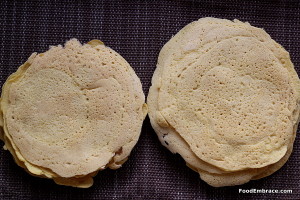
You need to use as little fat as possible per tortilla.  I was able to get thinner and larger tortillas but making sure the fat in the pan was minimal.  The picture above, the tortillas on the right are noticeably larger than the ones on the left.  The ones on the right were cooked with barely any fat in the skillet where the ones on the left were cooked with a teaspoon of fat.  This is why a nonstick skillet is key because it makes it easier to make these wraps.

Coconut flour tastes sweet and has a vanilla flavor to it.  If you are going to use these for a Mexican inspired dish, some lime zest and a squeeze of some lime juice would go nicely.  I would also recommend using lard for cooking, it will provide a more savory flavor.

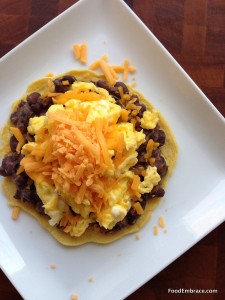
Grain Free tortilla with beans and eggsI’ve made enchiladas with these wraps as they fold and roll really nicely without breaking.  I’ve also topped them with beans and eggs to have at breakfast.

Since these tortillas freeze really well that makes them perfect when you want to make a quick sandwich or use for taco night.  Reheat them easily in a toaster oven or in a 300 degree oven for only a couple of minutes.


Grain Free Granola

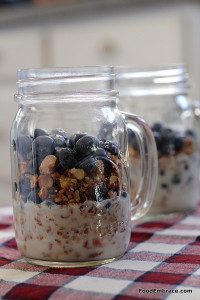
Paleo granola, coconut cream, blueberries After getting a little tired of eating animal protein at breakfast for several days in a row, I needed something else. Something that was going to provide me with the same nutritional punch and keep me full and satisfied.

But I wanted it to be a little lighter and something I could mix with fruit.

Granola came to mind and I looked around at several paleo granola recipes.  They all featured nuts in some way and some coconut.

Normally I have granola with yogurt but I was nixing yogurt during the course of the Spring Clean Eats challenge so I needed something else.

Coconut milk was challenge friendly and I used that to make a nice little sauce to go with the granola. Maple Kissed Coconut Cream Sauce goes perfectly with the granola.

Now I had a balanced breakfast! Full of protein, fresh fruit, and hefty enough to keep me full for several hours.

Andrea’s Grain-Free Granola 

  • 2C Whole Almonds, raw
  • 1 1/2C Pecan Halves, raw
  • 1C Walnuts, raw
  • 1C Shredded Unsweetened Coconut
  • 1/4C Raw Honey
  • 1/4C Ghee

Preheat oven to 325 and line a baking sheet with foil or parchment paper.  In a small sauce pan, combine honey and ghee and heat over low heat until the ghee is melted.  Stir to make sure the honey is incorporated with the ghee.  Remove from heat and set aside.  In a food processor, add all the nuts and pulse (about 7 times) until the nuts are much smaller pieces.  Pour nut mixture into a large mixing bowl.  Add in the ghee and honey mixture and stir until all the nuts are covered.

Pour mixture onto baking sheet, making sure to spread the mixture out.  Bake at 325, stirring every few minutes, for about 20 minutes.  The last 5 minutes of baking, add in the shredded coconut and stir.  Once the nuts have browned and the coconut is toasted, remove from heat.

Allow to cool for about 5 minutes and then serve!  Store in an airtight container in fridge.  Keeps for several weeks.

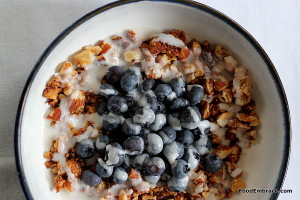
Grain free granola, blueberries, coconut creamDelicious easy breakfast! Perfect to highlight all the new summer fruits that will be arriving!

Maple Kissed Coconut Cream Sauce

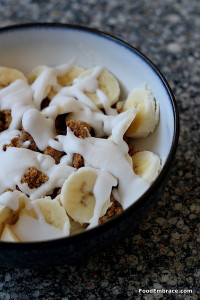
Banana, paleo scone, coconut cream Coconut Cream sauce came about because I needed a substitute for yogurt during the Spring Clean Eats challenge.

I really wanted some kind of accompaniment to go with granola.  Using coconut milk to create a sauce seemed like the natural solution.

This sauce is delicious, super simple to make, and only contains 3 ingredients.  All you need is a blender and then an airtight container for storage.

Easy!

Andrea’s Maple Kissed Coconut Cream Sauce

  • 1 13.5oz Can Full Fat Coconut Milk (365 brand is budget friendly)
  • 1TBSP Pure Maple Syrup
  • 2tsp Vanilla Extract

In a blender, add in all the ingredients.  Make sure to scrape out as much of the coconut milk fat from the can as possible.  Blend all ingredients for about 3 minutes.  You want the mixture to be creamy and fluffy.

Pour into airtight container.  Keeps for about a week to a week and a half.

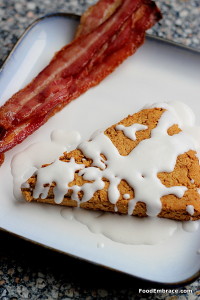
Grain free scones and baconThis sauce can be used to top granola, poured over a scone or pancakes.  You can even use it as a coffee creamer if you like!  Or you can eat it straight from the jar like I have been known to do.

Once blended the sauce will stay pourable even after being refrigerated.  No need to worry about it solidifying on you.  It’s best to always have some on hand because it goes with so many things!


Spring Clean Eats: Day 30, We Made It

Hooray!  We made it to the last day!  Yesterday was a pretty awesome day.  I started the morning off with a great run which always sets my day up for success.  I need to remember that more.

Paleo scone, banana, coconut cream

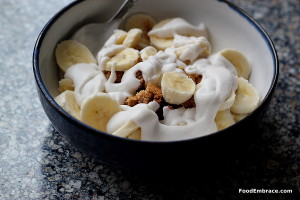
Breakfast was the same as yesterday, a crumbled up paleo scone with sliced banana and some coconut cream.

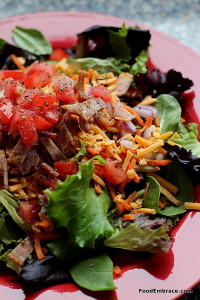
Mixed green salad

Lunch was a gigantic salad with:

  • Mixed greens
  • Cucumber
  • Carrot
  • Tomato
  • Red Onion
  • Cheddar
  • Bacon

I was really craving that bacon so I made sure to sneak some on the salad.

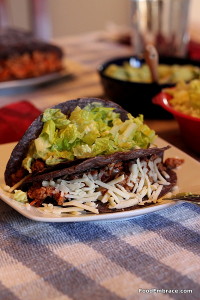
Dinner was something that Scott and I haven’t had in a while, tacos!

Tacos

And just tacos.  When we were discussing what to have as a side neither of us really wanted one.  We wanted to focus on tacos! I have no problem with this at all.  Ground pork tacos with guacamole, lettuce, and pepper jack cheese.

Scott and I also have not eliminated corn from our diet.  Both of us tolerate it just fine and both of us like it.  The corn tortillas were 365 Brand and the only ingredients are corn and oil.  Since this isn’t something we eat everyday, I’m ok with this.

We are not paleo perfectionists nor will we ever be.  We are ok with that and you should be too.

I will fully admit that I’m so glad to not have to photograph all of my eats any more!

I will be writing up a full recap post (it will be long, brace yourselves) and that will be posted on Friday morning.

Spring Clean Eats: Days 23-24, Eat Gorgeous Food

Yesterday I was out running errands most of the day and didn’t have a chance to write up a post before leaving.  I had a big shopping trip to do and I was trying to make it as quick as possible.

That naturally didn’t happen. Which always seems to be the case when grocery shopping.

But let’s get started! We’ve got two days to cover!

BREAKFAST

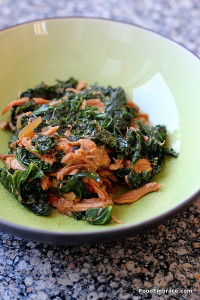
BBQ Pulled Pork and kaleDay 23: BBQ pulled pork with sauteed kale.  I found some leftover pulled pork in the freezer so I served that up with some sauteed kale.  It was delicious!  Some sort of pulled pork is probably my favorite protein to have at breakfast.

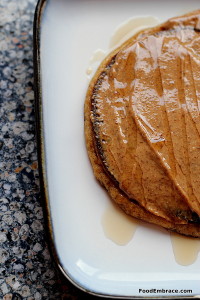
Grain free pancakeDay 24: Grain free pancake topped with almond butter and drizzled with maple syrup.  I used Elana’s recipe for almond meal based pancakes.  This was an interesting experience for sure!  The pancake turned out very well.  Filling but not nearly as filling/satisfying as an animal based breakfast (for me anyway).

LUNCH

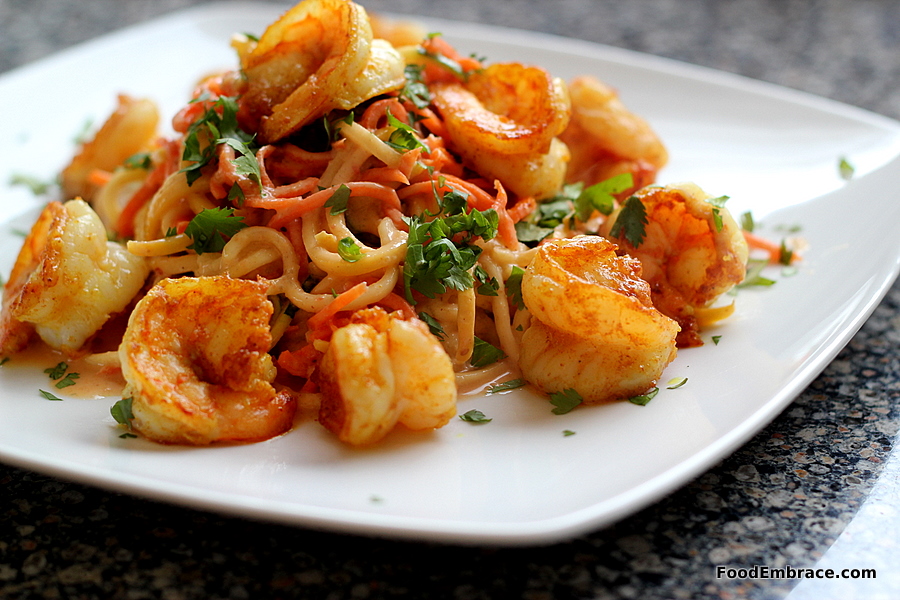
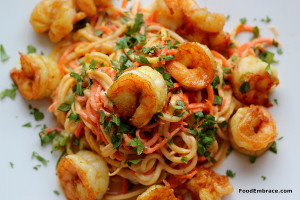
Veggie noodles in a peanut sauce with curry shrimpDay 23: I was still craving some shrimp (sushi wasn’t enough) so I made a big lunch featuring shrimp.  Carrot, squash, and zucchini “noodles” coated in a peanut coconut sauce from this recipe.  The shrimp was dusted with curry powder and then sautéed up in some ghee.

Day 24: No real lunch.  I snacked on some leftover fries, a big apple, and some Applegate pepperoni while I was putting away all of the groceries.

DINNER

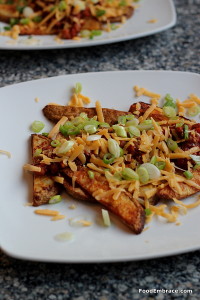
Chili cheese friesDay 23: There was still a tad bit of chili leftover so I turned that into chili cheese fries.  Oven baked fries topped with chili, a little cheddar, and green onions.  I really missed having some sour cream to dip them in!

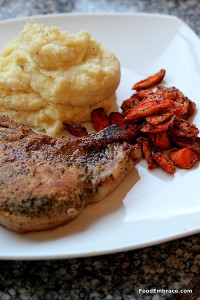
Pork chop, parsnip mash, roasted carrotsDay 24: I had a meeting before dinner so by the time I got home, I was ready to eat my arm off.  Thankfully dinner was substantial!  Bone-in pork chop (from our hog share), roasted carrots, and parsnip mash.

I am in love with parsnip mash!  I even love it more than the good old favorite paleo cauliflower mash.  Don’t worry, I’ll be talking about it more after the challenge.  I cannot get enough of it.

EXERCISE 

Both days I got a chance to run!  YES!  And I can still bust through an entire mile without stopping.  Hooray! I’m definitely on my way to being a runner again.

One take-away that I learned these past few days is that the more colors on the plate, the more I am excited to dig in and start eating.  It’s not just about, “Eat The Rainbow”.  We all know that we need variety but when you have lots of colors that pop on a plate, it makes you feel better about what you are about to eat. You know you’re getting something good.

And since we are headed into summer, I can’t wait to start exploring more colors and adding to our plates!