Status

Sweet and Smoky Shishito Peppers

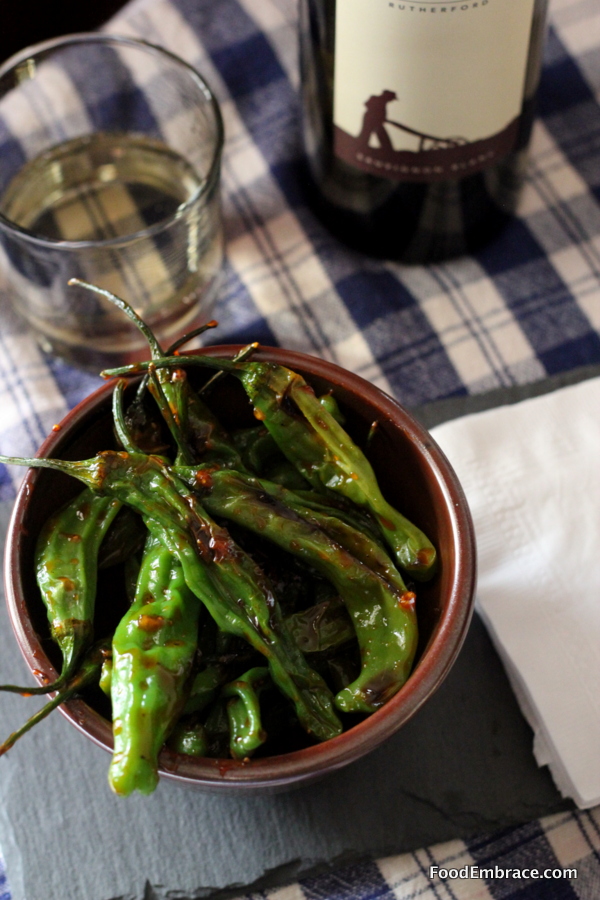
With all the holiday functions and parties that happen during this time of year, I wanted to create a quick and simple appetizer that would be great for entertaining, parties, or as a way to kick off an intimate date night at home. While out shopping I came across some awesome looking shishito peppers and knew they would be perfect to use. Most times the peppers are paired with a dipping sauce but I wanted to wrap the peppers is a sweet and sticky sauce making them easier to prepare and eat.

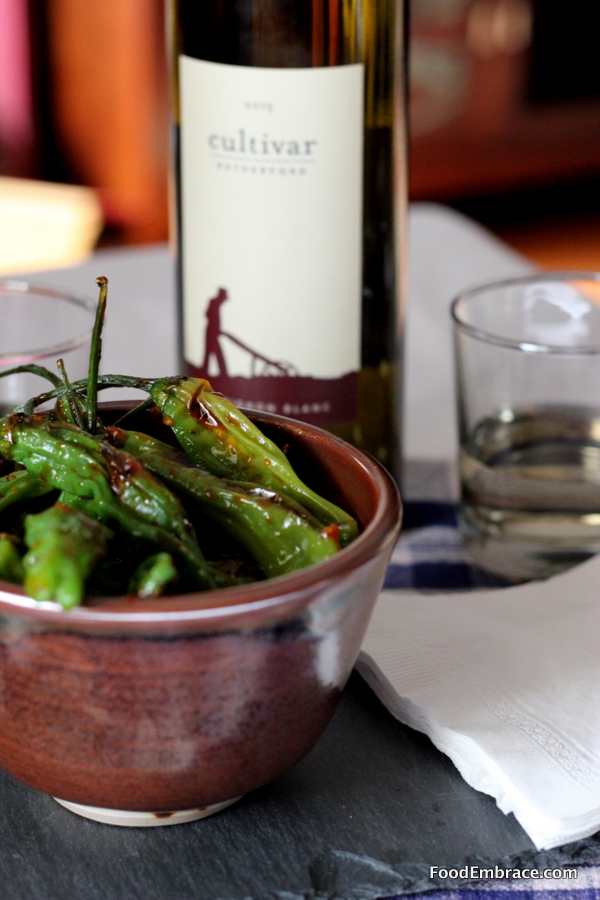
In a recent shipment from Cultivar Wines, I received a 2014 Cultivar Rutherford Sauvignon Blanc that I thought would pair nicely with this dish.

Sweet Smoky Shishito Peppers

Andrea’s Sweet and Smoky Shishito Peppers

  • 6oz Shishito Peppers
  • 1/2TBSP Light Olive Oil
  • Juice of 1 Large Lime
  • 2 Cloves of Garlic (Either use a garlic press or finely chop them)
  • 1 TBSP Honey
  • 1/2 tsp Smoked Paprika
  • Pinch of Salt (no more than 1/4 tsp)

In a bowl, combine the lime juice, garlic, honey, paprika, and salt, whisk until everything is combined and set aside. In a medium sized skillet, heat up the olive oil over medium to medium high heat for about 2 minutes (do not let the oil smoke), then add in the peppers in a single layer.  Cook peppers on each side for about 3 minutes until they blister and start to soften.  Reduce heat to medium and add in the sauce, stir and make sure all the peppers are covered.  Continue to gently stir and cook the sauce for about two minutes.  The sauce should cook down and start to coat the peppers.  Allow to cool for one minute and give another stir before plating.

Plate and serve!


Sweet Smoky Shishito Peppers

These peppers are great hot right out of the pan but can also be served at room temperature, making them perfect for entertaining and parties.

Having the sauce on the peppers means there’s less to handle and turns them into a fabulous finger food appetizer, just right for mingling and eating while standing.

You can make the sauce ahead of time making the cooking time on these even quicker.  I would recommend making a double batch because these will go quick!

These peppers and the 2014 Cultivar Rutherford Sauvignon Blanc really worked well together.  The crisp citrus notes of the wine balances out the smoky sweet sauce while the oaky herby notes compliments the earthy pepper flavor.

Have fun, and remember, always play with your food.  Enjoy!

Disclosure: I’m required to disclose a sponsored partnership between our site, Food Embrace, and Cultivar Wine. I have been compensated in exchange for this post in the form of product. All opinions presented are my own. I receive wine from Cultivar Wine as a member of the Cultivar Wine Bloggers group.

Status

Maple Bacon Wrapped Goat Cheese Stuffed Dates

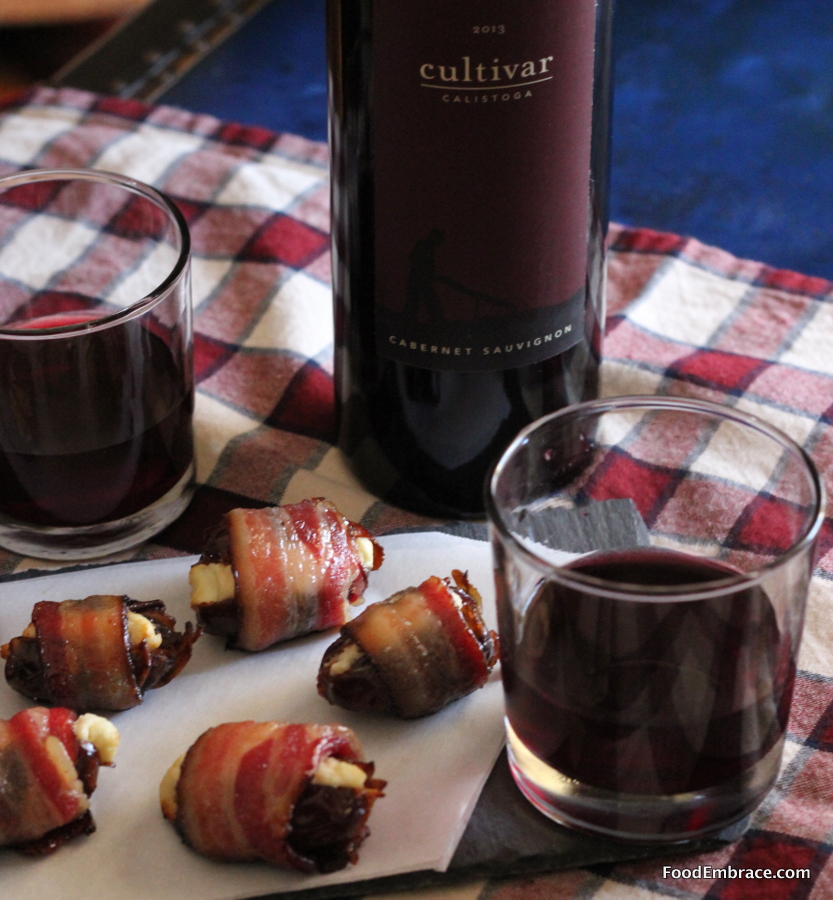
I wanted to make a snack that would be the perfect little bite. Something that could go before a meal or be a nice treat after. I had some dates and decided to stuff those with creamy earthy goat cheese then wrap them in savory smokey bacon.  These turned out better than I could have hoped and paired so well with the 2013 Calistoga Cabernet Sauvignon that Cultivar Wine recently sent me.

Cultivar Wine with Stuffed Dates


My husband is a HUGE fan of these little dates.  He basically wants them available at all times so he can enjoy a date or two in the evenings. This is very high praise, he doesn’t usually request things to have on hand.

They are super simple to make but give the illusion of being very fancy. Their decadent taste certainly helps support the hype. Perfect for get-togethers and special occasions.  Or just because it’s Tuesday, your choice. No judging from me.

Andrea’s Maple Bacon Wrapped Goat Cheese Stuffed Dates

  • 12 Dates, split and pitted (**See Note)
  • 6 Slices of Bacon, cut in half
  • 4 oz Goat Cheese
  • 1 TBSP Maple Syrup
  • 2 tsp Light Olive Oil

Preheat oven to 375 and line a small baking sheet with foil, brush the olive oil all over the foil. Make sure the dates are not cut in half but just split down the middle lengthwise.  Fill each date with some goat cheese (about 1/2 tsp each) and then wrap in bacon. Make sure the seam side is down when you place the dates on the baking sheet.  Continue until all dates are stuffed and wrapped.

Place baking sheet in oven and bake for about 15 minutes. Watch to be sure the bacon doesn’t burn. Right before removing the dates from the oven, brush each date with maple syrup.  Continue to bake for another two minutes. Remove from oven and allow to cool.  Serve immediately or can be stored in the fridge in an air tight container.

**I used regular dates but you can use medjool dates if preferred. Those are larger so you may need more goat cheese for the filling.

You can get even fancier and used bourbon barrel aged maple syrup if you like.

I highly recommend making a big batch of these if you will be having them at a gathering because they will go quickly! One batch is perfect for date night but you’ll need more for a bigger crowd.

Since these guys are on the sweeter side I decided to pair them with Cultivar Wine’s 2013 Calistoga Cabernet Sauvignon which worked beautifully.  The black pepper and tobacco notes brought out the smokiness of the bacon and maple syrup while the dryer finish helped balance out the sweetness.  The wine also accentuated the creaminess of the goat cheese and complimented its earthy flavor.

You can also make these dates ahead of time and then gently reheat them at 350 for about 5 minutes before serving.

If you’d like to try Cultivar Wine , they are offering a special promotion to my readers. Use the code CultivarWineFoodEmbrace when you order and you’ll receive 10 percent off your purchase.

Disclosure: I’m required to disclose a sponsored partnership between our site, Food Embrace, and Cultivar Wine. I have been compensated in exchange for this post in the form of product. All opinions presented are my own. I receive wine from Cultivar Wine as a member of the Cultivar Wine Bloggers group. 
 

Status

Smoked Salmon and Blue Cheese Ball

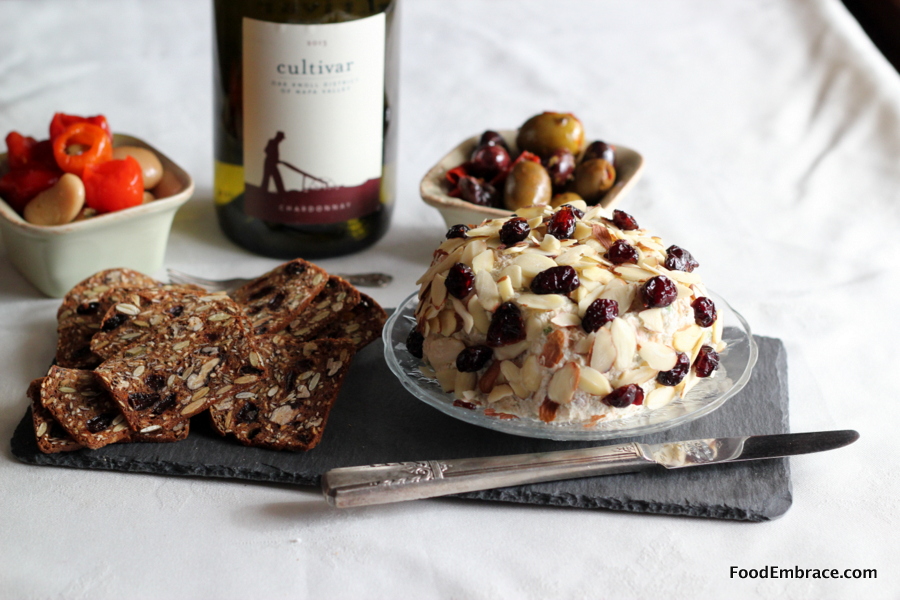
This smoked salmon and blue cheese ball is full of bold flavors and pairs perfectly with the 2013 Cultivar Oak Knoll Chardonnay that I received as part of their Cultivar Wine Bloggers.

Smoked Salmon and Blue Cheese Ball


During the holidays when I was a kid, one of the things that I looked forward to the most was the cheese ball and salmon ball that my mom made as part of the holiday table.  We only had it once a year and it was glorious.  I liked the cheese ball a lot but the salmon ball was my jam.  It was the only time I enjoyed eating salmon (I’m a grown adult now so things have clearly changed) and I lived for that salmon ball.

My mom was a proper 1960s-70s housewife so of course we had cheese ball when entertaining.  Sometimes jello molds as well but we don’t talk about those.

The cheese ball has died away and I’m not sure why.  Oh sure you may see some store bought concoction with it’s bright orange color and dotted with almonds sitting all alone on a table at a random gathering, but a cheese ball that someone made that’s actually delicious is no where to be found.

I decided to change that this year and created a dressed up version of the salmon ball my mom used to make.  This makes a lot which is perfect if you’re hosting a party or bringing a dish to one.  You can easily cut this recipe in half to create a smaller ball for smaller gatherings.

I used smoked salmon and blue cheese and paired this with 2013 Cultivar Wine Oak Knoll Chardonnay.  The butteriness of this wine balances out the sharp smoke of the salmon and brings out it’s briny bite.  The crisp citrus notes help tone down the blue cheese and helps cut through the creaminess of the spread.

This dish is great for entertaining or just to have as a snack while you binge some Netflix. No judgment here.

Andrea’s Smoked Salmon and Blue Cheese Ball

  • 8 oz Cream Cheese
  • 1/2 C Blue Cheese Crumbles
  • 6 oz Smoked Salmon* (see note at bottom)
  • 2 Green Onions, chopped, both white and green parts
  • 1 TBSP Prepared Horseradish
  • 2 tsp Lemon Juice
  • 1 TBSP Dried Dill
  • Sliced almonds for garnish
  • Dried cranberries for garnish

Add all ingredients except salmon and green onions, to a food processor and process until smooth.  Remove mixture from processor and add to a bowl.  Add in the salmon and green onion, mix till everything is combined.

Place mixture on some plastic wrap and shape into a ball.  Wrap in plastic wrap and place in fridge.  Allow to set up for at least 4 hours before serving.  Best if made the day before.

Carefully remove from wrap and place on a plate.  Stud with sliced almonds and dried cranberries.  Serve with crackers and veggies.  Keeps for 4 days.

*The smoked salmon I used is from the Honey Smoked Fish Company so it’s not the typical thinly sliced looks almost raw smoked salmon that you’re probably used to seeing.  I personally love this kind of smoked salmon and eat it all the time.  If you can’t find this style of smoked salmon you can certainly try using the other version.  You’ll want to chop that up before adding it to the mixture.  I can’t guarantee the outcome though since I haven’t tested that out.

Dried cranberries are a great addition to this recipe so I recommended being generous when adding them at the end.  That punch of sweetness is a lovely pairing with the blue cheese.

If you’re interested in trying out Cultivar Wine, as a reader of Food Embrace, you will be given 10% off your order.  Use the code, FoodEmbrace at checkout.

Disclaimer: I’m required to disclose a sponsored partnership between our site, Food Embrace, and Cultivar Wine. I have been compensated in exchange for this post in the form of product or experience. All opinions and recipes presented are my own.


Butternut Squash Hummus

Butternut Squash HummusIn October I was at an event over at Whole Foods and I was lucky enough to be one of the judges in a contest between some local chefs.

The food was fantastic!  One dish in particular that I really enjoyed and found to be very unique was the squash hummus.  It was light, creamy, and slightly sweet.

Delicious!

I decided to try my hand at making something similar because I thought it would be the perfect dish to take to gatherings and potlucks.  Something familiar yet a little different.

While my version isn’t nearly the same as The Kitchen’s, it came out how I wanted and makes for a lovely party dip.  It’s also super simple to make!

Andrea’s Butternut Squash Hummus

  • 1 can of Chickpeas, drained, rinsed (and if you feel inclined, remove the skins)
  • 2C of Peeled and Cubed Butternut Squash
  • 1tsp Olive Oil
  • 1 3/4C Honey Yogurt (I used Noosa, but you can use Greek Honey as well)
  • 1/2tsp Ground Cinnamon
  • 1TBSP Maple Syrup

Preheat oven to 400.  Toss the squash with the oil and place on a baking sheet.  Roast until the squash just starts to soften and turns a little brown around the edges.

Remove from oven and allow to cool.

In a food processor place the chickpeas, pulse just until the chickpeas start to break down.  Scrape down the sides of the bowl, add in the squash, yogurt, syrup, and cinnamon.  Pulse until the mixture becomes smooth and creamy.

Store in the fridge for at least 30 minutes before serving.  Serve with graham crackers or lightly salted pita chips.

Butternut Squash HummusSee, easy peasy!

I had a large squash that I peeled and chopped.  I used two cups from that bunch and the rest I put in a bag in the fridge to use later.

If you do have this dip out at a party, it’s best to put it out in small batches and refill when needed. You don’t want the yogurt to turn.

This will last about 4 days in the fridge.

I made it sweet because I wanted a little something different but squash plays very nicely with spice as well.  You could use curry or even some chili powder here if you wanted to try and make a savory version.

Now you have something fun and easy to take to your holiday parties!

Have fun kids, and remember, always play with your food!  Enjoy!

Figgy Bourbon Refrigerator Jam

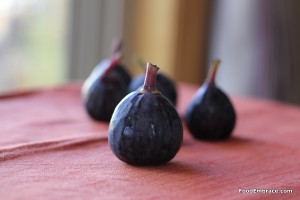
This is the recipe that got Scott to love figs. I have always had eyes for figs, even those silly Fig Newtons.

And once I had fresh figs sauteed in a little butter and sugar, I thought that was heaven.

Figs are in season now and I purchased a little pint of them to have for dessert one evening.

Scott wasn’t impressed.  He would eat them, he said, but figs weren’t something he would get excited about or look forward to.

Oh really?

The glove was thrown down.  I accepted this challenge and thought about how to make figs exciting for him.

Andrea’s Figgy Bourbon Refrigerator Jam

  • 12oz or One Pint of Fresh Figs
  • 3/4C Water, Plus another 1/4C
  • 1/4C Bourbon of your Choice
  • 2tsp Vanilla Extract
  • 2TBSP Dark Brown Sugar
  • 1/4tsp Ground Cinnamon

Split the figs in half and cut off the stem.  To a small sauce pan add, 3/4C water, figs, brown sugar, and cinnamon.

Bring to a simmer and simmer until the figs are tender and cooked through, about 10 minutes.  Remove from heat and place contents in a blender.  Add the other 1/4C water and blend until smooth.

The jam will be thick.

Scoop the contents out of the blender and back into the sauce pan.  Add in the vanilla and the bourbon and stir.  Heat pan over a medium-low heat just to thicken everything up a little more.  About 2-3 minutes.

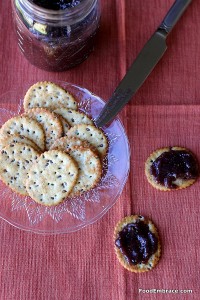
Remove from heat and pour into a glass container to cool.  You can either eat immediately or cover in an airtight container and keep in the refrigerator for up to two weeks.

The bourbon flavor is prominent in this jam so you best like bourbon when you make it! It’s slightly sweet from the added brown sugar and has a nice vanilla background to it.

No canning involved since it’s refrigerator jam, it’s simple and super quick to make!

Guess who is excited about figs now?  Someone couldn’t keep his hands off this jam and demanded we get more figs at the store.

Figs 1, Scott 0.  WIN!

Other ideas for the jam:

You can eat it straight up on crackers or biscuits.  Or pair with a lovely extra sharp cheddar.

Maybe a little brie and prosciutto?

Or heck, drizzle a little on top of some vanilla ice cream!

However you choose to eat it, I’m pretty sure it will be tasty.

Have fun guys, and remember always play with your food!  Enjoy!


Memorial Weekend Eats

Memorial Day weekend is coming up and it’s time to start planning all the grub that you’re going to put out! If you are in need of some ideas, I’ve got some coming your way!

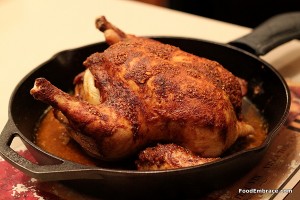
Tequila Brined Chicken can easily be made on the grill.  Either go the beer can route or you can quarter it up and grill it in pieces.

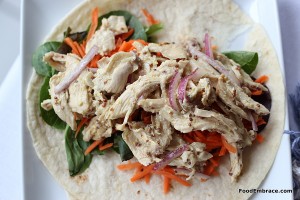
Got leftover chicken? Use it to make some mayo-less chicken salad!

Want a veggie dish that can stand up next to all the potato salads and baked beans?  Bring something a little different to the table with some Asian Noodles in a Coconut Peanut Sauce.

And don’t think I forgot the dips because that would be crazy talk.

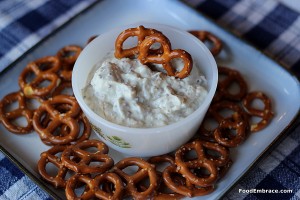
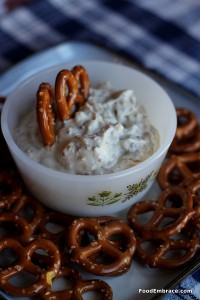
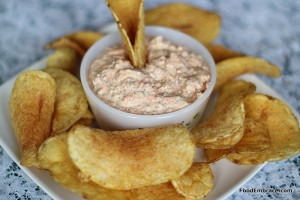
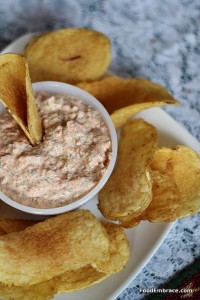
Horseradish Onion Dip better than anything that requires you to use dehydrated onions from a packet.

And just for fun:

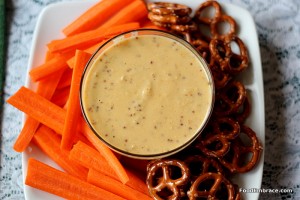
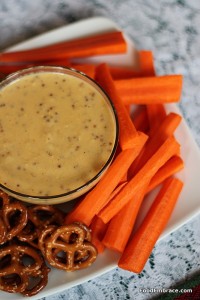
Beer Mustard Dip, cheesy creamy goodness.

Have fun this holiday weekend! Stay safe, drink some beer, and eat a little too much!

Horseradish Onion Dip

One of my favorite dips is French Onion dip! I loved it with all of it’s spice and tang along with the intense flavor of onions.

Growing up it was always made with soup mix, you know that stuff that doubles as meatloaf and pot roast flavoring?     When I was on my own and responsible for providing my own food, I would purchase premade dip.

That’s alright and it got the job done, of course, but there comes a point when you have to move away from the pre-made stuff.

Once I started cooking more and making my own versions of things, French Onion dip was something I tackled right away.

And failed at.

Oh the dip was tasty but it was way too sweet.  Caramelized onions are intense and super sweet! I was having trouble combating this and finally I put this idea up on the shelf to be revisited at another time.

I recently got inspired to start making dips again (we are a dip loving house!) and decided to give French Onion dip another shot.  This time I reduced the amount of onions and added in horseradish for much needed kick.

This was a winner!

Andrea’s Horseradish Onion Dip

  • 1 Large Onion, thinly sliced
  • 2TBSP Light Olive Oil
  • Pinch of Salt and Ground Pepper
  • 1TBSP Worcestershire Sauce
  • 2TBSP Prepared Horseradish
  • 2TBSP Whole Grain Mustard
  • 1tsp Garlic Powder
  • 1/2tsp Onion Powder
  • 1 1/2C 2% Greek Yogurt

In a medium sized skillet, heat the olive oil over medium-low heat.  Add in the onions and stir.  Sprinkle with salt and pepper, and stir again.

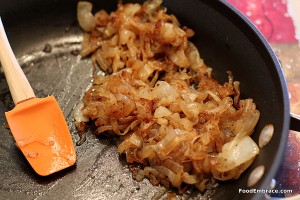
This is the part that takes the longest, caramelizing the onions.  This will take about 45 minutes to get the onions to where they need to be.  Stir on occasion until the onions are browned and soft.

They will look like this when ready:

Be patient! It’s completely worth it!


Allow onions to cool.

In a food processor, combine all of the ingredients including the onions.  Pulse until everything is well combined.  Do not pulse until completely smooth. You want some pieces of onion throughout the dip for texture and color.

Spoon dip into a glass bowl, cover and store in fridge at least 2 hours before serving.

Serve with your favorite veggies and chips!

I was a very happy lady with this dip!  Creamy with just enough onion bite to let you know it is the star ingredient.  The grainy mustard and the horseradish balance out the sweetness of the onions and give the dip that much needed tang and spicy note.

You could add in some red pepper flakes if you wanted to give it even more of a kick.

This makes a good amount of dip perfect for parties or two big dip lovers.

Or you could go bananas, and use this as a spread for shredded beef or thinly sliced ribeye sandwich.  Just a suggestion of course.

Have fun guys, and remember, always play with your food!  Enjoy!

Beer and Mustard Dip

While on our most recent break, Scott and I had “snackies” one night for our evening meal. Since we were on vacation, I wanted to make snackie night a little bit more special by adding in a few dips to the mix.

On a recent episode of Triple D (because I love it so), I saw mention of a beer and cheese dip.  This got me thinking about creating a beer dip that you could have with snacks and that doesn’t need to be kept warm.

By eliminating the need to keep this dip warm, it becomes perfect for having out for parties and get togethers.

I wanted the beer flavor to come through while also having a little bit of a kick to it.  What goes great with beer? Mustard!

Once I knew mustard was going into the mix, the rest of the recipe fell into place.

Andrea’s Beer and Mustard Dip

  • 1C Dark Lager Style Beer (I used Great Lakes Eliot Ness)
  • 2TBSP Whole Grain Mustard
  • 3TBSP Dijon Mustard
  • 2 Cloves of Garlic
  • 1/4 Small Onion, chunked
  • 1TBSP Prepared Horseradish
  • 1/2TBSP Unbleached All-Purpose Flour
  • 1/4tsp Garlic Powder
  • Big Pinch Red Pepper Flakes
  • About 1/2tsp each, salt and ground black pepper
  • Couple Dashes Your Favorite Hot Sauce
  • 1tsp Olive Oil
  • 1C Shredded Cheddar

In a small mixing bowl, combine the cheddar and flour.  Set aside.  In a small food chopper or food processer, add in the onion and garlic cloves and pulse until finely chopped.  In a medium sized sauce pan add in the olive oil and heat over medium heat.  Add in the onion and garlic and sautee for about 2 minutes stirring constantly so the garlic doesn’t burn.  Add in the salt, pepper, red pepper flakes, and garlic powder. Add in the beer, mustards, and horseradish.  Stir and allow to come to a simmer.  Simmer for about 5 minutes.  You should notice the sauce starting to thicken up at this stage (not a lot, it thickens just a tad).  Turn heat down to low and slowly whisk in the cheddar and flour combo.  Keep whisking until the cheddar is melted and fully incorporated into the sauce.

Remove from heat and pour dip into a glass bowl.  You can serve this immediately or allow to cool, cover, and store in fridge till you need it.

This dip is great warm and it’s great cold.  It can also be served at room temperature making it a perfect party dip!

It’s creamy with a strong flavor of beer and mustard.  It goes well with veggies, chips, or even sausage bites!  It can also be used on top of sandwiches as a spread or sauce.

The cheddar helps thicken it up just a little more while providing some background sharpness that brings some depth to the dip.  Horseradish makes it demand to be noticed.

I’m already looking forward to making some more of this and seeing what else I can add it to!

Have fun guys, and remember, always play with your food! Enjoy!


Roasted Veggie Dip

Dip was something that my family had at every party and every kind of gathering. We are a dip loving folk and when I started dating Scott, he discovered he is a dip loving person as well.

Then dips kind of got pushed aside for a while here at the HQ, and now I’m looking to bring them back.  I’ve been recreating a lot of my favorite flavors of dip and using Greek yogurt instead of sour cream.

So far I’ve been successful!  The first dip I made was a roasted veggie dip that’s creamy, full of dill punch, and roasted veggie goodness.

Andrea’s Roasted Veggie Dip

  • 1/4 Small or Medium Red Onion, chunked
  • 1/2 Red or Green Pepper, chunked
  • 1 Small or Medium Size Carrot, peeled and chunked
  • 2 Cloves of Garlic
  • 1 1/2C Greek Yogurt
  • 1 1/2TBSP Dried Dill
  • Pinch of Cayenne Pepper
  • Salt and Ground Black Pepper
  • 1/4tsp Garlic Powder
  • 1/4tsp Onion Powder
  • 1/2TBSP Olive Oil

Preheat oven to 400F. Toss veggies with olive oil and a large pinch of salt and pepper.  Roast on a baking sheet in the oven for about 10 minutes or until the onions and peppers have started to brown and caramelize.  Stir once while roasting.  Remove veggies from oven and set aside to cool.

Once veggies are cool, place in a food processor and pulse until the veggies start to break down.  Scrape down the sides, and add in the yogurt, dill, cayenne pepper, a little more salt and pepper, garlic powder and onion powder.  Pulse until smooth leaving the veggies a little chunky so there’s  a little texture to the dip.

Place in a glass bowl, cover and refrigerate for at least 3 hours before serving.  Can be made the day before.  Serve chilled with your favorite veggies and chips!

By letting the dip sit in the fridge for a few hours, this allows the flavors to mingle and get more pronounced.  It’s actually best if you make this a day before you want to serve it.  Before serving, give a taste and see what you think.  If you feel there needs to be more dill added, sprinkle in a bit more.  Some people really love dill and if that’s you, go crazy with it!

What I really enjoy about this dip is that it is made with fresh ingredients along with the added bonus of using Greek Yogurt instead of sour cream.  Greek Yogurt has the benefits of yogurt along with a high protein content.  You can feel good about eating this dip!

You can also switch up the veggies to suite your tastes. Like broccoli? Add it in! You can play around with flavors and use what you have on hand or what you like.

TIPS:

Switch out the Greek Yogurt for cream cheese and now you have your own roasted veggie cream cheese.

This can also be used on sandwichs as a flavor packed spread.

If you can’t find Greek Yogurt or feel it’s too pricey for your budget, you can quick make your own.  Line a fine mesh strainer with paper towels or a cheese cloth and dump in plain 2% yogurt.  Allow to strain for several hours until most of the whey is removed.  You’ll be left with a thicker yogurt or “yogurt cheese”.  Then just follow the recipe for making the dip!

Have fun guys, and remember, always play with your food! Enjoy!

Buzzin Bars

Last week Scott left for a business trip that had him away from the house for about a week.  He was flying off to San Francisco to geek out about code and be in his element.

Because I knew that eating times might be odd and because I know Scott, this meant he would need to take some food along with him.

He was taking a carry on which meant that the food had to be small, easy to carry, and not prone to spoilage.  And since I knew that these could very well be a meal source, I knew that they had to be jam packed with good stuff.  Stuff that could get you through a couple of hours.

I like using soaked dates in bars and coffee cakes because it adds a nice sweetness without being over powering.  Plus they are a great source of fiber and potassium.

Plus I wanted to do something fun so I added an extra little kick to these bars.

Andrea’s Buzzin Bars

  • 10, dried and pitted dates
  • 1C Coffee + 2TBSP
  • 2C Oats
  • 1C White Whole Wheat Flour
  • 2TBSP Unsweetened Cocoa Powder
  • 1/2C All Natural Peanut Butter
  • 1/2C Dark Chocolate Chips
  • 1TBSP Maple Syrup
  • 1/2C Unsweetened Coconut Milk (Not the kind in a can, the kind in the refrigerated section)
  • 2tsp Vanilla Extract

In a small to medium sized bowl, add the dates and pour 1C of hot coffee over the dates.  Allow to soak for 1/2 hour to an hour.  You can use leftover coffee that has been reheated.

Preheat oven to 375 degrees and grease an 8×8 baking dish (either with oil or nonstick spray).

Drain dates and add to a food processor.  Pulse just until the dates start to break up.  Add in the oats, flour, cocoa powder, and chocolate chips.  Pulse again until the oats start to break down and the chips start to break down as well.  The chips might not break down as easy, don’t worry about this.

In a medium sized mixing bowl, add in the coconut milk, 2TBSP of coffee, the peanut butter, maple syrup, and the vanilla extract.  Whisk until the PB is well incorporated into the mix.  Add this mixture to the date mixture, and pulse until well combined.

This will be an extremely thick batter.  It will not be a pourable batter and you may have to remove it from the processor and mix with your hands a few times.  Put this mixture into the baking dish, you’ll have to press it into place.  Again, remember this is a really thick batter.

Place in oven and bake for about 10 -15 minutes.  Just till the top starts to get a little browned.  It doesn’t take long at all for these bars to set.

Remove from oven and allow to cool for about 15 minutes before cutting.  Cut into squares and serve immediately.  Or allow to cool longer once cut, place in a storage container and keep in fridge until you’re ready to eat one.  I suggest heating it up slightly before eating.

These also freeze very well.

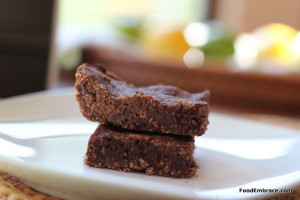
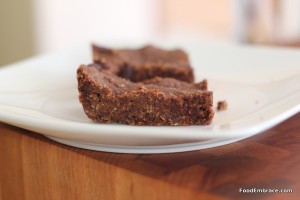
These smell exactly like a no bake cookie.  The peanut butter comes out as a very strong smell and flavor in these bars.  The coffee is just enough to enhance the chocolate and not dominate the flavor in any way.

The bars are very dense because they are so jam packed with goodness.  Fiber from the oats and dates, protein from the peanut butter, and a little fun from the chocolate.

If you don’t have coffee or don’t want to use coffee, you can soak the dates in hot water.  Use 2 TBSP of coconut milk in place of the 2 TBSP of coffee in the bar batter.

Great as a breakfast or a snack.

Bonus, you don’t even have to cook these!  You can roll them into little ball shapes and serve them up as a twist on a truffle. Yes there is flour in here but there is no “uncooked flour” taste when you eat these bars raw.  All you get is a straight forward chocolate and peanut butter combo.

I did give all of these to Scott to take on his trip.  That much chocolate and PB needs to stay close to home as well.  I had some for breakfast and they are chocolatey delish!

Do you make bars at home?  They are perfect for snacks on the go!

Have fun guys, and remember, always play with your food!  Enjoy!